Table of Contents
Advertisement
Advertisement
Table of Contents

Subscribe to Our Youtube Channel
Summary of Contents for Bush NE-6005
-
Page 2: Table Of Contents
Table of content MPORTANT SAFETY INSTRUCTIONS ............1 FEATURES AND CONTROLS................4 SWITCHING YOUR RADIO ON FOR THE FIRST TIME ......5 LISTENING TO YOUR RADIO................6 Hints for better reception ..................6 SETTING THE CLOCK....................6 DAB mode ........................6 DAB Auto Scan...................... - Page 3 SAFETY • FOR HOUSEHOLD AND INDOOR USE ONLY • PLACE THE APPLIANCE ON A FLAT, STABLE SURFACE WITH ADEQUATE VENTILATION AND AWAY FROM OTHER SOURCES OF HEAT. MINIMUM DISTANCES AROUND THE APPLIANCE FOR ADEQUATE VENTILATION IS 10CM. DO NOT COVER OR RESTRICT VENTILATION OPENINGS.
- Page 4 • KEEP APPLIANCE, CABLE, MAINS ADAPTOR PLUG DRY AND AWAY FROM AREAS WHERE IT IS LIKELY TO GET SPLASHED. AVOID USING IN HOT, HUMID ENVIRONMENTS. • DO NOT PLACE ITEMS WITH NAKED FLAMES OR CONTAINERS WITH LIQUIDS ON THIS APPLIANCE. •...
-
Page 5: Switching Your Radio On For The First Time
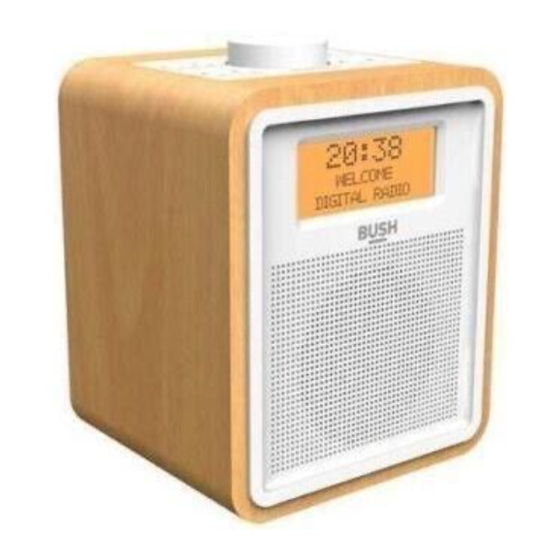
PARTS Top view 1. VOLUME/SNOOZE CONTROL 2. STANDBY BUTTON 3. MODE BUTTON 4. ALARM BUTTON 5. MENU/INFO BUTTON STANDBY MODE TUN/CH 6. TUN/CH ▼/▲ BUTTON 7. PRESET BUTTON ALARM MENU/INFO SELECT PRESET VOLUME/SNOOZE 8. SELECT BUTTON Front view Rear view DC 6V 9. - Page 6 Remarks: If the AC Adaptor voltage is over than 6V, it will possible make the line damage. DC (battery) operation 1. Ensure the AC/DC adaptor is disconnected from the radio and AC mains. 2. Installed the batteries (4×1.5V UM3/AA battery) into the battery compartment.
- Page 7 Mode Mode Menu Menu DAB Menu FM Menu Full Scan Scan Setting All station/Strong stations only Manual Tune Audio Setting Stereo Allowed/Forced mono Prune No/Yes System System System Menu Time Backlight Menu Backlight Backlight Low/ Medium/ High Factory Reset Software Version Sleep Alarm Menu Alarm...
-
Page 8: Setting The Clock
SETTING THE CLOCK The clock in this radio is equipped to receive a DAB radio frequency time signal. After the unit has been turned on, it will automatically tune into a DAB radio station and update the clock. It may be necessary to wait for 1-2 minutes to allow the unit to receive the time signal. -
Page 9: Dab Auto Scan
BASIC OPERATION - GETTING STARTED Press the STANDY button to turn the unit on, it will automatically enter into the DAB mode and perform auto scan function, During the scan the display show “Scanning…” together with a slide bar that indicates the progress of the scan and the amount of stations that have been found so far.(F.1) (F.2) Once the scan has finished, the radio will select the first alphanumerically found station. -
Page 10: Prune
Prune You may remove all unavailable station form on the list. 1. During DAB mode, press and hold MENU button and then press TUN/CH ▼/▲ buttons to select “Prune”. Press the SELECT button to confirm. 2. Press TUN/CH ▼/▲ buttons to select <Yes> to confirm delete. Or select <No>... -
Page 11: Fm Display Modes
Press TUN/CH ▼/▲ buttons to select “Stereo allowed/Forced mono” and then press the SELECT button to confirm the setting. Note: The radio will automatically switch between stereo and mono mode, but you can override this and switch this function manually which is helpful for poor signal reception. - Page 12 2. To set or change alarm 1, press ALARM button once, then press the SELECT button. 3. To set or change alarm 2, press the ALARM button twice, then press the SELECT button. 4. In the alarm setting mode, press the VOLUME/SNOOZE button to pause the alarm.
- Page 13 F.11 Alarm 1 : Off Alarm 1 : On Alarm 1 : Off Alarm 1 : On Alarm 1 : Off Alarm 2 : Off Alarm 2 : On Alarm 2 : On SNOOZE (AC OPERATION ONLY) 1. To temporarily silence a sounding alarm, press the SNOOZE button once, you can change the snooze period by repeatedly pressing the SNOOZE button, Snooze periods are 5,10,15 and 30 minutes.
-
Page 14: Factory Reset
USING HEADPHONES (not included) A stereo headphone jack has been provided so that the set can be used without disturbing others. Plug in the headphones at the point marked ‘ ’ and adjust the listening volume to your chosen level. Excessive sound pressure from earphones and headphones can cause hearing loss. -
Page 15: Technical Specification
TECHNICAL SPECIFICATION Rated voltage (adaptor) AC 100 – 240V~ 50/60Hz, 0.3A Adaptor output DC 6V Rated voltage (radio) DC 6V (1.5V x 4 AA) Power consumption Audio output Radio DAB 174-240MHz FM 87.5-108MHz Operating conditions Temperature: 5°C to 35°C Humidity 5% to 90% 116 (L) ×...


Need help?
Do you have a question about the NE-6005 and is the answer not in the manual?
Questions and answers