Axis P13 Series User Manual
Hide thumbs
Also See for P13 Series:
- Installation manual (131 pages) ,
- User manual (26 pages) ,
- Repainting instructions (9 pages)

Related Manuals for Axis P13 Series


Summary of Contents for Axis P13 Series
- Page 1 AXIS P13 Network Camera Series AXIS P1375 Network Camera AXIS P1377 Network Camera AXIS P1378 Network Camera User manual...
-
Page 2: Table Of Contents
AXIS P13 Network Camera Series Table of Contents Get started .......... -
Page 3: Get Started
Get started Find the device on the network To find Axis devices on the network and assign them IP addresses in Windows®, use AXIS IP Utility or AXIS Device Manager. Both applications are free and can be downloaded from axis.com/support. -
Page 4: Verify That No One Has Tampered With The Firmware
Verify that no one has tampered with the firmware To make sure that the device has its original Axis firmware, or to take full control of the device after a security attack: 1. Reset to factory default settings. See Reset to factory default settings on page 59. -
Page 5: Installation
AXIS P13 Network Camera Series Installation Installation Preview mode Preview mode is ideal for installers when fine tuning the camera view during the installation. No login is required to access the camera view in preview mode. It is available only in factory defaulted state for a limited time from powering up the device. -
Page 6: Configure Your Device
AXIS P13 Network Camera Series Configure your device Configure your device Basic settings Set the capture mode 1. Go to Video > Installation > Capture mode. 2. Click Change. 3. Select a capture mode and click Save and restart. See also Capture modes on page 13. -
Page 7: Reduce Noise In Low-Light Conditions
AXIS P13 Network Camera Series Configure your device 2. Click 3. Click the new mask and type a name. 4. Adjust the size and placement of the privacy mask according to your needs. 5. To change the color for all privacy masks, click Privacy masks and select a color. -
Page 8: Monitor Long And Narrow Areas
Use corridor format to better utilize the full field of view in a long and narrow area, for example a staircase, hallway, road, or tunnel. 1. Depending on your device, turn the camera or the 3-axis lens in the camera 90° or 270°. -
Page 9: Handle Scenes With Strong Backlight
2. Use the Local contrast slider to adjust the amount of WDR. 3. If you still have problems, go to Exposure and adjust the Exposure zone to cover the area of interest. Find out more about WDR and how to use it at axis.com/web-articles/wdr. View and record video This section includes instructions about configuring your device. -
Page 10: Set Up Rules For Events
AXIS P13 Network Camera Series Configure your device 2. Click Add network storage under Network storage. 3. Type the IP address of the host server. 4. Type the name of the shared location on the host server under Network share. - Page 11 Before you start: • Make sure you have an SD card installed. Make sure that AXIS Object Analytics is running: 1. Go to Apps > AXIS Object Analytics. 2. Start the application if it is not already running. 3. Make sure you have set up the application according to your needs.
-
Page 12: Audio
AXIS P13 Network Camera Series Configure your device 1. Go to System > Events and add a rule. 2. Type a name for the rule. 3. In the list of conditions, under Application, select Object Analytics. 4. In the list of actions, under Overlay text, select Use overlay text. -
Page 13: Learn More
Capture modes What capture mode to choose depends on the requirements for the frame rate and resolution of the specific surveillance setup. For specifications about available capture modes, see the product’s datasheet at axis.com. Privacy masks A privacy mask is a user-defined area that covers a part of the monitored area. In the video stream, privacy masks appear either as blocks of solid color or with a mosaic pattern. - Page 14 H.264 or MPEG-4 Part 10/AVC Note H.264 is a licensed technology. The Axis product includes one H.264 viewing client license. To install additional unlicensed copies of the client is prohibited. To purchase additional licenses, contact your Axis reseller. H.264 can, without compromising image quality, reduce the size of a digital video file by more than 80% compared to the Motion JPEG format and by as much as 50% compared to older MPEG formats.
- Page 15 AXIS P13 Network Camera Series Learn more frame rate as the instantaneous bitrate is kept below the specified target bitrate. You can choose to prioritize either image quality or frame rate. We recommend that you configure the target bitrate to a higher value than the expected bitrate. This gives you a margin in case there is a high level of activity in the scene.
-
Page 16: Applications
Applications With applications, you can get more out of your Axis device. AXIS Camera Application Platform (ACAP) is an open platform that makes it possible for third parties to develop analytics and other applications for Axis devices. Applications can be preinstalled on the device, available for download for free, or for a license fee. -
Page 17: Cybersecurity
AXIS Object Analytics AXIS Object Analytics is an analytic application that comes preinstalled on the camera. It detects objects that move in the scene and classifies them as, for example, humans or vehicles. You can set up the application to send alarms for different types of objects. To find out more about how the application works, see AXIS Object Analytics user manual. -
Page 18: The Web Interface
Shows what kind of access to the device that is active, and what encryption protocols are in use. Recommendations to the settings are based on the AXIS OS Hardening Guide. Hardening guide: Link to AXIS OS Hardening guide where you can learn more about cybersecurity on Axis devices and best practices. -
Page 19: Video
AXIS P13 Network Camera Series The web interface Ongoing recordings Shows ongoing recordings and their designated storage space. Recordings: View ongoing and filtered recordings and their source. For more information, see Recordings on page 30 Shows the storage space where the recording is saved. - Page 20 AXIS P13 Network Camera Series The web interface Starts the wiper. Click and select a preset position to go to that preset position in the live view. Or, click Setup to go to the preset position page. Adds or removes a focus recall area. When you add a focus recall area, the camera saves the focus settings at that specific pan/tilt range.
- Page 21 AXIS P13 Network Camera Series The web interface Installation Capture mode : A capture mode is a preset configuration that defines how the camera captures images. When you change the capture mode, it can affect many other settings, such as view areas and privacy masks.
- Page 22 AXIS P13 Network Camera Series The web interface The image before and after it has been straightened. Image Appearance Scene profile : Select a scene profile that suits your surveillance scenario. A scene profile optimizes image settings, including color level, brightness, sharpness, contrast, and local contrast, for a specific environment or purpose.
- Page 23 AXIS P13 Network Camera Series The web interface Sharpness: Use the slider to make objects in the image appear sharper by adjusting the edge contrast. If you increase the sharpness, it may increase the bitrate and the amount of storage space needed as well.
- Page 24 • Move the slider towards Dark to increase the threshold for the IR-cut filter. The camera changes to night mode later. IR light If your device doesn’t have built-in illumination, these controls are only available when you connect a supporting Axis accessory. Allow illumination: Turn on to let the camera use the built-in light in night mode.
- Page 25 AXIS P13 Network Camera Series The web interface Select an exposure mode to reduce rapidly changing irregular effects in the image, for example, flicker produced by different types of light sources. We recommend you to use the automatic exposure mode, or the same frequency as your power network.
- Page 26 AXIS P13 Network Camera Series The web interface Max gain: Select the suitable max gain. If you increase the max gain, it improves the visible level of detail in dark images, but also increases the noise level. More noise can also result in increased use of bandwidth and storage. If you set the max gain to a high value, images can differ a lot if the light conditions are very different from day to night.
- Page 27 Zipstream is a bitrate reduction technology, optimized for video surveillance, that reduces the average bitrate in an H.264 or H.265 stream in real time. Axis Zipstream applies a high bitrate in scenes where there are multiple regions of interest, for example, in scenes with moving objects.
- Page 28 AXIS P13 Network Camera Series The web interface • Average: Select to automatically adjust the bitrate over a longer time period and provide the best possible image quality based on the available storage. Click to calculate the target bitrate based on available storage, retention time, and bitrate limit.
-
Page 29: Audio
AXIS P13 Network Camera Series The web interface : Select the position of the overlay in the image. View areas : Click to create a view area. Click the view area to access settings. Name: Enter a name for the view area. The maximum length is 64 characters. -
Page 30: Recordings
AXIS P13 Network Camera Series The web interface Gain: Use the slider to change the gain. Click the speaker icon to mute or unmute. Stream Encoding: Select the encoding to use for the input source streaming. You can only choose encoding if audio input is turned on. If audio input is turned off, click Enable audio input to turn it on. -
Page 31: Apps
Apps Add app: Install a new app. Find more apps: Find more apps to install. You will be taken to an overview page of Axis apps. Allow unsigned apps: Turn on to allow installation of unsigned apps. Allow root-privileged apps: Turn on to allow apps with root privileges full access to the device. -
Page 32: System
• Activate license with a key: If the app requires a license, you need to activate it. Use this option if your device doesn’t have internet access. If you don’t have a license key, go to axis.com/products/analytics. You need a license code and the Axis product serial number to generate a license key. - Page 33 AXIS P13 Network Camera Series The web interface Assign IPv4 automatically: Select to let the network router assign an IP address to the device automatically. We recommend automatic IP (DHCP) for most networks. IP address: Enter a unique IP address for the device. Static IP addresses can be assigned at random within isolated networks, provided that each address is unique.
- Page 34 One-click cloud connection One-click cloud connection (O3C) together with an O3C service provides easy and secure internet access to live and recorded video from any location. For more information, see axis.com/end-to-end-solutions/hosted-services. Allow O3C: • One-click: This is the default setting. Press and hold the control button on the device to connect to an O3C service over the internet.
- Page 35 Authentication failed: Sends a trap message when an authentication attempt fails. Note All Axis Video MIB traps are enabled when you turn on SNMP v1 and v2c traps. For more information, see AXIS OS Portal > SNMP. • v3: SNMP v3 is a more secure version, which provides encryption and secure passwords. To use SNMP v3, we recommend you to activate HTTPS, as the password is then sent through HTTPS.
- Page 36 To install test firmware or other custom firmware from Axis on the device, you need a custom-signed firmware certificate. The certificate verifies that the firmware is approved by both the device owner and Axis. The firmware can only run on a specific device which is identified by its unique serial number and chip ID.
- Page 37 AXIS P13 Network Camera Series The web interface Add account: Click to add a new account. You can add up to 100 accounts. Account: Enter a unique account name. New password: Enter a password for the account. Passwords must be 1 to 64 characters long. Only ASCII printable characters (code 32 to 126) are allowed in the password, for example, letters, numbers, punctuation, and some symbols.
- Page 38 AXIS P13 Network Camera Series The web interface A rule defines the conditions that triggers the product to perform an action. The list shows all the currently configured rules in the product. Note You can create up to 256 action rules.
- Page 39 RSA is the preferred method during negotiation, followed by ECDSA, ED25519, and DSA. Make sure to enter the right MD5 host key that is used by your SFTP server. While the Axis device supports both MD5 and SHA-256 hash keys, we recommend using SHA-256 due to stronger security over MD5. For more information on how to configure an SFTP server with an Axis device, go to the AXIS OS Portal.
- Page 40 IoT integration and is used in a wide variety of industries to connect remote devices with a small code footprint and minimal network bandwidth. The MQTT client in Axis device firmware can simplify integration of data and events produced in the device to systems which are not video management software (VMS).
- Page 41 AXIS P13 Network Camera Series The web interface ALPN is a TLS/SSL extension that allows for the selection of an application protocol during the handshake phase of the connection between the client and server. This is used to enable MQTT traffic over the same port that is used for other protocols, such as HTTP.
- Page 42 AXIS P13 Network Camera Series The web interface The Last Will Testament (LWT) lets a client provide a testament along with its credentials when connecting to the broker. If the client disconnects ungracefully at some point later (maybe because his power source died), it can let the broker deliver a message to other clients.
- Page 43 DNS. Windows SMB/CIFS names are not supported. • Network share: Enter the name of the shared location on the host server. Several Axis devices can use the same network share since each device gets its own folder.
- Page 44 AXIS P13 Network Camera Series The web interface Important Risk of data loss and corrupted recordings. Do not remove the SD card while the device is running. Unmount the SD card before you remove it. Unmount: Click to safely remove the SD card.
- Page 45 When you create an ONVIF user, you automatically enable ONVIF communication. Use the username and password for all ONVIF communication with the device. For more information see the Axis Developer Community at axis.com. Add user: Click to add a new ONVIF user.
- Page 46 AXIS P13 Network Camera Series The web interface Update user: Edit the user’s properties. Delete user: Delete the user. You can’t delete the root user. ONVIF media profiles An ONVIF media profile consists of a set of configurations that you can use to change media stream settings.
- Page 47 AXIS P13 Network Camera Series The web interface Shock detector: Turn on to generate an alarm if the device is hit by an object or if it is tampered with. Sensitivity level: Move the slider to adjust the sensitivity level at which the device should generate an alarm. A low value means that the device only generates an alarm if the hit is powerful.
- Page 48 Severity: Select which messages to send when triggered. CA certificate set: See the current settings or add a certificate. Plain config Plain config is for advanced users with experience of Axis device configuration. Most parameters can be set and edited from this page.
-
Page 49: Maintenance
Note All Axis device firmware is digitally signed to ensure that you only install verified firmware on your device. This further increases the overall minimum cybersecurity level of Axis devices. For more information, see the white paper “Signed firmware, secure boot, and security of private keys” at axis.com. -
Page 50: Product Overview
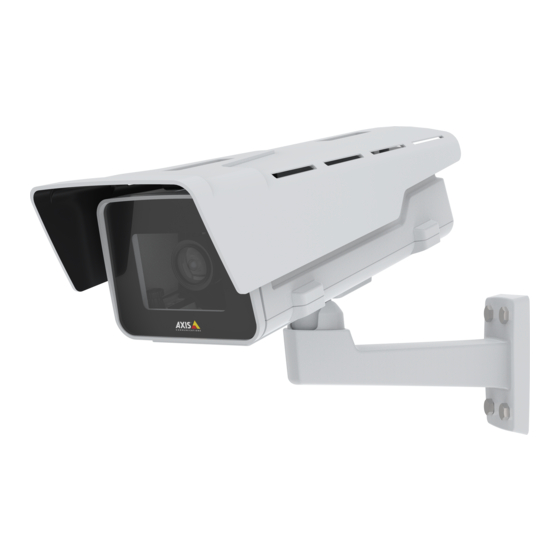
AXIS P13 Network Camera Series Specifications Specifications Product overview microSD card slot Status LED Built-in microphone Zoom puller Lock screw for focus ring Focus ring Power connector (DC) T92G20 connector Control button 10 RS485/422 connector 11 I/O connector 12 i-CS connector (compatible with P-iris and DC-iris) -
Page 51: Sd Card Slot
Don’t remove the SD card while the product is running. This device supports microSD/microSDHC/microSDXC cards. For SD card recommendations, see axis.com. microSD, microSDHC, and microSDXC Logos are trademarks of SD-3C LLC. microSD, microSDHC, microSDXC are trademarks or registered trademarks of SD-3C, LLC in the United States, other countries or both. - Page 52 AXIS P13 Network Camera Series Specifications Audio input 1 Tip 2 Ring 3 Sleeve Electret power if selected Ground Unbalanced microphone (with or without electret power) or line Audio output 1 Tip 2 Ring 3 Sleeve Channel 1, unbalanced line, mono...
- Page 53 AXIS P13 Network Camera Series Specifications DC ground DC output 12 V, max 50 mA Supervised input port 1 Digital output port 1 Supervised input port 2 Digital output port 2 Power connector 2-pin terminal block for DC power input. Use a Safety Extra Low Voltage (SELV) compliant limited power source (LPS) with either a rated output power limited to ≤100 W or a rated output current limited to ≤5 A.
- Page 54 Important The maximum cable length is 30 m (98 ft). T92G20 connector Use this connector when you mount the camera in an AXIS T92G20 Outdoor Housing. The connector supplies power to the heater and the IR illumination in the housing.
-
Page 55: Ptz Drivers
PTZ drivers PTZ drivers APTP This is a list of models supported by this driver. The physical installation depends on your Axis product and the PTZ unit. Important Check what serial communication your Axis product and the PTZ unit will support. - Page 56 Pelco Spectra Mini • Videotec DTRX3/PTH310P • Videotec ULISSE • PTK AMB • YP3040 Other models may be supported but this has not been verified by Axis. Technical information DEFAULT capabilities for PTZ driver: Driver Pelco 4.17 Version DEFAULT serial configuration: PortMode...
-
Page 57: Visca
To change serial port settings, go to System > Plain config > Serial in the device’s web interface. Visca This is a list of models supported by this driver. The physical installation depends on your Axis product and the PTZ unit. Important Check what serial communication your Axis product and the PTZ unit will support. - Page 58 AXIS P13 Network Camera Series PTZ drivers Note Different PTZ units may have other capabilities (both less and more). Movement Absolute Relative Continuous Tilt Zoom Focus Iris AutoIris AutoFocus IrCutFilter BackLight OSDMenu Connection For the RS485/RS422 pin assignment on your device, see RS485/RS422 connector on page 53.
-
Page 59: Troubleshooting
Using firmware from the active track is recommended if you want to access the newest features, or if you use Axis end-to-end system offerings. The LTS tracks are recommended if you use third-party integrations, which are not continuously validated against the latest active track. -
Page 60: Technical Issues, Clues, And Solutions
3. Go to Maintenance > Firmware upgrade and click Upgrade. When the upgrade has finished, the product restarts automatically. You can use AXIS Device Manager to upgrade multiple devices at the same time. Find out more at axis.com/products/axis-device-manager. Technical issues, clues, and solutions If you can’t find what you’re looking for here, try the troubleshooting section at axis.com/support. -
Page 61: Performance Considerations
IP addresses obtained from a DHCP server are dynamic and may change. If the IP address has been changed by DHCP changed, use AXIS IP Utility or AXIS Device Manager to locate the device on the network. Identify the device using its model or serial number, or by the DNS name (if the name has been configured). -
Page 62: Contact Support
Heavy network utilization due to poor infrastructure affects the bandwidth. • Viewing on poorly performing client computers lowers perceived performance and affects frame rate. • Running multiple AXIS Camera Application Platform (ACAP) applications simultaneously may affect the frame rate and the general performance. Contact support Contact support at axis.com/support. - Page 63 User manual Ver. M8.2 AXIS P13 Network Camera Series Date: April 2023 © Axis Communications AB, 2019 - 2023 Part no. T10135685...
Need help?
Do you have a question about the P13 Series and is the answer not in the manual?
Questions and answers