
Related Manuals for JETStream MIRO 1


Summary of Contents for JETStream MIRO 1
- Page 1 Montage- und Bedienungsanleitung GB INSTALLATION AND OPERATING INSTRUCTIONS INSTRUCTIONS DE MONTAGE ET MODE D’EMPLOI MIRO 1/2/3...
- Page 2 Inhaltsverzeichnis MONTAGE UND BEDIENUNGSANLEITUNG.......... Seite 3 - 11 GB Table of Contents INSTALLATION AND OPERATING INSTRUCTIONS ......page 12-21 Contenu INSTRUCTIONS DE MONTAGE ET MODE D’EMPLOI ......page 22-31...
-
Page 3: Table Of Contents
1.3 Gefahrenquellen Warnung! Die JetStream Anlage spritzt durch die Strahldüsen bis zu 780 Liter Wasser pro Minute in das Becken ein. Wird diese enorme Kraft voll zur Massage eingesetzt, kann dies zu Verletzungen der Muskulatur, des Bindegewebes und zu inneren Verletzungen führen. Aufgrund des verringerten elektrischen Widerstandes des menschlichen Körpers in Schwimmbädern und der daraus resultierenden erhöhten Wahrscheinlichkeit des Auftretens gefährlicher Körperströ-... -
Page 4: Sicherheitshinweise
Vor jeder Inbetriebnahme sind die örtlichen Sicherheitsbestimmungen sowie die Sicherheitshinweise einzuhalten. Ist das Gerät komplett montiert und elektrisch angeschlossen, kann das Gerät in Betrieb genommen werden. Bevor Sie die uwe JETSTREAM Anlage in Betrieb nehmen, drehen Sie den Motor am Lüfterrad von Hand mehrmals durch. - Page 5 Einbauvorschläge lose beiliegender Beton Schalbrett Schutzschlauch für Wandstärke über 24 bis 100 cm Schild „OBEN“ 20-35 optimal 25 Rohbauteil Düse Ø 17 Düsenmantel- Stopfen 2“ gehäuse bis zur Innenkontur Rohbauteil für Pneumatik- fliesen Zylinderkopf- Schrauben schalter Putz- und Fliesenausgleich Beckenwand Rohbauteil für Saugseite Flachkopf-...
-
Page 6: Fertigmontage/Angaben Nur Für Autorisierte Personen
Kürzen Sie den Luftansaugschlauch, wenn dieser länger ist, als Sie ihn benötigen. Je kürzer der Luftansaugschlauch, desto geringer ist sein Widerstand und umso höher ist der Luftdurchsatz. JetStream MIRO Einbauvorschlag in Betonbecken ohne Überflutungsrinne (Bild 7) JetStream MIRO Einbauvorschlag MIRO 2 und MIRO 3 und 2 Einlaufseiher (Bild 8) JetStream MIRO Einbauvorschlag in Treppe (Bild 9) - Page 7 Einbauvorschläge Steuerkasten und Ventile ca. 5-10 cm über dem Wasserspiegels montieren MIRO 1 Steuerkasten und Ventile ca. 5-10 cm über dem Wasserspiegels montieren MIRO1 MIRO2 Einlaufseiher MIRO3 Einlaufseiher Maße in cm Maße in cm...
-
Page 8: Inbetriebnahme/Angaben Für Den Benutzer Der Anlage
Druckstrahl werden die Haut, das Gewebe darunter und die Muskulatur kräftig durchmassiert. Das fördert die Durchblutung, lockert und entspannt. 4.4 Gegenstromschwimmen Stellen Sie die JetStream auf volle Strahlstärke ein. Die Lage der einstellbaren Düse muss so sein, dass eine starke Strömung direkt unterhalb des Wasserpegels erzeugt wird, ohne grosse Oberflächenwirbel zu verursachen. 4.5 Überwintern Wenn die JetStream MIRO frostgefährdet ist, wird empfohlen den Wasserpegel des Schwimmbeckens unterhalb der... -
Page 9: Wiederinbetriebnahme
4.6 Wiederinbetriebnahme Mutter am unteren Teil der Pumpe wieder zuschrauben. Um die Pumpe eventuell freizumachen, bringen Sie diese manuell in Bewegung. (Bringen Sie die Flügel des Ventilators mit Hilfe eines Schraubendrehers in Bewegung.) Vor dem Einschalten der Pumpe Muffenschieber wieder öffnen (wegen Trockenlauf). WARTUNG Gerät vom Netz trennen! Das Gerät immer nur in einwandfreiem Zustand betreiben. -
Page 10: An Den Elektroinstallateur
AN DEN ELEKTROINSTALLATEUR Hinweise zum Anschluss der stationären Schwimmbeckenpumpe JETSTREAM BAMBO2, BAMBO, COCO (unbeleuchtete Ausführungen) VIVA, LIBRA 3-5, LIDO, LIDO2, EuroJet, DUNA, MIRO, LARGO, PUNTO für Drehstrom 3N PE ~ 400 V 230 V 50 Hz und 1 N PE ~ 230 V - 50 Hz Es geht um Ihre Sicherheit! Führen Sie deshalb die Anschlussarbeiten sorgsam nach den Bestimmungen DIN VDE 0100 Teil 702 aus. - Page 11 Schaltplan für JETSTREAM BAMBO2, BAMBO, COCO Schaltplan für JETSTREAM BAMBO2, BAMBO, COCO (unbeleuchtete Ausführung) LIBRA 3-5, LIDO, LIDO2, VIVA, (unbeleuchtete Ausführung) LIBRA 3-5, LIDO, LIDO2, VIVA, EuroJet mit Pneumatikschalter und Zeitrelais EuroJet mit Pneumatikschalter 3 N ~ PE 50 Hz 400/230 V 16 A 3 N ~ PE 50 Hz 400/230 V 16 A Schaltplan für JETSTREAM...
- Page 12 Preface Your unit has been built in accordance with the latest state of the art, and is safe. However, the unit can be dangerous if it is operated by persons who have not received the necessary training or instruction, or if it is used improperly. Therefore, ever- yone entrusted with the task of installing the unit, setting it into operation, operating, maintaining and repairing it, must read and understand the Operating Instructions and - especially - the Safety Instructions.
-
Page 13: Safety Instructions
Warning! The JETSTREAM system forces up to 700 litres of water per minute into the pool through the nozzle. If all of this enormous force is used for massage, it can cause injuries to muscles and to connective tissue, as well as internal injuries. Because of the reduced electrical resistance of the human body in swimming pools and the resulting increased probability of the occurrence of dangerous currents in the body, increased safety requirements are imposed on the electrical installation. -
Page 14: Initial Operation
INITIAL OPERATION 2.1 Before starting Safety precautions and operating instructions must be carefully read and observed before setting up and operating. 2.2. First time operation Before operating, local safety requirements must be met and safety precautions must be observed. Before operating the unit for the first time, rotate the pump by hand several times at the ventillating fan in the direction shown. -
Page 15: Installation Suggestion
Installation Suggestion concrete Protective sleeve Shuttering for pneumatic tube Wall thickness 24 -100 cm Sticker „top“ 20-35 optimal 25 nozzle housing Ø 17 render and tile stopper 2“ to inner edge Pneumatics switch housing Shuttering max thickness screw render and tile If required M 6x35 poll wall... -
Page 16: Final Assembly Instrucions
Suggestion for the assemly of JetStream MIRO into concrete pools without overflow see picture 7 Suggestion for the assembly of JetStream MIRO 2 and MIRO 3 and of 2 intake screens see picture 8 Suggestion for the assembly of JetStream MIRO in stairs see picture 9... - Page 17 Installation Suggestion MIRO 1 MIRO1 MIRO2 intake screen MIRO3 intake screen dimensions in cm dimensions in cm...
-
Page 18: Operation / Information For The User Of The Unit
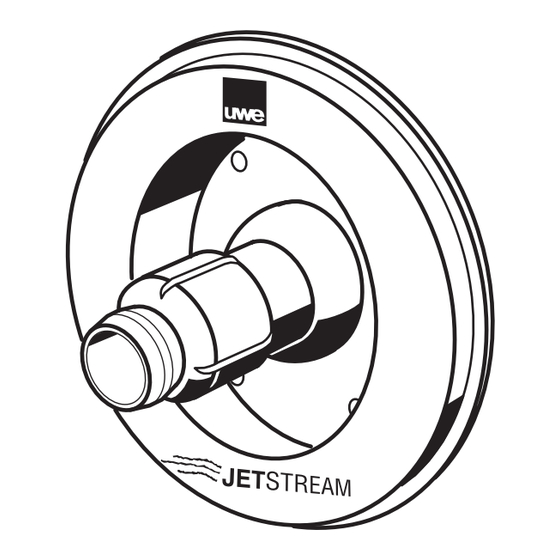
• Massage hose When you wish to put the massage hose on or take it off, you must first switch off the JETSTREAM equipment. Put the massage hose into the nozzle (2) and secure it with the aid of the movable ring. To take the massage hose off, hold the hose with one hand, and with the other hand release the movable ring by moving it towards the hose. -
Page 19: Again Operation
4.6 Again- operation Before putting into operation again, screw in the discharging screw, open valves and fill the pool. Before switching on, rotate the pump by hand several times at the ventilating fan in the direction shown. 5 SERVICE Operate the unit only in perfect condition. Take care to have it regularly checked and serviced. When repairing or bringing into operation again, ensure that tampering has not occurred. -
Page 20: Information For The Electrician
INFORMATION FOR THE ELECTRICIAN Notes about connection of the pool pumps JETSTREAM BAMBO2, BAMBO, COCO (version without illumination) VIVA, LIBRA 3-5, LIDO, LIDO2, EuroJet, DUNA, MIRO, LARGO, PUNTO for three phase 3N PE ~ 400 V 230 V 50 Hz and 1 N PE ~ 230 V - 50 Hz This affects your safety! Therefore, perform all work carefully in accordance with the regulations EN-60335-2-41. - Page 21 Wiring diagramm for JETSTREAM EuroJet, BAMBO2, BAMBO, COCO Wiring diagramm for JETSTREAM BAMBO2, BAMBO, COCO (versions without illumination), LIBRA 3-5, LIDO, LIDO 2, VIVA, EuroJet (versions without illumination) LIBRA 3-5, LIDO, LIDO 2, VIVA with pneumatic switch and time relay 3N ~ PE 50 Hz 400/230 V 16 A...
-
Page 22: Instructions De Sécurité
Attention ! L’installation JETSTREAM peut, selon le type d’appareil, injecter par sa buse éjectrice jusqu’à 780 litre d’eau à la minute dans le bassin. L’utilisation de cette pleine puissance pour un massage peut conduire à des blessures au niveau de la musculature, du tissu conjonctif ainsi qu’à... - Page 23 à 30 mA. 2. Le local technique de l’appareil JetStream MIRO doit être hors du volume de protection du bassin (soit à plus de 2,50 m, soit sous Ia plage). Le couvercle doit s’ouvrir à l’aide d’une clé ou d’un outil être équipé d’un système de coupure électrique des éléments actifs à...
-
Page 24: Mise En Service/Informations Destinées À L'utilisateur
MISE EN SERVICE INFORMATIONS DESTINÉES À L’UTILISATEUR 2.1 Avant la mise en service Les instructions de sécurité et le mode d’emploi doivent être lus attentivement avant l’installation et la mise en service de l’appareil. 2.2 Première mise en service de l’appareil Il est impératif d’observer les prescriptions locales de sécurité... - Page 25 Proposition de Montage gaine de protection planche de béton amovible pour coffrage épasseurs de paroi entre 24 et 100 étiquette „haut“ 20-35 optimal 25 pièce à sceller buse Ø 17 carreler jusqu’ bouchon 2“ au contour pièce à sceller du intérieur commutateur boulon...
-
Page 26: Instructions Pour Montage Final
3 INSTRUCTIONS POUR LE MONTAGE FINAL INFORMATIONS DESTINEES EXCLUSIVEMENT AUX PERSONNES AUTORISEES Avant le montage Les Instructions de sécurité doivent être lues attentivement avant l’installation. Conformez-vous exactement aux instructions données par la société uwe et aux différentes normes en vigueur. En cas de non-respect de ces instructions, l’utilisateur est seul tenu responsable. - Page 27 Proposition de montage de JetStream MIRO dans une piscine en béton sans goulotte à débordement voir image 7 Proposition de montage de JetStream MIRO 2 et MIRO 3 et de 2 crépines voir image 8 Proposition de montage de JetStream MIRO dans les escaliers voir image 9...
-
Page 28: Mise En Service/Informations Destinées À L'utilisateur
4.5 Hivernage Si le JETSTREAM risque les effets du gel, il est conseillé de descendre le niveau d’eau de la piscine juste en dessous le MIRO. Ouvrez les deux vannes et enlevez l’écrou de vidange à la partie basse de la pompe. -
Page 29: Remise En Service
Révisser l’écrou en partie basse de la pompe. Laisser les vannes ouvertes et remonter le niveau du bassin. Faites tourner la pompe à la main par un tournevis dans les ailettes du ventilateur afin de la „dégommer“ éventuellement. Mettre en route électriquement ensuite. Le JetStream peut être utilisé dans jusqu´à une température max. de 35° C. IMPORTANT! Si le local technique où... -
Page 30: L'attention De L'électricien
Seuls des électriciens spécialisés sont autorisés à effectuer des travaux sur les pompes uwe Jetstream. Les normes en vigueur, les normes DIN VDE et UTE ainsi que les instructions de prévention applicables contre les accidents sont à... - Page 31 SCHEMA DE BRANCHEMENT A REALISER SCHEMA DE BRANCHEMENT A REALISER POMPE 1,7 kW MONOPHASEE 230 VOLTS POMPE 3,2 kW MONOPHASEE 230 VOLTS ALIMENTATION ALIMENTATION Diffférentiel 30mA 0bligatoire Diffférentiel 30mA 0bligatoire TERRE PHASE NEUTRE TERRE NEUTRE PHASE 1 N 1 ALIMENTATION ALIMENTATION Différentiel 30 mA Différentiel 30 mA...
- Page 32 GmbH Buchstraße 82 · Postfach 2020 D-73510 Schwäbisch Gmünd Tel. (07171) 103 -0 · Fax (07171) 103 -106...
Need help?
Do you have a question about the MIRO 1 and is the answer not in the manual?
Questions and answers