Jabra PANACAST 50 Installation Manual
Video bar system
Hide thumbs
Also See for PANACAST 50:
- Administrator's manual (73 pages) ,
- User manual (50 pages) ,
- Manual (14 pages)
Table of Contents
Advertisement
Quick Links
Advertisement
Table of Contents

Related Manuals for Jabra PANACAST 50


Summary of Contents for Jabra PANACAST 50
- Page 1 INSTALLATION MANUAL PANACAST Video Bar System Technology for life’s new rhythm...
- Page 2 ® ® © 2023 GN Audio A/S. All rights reserved. Jabra is a trademark of GN Audio A/S. The Bluetooth word mark and logos are registered trademarks owned by the Bluetooth SIG, Inc. and any use of such marks by GN Audio A/S is under license.
- Page 3 1. Welcome ........5 4.4 Installation height 5. Cabling ......... 20 2. Overview ........6 5.1 Room system cabling 2.1 Jabra PanaCast 50 Video Bar System Base Unit overview 5.2 Video bar cabling 2.2 Jabra PanaCast Control overview 5.3 Touch controller cabling 2.3 Included accessories - Jabra PanaCast 50...
- Page 4 10. Restart devices ......31 11. Factory reset ......34 12. Support ........37 12.1 FAQ and technical specifications 12.2 How to care for your Jabra device...
- Page 5 Thank you for choosing the Jabra PanaCast 50 Video Bar System. We hope you will enjoy it! Here are some key features you will benefit from by using the Jabra PanaCast 50 Video Bar System: • World-class audio with full duplex and powerful stereo speakers •...
-
Page 6: Front Side
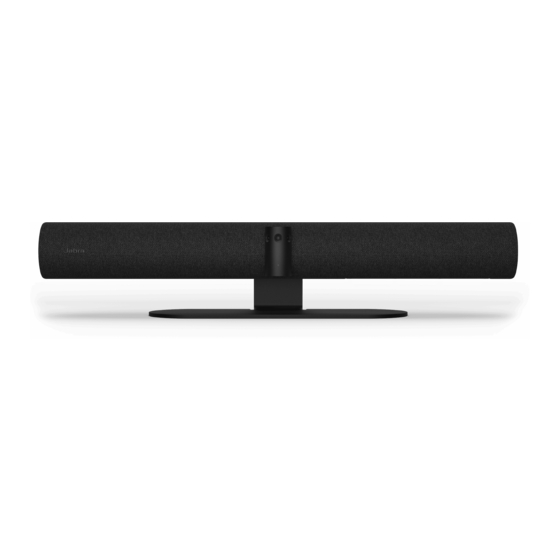
2. Overview 2.1 Jabra PanaCast 50 Video Bar System Base Unit overview FRONT SIDE Microphones Microphones Cameras Microphones Microphones Speakers Speakers... -
Page 7: Back Side
BACK SIDE Port connections HDMI IN HDMI OUT2 HDMI OUT1 USB A USB A ETHERNET USB C POWER 3.5MM JACK Air vents Reset button Adjustable mounting bracket... - Page 8 2.2 Jabra PanaCast Control overview Ethernet port (PoE) FRONT SIDE BACK SIDE USB-C port 10-inch LCD Ultrasonic sound Port connections touch screen proximity detector (remove cover for access) Proximity sensor Manual tightening Pinhole reset screws button...
- Page 9 2.3 I ncluded accessories - Jabra PanaCast 50 Video Bar System Base Unit AC power adapter (1.83m/6ft) AC power cable HDMI cable RJ45 Ethernet (1m/3.28ft) (1.83m/6ft) cable (4.57m/15ft) Cable cover compartment (2 pcs) Wall mount Camera privacy with embedded screws cover &...
- Page 10 2.4 Included accessories - Jabra PanaCast Control Jabra PanaCast Control POWER OVER ETHERNET (PoE) KIT PoE injector AC power cable RJ45 Ethernet cable (2 pcs) (1m/3.28ft) (4.57m/15ft) Additional accessories can be purchased at jabra.com/accessories.
-
Page 11: Optional Accessories
2.5 Optional accessories Accessories can be purchased at jabra.com/accessories. Screen mount Table stand... - Page 12 Accessories can be purchased at jabra.com/accessories. Regional power HDMI cable HDMI ingest RJ45 Ethernet cords (1.83m/6ft) cable cable (1m/3.28ft) (4.57m/15ft) (4.57m/15ft) USB-A to C cable USB-A to B cable Jabra PanaCast Control (4.57m/15ft) (1.83m/6ft) table mount...
- Page 13 2.6 Dimensions - Jabra PanaCast 50 Video Bar System Base Unit 141mm/5.55in 77mm/3.03in 139mm/5.47in 77mm/3.03in 151.6mm/5.96in 108.5mm/4.27in...
- Page 14 2.7 Dimensions - Jabra PanaCast Control 84.4mm/3.32in...
- Page 15 3. Room setup guide The Jabra PanaCast 50 Video Bar System is designed for meeting rooms up to 4.5 meters x 6 meters (15 feet x 20 feet). View the Room setup guide PDF here: jabra.com/help/panacast50vbs/getstarted Below are some typical room setup scenarios.
-
Page 16: Wall Mount Installation
4. Mounting 4.1 Wall mount installation View the wall mount assembly video and PDF here: jabra.com/help/panacast50vbs/ getstarted... - Page 17 4.2 Screen mount installation The screen mount is designed for screens up to 220 centimeters (86 inches) and VESA mounts up to 600 millimeters. View the screen mount assembly video and PDF here: jabra.com/help/ panacast50vbs/getstarted...
- Page 18 4.3 Table stand installation View the table stand assembly video and PDF here: jabra.com/help/panacast50vbs/ getstarted...
-
Page 19: Installation Height
4.4 Installation height It is recommended to install the video bar at eye-level of the meeting room participants. When installing the video bar with the wall mount or screen mount, the Recommended camera should be positioned 8 Min. 30-35 cm (12-14 in) 8 cm (3 in) centimeters (3 inches) below the screen and ideally 30-35 centimeters... - Page 20 5. Cabling 5.1 Room system cabling Monitor Powered Ethernet Touch controller Ethernet HDMI OUT 1 Ethernet Ethernet PoE kit Video bar Ethernet switch...
- Page 21 5.2 Video bar cabling VIDEO BAR CONNECTED TO ONE MONITOR Monitor HDMI OUT 1 Power Ethernet Video bar Ethernet switch...
- Page 22 VIDEO BAR CONNECTED TO TWO MONITORS Monitor 1 Monitor 2 HDMI OUT 1 HDMI OUT 2 (cable not supplied) Ethernet Power Video bar Ethernet switch...
- Page 23 5.3 Touch controller cabling POWERED ETHERNET Power over Ethernet switch Powered Ethernet...
- Page 24 POWER OVER ETHERNET KIT If the Ethernet connection does not supply power to the touch controller, the included PoE injector will need to be connected between the Ethernet switch and the touch controller. Ethernet switch Power PoE injector...
- Page 25 During the last step of the configuration it is necessary to log into the video conferencing account of your service provider. The Jabra PanaCast 50 Video Bar System is versatile and can come pre-loaded with native Microsoft Teams Room on Android...
- Page 26 6.1 Configuration using the touch controller The Jabra PanaCast 50 Video Bar System is easily configured by following the Setup wizard using the touch controller. The setup includes: - Language selection - Date and time setup - Pairing between video bar and touch...
- Page 27 6.2 Configuration using the video bar The PanaCast 50 Video Bar System can be configured using just the video bar. This configuration method allows you to set up the system when there is no touch controller available. This configuration method requires either a touch monitor or a wired keyboard and mouse.
- Page 28 7. Pairing The Jabra PanaCast 50 Video Bar System video bar and touch controller are pre- paired and ready to be configured. If the video bar and touch controller are bought separately or the pairing has been lost, it is necessary to manually pair them.
-
Page 29: Remote Management
6 digits of the serial number of the device used to access the Web Console. If the Jabra PanaCast 50 Video Bar System has not been configured, the Web Console will take you through the necessary configuration process. -
Page 30: Operating System
9.2 Microsoft Teams and Teams Rooms Microsoft Teams or Microsoft Teams Rooms will automatically detect and set the Jabra PanaCast 50 Video Bar System as the default video and audio device. 9.3 Zoom and Zoom Rooms Zoom or Zoom Rooms will automatically detect and set the Jabra PanaCast 50 Video Bar System as the default video and audio device. - Page 31 10. Restart devices To restart the video bar and touch controller, access the Device settings menu on the touch controller and go to the Restart section. Both devices will be restarted. You can also access the Web Console by entering the IP address of the video bar or touch controller in a browser, and go to the System Reset menu.
- Page 32 Individual restart of the video bar Press and hold the Reset button on the back of the video bar. Release the button after 5 seconds and a ‘Restarting’ message will be displayed on the monitor. The video bar will restart and play an audio notification when ready for use. The reboot takes approximately 1 minute.
- Page 33 Individual restart of the touch controller Use a paperclip to press and hold the Pinhole reset button on the back of the touch controller. Release the button after 5 seconds and a ‘Restarting’ message will be displayed on the monitor. The touch controller will flash green and restart.
-
Page 34: Factory Reset
11. Factory reset To factory reset the video bar and touch controller, access the Device settings menu on the touch controller and go to the Restart section and select Factory reset. Both devices will be reset. You can also access the Web Console by entering the IP address of the video bar or touch controller in a browser, and go to the System Reset menu. - Page 35 Individual factory reset of video bar Resetting will restore the video bar to its factory default settings. Press and hold the Reset button on the back of the video bar for 20 seconds until the LED flashes pink and the ‘factory data reset’ message is displayed on the monitor. The video bar will restart and play an audio notification when ready for use.
- Page 36 Individual factory reset of the touch controller Resetting will restore the touch controller to its factory default settings. Use a paperclip to press and hold the Pinhole reset button on the back of the touch controller for 20 seconds until the ‘factory data reset’ message is displayed on the screen.
- Page 37 12.2 How to care for your Jabra device The Jabra PanaCast 50 Video Bar System is for indoor use only. • Avoid direct sunlight and temperatures above 40°C/104°F or below 0°C/32°F. • Do not expose the camera or cables to rain or other liquids.
- Page 38 To learn more about the Jabra PanaCast 50 Video Bar System, go to jabra.com/help/panacast50vbs/getstarted...
Need help?
Do you have a question about the PANACAST 50 and is the answer not in the manual?
Questions and answers