Table of Contents
Advertisement
Quick Links
Advertisement
Table of Contents

Subscribe to Our Youtube Channel
Related Manuals for Janome DC2011


Summary of Contents for Janome DC2011
- Page 1 Instruction Book Manual de instrucciones Manuel d’instructions...
- Page 2 IMPORTANT SAFETY INSTRUCTIONS This appliance is not intended for use by persons (including children) with reduced physical, sensory or mental capabilities, or lack of experience and knowledge, unless they have been given supervision or instruction concerning use of the appliance by a person responsible for their safety. Children should be supervised to ensure that they do not play with this sewing machine.
- Page 3 INSTRUCCIONES IMPORTANTES DE SEGURIDAD Esta máquina no fue concebida para ser usada por personas (incluyendo a los niños) con capacidades físicas, sensoriales o mentales reducidas, o bien con falta de experiencia y conocimientos, salvo si están supervisadas o han recibido instrucciones relativas al uso de la máquina por parte de una persona encargada de su seguridad. Los niños deben ser vigilados para asegurarse de que no jueguen con la máquina.
- Page 4 INSTRUCTIONS DE SÉCURITÉ IMPORTANTES Cette machine n'est pas censée être utilisée par des personnes (y compris des enfants) ayant des capacités physiques, sensorielles ou mentales réduites ou un manque d'expérience et de connaissances, sauf si elles sont sous surveillance ou ont été instruites sur l'usage de la machine par une personne responsable de leur sécurité. Les enfants devraient être surveillés pour s'assurer qu'ils ne jouent pas avec la machine.
-
Page 5: Table Of Contents
TABLE OF CONTENTS SECTION I. NAMES OF PARTS SECTION 4. UTILITY STITCHES Names of Parts ..............2 Overcasting (Zigzag stitch) ..........40 Standard Accessories ............4 Multiple Zigzag Stitch (Tricot stitch) ........ 40 Extension Table and Free Arm Sewing ......6 Overedge Stitch .............. - Page 6 INDICE SECCION 1. NOMBRE DE LAS PIEZAS SECCION 4. PUNTADAS UTILES Nombre de las piezas ..............3 Sobrehilado (Puntada en zigzag) ..........41 Accesorios estandares ..............5 Punta múltiple en zigzag (puntada de croché simple) ....41 Mesa de extensión y confección con brazo libre ......7 Puntada de sobrehilado (serging) ..........
- Page 7 TABLE DES MATIÈRES PARTIE 1. IDENTIFICATION DES PIÉCES DE LA MACHINE PARTIE 4. LES POINTS UTILITAIRES Surjeter (Point zigzag) .............. 41 è Nom des pi ces ................3 Point zigzag multiple (point tricot) ..........41 Accessoires standard ..............5 Point de surjet ................41 Plateau extensible et couture en bras libre .........
-
Page 8: Section I. Names Of Parts Names Of Parts
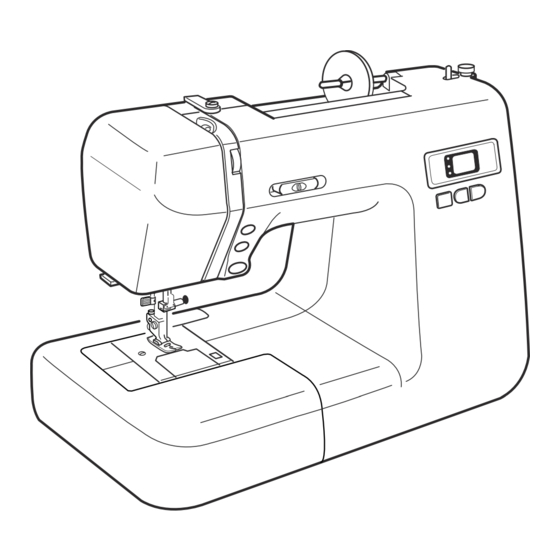
SECTION 1. NAMES OF PARTS Names of Parts q Mode selecting key w Down (–) key e Up (+) key r LED display t Spool holder (large) y Spool pin u Bobbin winding thread guide i Thread guide o Thread take-up lever !0 Thread tension dial !1 Face plate !2 Thread cutter... -
Page 9: Nombre De Las Piezas
SECCION 1. NOMBRE DE LAS PARTES PARTIE 1. IDENTIFICATION DES PIÉCES DE LA MACHINE Nombre de las piezas Nom des pièces q Tecla de selección de modalidad q Touche de sélection du mode w Tecla Menos (–) w Touche (–) e Tecla Más (+) e Touche (+) r Pantalla... -
Page 10: Standard Accessories
Standard Accessories Bobbin Needle set Satin stitch foot F Zipper foot E Automatic buttonhole foot R Overedge foot C Blind hem foot G 1/4” seam foot O Even feed foot Seam ripper / Buttonhole opener Screwdriver Lint brush Quilter bar Foot control Additional spool pin Spool pin felt... -
Page 11: Accesorios Estandares
Accesorios estandares Accessoires standard Canillas Canettes Juego de agujas Jeu d’aiguille Prensatelas para puntada decorativa F Pied à point lance F Prensatelas para cremalleras E Pied pour fermetures éclair E Prensatelas para ojals automaticon R Pied pour boutonnière automatique R Prensatelas de sobrehilado C Pied de surjet C Prensatelas para puntada invisible G... -
Page 12: Extension Table And Free Arm Sewing
Extension Table and Free Arm Sewing • To detach: Pull the extension table to the left. • To attach: Slide the extension table along the free arm, inserting the pin into the hole to attach. q Extension table w Pin e Hole •... -
Page 13: Mesa De Extensión Y Confección Con Brazo Libre
Plateau extensible et couture en bras libre Mesa de extensión y confección con brazo libre • Retirer le plateau: • Desmontaje: Tirer le plateau vers la gauche. Tire de la mesa de extensión hacia la izquierda. • Remettre le plateau en place •... -
Page 14: Section 2. Getting Ready To Sew Connecting The Power Supply
SECTION 2. GETTING READY TO SEW Connecting the Power Supply 1. Turn the power switch OFF. 2. Insert the foot control plug into the machine socket. 3. Insert the machine plug into the machine socket. 4. Insert the power supply plug into the outlet. 5. -
Page 15: Seccion 2. Preparativos Para Coser Conexión A La Fuente Eléctrica
SECCIÓN 2. PREPARATIVOS PARA COSER PARTIE 2. SE PREPARER A COUDRE Conexión a la fuente eléctrica Brancher la machine 1. Apague la máquina. 1. Mettre le bouton de mise en marche sur la position OFF 2. Introduzca la clavija del pedal de control en el (arrêt). -
Page 16: Function Keys And Buttons
Function Keys and Buttons q q q q q Reverse stitch button While the reverse stitch button is pressed, the machine sews backwards when pattern 01, 02, 10 or 11 ( ) has been selected. The machine will not sew backwards for any other stitch pattern. -
Page 17: Teclas De Funciones Y Botones
Teclas de funciones y botones Touches et boutons fonctionnels q Le bouton de marche arrière q Botón de puntada inversa Lorsque le bouton de marche arrière est enclenché, la Al oprimir el botón de puntada inversa, la máquina cose en machine coud en sens inverse. -
Page 18: Mode Selection Key
r Mode selection key Press this button to enter one of the following modes. z Pattern selection mode: Press the Up or Down key until the pattern number of the desired stitch appears on the LED display. x Stitch width adjusting mode: Press the Up key to increase the stitch width or Down... -
Page 19: Tecla De Selección De Modalidad
r Touche de sélection du mode r Tecla de selección de modalidad Appuyer sur ce bouton pour utiliser un des modes suivants. Oprima este botón para acceder a una de las siguientes modalidades. z Mode de sélection du point z Modalidad de selección de patrón: Appuyer sur la touche ou sur la touche Oprima la tecla Más... -
Page 20: Dropping The Feed Dog
Dropping the Feed Dog The feed dog can be lowered by the drop feed lever for sewing on buttons, manual embroidery etc. Push the drop feed lever to the right to lower the feed dog. Push the lever to the left to raise the feed dog; it will return to the up position when starting the machine. -
Page 21: Descenso De Las Garras Transportadoras
Descenso de las garras transportadoras Abaisser la griffe d’entraînement Las garras transportadoras pueden bajarse con la palanca Pour abaisser la griffe d’entraînement, utiliser le levier de descenso de garras transportadoras para confeccionar d’entraînement utilisé pour coudre les boutons, pour faire botones, realizar bordado manual, etcétera. -
Page 22: Changing The Presser Foot
Changing the Presser Foot WARNING: Turn OFF the power switch before changing the foot. Always use the proper foot for the selected pattern. Wrong foot can cause needle to break. • To release: Raise the needle and presser foot. Press the red button on the back of the foot holder and the foot will drop off. -
Page 23: Cambio Del Prensatelas
Cambio del prensatelas Changer de pied presseur ATENCIÓN: ATTENTION: Apague la máquina antes de cambiar el prensatelas. Éteindre bouton de mise en marche avant de changer le Siempre utilice el prensatelas apropiado para el patrón pied presseur. Toujours utiliser le pied recommandé pour seleccionado. -
Page 24: Thread And Needle Chart
* Check your needles frequently for barbed or blunted points. Snags and runs in knits, fine silks and silk-like fabrics are permanent and are almost always caused by a damaged needle. • Thread and Needle Chart Fabrics Threads Needle Size Light Crepe de Chine, Fine Silk... -
Page 25: Cuadro Comparativo De Aguja E Hilos
* Comprobar,con una cierta asiduidad, que la aguja * Vérifiez souvent vos aiguilles pour trouver des pointes acérées ou épointées. Les accrocs dans no se encuentra ni desbarvada ni despuntada, ya les tricots, la soie et les tissus semblables sont que los géneros de punto y de seda pueden ser permanents et sont souvent causés par une dañados por ella. -
Page 26: Winding The Bobbin
Winding the Bobbin Removing the bobbin Slide the hook cover release button to the right, and remove the hook cover. Lift the bobbin out. q Hook cover release button w Hook cover e Bobbin Setting the spool of thread Place the spool of thread on the spool pin with the thread coming off the spool as shown. -
Page 27: Enrollado De La Bobina
Enrollado de la bobina Remplir la canette Extracción de la bobina Retirer la canette Deslice el botón de liberación de la tapa del gancho Faire glisser le bouton d’ouverture du couvercle vers la suavemente hacia la derecha y quite la tapa. droite et retirer le couvercle. -
Page 28: Inserting The Bobbin
Inserting the bobbin z Place the bobbin in the bobbin holder with the thread running counter-clockwise. q End of the thread w Bobbin holder x Guide the thread into slot A on the front side of the bobbin holder. Draw the thread to the left sliding it between the tension spring blades. -
Page 29: Inserción De La Bobina
Mettre en place la canette Inserción de la bobina z Placer la canette dans le porte-canettes. Le fil devra se z Coloque la bobina en el soporte de la bobina, con el hilo dérouler dans le sens inverse des aiguilles d’une montre. saliendo en sentido antihorario. -
Page 30: Threading The Machine
Threading the Machine Threading the machine q Spool w Spool holder e Presser foot lifter z Raise the presser foot. Press the Up/Down needle position button to bring the take-up lever to its highest position. Turn the power switch OFF. Draw the end of the thread with your left hand and hook around the upper thread guide while holding the thread at the spool with your right hand. -
Page 31: Enhebrado De La Máquina
Enhebrado de la máquina Enfilage de la machine Enhebrado de la máquina Enfilage de la machine q Carrete q Bobine w Soporte del carrete w Support de bobine e Elevador del prensatelas e Releveur de pied presseur z Levante el prensatelas. Oprima del botón de ascenso y z Relever le pied presseur. -
Page 32: Automatic Needle Threader
Automatic Needle Threader z Raise the needle to its highest position. Pull down the needle threader knob as far as it will go. q Needle threader knob w Hook x Turn the knob in the direction of the arrow as shown. -
Page 33: Enhebrador Automático De La Aguja
Enhebrador automático de la aguja Enfilage automatique z Levante la aguja a su posición más alta. z Soulever l’aiguille jusqu’à son point le plus élevé. Baje la perilla del enhebrador de aguja tanto como pueda. Tirer le bouton du dispositif d'enfilage aussi loin que q Perilla del enhebrador de agujas possible. -
Page 34: Balancing Thread Tension
Balancing Thread Tension Correct tension q Needle thread (Top thread) w Bobbin thread (Bottom thread) e To loosen r To tighten The ideal straight stitch has threads locked between two layers of fabric, as illustrated. If you look at the top and bottom of a seam, notice that there are no gaps. -
Page 35: Equilibrio De La Tensión Del Hilo
Équilibrer la tension du fil de l’aiguille Equilibrio de la tensión del hilo Tension correcte: Tensión correcta: q Cadran de la tension du fil q Perilla de tensión del hilo w Repère w Marca de ajuste e Fil de l’aiguille e Hilo de la aguja r Fil de la canette r Hilo de la bobina... -
Page 36: Section 3. Basic Sewing Straight Stitch Sewing
SECTION 3. BASIC SEWING Straight Stitch Sewing Machine setting q Pattern: w LED display e Foot: A: Zigzag foot Starting to sew Raise the presser foot and place the fabric on the machine. Lower the needle into the fabric where you want to start. -
Page 37: Seccion 3. Costura Basica
PARTIE 3. COUTURE DE BASE SECCIÉON 3. COSTURA BASICA Le point droit Puntada recta Réglage de la machine Configuración de la máquina q Point q Patrón w Affichage électronique w Pantalla e Pied e Prensatelas A : pied zigzag A: Prensatelas de zigzag Commencer à... -
Page 38: Adjusting The Stitch Length
Adjusting the Stitch Length Press the mode selection key to enter stitch length adjusting mode. The LED display shows “2.2” (default setting). Press the Down (–) key to decrease stitch length. Press the Up (+) key to increase stitch length. The stitch length can be varied from 0.0 to 5.0. -
Page 39: Ajuste De La Longitud De Puntada
Ajuste de la longitud de puntada Régler la longueur du point Oprima la tecla de selección de modalidad para Appuyer sur la touche de sélection du mode et choisir cambiar a la modalidad de ajuste de longitud de puntada. le mode de réglage de la longueur du point. En la pantalla aparece “2.2”... -
Page 40: Using The Seam Guides
Using the Seam Guides The seam guides on the needle plate are engraved to help you measure seam allowance. The numbers on the needle plate indicate the distance between the center needle position and the edge of the fabric. The lines are 1/8˝... -
Page 41: Cómo Usar Las Líneas Guía De Costura
Cómo usar las líneas guía de costura Utiliser les guides de couture La línea de guía de costura en el plato de la aguja y en la Les guides de couture sont gravés sur la plaque d’aiguille placa cubre gancho, le ayudará a medir el ancho de la pour vous aider à... -
Page 42: Variety Of Straight Stitches
Variety of Straight Stitching q Pattern: Straight stitch w Foot A: Zigzag foot For seaming garments, zipper application and more. Pattern #02 is used for seaming along the edge. q Pattern: Lock-A-Matic stitch w Foot A: Zigzag foot Seaming with auto reverse stitches at the beginning. Press the reverse stitch button once at the end;... -
Page 43: Diversas Puntadas Rectas
Diversas puntadas rectas Différents points droits q Patrón q Point Puntada recta Point droit w Prensatelas w Pied A: Prensatelas de zigzag A: Pied zigzag Para costuras de prendas, aplicaciones de cremalleras y Pour coudre les vêtements, les fermetures éclair et mucho más. -
Page 44: Basic Zigzag Stitch
Basic Zigzag Stitch Machine setting q Pattern w LED display e Foot A: Zigzag foot Zigzag stitch is one of the most useful and versatile stitches. It is used for overcasting, mending, appliqué also used as a decorative stitch. NOTE: Use an interface when sewing on stretch fabric such as knit, jersey or tricot. -
Page 45: Puntada Básica En Zigzag
Puntada básica en zigzag Le point zigzag de base Configuración de la máquina Réglage de la machine q Patrón q Point w Pantalla w Affichage électronique e Prensatelas A: Prensatelas de zigzag e Pied A : Pied zigzag La puntada de zigzag es una de las más útiles y versátiles. Le point zigzag est l’un des points les plus utiles et les plus Se utiliza para sobrehilado, remiendos, aplicaciones y versatiles. -
Page 46: Section 4. Utility Stitches Overcasting (Zigzag Stitch)
SECTION 4. UTILITY STITCHES Overcasting (Zigzag stitch) Machine setting q Pattern w LED display e Foot A:Zigzag foot or C:Overedge foot CAUTION: Do not set the stitch width less than 5 when using the overedge foot to prevent the needle from hitting the wires on the foot. -
Page 47: Seccion 4. Puntadas Utiles Sobrehilado (Puntada En Zigzag)
SECCION 4. PUNTADAS UTILES PARTIE 4. LES POINTS UTILITAIRES Sobrehilado (Puntada en zigzag) Surjeter (Point zigzag) Configuración de la máquina Réglage de la machine q Patrón q Point w Pantalla w Affichage électronique e Prensatelas e Pied A: Prensatelas de zigzag o A: Pied zigzag ou C: Prensatelas de sobrehilado C: Pied de surjet... -
Page 48: Knit Stitch
Knit Stitch Machine setting q Pattern w LED display e Foot A: Zigzag foot This stitch is recommended for finishing the edge of knit fabrics. Sew along the fabric edge leaving an extra seam allowance. After you finished sewing, trim seam allowance close to the stitches. -
Page 49: Punta De Tejido
Punta de tejido Le point tricot Configuración de la máquina Réglage de la machine q Patrón q Point w Pantalla w Affichage électronique e Prensatelas e Pied A: Prensatelas de zigzag A:Pied zigzag Se recomienda esta puntada para terminar el borde de telas L’utilisation de ce point est conseillée pour finir le bord des tejidas. -
Page 50: Automatic Buttonholes
Automatic Buttonholes There are three different types of buttonholes available. Square buttonhole (#06): Widely used for medium to heavy weight fabrics Round end buttonhole (#07): For fine to medium fabrics, such as blouses and children’s garments Keyhole buttonhole (#08): For medium to heavy weight fabrics, such as jackets and overcoats Square buttonhole Machine setting... -
Page 51: Ojal Automático
Ojal automático Boutonnière automatique Hay tres tipos de ojales disponibles. Il existe trois types différents de boutonnières. Les boutonnières carrées (N.06): Ojal cuadrado (06): Utilisées en général pour les tissus moyens ou lourds. Se utiliza para telas medianas y gruesas. Ojal redondo (07): Les boutonnières à... - Page 52 z Raise the needle and foot. Place the automatic buttonhole foot with its pin just under the groove of the foot holder. Lower the presser bar to attach the foot. q Groove w Pin x Pull the button holder open to the back (A), and place the button in it.
- Page 53 z Levante la aguja y el prensatelas. Coloque el z Relever l’aiguille et le pied. Placer le pied pour prensatelas para ojales automáticos con el poste justo boutonnières automatique de façon à ce que la tige se debajo de la muesca del soporte del prensatelas. Baje la trouve juste en-dessous de la rainure du support du barra del prensatelas para montar el prensatelas.
- Page 54 b Depress the foot control to sew a buttonhole. The machine will sew a buttonhole in the following a a a a a order: a a a a a Step 1 and 2: Front bartack and left row !2 Starting point ↓...
- Page 55 b Oprima el pedal de control para coser el ojal. b Appuyer sur la commande à pédale et coudre une La máquina coserá el ojal en el siguiente orden: boutonnière. a a a a a Pasos 1 y 2: Remate delantero y fila izquierda. La machine coud les boutonnières dans l’ordre suivant : !2 Punto inicial a a a a a Étapes 1 et 2 : barrette de renfort et longueur de gauche...
-
Page 56: Adjusting The Buttonhle Width And Density
Adjusting the buttonhole width and density a a a a a Adjusting the buttonhole width a a a a a Press the mode selection key to enter the stitch width adjusting mode. Press the Down(–) key to decrease buttonhole width. Press the Up (+) key to increase buttonhole width. -
Page 57: Ajuste De La Anchura Y La Densidad De Ojales
Ajuste de la anchura y la densidad de ojales Régler la densité et la largeur des boutonnières a a a a a Ajuste de la anchura del ojal a a a a a Régler la largeur des boutonnières Oprima la tecla de selección de modalidad para Appuyer sur la touche de sélection du mode et choisir... -
Page 58: Round End/Keyhole Buttonhole
Round end/Keyhole buttonhole Machine setting q Pattern w LED display e Foot R: Automatic buttonhole foot The sewing sequence is the same as square buttonhole Refer to pages 44-48 for sewing instruction. q Starting point w End point Adjusting the buttonhole width Press the mode selection key to enter the stitch width adjusting mode. -
Page 59: Ojal Redondo Y De Bocallave
Ojal redondo y de bocallave Boutonnière à bout rond / à oeillet Configuración de la máquina Réglage de la machine q Patrón q Point w Pantalla w Affichage électronique e Prensatelas R:Prensatelas para ojales automáticos e Pied R:Pied pour boutonnières automatique La secuencia de costura es la misma que se sigue para el L’ordre de couture est le même que pour les boutonnières... -
Page 60: Corded Buttonhole
Corded buttonhole Machine setting q Pattern w LED display e Foot R: Automatic buttonhole foot z With the buttonhole foot raised, hook the filler cord on the cord spur on the back of the buttonhole foot. Bring the ends toward you under the foot, and hook the filler cord ends into the forks on the front of the foot to hold them tight. -
Page 61: Ojales Acordonados
Ojale acordonado Boutonnière gansée Configuración de la máquina Réglage de la machine q Patrón q Point w Pantalla w Affichage électronique e Prensatelas e Pied R:Prensatelas para ojales automáticos R:Pied pour boutonnières automatique z Levante el prensatelas para ojales, enganche el cordón z Le pied pour boutonnières levé, accrocher le cordon sur de relleno en el gancho para cordón localizado en la l’ergot situé... -
Page 62: Sewing On Buttons
Sewing on Buttons Machine setting q Pattern w LED display e Foot F: Satin stitch foot r Feed dog Dropped Adjust the Stitch width as necessary. z Press the mode selection key to enter stitch width adjusting mode. Adjust the stitch width to match the needle swing with the span of the holes on the button, by pressing the Up (+) or Down (–) key. -
Page 63: Confección De Botones
Confección de botones Coudre les boutons Configuración de la máquina Réglage de la machine q Patrón q Point w Pantalla w Affichage électronique e Prensatelas e Pied F: Prensatelas para puntadas F : Pied pour points de raso satin r Garras transportadoras Abajo r Griffe d’entraînement Baissée Ajústela según se requiera. -
Page 64: Darning
Darning Machine setting q Pattern w LED display e Foot R: Automatic buttonhole foot z Pull the button holder fully to the back. z x c x Draw the needle thread to the left through the hole on the foot. c Lower the needle into the fabric at starting point. -
Page 65: Zurcido
Zurcido Repriser Configuración de la máquina Réglage de la machine q Patrón q Point w Pantalla w Affichage électronique e Prensatelas e Pied R: Prensatelas para ojales R: Pied pour automáticos boutonnières automatique z Mueva el portabotones totalmente hacia atrás. x Lleve el hilo de la aguja por la izquierda, a través del z Tirer le pince-boutons vers l’arrière aussi loin que agujero del prensatelas. -
Page 66: Zipper Sewing
Zipper Sewing Machine setting q Pattern w LED display e Foot E: Zipper foot • Attaching the zipper foot To sew on the left side of the zipper, attach the foot holder to the right pin on the zipper foot. To sew on the right side of the zipper, attach the foot holder to the left pin on the zipper foot. -
Page 67: Aplicación De Cremalleras
Aplicación de cremalleras Couture des fermetures éclair Configuración de la máquina Réglage de la machine q Patrón q Point w Pantalla w Affichage électronique e Prensatelas e Pied E:Prensatelas para cremalleras E: Pied pour boutonnières • Colocando el pie para cremalleras •... - Page 68 Zipper Sewing (continued) x Sew through all layers the entire length of the zipper tape, removing the pins as you go. Stop the machine about 2” (5cm) before the zipper foot reaches the pull tab. Lower the needle slightly into the fabric.
- Page 69 Costura de cremalleras (continuación) Couture des fermetures à glissière (suite) Cosa todas las capas de tela junto al doblez. Pare la Piquez à travers toutes les épaisseurs de tissu au ras du máquina 5 cm antes de que el prensatelas llegue al pli.
-
Page 70: Blind Hem Stitch
Blind Hem Stitch Machine setting q Pattern w LED display e Foot G: Blind hem foot z Fold hem with the wrong side up forming a 0.4–0.7 cm (3/16-5/16") allowance. q Wrong side of the fabric w 0.4–0.7 cm (3/16-5/16") a a a a a On heavy weight fabrics that ravel, the raw edge should be overcast first. -
Page 71: Puntada De Dobladillo Invisible
Puntada de dobladillo invisible L’ourlet invisible Configuración de la máquina Réglage de la machine q Patrón q Point w Affichage électronique w Pantalla e Prensatelas e Pied G:Pied pour ourlet G: Prensatelas de dobladillo invisible invisible z Haga un dobladillo con el reverso de la tela hacia arriba, z Plier un ourlet avec l’envers du tissu face à... -
Page 72: Section 5. Decorative Stitches Shell Tucking
SECTION 5. DECORATIVE STITCHES Shell Tucking Machine setting q Pattern w LED display e Foot F: Satin stitch foot r Thread tension 6–8 Fold the fabric on the bias. Sew along the folded edge so that the needle on the right swing just clear the fold to form tucks. -
Page 73: Seccion 5. Puntadas Decorativas
PARTE 5. COUTURE ET POINTS SECCIÓN 5. PUNTADAS DECORATIVAS DECORATIFS Alforza tipo concha marina Le point coquille Configuración de la máquina Réglage de la machine q Patrón q Point w Pantalla w Affichage électronique e Prensatelas e Pied F: Prensatelas para puntadas de raso F:Pied pour points satin r Tensión del hilo 6 a 8 r Tension du fil... -
Page 74: Appliqué
Appliqué Machine setting q Pattern w LED display e Foot F: Satin stitch foot Baste or glue applique pieces on the fabric. Stitch around the applique making sure the needle falls along the outer edge of the applique. When turning corners, lower the needle down into the outer edge of the appliqué, and raise the presser foot to pivot the fabric. -
Page 75: Aplicación
Aplicación Le point pour appliques Configuración de la máquina Réglage de la machine q Patrón q Point w Pantalla w Affichage électronique e Prensatelas e Pied F: Prensatelas para puntadas de raso F: Pied pour points satin Hilvane o pegue las piezas de aplicación a la tela. Cosa Pour faire tenir les pièces d’applique sur le tissu, faire un alrededor de la aplicación, cerciorándose de que la aguja point de bâti ou fixer avec de la colle. -
Page 76: Smocking
Smocking Machine setting q Pattern w LED display e Foot F: Satin stitch foot Set the thread tension dial at 1–3, and stitch length at 3–4, sew straight lines 1 cm (3/8") apart across the area to be smocked. Knot the needle and bobbin threads along one edge w. Pull the bobbin threads e and distribute gathers evenly. -
Page 77: Fruncido Ornamental
Fruncido ornamental Le point smocks Configuración de la máquina Réglage de la machine q Patrón q Point w Pantalla w Affichage électronique e Prensatelas e Pied F: Prensatelas para puntadas de raso F:Pied pour points satin Ajuste la perilla de tensión de hilo entre 1 y 3, ajuste la Régler le cadran de tension du fil sur 1-3 et la longueur du perilla de longitud de puntada a 3 o 4 y cosa líneas rectas point sur 3-4 et coudre des lignes droites à... -
Page 78: Patchwork Piecing
Patchwork piecing Machine setting q Pattern w LED display e Foot O: 1/4” seam foot Place the patchwork pieses right sides together. Sew while guiding the edge of the fabric along the guide on the foot keeping a precise 1/4” seam allowance. q Guide w Right sides of the fabric Quilting... -
Page 79: Costura De Piezas En Patchwork
Costura de piezas en patchwork Couture de pièces de patchwork Configuración de la máquina Réglage de la machine q Patrón q Point w Pantalla w Affichage électronique e Prensatelas e Pied O: Prensatelas para costura de 1/4” O: Pied pour coutures de 0,7 cm Coloque enfentadas las caras derechas de las piezas Plasez les tissus enfroit contre endroit. -
Page 80: Stitch In The Ditch With Even Feed Foot
Stitch in the ditch with even feed foot Machine setting q Pattern w LED display e Foot Even feed foot The even feed foot is extremely effective when stitching in the ditch on patchwork quilts. To attach: 1. Be sure to turn the power off. Raise the needle and presser foot. -
Page 81: Puntada De Profundidad Con El Pie Prensatelas De Arrastre Regular
Puntada de profundidad con el pie Couture de rebord avec le pied à avancée régulière prensatelas de arrastre regular Réglage de la machine q Point Configuración de la máquina q Patrón w Affichage électronique w Pantalla e Pied Pied à avancée régulière e Prensatelas Prensatelas arrastre regular El prensatelas de arrastre regular es muy eficaz para... -
Page 82: Pin Tucking
Pin Tucking Machine setting q Pattern w LED display e Foot G: Blind hem foot Fold the fabric with wrong side together. Position the fabric so that the needle pierces 0.1–0.2 cm (1/16") inside of the folded edge, and lower the foot. -
Page 83: Pliegues Cosidos
Pliegues cosidos Les nervures Configuración de la máquina Réglage de la machine q Patrón q Point w Pantalla w Affichage électronique e Prensatelas e Pied G: Prensatelas de dobladillo invisible G:Pied pour ourlet invisible Doble la tela, uniendo los reversos. Coloque la tela de Plier le tissu, l’envers du tissu à... -
Page 84: Section 6. Care Of Your Machine Adjusting Stretch Stitch Balance
SECTION 6. CARE OF YOUR MACHINE Adjusting Stretch Stitch Balance The sewing results of the stretch stitch patterns may vary depending upon the sewing conditions, such as sewing speed, type of the fabric, number of layers, etc. Always test sew on a scrap piece of the fabric that you will be using. -
Page 85: Seccion 6. Cuidado De La Máquina De Coser Ajuste De Equilibrio De Puntada Elástica
SECCION 6. CUIDADO DE LA MÁQUINA PARTIE 6. ENTRETIEN DE VOTRE MACHINE DE COSER Ajuste de equilibrio de puntada elástica Régler l’équilibre des points extensibles Los resultados de los patrones de puntadas elásticas Lorsque vous utilisez des points extensibles, le résultat est pueden variar según las condiciones de la operación de influencé... -
Page 86: Cleaning Hook Race And Feed Dog
Cleaning Hook Race and Feed Dog WARNING: Raise the presser foot and needle, and then unplug the machine. DO NOT dismantle the machine other than as explained in this section. z Remove the needle and presser foot. q Screwdriver w Setscrew e Needle plate x Remove the setscrew and needle plate. -
Page 87: Limpieza Del Canal Del Gancho De La Bobina Y Las Garras Transportadoras
Limpieza del canal del gancho de la bobina y las garras Nettoyer la coursière et la griffe d'entraînement transportadoras ATTENTION: ATENCIÓN: Relever le pied presseur et l’aiguille, puis débrancher la Levante el prensatelas y la aguja y desconecte la machine. NE PAS démonter la machine si ce n’est en máquina. -
Page 88: Problems And Warning Signals
Problems and Warning Signals When beep sounds and the LED display shows warning signal, follow the guidance below. Visual signal Cause and Action The foot control has been disconnected while sewing. Turn OFF the power and connect the foot control. A button is pressed when the machine halts due to the overload. -
Page 89: Problemas Y Señales De Advertencia
Problemas y Señales de Advertencia Cuando la máquina emita un sonido y en la pantalla aparezca una señal de advertencia, siga estos paso para resolver el problema. Señal visual Causa y acción Pantalla El pedal de control se desconectó durante la costura. Apague la máquina y conecte el pedal de control. - Page 90 Problemes et Avertissements Lorsque vous entendez un bip sonore et que des avertissements apparaissent sur l’affichage électronique, suivez les indications ci-dessous: Avertissements visuels: Cause et action Ecran La commande à pédale a été débranchée pendant la couture. Éteindre la machine re-brancher la commande à pédale. Une touche est maintenue enclenchée alors que la machine s’arrête de coudre, pour cause de surcharge.
-
Page 91: Troubleshooting
Troubleshooting Cause Condition Reference 1. The needle thread is not threaded properly. See page 24 The needle thread 2. The needle thread tension is too tight. See page 28 breaks. 3. The needle is bent or blunt. See page 16 See page 16 4. -
Page 92: Identificación Y Resolución De Problemas
Identificación y resolución de problemas Problema Causa Referencia 1. El hilo de la aguja no está enhebrado correctamente. Página 25 El hilo de la aguja se 2. La tensión del hilo de la aguja es muy alta. Página 29 rompe. 3. - Page 93 En cas de problème Problème Causa Referencia 1. Le fil de l’aiguille n’est pas penfilé correctement. Page 25 Le fil de l’aiguille se 2. La tension du fil d’aiguille est trop forte. Page 29 casse. 3. L’aiguille est torde ou émoussée. Page 17 4.
- Page 94 843-801-361 (E/S/F) Printed in Taiwan...
Need help?
Do you have a question about the DC2011 and is the answer not in the manual?
Questions and answers