
Subscribe to Our Youtube Channel
Related Manuals for Kogan KA52DCCFLRS


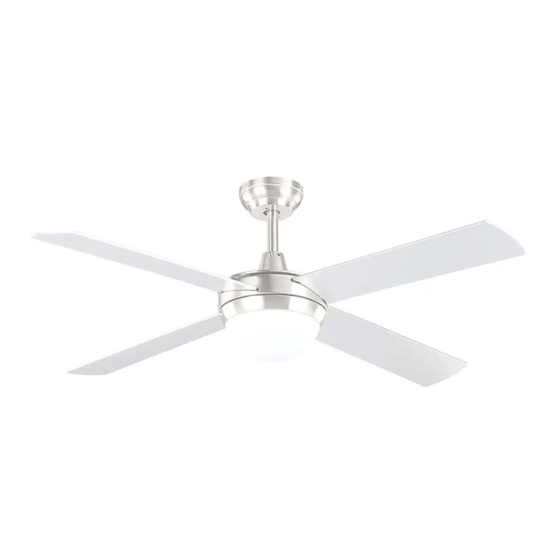
Summary of Contents for Kogan KA52DCCFLRS
- Page 1 1300MM DC MOTOR CEILING FAN WITH LIGHT & REMOTE KA52DCCFLRS, KA52DCCFLRW & KA52DCCFLRB...
-
Page 3: Safety And Warnings
• Keep the appliance and its cord out of reach of children under the age of 8. • Do not try to repair the appliance yourself. Contact help.Kogan.com for support. • Cleaning and maintenance must be carried out according to this user guide to make sure the appliance functions properly. - Page 4 • Switch off the power before connecting the fan. • The electrical wiring must be in accordance with local regulations. The fan must be properly grounded to avoid the risk of electric shocks. • Never mount the fan in a moist or wet room. Be careful when working near the rotating blades.
- Page 5 OVERVIEW Components (included) Mounting bracket Blades Extended down rod and Screw kit, mounting bracket hanging ball hardware (wire, nuts, rubber washers) and attachment hardware. Canopy Remote control Fan motor housing LED light Glass shade Additional tools and material required (not included) 10.
-
Page 6: Installation
INSTALLATION Unpack your ceiling fan carefully, remove all parts and components, and lay on a cloth or soft surface to avoid damage. Do not lay the motor housing on its side, the housing may get damaged. Before commencing installation, check that all parts are included. Warning: All electrical tasks should only be undertaken after disconnection of electricity by removing fuses or turning off the circuit breaker to avoid the risk of electric shock. - Page 7 Concrete surface: If installing the ceiling fan into a concrete ceiling, drill out the four holes in the mounting bracket using an 8mm drill bit. Attach the mounting bracket using the 4 M6 expansion bolts. Once the mounting bracket is installed, drill a 10mm hole next to the bracket. Note: Be cautious when drilling the 10mm hole to avoid hitting an electrical wiring.
- Page 8 Insert the down rod into the motor housing’s hole and align the holes on both sides with the holes on the down rod. Carefully insert the clevis pin through the holes so that it passes through the down rod. Secure the clevis pin in place using the hairpin clip.
- Page 9 Remote Receiver and Wiring Instruction Place the receiver through the hanging bracket and connect the wires following the colour codes. Connect the push connectors from the fan to the remote receiver. Note: Refer to the “Wiring Diagram” section for more detailed information. Note: Ensure the ground wire is connected correctly, otherwise it will cause the fan or light to malfunction.
- Page 10 Wiring Diagram AC POWER INPUT FAN WIRES Light Motor...
- Page 11 • Adopt RF wireless digit emission technique, biunique controlled, coincident code rate is less than one millionth, • If the remote control or receiver are damaged, contact help.Kogan.com support for maintenance. • The remote control can be used from any angle of the receiver.
- Page 12 Insert the blades through the motor housing’s side slots and align them with the 3 holes. Secure the blades using 3 blade screws and ensure that the blade screws are tightened properly. Do not over tighten the screws as this can damage the blades. Repeat this process for the remaining blades.
- Page 13 Connect the LED light wires to the fan motor wires. Carefully install the glass shade into the main body and turn it clockwise to lock it. WARNING: Do not over tighten when installing the glass shade.
- Page 14 Balancing Kit The Balancing Kit should only be used if there is an unacceptable amount of fan wobble after completing the previous installation steps. Turn the fan on and set the speed control setting to a speed at which the wobble is the greatest.
-
Page 15: Operation
OPERATION The direction switch on the fan body controls air flow: • Winter function: Press the switch UP for the blades to move warm air near the ceiling around. • Summer function: Press the switch DOWN for blades to create a breeze and improve air circulation. -
Page 16: Cleaning And Care
• In case of fault or damage, do not try to repair the fan by yourself to avoid risk of fire or electric shock. Cease use immediately and contact help.Kogan.com for support. -
Page 17: Troubleshooting
TROUBLESHOOTING Problem Troubleshooting Steps • Check all the fuses or circuit breakers. The fan does not • Turn off the electrical power and check all wire connections. start up • Always allow a few days “break in” time for any new fan at medium or high speed. -
Page 18: Specifications
SPECIFICATIONS Voltage Fan (Max.) Lamp (Max.) 200~240V 140W 120V... - Page 19 NOTES...
- Page 20 Need more information? We hope that this user guide has given you the assistance needed for a simple set-up. For the most up-to-date guide for your product, as well as any additional assistance you may require, head online to help.kogan.com...
Need help?
Do you have a question about the KA52DCCFLRS and is the answer not in the manual?
Questions and answers