
Subscribe to Our Youtube Channel
Related Manuals for arcelik 9681 STI


Summary of Contents for arcelik 9681 STI
- Page 1 Built Built- - - - In Oven In Oven Built Built In Oven In Oven 9681 STI 9681 STI 9681 STI 9681 STI 285442412...
- Page 2 Please read this user manual first! Please read this user manual first! Please read this user manual first! Please read this user manual first! Dear Customer, Thank you for purchasing this Arçelik product. We hope that you get the best results from your product which has been manufactured with high quality and state-of-the-art technology.
-
Page 3: Table Of Contents
TABLE OF CONTENTS Initial heating ..........17 Important instructions and warnings How to operate the oven for safety and environment General information on baking, roasting and General safety ..........4 grilling ..........18 Electrical safety ..........4 How to operate the electric oven ....18 Product safety .......... -
Page 4: Important Instructions And Warnings For Safety And Environment
Important instructions and warnings for safety and environment This section contains safety • Control that the product function instructions that will help protect from knobs are switched off after every risk of personal injury or property use. damage. Failure to follow these Electrical safety instructions shall void any warranty. -
Page 5: Product Safety
• If the power connection cable for Product safety the product is damaged, it must • The appliance and its accessible be replaced by the manufacturer, parts become hot during use. its service agent or similary Care should be taken to avoid qualified persons in order to avoid touching heating elements. -
Page 6: Intended Use
accumulation might damage the • Make sure that not whether liquid bottom of the oven. or moisture on the socket is • Do not use harsh abrasive pluged to product . cleaners or sharp metal scrapers Intended use to clean the oven door glass since •... -
Page 7: Compliance With Aeee Regulation And Disposal Of Waste Products
children. Please dispose of all parts and materials which can be parts of the packaging according reused and are suitable for to environmental standards. recycling. Therefore, do not • Electrical products are dangerous dispose the product with normal to children. Keep children away domestic waste at the end of its from the product when it is service life. -
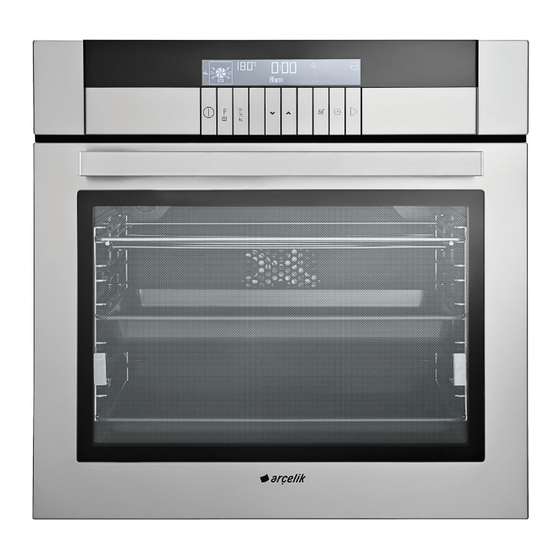
Page 8: General Information
General information Overview Control panel Pitcher Wire shelf Fan motor (behind steel plate) Tray Lamp Handle Top heating element Front door Shelf positions Water level indicator Shelf positions Time and settings key Function display OK key Temperature/weight indicator field Text display Oven Inner Temperature symbol Up/down keys (Menu step) Current time indicator field... -
Page 9: Package Contents
Telescopic racks allow you to install and Package contents remove the trays and wire shelf easily. Accessories supplied can vary depending on When using the tray and wire shelf with the product model. Not every accessory telescopic racks, make sure that the pins at described in the user manual may exist on the rear section of the telescopic rack your product. -
Page 10: Technical Specifications
Placing the wire shelf and tray onto the Placing the wire shelf and tray onto the Placing the wire shelf and tray onto the Placing the wire shelf and tray onto the wire racks properly wire racks properly wire racks properly wire racks properly Products without telescopic pull Products without telescopic pull- - - - out:... -
Page 11: Installation
Installation Refer to the nearest Authorised Service Agent for Before installation installation of the product. Make sure that the The appliance is intended for installation in electric and gas installations are in place before commercially available kitchen cabinets. A safety calling the Authorised Service Agent to have the distance must be left between the appliance and product ready for operation. - Page 12 min. 12/EN...
-
Page 13: Installation And Connection
min. grounding installation made by a qualified electrician while using the product with or Installation and connection without a transformer. Our company shall not be • Product can only be installed and connected liable for any damages that will arise due to in accordance with the statutory installation using the product without a grounding installation rules. -
Page 14: Future Transportation
DANGER: The product must be connected to the mains supply only by an authorised and qualified person. The product's warranty period starts only after correct installation. Manufacturer shall not be held responsible for damages arising from procedures carried out by unauthorised persons. Secure the oven with 2 screws as illustrated. - Page 15 bubble wrap or thick cardboard and tape it • Do not use the door or handle to lift or move securely. the product. • To prevent the wire grill and tray inside the Do not place any objects onto the product oven from damaging the oven door, place a and move it in upright position.
-
Page 16: Preparation
Preparation can cook by placing two cooking vessels Tips for saving energy onto the wire shelf. The following information will help you to use • Cook more than one dish one after another. your appliance in an ecological way, and to save The oven will already be hot. -
Page 17: First Cleaning Of The Appliance
Set the time Initial heating Heat up the product for about 30 minutes and then switch it off. Thus, any production residues or layers will be burnt off and removed. 1. After selecting the language, "Time setting" WARNING appears on the Text display and symbol Hot surfaces cause burns! flash. -
Page 18: How To Operate The Oven
How to operate the oven • Each centimeter of meat thickness requires General information on baking, approximately 4 to 5 minutes of cooking roasting and grilling time. • Let meat rest in the oven for about WARNING 10 minutes after the cooking time is over. Hot surfaces cause burns! Product may be hot when it is in use. - Page 19 Shelf positions Function display Oven returns to stand-by display after it is Temperature/weight indicator field switched on and the current time is set. Only the Oven Inner Temperature symbol current time appears on the display. Current time indicator field Only the keys are functional when the Convenience food selection display display is in this status.
- Page 20 Current time indicator field Text display This screen contains the recommended temperature under temperature/weight indicator and the active heaters and recommended tray position in the function display. 3. Touch keys to select the desired operating mode (function). After the function is selected, "Temperature", "Cook time", "Cook end time"...
-
Page 21: Operating Modes
Fan heating Fan heating Fan heating Fan heating Hot air heated by the rear heater is evenly distributed Even if the oven is switched off, oven lamp throughout the oven rapidly by means of the fan. It is lights up when the oven door is opened. suitable for cooking your meals in different rack levels and preheating is not required in most cases. - Page 22 Full grill Full grill Low temperature cooking Low temperature cooking Full grill Full grill Low temperature cooking Low temperature cooking Used for cooking at low temperatures in longer times • Put big or medium-sized portions in (10-15 hours). correct rack position under the grill heater for grilling.
-
Page 23: How To Operate The Oven Control Unit
Steam Turbo Steam Turbo Steam Turbo Steam Turbo Close the door and “Cooking” is displayed. Steam cleaning Steam cleaning Steam cleaning Steam cleaning “Press to spray steam” appears when This mode is for softening dirt inside the oven after the set temperature is attained. Touch the key you have completed cooking. - Page 24 6. Touch keys to set the desired cooking time and confirm the setting by touching the key. Once the Cook Time is set, will be displayed continuously. 4. Touch until the desired temperature appears in the Temperature/Weight Indicator field. Touch to set the temperature when the desired value appears on the display.
-
Page 25: Using The Keylock
All segments of the inner oven symbol disappears as soon as the oven » temperature symbol (4) will turn on reaches the desired temperature and oven when the oven reaches the set resumes operating in the function it was in temperature. -
Page 26: Using The Clock As An Alarm
Deactivating the keylock 1. Touch key with short intervals until 1. Touch key twice to deactivate the keylock. symbol appears on the display. "Key lock passive” appears on the 2. Touch keys to set the desired time display. and confirm the setting by touching the 2. - Page 27 Dish Dish Cooking level number Cooking level number Rack position Rack position Temperature (°C) Temperature (°C) Cooking time Cooking time Dish Dish Cooking level number Cooking level number Rack position Rack position Temperature (°C) Temperature (°C) Cooking time Cooking time (approx.
-
Page 28: Ready Meals Functions
the pastry. Try to scatter the sauce equally To select the Ready Meals functions: between the dough layers and on the top of 1. Touch key to switch on the oven. pastry for an even browning. Initial operation screen appears when the oven is turned on. - Page 29 2. Touch keys to set the weight and "Back" appearing on the display while confirm by touching the key. navigating in the meal menu allows you Oven will change the temperature and to return to the upper menu. Touch the cooking time automatically on basis key to switch to the initial function of the weight change.
- Page 30 If the key is not touched within 20 seconds, the oven will switch itself off. 8. "Fill with 350 ml water" appears on the display. Risk for health! Do not use any other liquids apart from potable water in the steam system. 9.
-
Page 31: Settings Menu
Water level in the tank should be checked If the oven is switched off before the through the water indicator while adding cooking is completed and no cooking water. If the water level exceeds the tank function is selected within 2 minutes, "Please take the meal. -
Page 32: How To Operate The Grill
2. There are 2 voice levels, namely 1 and WARNING 2.Touch keys to select the desired Close oven door during grilling. level. Hot surfaces may cause burns! 3. Touch to confirm the setting. Switching on the grill » It returns to the stand-by display. Only the 1. -
Page 33: Cooking Times Table For Grilling
Cooking times table for grilling Grilling with electric grill Food Food Insertion level Insertion level Grilling time (approx.) Grilling time (approx.) Food Food Insertion level Insertion level Grilling time (approx.) Grilling time (approx.) Fish 4...5 20...25 min. Sliced chicken 4...5 25...35 min. -
Page 34: Maintenance And Care
Maintenance and care General information Do not use steam cleaners to clean the appliance as this may cause an electric Service life of the product will extend and the shock. possibility of problems will decrease if the product is cleaned at regular intervals. Cleaning the pitcher Pitcher stops at a certain point when you pull it DANGER:... - Page 35 Be sure that side rack and side wall has been placed properly. Steam Cleaning It ensures easy cleaning because the dirt (having waited not for too long) is softened with water drops condensing inside the oven after giving steam for a certain time. 1.
-
Page 36: Removing The Oven Door
4. Remove the front door by pulling it upwards Clean oven door to release it from the right and left hinges. To clean the oven door, use warm water with washing liquid, a soft cloth or sponge to clean Steps carried out during removing process the product and wipe it with a dry cloth. -
Page 37: Replacing The Oven Lamp
Plastic glass panel slot-Lower Push the plastic part towards the frame until you hear a "click". As illustrated in figure, raise the innermost glass panel (1) slightly in direction A A A A and pull it out in direction B B B B . Replacing the oven lamp Repeat the same procedure to remove the inner DANGER:... -
Page 38: Troubleshooting
Troubleshooting Oven emits steam when it is in use. • It is normal that steam escapes during operation. >>> This is not a fault. Product emits metal noises while heating and cooling. • When the metal parts are heated, they may expand and cause noise. >>> This is not a fault. Product does not operate. - Page 39 Filename: 285442412.doc Directory: \\ar.arcelik\arcdfs\bol\bol-users\AR720007 Template: D:\Documents and Settings\ar720007\Application Data\Microsoft\Templates\Normal.dotm Title: Subject: Author: Arcelik BT Keywords: Comments: Creation Date: 16.05.2013 09:07:00 Change Number: Last Saved On: 16.05.2013 09:07:00 Last Saved By: Arcelik BT Total Editing Time: 10 Minutes Last Printed On: 16.05.2013 09:26:00...
Need help?
Do you have a question about the 9681 STI and is the answer not in the manual?
Questions and answers