
Related Manuals for arcelik KF 839 DGI


Summary of Contents for arcelik KF 839 DGI
- Page 1 Built Built- - - - In Oven In Oven Built Built In Oven In Oven KF 839 DGI KF 839 DGI KF 839 DGI KF 839 DGI 285450068...
- Page 2 Please read this user manual first! Please read this user manual first! Please read this user manual first! Please read this user manual first! Dear Customer, Thank you for purchasing this Arçelik product. We hope that you get the best results from your product which has been manufactured with high quality and state-of-the-art technology.
-
Page 3: Table Of Contents
TABLE OF CONTENTS Time setting ..........15 First cleaning of the appliance ...... 16 Important instructions and warnings Initial heating ..........16 for safety and environment General safety ..........4 How to operate the oven Electrical safety ..........4 General information on baking, roasting and Product safety .......... -
Page 4: Important Instructions And Warnings For Safety And Environment
Important instructions and warnings for safety and environment This section contains safety • Control that the product function instructions that will help protect from knobs are switched off after every risk of personal injury or property use. damage. Failure to follow these Electrical safety instructions shall void any warranty. -
Page 5: Product Safety
its service agent or similary Care should be taken to avoid qualified persons in order to avoid touching heating elements. a hazard. Children less than 8 years of age • The appliance must be installed shall be kept away unless so that it can be completely continuously supervised. -
Page 6: Intended Use
to clean the oven door glass since Intended use they can scratch the surface, • This product is designed for which may result in shattering of domestic use. Commercial use the glass. will void the guarantee. • Do not use steam cleaners to •... -
Page 7: Compliance With Aeee Regulation And Disposal Of Waste Products
• Electrical products are dangerous reused and are suitable for to children. Keep children away recycling. Therefore, do not from the product when it is dispose the product with normal operating and do not allow them domestic waste at the end of its to play with the product. -
Page 8: General Information
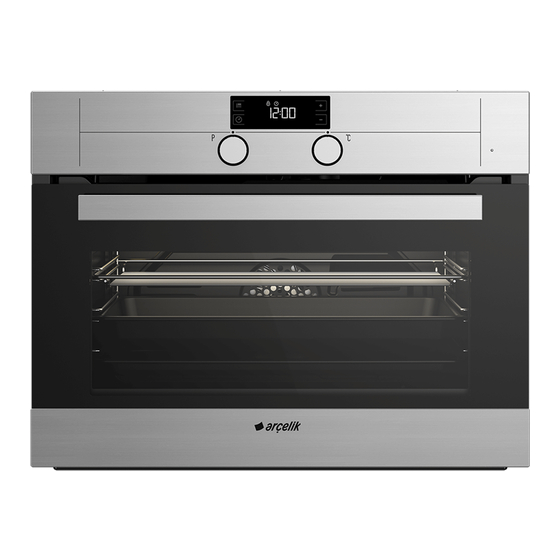
General information Overview Control panel Fan motor (behind steel plate) Wire shelf Lamp Tray Top heating element Handle Shelf positions Door Function knob Digital timer Thermostat knob Thermostat lamp Package contents Cake tray Cake tray Cake tray Cake tray Accessories supplied can vary depending on Used for pastries such as cookies and the product model. -
Page 9: Technical Specifications
Used for roasting and for placing the food to be baked, roasted or cooked in casserole dishes to the desired rack. Technical specifications Voltage / frequency 220-240 V ~ 50 Hz Total power consumption 2.4kW Fuse min. 16 A Cable type / section H05VV-FG 3 x 1,5 mm Cable length... -
Page 10: Installation
Installation Refer to the nearest Authorised Service Agent for Before installation installation of the product. Make sure that the The appliance is intended for installation in electric and gas installations are in place before commercially available kitchen cabinets. A safety calling the Authorised Service Agent to have the distance must be left between the appliance and product ready for operation. - Page 11 min. 11/EN...
- Page 12 min. 12/EN...
-
Page 13: Installation And Connection
Installation and connection DANGER: Before starting any work on the • Product can only be installed and connected electrical installation, disconnect the in accordance with the statutory installation product from the mains supply. rules. There is the risk of electric shock! Electrical connection Connect the product to a grounded outlet/line protected by a fuse of suitable capacity as stated... -
Page 14: Future Transportation
The built-in cooling fan cools both the built-in bubble wrap or thick cardboard and tape it cabinet and the front of the product. securely. • To prevent the wire grill and tray inside the Cooling fan continues to operate for about oven from damaging the oven door, place a 20-30 minutes after the oven is switched strip of cardboard onto the inside of the... -
Page 15: Preparation
Preparation Minus key Tips for saving energy Alarm symbol The following information will help you to use End of cooking time your appliance in an ecological way, and to save Cooking time energy: Program key • Use dark coloured or enamel coated cookware in the oven since the heat transmission will be better. -
Page 16: First Cleaning Of The Appliance
» Brightness level chosen on the screen will be Electric oven shown as d-01 or d-02or d-03 . 1. Take all baking trays and the wire grill out of 3. After setting brightness, touch the key or the oven. wait for 4 seconds. 2. -
Page 17: How To Operate The Oven
How to operate the oven roast and does not run out when the meat is General information on baking, cut. roasting and grilling • Fish should be placed on the middle or lower rack in a heat-resistant plate. WARNING Hot surfaces cause burns! How to operate the electric oven Product may be hot when it is in use. -
Page 18: Operating Modes
Full grill Full grill Full grill Full grill Switching off the electric oven Large grill at the ceiling of the oven is Turn the function knob and temperature knob to in operation. It is suitable for grilling off (upper) position. large amount of meat. -
Page 19: Using The Oven Clock
Using the oven clock Cooking by specifying the cooking time: You can set the oven so that it will stop at the end of the specified time by setting the cooking time on the clock. 1. For cooking time, touch the key to activate the symbol. -
Page 20: Using The Keylock
» Oven timer automatically calculates the startup Using the clock as an alarm time for cooking by using the end of cooking time You can use the clock of the product for any and the cooking period you have set. Selected warning or reminder apart from the cooking operation mode is activated when the startup programme. -
Page 21: Cooking Times Table
Cooking times table Baking and roasting 1st rack of the oven is the bottom bottom rack. bottom bottom The timings in this chart are meant as a guide. Timings may vary due to temperature of food, thickness, type and your own preference of cooking. -
Page 22: Cooking Times Table For Grilling
WARNING Close oven door during grilling. Hot surfaces may cause burns! Switching on the grill 1. Turn the Function knob to the desired grill symbol. 2. Then, select the desired grilling temperature. 3. If required, perform a preheating of about 5 Foods that are not suitable for grilling minutes. -
Page 23: Maintenance And Care
Maintenance and care General information Do not use steam cleaners to clean the appliance as this may cause an electric Service life of the product will extend and the shock. possibility of problems will decrease if the product is cleaned at regular intervals. Cleaning the control panel DANGER: Clean the control panel and knobs with a damp... -
Page 24: Removing The Door Inner Glass
Frame Front door Plastic part Hinge Pull towards yourself and remove the plastic part Oven installed to upper section of the front door. 3. Move the front door to half-way. 4. Remove the front door by pulling it upwards to release it from the right and left hinges. Steps carried out during removing process should be performed in reverse order to install the door. -
Page 25: Replacing The Oven Lamp
Replacing the oven lamp DANGER: Before replacing the oven lamp, make sure that the product is disconnected from mains and cooled down in order to avoid the risk of an electrical shock. Hot surfaces may cause burns! The oven lamp is a special electric light bulb The first step to regroup the door is reinstalling that can resist up to 300 °C. -
Page 26: Troubleshooting
Troubleshooting Oven emits steam when it is in use. • It is normal that steam escapes during operation. >>> This is not a fault. Product emits metal noises while heating and cooling. • When the metal parts are heated, they may expand and cause noise. >>> This is not a fault. Product does not operate. - Page 27 Filename: 285450068.doc Directory: \\ar.arcelik\arcdfs\bol\bol-users\AR720007 Template: D:\Documents and Settings\ar720007\Application Data\Microsoft\Templates\Normal.dotm Title: Subject: Author: Arcelik BT Keywords: Comments: Creation Date: 16.05.2013 10:31:00 Change Number: Last Saved On: 16.05.2013 10:31:00 Last Saved By: Arcelik BT Total Editing Time: 0 Minutes Last Printed On: 16.05.2013 10:35:00...
Need help?
Do you have a question about the KF 839 DGI and is the answer not in the manual?
Questions and answers