Advertisement
Quick Links
S
HOWER
PLEASE REVIEW THIS ENTIRE MANUAL PRIOR TO INSTALLATION
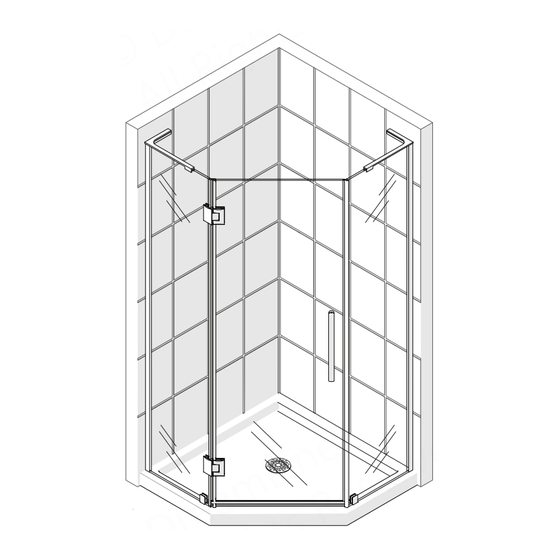
(Left-swing door installation shown)
IMPORTANT!
DreamLine
reserves the right to alter, modify or redesign products at any time without prior notice for the
®
purpose of product improvement and customer experience. Please refer to the model's web page on
DreamLine.com for the latest technical drawings, installation manuals, warranty information or additional
product details.
Do Not Return Product to the Store. Contact DreamLine® with any questions
PRISM PLUS Shower Enclosure Manual Ver 2 Rev 1 082020
PRISM PLUS
E
NCLOSURE
1-866-731-2244
I
NSTALLATION
I
NSTRUCTIONS
MODEL #s
SHEN-2634340-##
SHEN-2636360-##
SHEN-2638380-##
SHEN-2640400-##
##=finish
01- Chrome
04- Brushed Nickel
06- Oil Rubbed Bronze
09- Satin Black
G - Gray Glass
©2020 DreamLine
All Rights Reserved
®
Advertisement

Related Manuals for Dreamline PRISM PLUS SHEN-2634340 Series


Summary of Contents for Dreamline PRISM PLUS SHEN-2634340 Series
- Page 1 ® purpose of product improvement and customer experience. Please refer to the model’s web page on DreamLine.com for the latest technical drawings, installation manuals, warranty information or additional product details. Do Not Return Product to the Store. Contact DreamLine® with any questions...
- Page 2 For best results, squeegee the glass after each use and dry with a soft cloth. Record the following purchase information for your records or in the event you need to contact DreamLine ® Purchase Order...
-
Page 3: Symbol Legend
Table of Contents Section Title Page # Checking Dimensions Important Information Model-Specific Preparation Tools Detailed Diagram of Shower Door Components Parts List 9-26 Installation Steps Adjustable Hinge Information Product Maintenance Troubleshooting Factory Parts Information Measure the finished opening before proceeding with the installation to be sure the correct model size has been ordered Symbol Legend CORRECT -... - Page 4 Checking Dimensions NOTE: This enclosure must be installed at the model size dimensions shown in Table A on page 2 and page 9. Be sure that the correct size shower enclosure has been ordered to fit the finished dimensions of the base or threshold where the enclosure will be installed.
- Page 5 IMPORTANT GENERAL PREPARATION • DreamLine® reserves the right to alter, modify or redesign products any time without • After opening all boxes and packages, read this introduction carefully. Check that all the prior notice for product improvement and customer experience. Please refer to the items are included in the package by marking off the components on the “Detailed...
- Page 6 Model-Specific Preparation REQUIRED: ±0.0 ±0.0 ±0.0 ±0.0 1-1/2” minimum threshold ±0.0 ±0.0 ±0.0 ±0.0 DO NOT install the handle onto the door Acrylic Tile glass until instructed. DO NOT lift the glass using the handle. Contact the manufacturer of the base or This could result in damage to other threshold material with any questions the glass and/or serious...
- Page 7 Detailed Diagram on page 6 and parts list in this manual as a reference. Before NOTE discarding the carton, check for small hardware bags that may have fallen to the bottom of the box. If any parts are damaged or missing, please contact DreamLine ® for replacement.
- Page 8 Detailed Diagram of Shower Door Components (Left-swing door installation shown) © 2020 DreamLine® All Rights Reserved...
-
Page 9: Parts List
Parts List PRISM PLUS Shower Enclosure Manual Ver 2 Rev 1 082020... - Page 10 Parts List PRISM PLUS Shower Enclosure Manual Ver 2 Rev 1 082020...
- Page 11 Table A. SHEN-GLP2601-363610 36" 36" SHEN-GLP2601-383810 38" 38" SHEN-GLP2601-404010 40" 40" NOTE Measure at the bottom Tools Needed and draw a plumb line up from the threshold Fig 1 © 2020 DreamLine® All Rights Reserved...
- Page 12 Fig 2 Parts Needed Tools Needed PRISM PLUS Shower Enclosure Manual Ver 2 Rev 1 082020...
- Page 13 Repeat Steps 2 and 3 for the opposite side of opening NOTE Fig 3 ◾If a Stud is present behind the wall: drill a Ø3/16”(4mm) hole up to the stud, drill an Ø1/8” (3mm) pilot hole into the stud and use NOTE ST4.2 x 40mm Countersunk Screws (#23) ◾If No Stud is present behind the wall:...
- Page 14 inside inside inside Fig 4 Fig 5 Tools Needed Parts Needed (Left-hand swing installation shown) PRISM PLUS Shower Enclosure Manual Ver 2 Rev 1 082020...
- Page 15 Fig 6a 23-15/16” The distance between the edges of both stationary panels needs to be 23-15/16” 23-15/16” Tools Needed 23-15/16” Fig 6b (Left-hand swing installation shown) PRISM PLUS Shower Enclosure Manual Ver 2 Rev 1 082020...
- Page 16 (Overhead View) 23-15/16” Tools Needed PRISM PLUS Shower Enclosure Manual Ver 2 Rev 1 082020...
- Page 17 Repeat these steps to install the NOTE panel glass on the opposite threshold NOTE For installation into an Acrylic threshold: ◾ Drill an Ø1/8”(3mm) hole and use ST4.2 x 40mm Countersunk Screws (#23). For installation into an Tile threshold Tools Needed Parts Needed ◾...
- Page 18 *Fast-drying 100% silicone recommended for the installation of hinge panels. screw washer Repeat these steps to install the Parts Needed Tools Needed NOTE panel glass on the opposite threshold. Maintain the required 23-15/16” spacing. PRISM PLUS Shower Enclosure Manual Ver 2 Rev 1 082020...
- Page 19 (Left-hand L-Bar™ Support Bracket shown) PVC Spacer 0.5 mm 2pcs M5 Rubber-Tipped Set Screw 2pcs L-Bar™ Bracket Parts Needed L-Bar™ Bracket Decorative Cover Wall Anchor 2pcs L-Bar™ Bracket Wall Plate Truss Head Screw ST4.2×40 2pcs 2pcs M5×14.5 Screw © 2020 DreamLine® All Rights Reserved...
- Page 20 Fig 11 (Left-hand L-Bar™ Support Bracket shown) *Leave the L-Bar™ decorative cover attached when Tools Needed marking the L-Bar™ position on the wall to allow space (1/16”-1/8”) to re-attach the cover plate after installation. © 2020 DreamLine® All Rights Reserved...
- Page 21 (See Fig 12.3 and 12.4) to adjust the angle of the L-Bar™ NOTE (up to 3/16” (4mm)) in the desired direction. Hand tighten the M5 x 14.5 screws after adjustment is complete and replace the decorative cover. © 2020 DreamLine® All Rights Reserved...
- Page 22 23-15/16” 23-15/16” Return Panel Glass (#01) Fig 13 Lorem ipsum (Left-hand swing installation shown) Before installing the Door glass (#02), attach the 135° Strike Vinyl (#14) to the edge of Return Panel Glass (#01) to protect the edge of the glass during installation of the Door Glass (#02).
- Page 23 2mm hinge gaskets hinge panel 2mm hinge gaskets Door glass Install the hinges flush with the edge of the Door Glass Fig 14a Door Glass NOTE Parts Needed Use 13/16” shims (not included) beneath the door glass to help align the door glass with the hinge openings and the tops of the Panel...
- Page 24 These adjustable hinges are factory set to overclose for a tight NOTE for instructions regarding the adjustment features seal. Page 26 of these hinges. Fig 14b Install the Door handle (#06) Fig 15 outside Parts Needed Fig 15 PRISM PLUS Shower Enclosure Manual Ver 2 Rev 1 082020...
- Page 25 Vinyl Seal Installation Fig 15 Parts Needed Inside The deflector strip on the Sweep Vinyl must NOTE be installed toward the inside of the shower De ector Strip © 2020 DreamLine® All Rights Reserved...
- Page 26 Vinyl Seal Installation (Cont’d.) (Notching the Sweep Vinyl) 3/8” (+/-) Parts Needed Tools Needed Fig 18...
- Page 27 Vinyl Seal Installation (Cont’d.) (Notching the Hinge-Side Vinyl) Notch vinyl to t around back side of hinge Slit soft vinyl ap Slice the soft vinyl ap with a razor knife where the hinge and glass meet hinge panel Notch bottom of vinyl to t around back side of the hinge Slice the soft vinyl ap...
- Page 28 Surfaces need to be clean and free of debris before applying silicone. NOTE Apply to the entire interior perimeter of the panel glass. Hours Allow 24 hours for the silicone to cure before using shower. Tools Needed PRISM PLUS Shower Enclosure Manual Ver 2 Rev 1 082020...
- Page 29 130° Adjustable Hinge Information HG-PRS30A 130° Adjustable Hinge The hinge assemblies are preset to overclose 5° beyond the normal closing position to create a tight seal against the strike vinyl. The NOTE adjustment feature on the hinge assemblies can be used to change the closing angle of the door only.
-
Page 30: Product Maintenance
To maximize the life of your door, it is important to regularly inspect the glass and other hardware for misalignment, proper attachment, NOTE and/or damage. Contact DreamLine with any questions or concerns. ® PRISM PLUS Maintenance Checklist ◻... -
Page 31: Troubleshooting
L-Bar™ not installed level with the 17-19 adjust the L-Bar™ (#04) (See steps #10-12) panel glass. Prior to contacting DreamLine® Customer Service, please have the following information readily available: - Purchase Order Information - Name, PO Number, Dealer/Vendor Name, etc. - Page 32 PVC Glass Spacer 0.5mm BOLD digit indicates finish: 1 = Chrome; 4= Brushed Nickel; 06=ORB: 09=Sa�n Black Contact Support@DreamLine.com for Part replacement, installation assistance or additional information. Complete Warranty information is available on DreamLine.com. © 2020 DreamLine® All Rights Reserved...
- Page 33 NOTES: ©2020 DreamLine ® All Rights Reserved...
- Page 34 NOTES: ©2020 DreamLine ® All Rights Reserved...
- Page 35 NOTES: ©2020 DreamLine ® All Rights Reserved...
- Page 36 TEL: 866-731-2244 FAX: 866-857-3638 DREAMLINE.COM For more information on DreamLine Shower Doors and Enclosures please visit DreamLine.com ® ©2020 DreamLine ® All Rights Reserved...
Need help?
Do you have a question about the PRISM PLUS SHEN-2634340 Series and is the answer not in the manual?
Questions and answers