Table of Contents
Advertisement
Quick Links
Advertisement
Table of Contents

Related Manuals for THORLABS CC505MU


Summary of Contents for THORLABS CC505MU
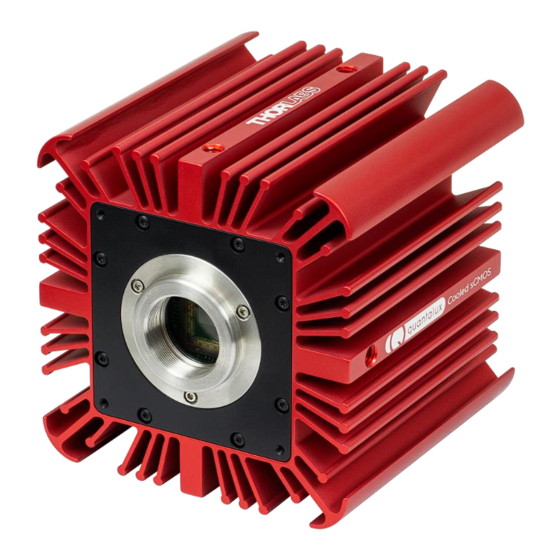
- Page 1 Cooled Scientific Digital Cameras User Guide CC215MU, CC505MU, CC895MU...
-
Page 2: Table Of Contents
Cooled Scientific Digital Cameras Table of Contents Safety........................... 1 Chapter 1 1.1. Precautions ........................1 1.2. Warning Symbol Definitions ..................2 1.3. Product Care ......................... 3 1.3.1. Service ..........................3 1.3.2. Accessories and Customization .................... 3 Chapter 2 Description ......................... 4 2.1. - Page 3 6.1. CMOS Sensor Specifications ..................25 6.2. Quantum Efficiency ....................25 6.3. Imaging Specifications ....................25 6.4. Example Frame Rates ....................26 6.5. CC505MU Power Consumption ................. 26 6.6. Operating/Storage Temperatures ................26 6.7. Sensor Temperatures in Cooling Mode ..............26 CS895MU Specifications ....................27 Chapter 7 7.1.
- Page 4 Cooled Scientific Digital Cameras 12.2. FCC Statement ......................38 12.3. Auxiliary I/O Cable Requirements ................38 Warranty ..........................39 Chapter 13 13.1. General Product Warranty ..................39 13.2. Specific Warranties and Repairs ................39 Thorlabs Worldwide Contacts ..................40 Chapter 14...
-
Page 5: Chapter 1 Safety
Any modification or servicing of this system by unqualified personnel renders Thorlabs free of any liability. This device can only be returned when packed into the complete original packaging, including all foam packing inserts. If necessary, ask for replacement packaging. -
Page 6: Warning Symbol Definitions
Cooled Scientific Digital Cameras Chapter 1: Safety 1.2. Warning Symbol Definitions Below is a list of warning symbols you may encounter in this manual or on your device. Symbol Description Direct Current Alternating Current Both Direct and Alternating Current Earth Ground Terminal Protective Conductor Terminal Frame or Chassis Terminal Equipotentiality... -
Page 7: Product Care
Thorlabs. Any modification or servicing by unqualified personnel renders the warranty null and void, leaving Thorlabs free of liability. Please contact Thorlabs for questions on customization. All cameras are supplied with one USB 3.0 cable. These cables are constructed to provide reliable data throughput at a length of 3 m. -
Page 8: Chapter 2 Description
Failure to do so can result in the carrier refusing to honor the claim. To return your camera to TSI for service, you must first contact your local Thorlabs office or distributor and request a Return Material Authorization (RMA). Returns will not be accepted without an RMA. See Chapter 13, titled “Warranty Information”... -
Page 9: Supplied Equipment
ADAPTER7 AUS – Australian Plug Adapter For SMI18 Power Supply Note 2: Each camera includes one of the four adapters listed above, based of the country where the order was placed. They are also each available individually from Thorlabs. Rev D, March 16, 2021... -
Page 10: Chapter 3 Setup & Installation
Select the driver that matches the interface on your camera, in this case USB3.0. Thorlabs offers various cameras with Gigabit Ethernet or Camera Link interfaces. If you have more than one camera, and they have different interfaces, select all that apply. - Page 11 Cooled Scientific Digital Cameras Chapter 3: Setup & Installation Select a driver for installation by clicking on the dropdown arrow and selecting either of the two choices; “This feature will be installed on local hard drive,” or “This feature, and all sub-features, will be installed on local hard drive.”...
- Page 12 USB Driver Installation. Click “Install”. This is required for Cooled sCMOS series cameras. Gigabit Ethernet Driver Installation. This is not required for Cooled sCMOS series cameras, but if you have Thorlabs “GE” cameras it is recommended. If so, click “Install”. Page 8...
- Page 13 Cooled Scientific Digital Cameras Chapter 3: Setup & Installation Once setup is complete, you may now proceed to the next section that will describe how to connect and power on your camera. When the camera is connected and powered up, you can navigate to the ThorCam Imaging Software as shown below: “Start”→”All Programs”→”ThorIabs”...
-
Page 14: Installing 3 Rd Party Software Application Support
Chapter 3: Setup & Installation 3.2.4. Installing 3 Party Software Application Support After installation of Thorlabs components is complete, you have access to interfaces for select 3 -party image ® analysis packages you may already have installed on your computer, such as MATLAB... -
Page 15: Connecting The Camera
Cooled Scientific Digital Cameras Chapter 3: Setup & Installation 3.3. Connecting the Camera Figure 1 Rear Panel Connections To connect the camera, follow the steps below. 1. Connect the provided USB 3.0 cable into the mating USB 3.0 port on the back of the camera. The camera end of the cable will have two thumb screws. -
Page 16: Optical And Mechanical Mounting Considerations
For the best results, the use of a C-mount lens that matches the optical format of the sensor’s imaging area is recommended (refer to the sensor specifications starting at Chapter 5). For more information on Thorlabs C- Mount lenses, please visit www.thorlabs.com. -
Page 17: Using The Camera With A Cage System
Chapter 3: Setup & Installation 3.4.3. Using the Camera with a Cage System The cameras have 4-40 tapped holes on the front face for compatibility with Thorlabs’ 60 mm Cage systems. For more information on Thorlabs’ 60 mm Cage system components, please visit www.thorlabs.com. -
Page 18: Optical Front End
All monochrome cooled scientific cameras are configured with a clear, broadband, AR-coated protective window to preserve the entire sensor spectral response. If the image spectrum must be limited, for example to eliminate unwanted near-infrared light, Thorlabs offers a wide range of high- quality interference and colored-glass filters compatible with the camera. -
Page 19: Optical Front End Procedures
Cooled Scientific Digital Cameras Chapter 3: Setup & Installation 3.6. Optical Front End Procedures 3.6.1. Window Removal and Replacement Procedure TSI cooled scientific cameras have a protective clear glass window installed (See Section 3.5.1). The window has a broadband anti-reflection coating that is easily scratched or smudged by oil from fingers. Use soft, clean cotton, latex, or nitrile gloves and handle the window by the edges. -
Page 20: Auxiliary Connector
Cooled Scientific Digital Cameras Chapter 3: Setup & Installation 3.7. Auxiliary Connector The auxiliary connector on the camera allows the user to access optional camera control and internal status signals. 3.7.1. Pin Descriptions Pin Descriptions Pin # Signal Ground Ground Ground LVTTL STROBE_OUT / EEP LVTTL TRIGGER_IN... -
Page 21: Auxiliary I/O Cable Requirements
Lengths greater than 10 feet (3 m) have not been evaluated for EMC compliance. The mating connector for the rear panel connector is HIROSE HR10-10P-12P (73). A 10-foot-long (3 m) auxiliary I/O cable and interconnect break-out board are available from Thorlabs allowing access to some of the I/O control functions (LVTTL_Trigger_In, LVTTL_LVAL_Out, LVTTL_FVAL_Out, and LVTTL_Strobe_Out). -
Page 22: Chapter 4 Operation
Note 1 – The Status LED will be yellow momentarily at power up while the camera initializes. If you are using the ThorCam Image Acquisition Software please refer to the ThorCam User Guide, which can be accessed in the Documentation selection under the Start menu / All Programs listing for Thorlabs’ products. Page 18... -
Page 23: Camera Timing Diagrams
Cooled Scientific Digital Cameras Chapter 4: Operation 4.2. Camera Timing Diagrams Timing Diagram – Standard, Frames per Trigger = 0 or > 1 Figure 9 Timing Diagram – Standard, Frames per Trigger = 1 Figure 10 Rev D, March 16, 2021 Page 19... -
Page 24: Camera-Specific Timing Considerations
AFTER the falling edge of the external trigger. This is inherent in the Kiralux sensor operation. This error is 13.72 µs on the CC505MU, and 14.26 µs on the CC895MU. It is important to note that the Strobe_Out signal includes the additional fixed exposure time error and therefore is a better representation of the actual exposure time. -
Page 25: Equal-Exposure Pulse (Cc215Mu Quantalux Only)
Cooled Scientific Digital Cameras Chapter 4: Operation 4.3. Equal-Exposure Pulse (CC215MU Quantalux Only) The Equal-Exposure Pulse (EEP) is an output signal available on the Quantalux Cooled sCMOS camera’s I/O connector (Refer to Section 3.7). When operated from the ThorCam acquisition software, checking the Equal Exposure Pulse box in the Settings Dialog will reconfigure the Strobe_Out signal on the I/O connector to be active only after the sensor’s “rolling reset”... -
Page 26: Hot Pixel Correction
Cooled Scientific Digital Cameras Chapter 4: Operation Timing Diagram – Strobe Driven Exposure Figure 13 Timing Diagram – EEP Driven Exposure Figure 14 4.4. Hot Pixel Correction Hot Pixel Correction is a firmware function that identifies and corrects pixels that are much brighter than their surrounding pixels. -
Page 27: Chapter 5 Cc215Mu Specifications
Cooled Scientific Digital Cameras Chapter 5: CC215MU Specifications CC215MU Specifications Chapter 5 5.1. sCMOS Sensor Specifications Sensor Specifications Sensor Type sCMOS Monochrome Number of Active Pixels 1920 (H) x 1080 (V) (~2.07 MP) Pixel Size 5.04 µm x 5.04 µm Optical Format 2/3"... -
Page 28: Example Frame Rates
Cooled Scientific Digital Cameras Chapter 5: CC215MU Specifications 5.4. Example Frame Rates Frame Rate L.R.N. H.F.R. Full Sensor (1920 x 1080) 30 fps 50 fps Half Sensor, (960 x 540) 60 fps 100 fps 1/10th Sensor, (192 x 108) 300 fps 500 fps ~1 ms Exposure Time, 1 x 1 Binning, Frames per Trigger = Continuous... -
Page 29: Chapter 6 Cc505Mu Specifications
Cooled Scientific Digital Cameras Chapter 6: CC505MU Specifications CC505MU Specifications Chapter 6 6.1. CMOS Sensor Specifications Sensor Specifications Sensor Type CMOS Monochrome Number of Active Pixels 2448 (H) x 2048 (V) (~5.01 MP) Pixel Size 3.45 µm x 3.45 µm Optical Format 2/3"... -
Page 30: Example Frame Rates
Cooled Scientific Digital Cameras Chapter 6: CC505MU Specifications 6.4. Example Frame Rates Frame Rate Full Sensor (2448 x 2048) 35 fps Half Sensor (1224 x 1024) 68 fps ~1/10th Sensor (260 x 208) 290 fps Min ROI (260 x 4) 887.6 fps... -
Page 31: Chapter 7 Cs895Mu Specifications
Cooled Scientific Digital Cameras Chapter 7: CC895MU Specifications CC895MU Specifications Chapter 7 7.1. CMOS Sensor Specifications Sensor Specifications Sensor Type CMOS Monochrome Number of Active Pixels 4096 (H) x 2160 (V) (~8.9 MP) Pixel Size 3.45 µm x 3.45 µm Optical Format 1"... -
Page 32: Example Frame Rates
Cooled Scientific Digital Cameras Chapter 7: CC895MU Specifications 7.4. Example Frame Rates Frame Rate Full Sensor (4096 x 2160) 20.8 fps Half Sensor (2048 x 1080) 40.8 fps ~1/10th Sensor (410 x 216) 175.4 fps Min ROI (260 x 4) 922 fps ~1 ms Exposure Time, 1 x 1 Binning, Frames per Trigger = Continuous... -
Page 33: Chapter 8 Protective Glass Window
Cooled Scientific Digital Cameras Chapter 8: Protective Glass Window Protective Glass Window Chapter 8 The protective glass window is an AR (anti-reflective) coated window for monochrome cameras. 8.1. Protective Glass Window Dimensions Figure 15 Protective Window Dimensions 8.2. AR-Coated Window Specifications <... -
Page 34: Chapter 9 Mechanical Drawings
Cooled Scientific Digital Cameras Chapter 9: Mechanical Drawings Mechanical Drawings Chapter 9 Figure 16 Cooled Scientific Camera Dimensions Page 30 ITN004586-D02... -
Page 35: Chapter 10 Troubleshooting
Cooled Scientific Digital Cameras Chapter 10: Troubleshooting Chapter 10 Troubleshooting 10.1. Interface Problem Symptoms Possible Cause Remedy 1. Connect camera to USB 3.0 1. No power to camera. Port. 2. Restart/refresh software after • 2. Camera has yet to complete camera has been powered on Software does not “enumeration”. -
Page 36: Operational
4. Refer to Section 4.1. and “started” properly. 1. Use a PCIe high bandwidth USB 1. Low bandwidth USB 3.0 3.0 Card, such as: port. Thorlabs’ USB3-PCIE. • Low Bandwidth Excessive dropped USB 3.0 frames 2.a. Use the 3 m cable supplied with •... -
Page 37: Chapter 11 Maintenance
Cooled Scientific Digital Cameras Chapter 11: Maintenance Chapter 11 Maintenance There are no user-serviceable parts inside the camera. Removing the rear cover of the camera without expressed authorization from TSI will void the camera warranty. TSI scientific grade cameras are manufactured in a clean environment. Before shipping, each camera is tested to assure that it meets stringent specifications for cleanliness and quality. - Page 38 Re-examine once again and repeat the process once, if necessary. If contamination continues to be a problem, please call Thorlabs for assistance. Cleaning the Hermetic Chamber’s Protective Window The hermetic chamber protective window is visible when the lens, C-mount adapter, and Ø1" protective window are removed.
- Page 39 Re-examine once again and repeat the process once, if necessary. If contamination continues to be a problem, please call Thorlabs for assistance. CAUTION Ethyl and isopropyl alcohols are highly flammable! Do not use near extreme heat, arcing electrical equipment (such as space heaters) or open flame! Use only with proper ventilation.
-
Page 40: Chapter 12 Regulatory
Waste Treatment is Your Own Responsibility If you do not return an “end of life” unit to Thorlabs, you must hand it to a company specialized in waste recovery. Do not dispose of the unit in a litter bin or at a public waste disposal site. -
Page 41: Certifications And Compliance - Ce Declaration Of Conformity
Cooled Scientific Digital Cameras Chapter 12: Regulatory 12.1. Certifications and Compliance – CE Declaration of Conformity Rev D, March 16, 2021 Page 37... - Page 42 Cooled Scientific Digital Cameras Chapter 12: Regulatory 12.2. FCC Statement This device complies with part 15 of the FCC rules. Operation is subject to the following conditions: (1) This device may not cause harmful interference, and (2) this device must accept any interference received, including interference that may cause undesired operation.
Need help?
Do you have a question about the CC505MU and is the answer not in the manual?
Questions and answers