
Related Manuals for Cortelco 3719


Summary of Contents for Cortelco 3719
- Page 1 Menu Driven Network Service Telephone Caller ID With Call Waiting WNER’S NSTRUCTION ANUAL...
- Page 2 We want you to know all about your new Network Service Telephone, how to install it, the features it provides, and the services you can expect from its use. We have included this information in your Owner’s Instruction Manual. PLEASE READ BEFORE INSTALLING AND USING YOUR NEW TELEPHONE EQUIPMENT.
-
Page 3: Table Of Contents
INSTALLATION ... 5 FACTORY PRESETS ... 7 SETUP ... 7 FEATURES OF YOUR TELEPHONE ... 10 USING YOUR TELEPHONE ... 10 RECEIVING A PHONE CALL ... 1 1 PLACING A PHONE CALL ... 1 1 SPEAKERPHONE BUTTON ... 1 1 DURATION COUNTER ... - Page 4 NO DATA SENT ... 2 2 PRIVATE CALLS ... 2 3 UNKNOWN CALLS ... 2 3 USING NETWORK SERVICE FUNCTION ... 24 TELEPHONE SERVICE PROBLEMS ... 26 MAINTENANCE INFORMATION ... 27 REPAIR OF YOUR TELEPHONE ... 28 THE FCC WANTS YOU TO KNOW ... 29...
-
Page 5: Important Safety Instructions
Do not place any objects on the telephone line cord. Do not locate the telephone where the line cord will be walked Do not block or cover ventilation slots and openings in the bottom of the telephone. The openings should never be blocked by placing the telephone on a bed, sofa, rug, or other similar surfaces. - Page 6 Never spill liquid on the telephone or push objects of any kind through ventilation slots. Liquid or objects may touch dangerous voltage points or short out parts that could result in a risk of fire or electrical shock. Do not disassemble this product. Opening or removing covers may expose you to dangerous voltages or other risks.
-
Page 7: Introduction
The 3719 is a corded Network Service Telephone that incorporates your telephone company’s calling features, such as Caller ID, Voicemail, Call Waiting Caller ID, and Network Service Features. 3719 FEATURES • DTMF Dialing • Ten Two-Touch Memory Dialing Locations •... -
Page 8: Installing Your Telephone
PLUG IN THE ADAPTER Plug the AC adapter tip into the DC 9V jack on the telephone base and the other end into an electrical outlet. Be sure that the tip is securely plugged into the jack. Thread the cord through the clip on the housing to prevent the cord from pulling loose. -
Page 9: Installation
INSTALL THE TELEPHONE LINE CORD DESKTOP INSTALLATION • Place the wedge in the Desktop position on the bottom of the base. Install the wedge by aligning it over the holes and pressing down until it snaps into place. • Plug the line cord into the phone jack labeled LINE. -
Page 10: Factory Presets
FACTORY PRESETS To ensure your telephone works properly, you must set the following options correctly before using your phone. To begin the setting sequence, press “Mem” twice rapidly. The following table shows the factory default settings for your unit: Display... - Page 11 When “Enter Area Code” appears on the display, use the keypad 1-0 to enter the area code. After you finish all three digits, press the Up Review button to confirm. If you do not wish to enter an area code, then press the Up Review button without entering any digits and the next setting will appear.
- Page 12 When “Voice Mail Access Number” is prompted, the display shows “VM Access Num”, use the keypad to enter the voice mail access number. A maximum of 11 digits may be entered. If the setup times out without number confirmation, then the number is not saved.
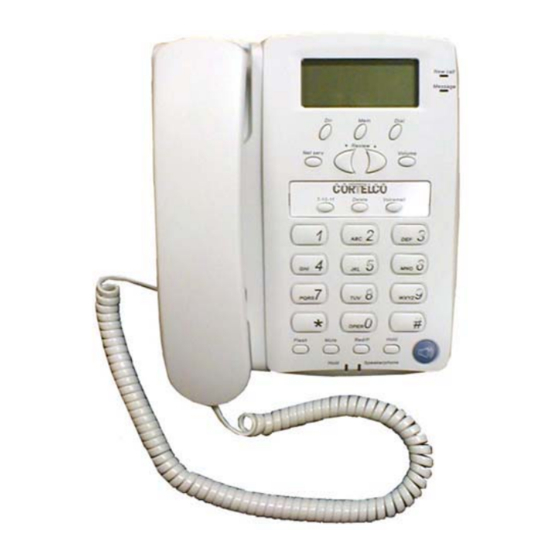
- Page 13 Memory Key Directory Key Review Keys Network Service Key Handset Hookswitch 7-10-11 Key ELEPHONE EATURES Flash Key Mute Key Hold LED LCD Display New Call LED New Message LED Dial Key Ringer Vol. Control Volume Key (Handset) Delete Key Volume Control (Handsfree) Voice Mail Dial Pad...
-
Page 14: Using Your Telephone
RECEIVING A PHONE CALL Be sure the RINGER switch is set to the LO or HI position. If the RINGER is OFF, then the telephone will not ring. 2. When the phone rings and the caller’s information shows on the display window, lift the handset or press the SPEAKER PHONE button and begin your conversation. -
Page 15: Duration Counter
NOTE: If you wish to switch from handsfree to handset, simply lift the handset. If you wish to switch from handset to handsfree, press and release SPEAKERPHONE and then hang up the handset. DURATION COUNTER A built-in counter will start counting for your reference 6 seconds after you lift the handset or 6 seconds after you dial a tele- phone number. -
Page 16: Hold Button
FLASH BUTTON This telephone provides a break signal for a PABX service of Call Waiting from your local telephone company. The Flash time is set for 600 ms and is not programmable. If you have subscribed to the call waiting service, you can alternate the call waiting function per the following instructions. -
Page 17: Call Waiting Display
The call waiting information is shown on the display. The CALL WAITING (CW) symbol will flash for 16 seconds along with the telephone number and name of the person who is on call waiting. Press the FLASH button to put the existing call on hold and answer the new call. -
Page 18: Headset Compatible
A headset with a standard 2.5mm plug may be used in the headset jack on the right side of the base. DATA PORT This is a connection which is in parallel with the telephone line. It allows the connection of a device such as a modem, Caller ID, or an answering machine. -
Page 19: Network Services
NETWORK SERVICES The Network Services button allows you easy access to special features offered by your telephone company. See section entitled “USING NETWORK SERVICE FUNCTION” for more details. REVIEW BUTTONS The Review buttons are used to scroll through the menus. In idle state, the Review buttons can be used to scroll through saved CID information. -
Page 20: Using The Directory
SING IRECTORY This unit stores the numbers of up to 50 of your business associates, clients, contacts, and friends in your directory. You can dial these numbers by selecting them. Names are sorted alphabetically starting with the first character. (If you want your Directory sorted by the last name, enter the last name first.) To Store A New Number And Name Into The Directory Pressing Dir for 2 sec. - Page 21 Dialing Telephone Numbers In The Directory Find the number you want to dial in the Directory List. (Telephone can be on or off hook) When the number shows on the display, press DIAL to start dialing. Deleting Items In The Directory Deleting Individual Entries Enter the directory and select the individual entry.
-
Page 22: Using The Caller Id Function
An indicator marked NEW CALL will light and flash to let you know when new calls are received. If you have a voice mailbox service with your telephone company, another indicator marked MESSAGE will flash to alert you to dial your telephone company to check your new messages. -
Page 23: Receiving Calls
RECEIVING CALLS 1. When the telephone is not in use and a new call is received, the display will show the NEW symbol, the phone number, the caller’s name, and time/date of the call for 20 seconds. The REPEAT symbol will appear if the call has come in more than once. -
Page 24: Deleting Calls
CALLS-) appears on the display to show there are no calls stored in memory. CALLBACK (DIAL) When reviewing received calls, there are two ways to dial the telephone numbers shown on the display by pressing DIAL. 1. With the handset in its cradle (on-hook), press DIAL. The number will be dialed using handsfree operation. -
Page 25: Message Error
Pressing 7-10-11 three times will go back to the original 7 digit telephone number. The LCD can only display 10 digit telephone numbers, when you change the format to 11 digits, only the first 10 digits can be seen, but it will dial 11 digits after you press DIAL. -
Page 26: Private Calls
If the caller has exercised the option to block his number from being sent, [PRIVATE NUMBER] and his name will alternately display on the screen when this information is received. · If the caller has exercised the option to block his name from being sent, [PRIVATE NAME] and his telephone number will be displayed on the screen. ·... -
Page 27: Using Network Service Function
SING The Network Service button allows you easy access to special features offered by your telephone company. To activate a specific Network Service, press “Net Serv”. The display will then show the first listed network service. Pressing the Review Up and Review Down arrows, scrolls through the options available. - Page 28 If the network services are not functional after subscribing through your local telephone company and activating the network services, then select the alternate set of network service codes. To select the alternate Network Serv. Codes: • Disconnect the power adapter.
-
Page 29: Telephone Service Problems
SPEAKERPHONE indicator is on. Turn off speakerphone. NO DIAL TONE Wire is disconnected at telephone jack or at wall jack. Test the telephone in a different wall jack. If it works, the first jack may be defective. REDIAL BUTTON DOES NOT FUNCTION The telephone may have been momentarily disconnected from the telephone jack. -
Page 30: Maintenance Information
Avoid putting near heating appliances and devices that generate electrical noise (for example, motors and florescent lamps). Clean your telephone equipment with a damp cloth. Stains may be removed with a mild soap. Do not use liquid or aerosol detergents or cleaning agents. -
Page 31: Repair Of Your Telephone
DO NOT INCLUDE THE ORIGINAL SALES RECEIPT. If date-of-purchase is not included, the factory date printed on the label on the bottom of your telephone will be used as the date-of-purchase. The factory date allows six months for distribution and sale of this product. - Page 32 Part 68 is a Federal regulation which requires equipment to be tested and registered with the FCC prior to its connection to the network. This equipment complies with Part 68 of FCC rules. On the bottom of the telephone is a label that contains, among other information, the FCC Registration Number and the Ringer Equivalence Number (REN) for this equipment.
-
Page 33: Warranty
CORTELCO with the telephone and loss of parts. The warranty is voided in the event any unauthorized person alters or repairs the telephone.
Need help?
Do you have a question about the 3719 and is the answer not in the manual?
Questions and answers