Table of Contents
Advertisement
Quick Links
Advertisement
Table of Contents

Related Manuals for Cortelco 2194**VOE27S


Summary of Contents for Cortelco 2194**VOE27S
- Page 1 WNER’S NSTRUCTION ANUAL ID T ALLER ULTI- EATURE ELEPHONE...
- Page 2 ALLER -FEATURE TELEPHONE ULTI We want you to know all about your new Colleague Telephone, how to install it, the features it provides, and the services you can expect from its use. We have included this information in your Owner’s Instruction Manual.
-
Page 3: Table Of Contents
SETUP/INSTALLATION ... 4 WALL MOUNT INSTRUCTIONS ... 5 UNIT SETUP ... 5 FACTORY PRESETS ... 5 TELEPHONE PART IDENTIFICATION ... 7 TELEPHONE FEATURES ... 8 PULSE AND TONE DIALING ... 8 RECEIVING A PHONE CALL ... 8 PLACING A PHONE CALL ... 8 SPEAKERPHONE BUTTON ... - Page 4 DIAL OPTIONS BUTTON ... 15 MESSAGE ERROR ... 17 NO DATA SENT ... 17 PRIVATE CALLS ... 17 UNKNOWN CALLS ... 18 TELEPHONE SERVICE PROBLEMS ... 19 MAINTENANCE INFORMATION ... 20 TELEPHONE REPAIR ... 21 FCC INFORMATION ... 22 INDEX...
-
Page 5: Important Safety Instructions
Unplug this product from the wall outlet before cleaning. Use a damp cloth for cleaning. Do not use liquid or aerosol cleaners. Do not use the telephone near water. For example, do not use near a bathtub, wash bowl, kitchen sink, laundry tub, swimming pool, or in a wet basement. - Page 6 Avoid using a telephone during a local thunderstorm. There may be a remote risk of electrical shock from lightning. Do not use a telephone to report a gas leak in the vicinity of the leak. Unplug the telephone from the wall outlet and refer servicing to qualified service personnel under the following conditions: •...
-
Page 7: Telephone Usage
Use the existing line cord supplied to connect the LINE jack of your answering machine to the wall modular line jack. • Use the new line cord supplied to connect the telephone’s jack of your new Caller ID phone to the PHONE jack of your answering machine. •... -
Page 8: Wall Mount Instructions
WALL MOUNT INSTRUCTIONS 1. Install wall mount bracket in wall mount position and route cords as shown in diagram below. 2. Connect the adapter and the line cord. See Steps 2 & 3 on preceding page for specific instructions. 3. Push out the handset hook and reattach in opposite direction for the wall mount position, plug the coiled cord into the handset, and then plug the other end of the cord into the base. -
Page 9: Set Language
After the adapter is connected, the display will show as indicated below for setting. SET LANGUAGE select the language. E - English, F - French, S - Spanish, and then press the DIAL button to confirm the selection. When LCD CONTRAST contrast darker, and then you can press REVIEW DOWN ( contrast back to the preset. -
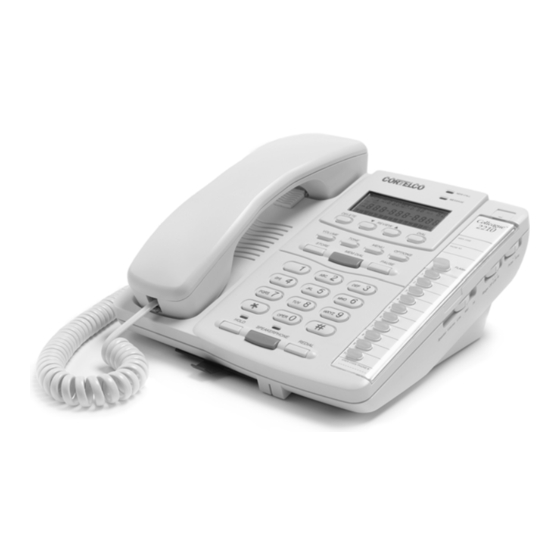
Page 10: Telephone Part Identification
ELEPHONE Store Button Hook Switch Handset Hook Memory Dial Button Handset Cord Jack Volume Button Delete Button Tone Button Review Up/Down Button Menu Button Red New Call LED Green New Message LCD Display Dial Button DENTIFICATION Flash Options Button 10 Auto Memory Button Pause Button Redial Button Speakerphone LED... -
Page 11: Telephone Features
If you are unsure which system you have, set the switch to the TONE position. Lift the handset. When you get a dial tone, dial a telephone number. If the dial tone continues, move the switch to PULSE, and then dial the telephone number again. -
Page 12: Duration Counter
If the PULSE/TONE switch is set to the PULSE position, and you want to make a tone entry (ex. telephone number into pager) after pulse dialing, press the TONE button once, then dial the number. The number dialed out will be changed to tone dialing automatically without setting the PULSE/TONE switch to TONE position. -
Page 13: To Dial A Phone Number In Memory
Press the desired memory location. • To store in an auto memory button (located on right-hand side of base) - Press 1, 2, 3, or 10). • To store in a keypad memory location - Press one of the keypad buttons (l, 2, 3, or 0). -
Page 14: Hold Button
DATA PORT This is a connection which is in parallel with the telephone line. It allows the connection of a device such as a modem, caller ID, or an answering machine. CALL WAITING DISPLAY In the past, if you had call-waiting service, a tone alerted you there was a new call coming while you were on an existing call. -
Page 15: Caller Id Features
Note: Make sure you have subscribed to both Call Waiting Caller ID and Caller ID service from your local telephone company. If you only have Caller ID service, the unit works for Caller ID only. ALLER... -
Page 16: Receiving Calls
RECEIVING CALLS When the telephone is not in use and a new call is received, the display will show the NEW symbol, the phone number, the caller s name, and time and date of the call for 20 seconds. The RPT (repeat) symbol will appear if the call has come in more than once. -
Page 17: Reviewing Calls
When you have reached the end of the call records, the display will indicate [-END OF LIST- ] , confirming there are no more calls stored. Note: If the telephone number received is more than 10 digits, the unit will only store the first 10 digits into memory. -
Page 18: Callback
Please hang up the telephone and program the area code. If a local call (a telephone number with the same area code as you set) is reviewed and its 7-digit number displayed, press DIAL to dial the number displayed. - Page 19 Pressing OPTIONS three times will go back to the original 7-digit telephone number. For example: Your area code is 205 and you are reviewing telephone number 785-2883. When the desired format of the telephone number is reached, press DIAL to dial the displayed number.
-
Page 20: Message Error
• If the caller has exercised the option to block his name from being sent, [PRIVATE NAME] and his telephone number will be displayed on the screen. • If the caller has exercised the option to block his name and number from being sent, then [PRIVATE CALLER] will be displayed on the screen. -
Page 21: Unknown Calls
[UNKNOWN NUMBER] and his name will alternately display on the screen when this information is received. • When the telephone company is unable to provide information of the caller s name, [UNKNOWN NAME] and his telephone number will be displayed on the screen. •... -
Page 22: Telephone Service Problems
SPEAKERPHONE indicator is on. Turn off speakerphone. NO DIAL TONE Wire is disconnected at telephone jack or at wall jack. Test the telephone in a different wall jack. If it works, the first jack may be defective. HAVE DIAL TONE BUT CANNOT DIAL OUT Check if the PULSE/TONE switch is at the correct position. -
Page 23: Special Note
Avoid putting near heating appliances and devices that generate electrical noise (for example, motors and florescent lamps). Clean your telephone equipment with a damp cloth. Stains may be removed with a mild soap. Do not use liquid or aerosol detergents or cleaning agents. -
Page 24: Telephone Repair
Call Waiting Caller ID Telephone. Shipping must be prepaid. If the telephone is in warranty, it will be repaired or replaced, at our option, at no cost to you, and it will be returned shipping prepaid. -
Page 25: Fcc Information
Your telephones may not ring if the total is more than five. Also, in some rural locations, your telephone may not ring if the REN total is more than three. -
Page 26: Index
Message waiting Maintenance NDEX N, O Options One-touch dialing Part Identification Pulse dialing Pause Private Calls Q, R Receiving calls Telephone Caller I.D. Redial Reviewing calls Repair Safety Setup Speakerphone Tone dialing Troubleshooting Unknown Calls Volume W, X, Y, Z... - Page 27 ELEPHONE UMBERS ____________________________________________________ ____________________________________________________ ____________________________________________________ ____________________________________________________ ____________________________________________________ ____________________________________________________ ____________________________________________________ ____________________________________________________ ____________________________________________________ ____________________________________________________...
-
Page 28: Limited Warranty
CORTELCO with the product and loss of parts. The warranty is voided in the event any unauthorized person alters or repairs the unit.
Need help?
Do you have a question about the 2194**VOE27S and is the answer not in the manual?
Questions and answers