Table of Contents
Advertisement
Quick Links
Download this manual
See also:
Instruction Manual
Advertisement
Table of Contents
Troubleshooting

Related Manuals for Cortelco 8012


Summary of Contents for Cortelco 8012
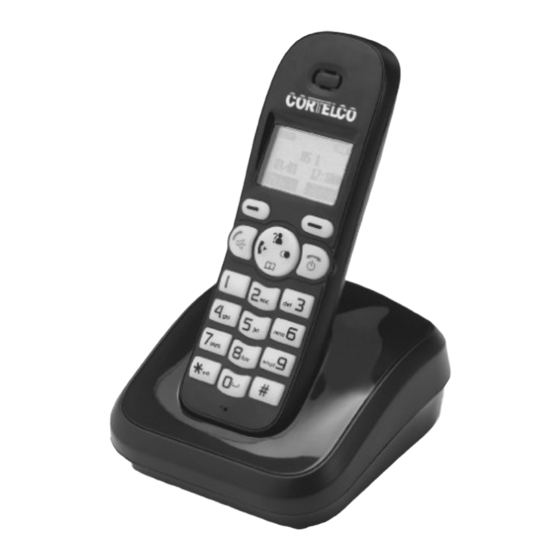
- Page 1 OWNER’S INSTRUCTION MANUAL DECT 6 CORDLESS TELEPHONE MODEL 8012...
-
Page 2: Table Of Contents
Contents Important Safety Instructions ... 8 Unpacking and Installation ... 12 Features ... 13 Telephone Part Identification ... 14 Key Descriptions ... 16 Navigation Key ... 17 Installation ... 20 Basic Functions ... 24 Making a Call ... 24 Making a Call - Standby Mode ... 24 Receiving a Call ... - Page 3 Ringer Settings ... 26 Last Number Redial ... 28 Redial Book Options ... 29 Caller ID Functions ... 30 Review Caller ID Records ... 30 Dial from CID ... 31 Add CID Number to Phone Book ... 31 Delete a CID Number ... 32 Delete all CID Numbers ...
- Page 4 Flash ... 40 Backlight ... 40 Advanced Features ... 41 Menu Navigation ... 41 Standby Mode ... 41 Phone Book ... 42 Character Map ... 42 Adding a Phone Book Entry ... 43 Viewing a Phone Book Entry ... 44 Dialing from a Phone Book Entry ...
- Page 5 Modify PIN ... 49 BS (Base) Reset ... 50 Handset (HS) Settings ... 51 Alarm ... 51 Audio Setup ... 52 Key Tone ... 53 LCD Contrast ... 54 Base Selection ... 55 Date and Time Format ... 56 Setting Date and Time ... 57 HS Reset ...
- Page 6 Telephone Service Problems ... 63 Technical Specifications ... 64 Troubleshooting ... 65 Troubleshooting (continued) ... 66 Telephone Repair ... 67 Limited Warranty ... 71...
- Page 7 THANK YOU FOR PURCHASING THE 8012 DECT 6 CORDLESS TELEPHONE We want you to know all about your new telephone, how to install it, the features it provides, and the services you can expect from its use. We have included this information in your Owner’s Instruction Manual.
-
Page 8: Important Safety Instructions
Important Safety Instructions Always follow basic safety precautions when using your telephone to reduce the risk of fire, electrical shock and injury. Read and understand all instructions. Follow all warnings and instructions marked on the product. Unplug this product from the wall outlet before cleaning. Do not use liquid cleaners or aerosol cleaners. - Page 9 Do not allow anything to rest on the power cord. Do not locate this product where the cord will be damaged by persons walking on it. Do not overload wall outlet extension cords, as this can result in the risk of fire or electric shock.
-
Page 10: Safety Instructions For Handset Battery Pack
If the product does not operate normally by following the operating instructions. Adjust only those controls that are covered by the operating instructions because improper adjustment of other controls may result in damage and will often require extensive work by a qualified technician to restore the product to normal operation. If the product has been dropped or cabinet has be damaged. - Page 11 CONTAINS NICKEL-METAL HYDRIDE BATTERY. BATTERY MUST BE RE- CYCLED OR DISPOSED OF PROPERLY Do not dispose of the batteries in a fire. They may explode. Check with local codes for possible special disposal instructions. Do not open or mutilate the batteries. Released electrolyte is corrosive and may cause damage to the eyes or skin.
-
Page 12: Unpacking And Installation
Unpacking and Installation Box Contents The following items should be packed with your 8012. Please contact your dealer if any of them is missing. -
Page 13: Features
Features 1 . 8 G H z D E C T T e c h n o l o g y w i t h C a l l D u r a t i o n D i s p l a y G A P 5 R o w B a c k l i t D o t M a t r i x L C D ( 1 2 8 A l a r m C l o c k w i t h S n o o z e... -
Page 14: Telephone Part Identification
Telephone Part Identification... -
Page 16: Key Descriptions
Key Descriptions Dial/Speaker Key - Used to place or answer a call. If pressed during a call, activates the speakerphone. End Key - End a call. If pressed and held, powers off the handset Left/Right Soft Key - Performs the function indicated by the text immediately over it in the display. -
Page 17: Navigation Key
Navigation Key Up/CID Key - Scrolls up through list and menu options. Increases the receiver or speakerphone volume during a call. Enters the CID book as described on Page 18. Down/Phonebook Key - Scrolls down through list and menu options. Decreases the receiver or speakerphone volume during a call. - Page 18 Icons New Call - One or more calls have been received. MSG Waiting - One or more voice messages have been received. Off Hook - The line is in use. Speakerphone - Speakerphone function is in use.
- Page 19 Alarm - The alarm is activated. Signal - Indicates the signal strength. Blinks if the handset is too far from the base. Battery - Shows battery charge level Keypad Lock - Keypad is locked.
-
Page 20: Installation
Installation Line and Power Connection Connect the phone line cord to the telephone line jack in the base. Connect the other end of the line cord to a telephone outlet. Connect the AC power adapter to the base power jack. Plug the AC power adapter into an AC outlet. -
Page 21: Battery Installation
Battery Installation Two rechargeable Ni-MH AAA size batteries come with the 8012. These must be installed before use. Slide the battery cover in the direction shown below and remove. Install the batteries as shown below. Care must be taken to install in the correct polarity. -
Page 22: Charging Handset
Charging Handset The handset should be charged for 15 hours before initial use. To charge the handset, place it in the base. If the handset is off, it will automatically turn on. To turn the handset off, press until the display turns off. -
Page 23: Dsl Interference
DSL Interference If the 8012 is used on a line with DSL service, it may be necessary to install a noise filter. A filter may be obtained from the DSL provider. It should by used if noise is heard during conversations or Caller ID is not functioning properly. -
Page 24: Basic Functions
Basic Functions Making a Call Remove the handset from the base and press Dial the telephone number. Making a Call - Standby Mode Enter the telephone number (up to 32 digits). Use the Erase soft key to correct mistakes. Press to dial the number. -
Page 25: Mute
To change the ringer volume, press Mute During a conversation, the microphone of the 8012 can be muted so that the distant party cannot hear what is being said. To mute the microphone, press the MUTE soft key. The display will show “CALL MUTED.” To unmute the microphone, press the MUTE soft key again. -
Page 26: Volume Control
Volume Control During a conversation, pressing speakerphone volume level. Volume can be adjusted in 5 steps. Message Waiting If a voice message is received, the display will show the ON “ To deactivate the icon, press the hold the 4 key. Finally, press to return to standby mode. - Page 27 Press the Select soft key. 10. Choose the desired ring tone (1 - 10) or desired ring volume (1 - 5 or off). The 8012 will play the selected melody or volume level. 11. Press the Save soft key to confirm.
-
Page 28: Last Number Redial
Press to dial the number. Redial Book The 8012 can also retrieve the last 10 numbers dialed and redial them. Press the Redial soft key in standby mode. Press to scroll through the list of numbers until the desired number is displayed. -
Page 29: Redial Book Options
Redial Book Options Redial Book Options allows a number to be added to the phone book or deleted from the redial book. Press the Redial soft key in standby mode. Press to scroll through the list of numbers until the desired number is displayed. -
Page 30: Caller Id Functions
Caller ID Functions When a call is received, the 8012 will normally display the name and number of the caller. If the caller has chosen to prevent his information from being transmitted, the display will show “Private.” If information cannot be received for some other reason, the display will show “Out Of Area.”... -
Page 31: Dial From Cid
Dial from CID Follow the steps above for reviewing Caller ID Records. When the desired number is displayed, press to dial. Add CID Number to Phone Book Press the Menu soft key. Using the Select soft key, choose the CID Book. to review the numbers. -
Page 32: Delete A Cid Number
Delete a CID Number Press the Menu soft key. Using the Select soft key, choose the CID Book. to review the numbers. When the desired number is displayed, press the More soft key. to choose Delete. Press the Select soft key. When the display shows Confirm ?, press the Del soft key. -
Page 33: Caller Id On Call Waiting
When the display shows Confirm ?, press the Del All soft key. A beep will sound to confirm and the 8012 will return to standby mode. Caller ID on Call Waiting This service allows the number of a calling party to be displayed while on another call. -
Page 34: Auto Answer
Auto Answer Activating Auto Answer allows calls to be answered by simply removing the handset from the base. To activate Auto Answer: Press the Menu soft key. Press repeatedly to choose HS Settings. Press the Select soft key. to choose Auto Answer. Press the Select soft key. -
Page 35: Language
Language The 8012 supports 8 languages: English, French, Spanish, German, Italian, Dutch, Polish, and Traditional Chinese. To select a language: Press the Menu soft key. Press repeatedly to choose HS Settings. Press the Select soft key. to choose Language. Press the Select soft key. -
Page 36: Handset Name
Handset Name The 8012 handset can be given a name. This is useful if more than one handset is registered to a base. To set the handset name: Press the Menu soft key. Press repeatedly to choose HS Settings. Press the Select soft key. -
Page 37: Range Alarm
Range Alarm Normally a beep will sound whenever the handset moves out of range of the base. This feature may be enabled or disabled. Press the Menu soft key. Press repeatedly to choose HS Settings. Press the Select soft key. to choose Tone Setup. -
Page 38: Paging
5 seconds will put the base into registra- tion mode. See Page 33. Dial Mode The 8012 supports DTMF or Pulse dialing. To change the dial mode: Press the Menu soft key. Press repeatedly to choose BS Settings. -
Page 39: Handsfree/Speakerphone
Press the Select soft key. Press to select the desired dial mode (Tone/Pulse). Press the Save soft key. A beep will sound to confirm. Handsfree/Speakerphone During a call, the speakerphone may be activated. To Activate Handsfree press . The To Deactivate Handsfree press again. -
Page 40: Flash
Flash The Flash key sends a timed line break. This signal is used to activate some special services such as call waiting. The services available will depend on the telephone company. To send a flash, press the Flash soft key while the phone is active. The display will show R. -
Page 41: Advanced Features
Repeat scrolling and selecting if necessary. Press the Back soft key from any menu to return to the previous screen. Standby Mode Press to return to standby mode. The 8012 will also return to standby mode if no key is pressed for 40 seconds. -
Page 42: Phone Book
Phone Book Character Map Characters are entered by pressing the keypad. The chart below shows the charac- ters that are generated by repeatedly pressing the keys. Character & "... -
Page 43: Adding A Phone Book Entry
Adding a Phone Book Entry Press the Menu soft key. Press to choose Phonebook. Press the Select soft key to choose New. The display shows “Name ?”. Enter the name using the keypad. Press the Next soft key. Enter the name and press the Next soft key. The display shows “Number ?”. -
Page 44: Viewing A Phone Book Entry
Viewing a Phone Book Entry In standby mode, press Press repeatedly until the desired entry is displayed. Dialing from a Phone Book Entry After viewing the desired number as described above, press key. Editing a Phone Book Entry Press the Menu soft key. Press to choose Phonebook. -
Page 45: Deleting A Phone Book Entry
Press the Select soft key. Edit the entry using the Erase soft key as needed. Press the Next soft key to save. 10. Use to select the ring tone (1 - 10). 11. Press the Save soft key. Deleting a Phone Book Entry Press the Menu soft key. -
Page 46: Deleting All Phone Book Entries
Deleting all Phone Book Entries Press the Menu soft key. Press to choose Phonebook. Press the Select soft key. Press to choose Delete All. Press the Select soft key. Press the Select soft key. The display shows “Confirm ?” Press the Del All soft key to delete. Press Cancel to exit. Pause A pause provides a delay of 3 seconds. -
Page 47: Base (Bs) Settings
Base (BS) Settings Terminate HS (Handset) This allows a handset registration to be deleted from the base. Press the Menu soft key. Press to select BS Settings. Press the Select soft key. Press the Select soft key again to select the Termnate HS menu. The display shows “PIN ?”... -
Page 48: Change Flash Time
Change Flash Time Note:The default flash time is correct for almost all phone systems used in North America. Press the Menu soft key. Press to select BS Settings. Press the Select soft key. Press to choose the Flash Time menu. Press the Select soft key. -
Page 49: Modify Pin
Modify PIN The default PIN is 0000. If security is a concern, this can be changed. Press the Menu soft key. Press to select BS Settings. Press the Select soft key. Press to choose the Modify PIN menu. Press the Select soft key. The display shows “PIN ?” Enter the current PIN Code. -
Page 50: Bs (Base) Reset
BS (Base) Reset This will restore all settings to factory default. Press the Menu soft key. Press to select BS Settings. Press the Select soft key. Press to choose the BS Reset menu. Press the Select soft key. The display shows “PIN ?” Enter the PIN Code. -
Page 51: Handset (Hs) Settings
Handset (HS) Settings Alarm Press the Menu soft key. Press to select HS Settings. Press the Select soft key. Press the Select soft key to choose the Alarm menu. The display will show the current alarm time. Press to select On/Off. Press the Select soft key. -
Page 52: Audio Setup
Notes: When the alarm sounds, press any key on the keypad to silence it. To disable snooze, press when the alarm sounds. Audio Setup Use this option to adjust the volume of the receiver or speaker. Press the Menu soft key. Press to select HS Settings. -
Page 53: Key Tone
Key Tone Whenever a key is pressed, the 8012 acknowledges it with a key tone. If silent operation is desired, this feature may be disabled. Press the Menu soft key. Press to select HS Settings. Press the Select soft key. -
Page 54: Lcd Contrast
LCD Contrast The display contrast may be adjusted to provide better visability. Press the Menu soft key. Press to select HS Settings. Press the Select soft key. Press the repeatedly to choose LCD Contrast. Press the Select soft key. Press the repeatedly to choose the desired contrast level. -
Page 55: Base Selection
Base Selection The handset may be registered to multiple bases. Press the Menu soft key. Press to select HS Settings. Press the Select soft key. Press the repeatedly to choose Select Base menu. Press the Select soft key. Press the to choose the desired base. -
Page 56: Date And Time Format
Date and Time Format Press the Menu soft key. Press to select HS Settings. Press the Select soft key. Press to choose Date & Time menu. Press the Select soft key. Press to choose Date Format or Time Format. Press the Select soft key. Press to select the Date Format (DD-MM/MM-DD) or the Time Format (12 Hour/24 Hour). -
Page 57: Setting Date And Time
Setting Date and Time Press the Menu soft key. Press to select HS Settings. Press the Select soft key. Press to choose Date & Time menu. Press the Select soft key. Press to choose Set Date or Set Time menu. Press the Select soft key. -
Page 58: Hs Reset
HS Reset Resetting the handset will restore all hanset features to their factory default values except LCD Contrast. Press the Menu soft key. Press to select HS Settings. Press the Select soft key. Press to choose the HS Reset menu. Press the Select soft key. -
Page 59: Registration
Registration The hanset ships from the factory registered as Number 1. Up to 5 handsets can be registered with one base. This allows a line to be shared among multiple handsets. Before changing the handset registration, press the mately 5 seconds. Then perform the following steps. Press the Menu soft key. -
Page 60: Multiple Handset Operation
Multiple Handset Operation If more than one handset is registered to a base, internal calls can be made between handsets and external calls may be transferred between handsets. Internal Calling Press . The display will show a list of available handsets. Enter the number of the handset to be called. -
Page 61: Call Transfer
Note: If an external call arrives during an internal call, the display will show the Caller ID information. To answer the external call, first press Then, press to answer the external call. Call Transfer An external call may be transferred between handsets registered to the same base. During an external call, press Enter the number of the handset to recieve the transferred call. -
Page 62: 3-Way Conference Call
3-Way Conference Call A conference call may be extablished between two handsets and one external caller. During an external call, press Enter the number of the handset to add to the conference call. Press to answer the call. Press at the calling handset to establish the conference. Press at either of the internal handsets to leave the call. -
Page 63: Maintenance Information
Maintenance Information Treat your telephone equipment with care for trouble-free performance. Avoid dropping the handset. Carefully place the handset in the base after use. Avoid putting near heating appliances and devices that generate electrical noise (for example, motors and florescent lamps). Clean your telephone equipment with a damp cloth. -
Page 64: Technical Specifications
Technical Specifications F re q u e n c y R a n g e 1 . 8 8 ~ 1 . 9 0 G H z C h a n n e ls 1 2 0 D u p le x C h a n n e ls C a rrie r P o w e r <... -
Page 65: Troubleshooting
Troubleshooting Phone Does Not Operate Power adapter is disconnected. Line cord is disconnected at telephone outlet or at telephone. Test the tele- phone in a different wall jack. If it works, the first jack may be defective. Batteries are discharged. Batteries are improperly installed. -
Page 66: Troubleshooting (Continued)
Troubleshooting (continued) Callers Are Not Displayed on Screen Verify that you have subscribed to the appropriate service (Caller ID and Call Waiting Caller ID) from your telephone company. If you only subscribed to Caller ID service the unit will not display call waiting caller ID information. Check if your answering machine is set to answer before 2 rings. -
Page 67: Telephone Repair
Telephone Repair DO NOT ATTEMPT TO REPAIR THIS PRODUCT YOURSELF. Telephones manu- factured by CORTELCO must be returned to us for repair. You can return your telephone to CORTELCO for repair or replacement in accordance with our LIMITED WARRANTY. CORTELCO warrants THIS PRODUCT against defects in material and workmanship in accordance with our LIMITED WARRANTY. - Page 68 Ship your telephone (shipping prepaid) to: CORTELCO REPAIR CENTER 1703 SAWYER ROAD CORINTH, MS 38834...
-
Page 69: Fcc Information
FCC Information Part 68 is a Federal regulation which requires equipment to be tested and registered with the FCC prior to its connection to the network. This equipment complies with Part 68 of FCC rules. On the bottom of the telephone is a label that contains, among other information, the FCC Registration Number and the Ringer Equivalence Number (REN) for this equipment. - Page 70 INSTALLATION This model telephone must be connected to the telephone company lines through a modular jack. The required USOC for the modular jack is RJ11C for desk mounting and RJ11W for wall mounting. The USOC number is printed on the label on the bottom of your telephone.
-
Page 71: Limited Warranty
IMITED ARRANTY If you purchased this product new in the U.S. or Puerto Rico, CORTELCO warrants it against defects in material and workmanship for a period of one (1) year from the date of original purchase. This warranty is in lieu of all other express warranties. During the warranty period, CORTELCO agrees to repair or, at its option, replace the defective product, or any part of it without charge for parts or labor. - Page 72 If failure occurs and your telephone is in warranty, service shall be provided by returning it to CORTELCO - Repair Center, 1703 Sawyer Road, Corinth, Mississippi 38834, shipping prepaid. The product will be repaired or replaced if examination by us determines the product to be defective.
Need help?
Do you have a question about the 8012 and is the answer not in the manual?
Questions and answers