Table of Contents
Advertisement
Quick Links
Laura Ashley
Thank you for purchasing this product. Please read the instructions carefully before use to ensure safe and
satisfactory operation of this product.
Please ensure instructions are read in full before commencing with this product.
Necessary Tools:
Please check the pack contents before you begin. A full checklist of components is given in this leaflet. If any
components are missing, please contact the retailer from whom you bought this product.
Safety Advice and Assembly Recommendations
Do not stand or lean on this product.
-
Make sure the area is clear when unpacking and positioning this product.
-
-
This product is heavy, it should be assembled as near as possible to the point of use.
Take care when lifting to avoid personal injury and or damage to the product.
Keep small children/pets away from assembly area. This product has small component parts that are a
-
choking hazard.
Make sure you assemble this product correctly as per the instructions and ensure all fittings are tight.
-
A minimum of two persons is require to lift the Bed into position
-
We recommend that the packaging is used to protect the surfaces during assembly.
-
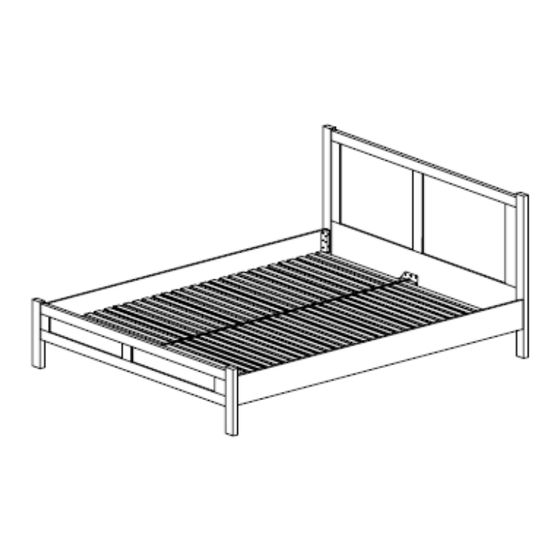
ASHWELL Bed
Allen Key (included)
1
Advertisement
Table of Contents

Related Manuals for Laura Ashley ASHWELL


Summary of Contents for Laura Ashley ASHWELL
- Page 1 Laura Ashley ASHWELL Bed Thank you for purchasing this product. Please read the instructions carefully before use to ensure safe and satisfactory operation of this product. Please ensure instructions are read in full before commencing with this product. Necessary Tools: Allen Key (included) Please check the pack contents before you begin.
- Page 2 Fittings and parts checklist Bolt x 12 Allen Key x 1 Screw Ø 3.5 x25 x 12 Dowel x 8 Step by step assembly instructions A minimum of two persons is required to assemble this product. Step One Attach Side Rails to Headboard Step Two Attach Side rail to the Footboard using Bolt...
- Page 3 Step Three Repeat step two with the other side rail, than connect the side rails to the footboard and assembly in the same manner Step Four - Fit 2 x Adjustable Support Legs onto Centre Rail , aligning corresponding holes. Step Five - Fit metal brackets on each end of Centre Rail into each metal brackets on Headboard &...
- Page 4 - To compensate for uneven floors, adjust levelers on adjustable support legs, as necessary. Care and Maintenance. Please refer to Laura Ashley Care Guide PLEASE KEEP THESE INSTRUCTIONS FOR FUTURE REFERENCE If you have any queries with this product please contact Laura Ashley Customer Services.
Need help?
Do you have a question about the ASHWELL and is the answer not in the manual?
Questions and answers