Garmin FORCE KRAKEN Owner's Manual
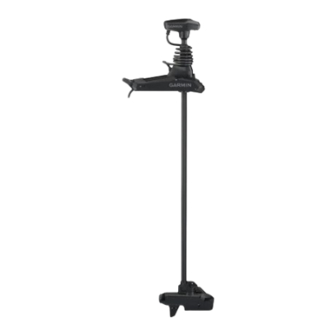
Trolling motor
Hide thumbs
Also See for FORCE KRAKEN:
- Installation manual ,
- Quick start manual (21 pages) ,
- Replacement instructions manual (14 pages)
Table of Contents
Advertisement
Advertisement
Table of Contents

Related Manuals for Garmin FORCE KRAKEN


Summary of Contents for Garmin FORCE KRAKEN
- Page 1 FORCE KRAKEN TROLLING MOTOR ® Owner’s Manual...
- Page 2 © 2023 Garmin Ltd. or its subsidiaries All rights reserved. Under the copyright laws, this manual may not be copied, in whole or in part, without the written consent of Garmin. Garmin reserves the right to change or improve its products and to make changes in the content of this manual without obligation to notify any person or organization of such changes or improvements. Go to www.garmin.com...
-
Page 3: Table Of Contents
Operation........13 Deployed Dimensions......24 Turning the Propeller On and Off..13 Registering Your Device......25 Adjusting the Speed of the Motor..13 Contacting Garmin Support....25 Maintaining Your Speed....14 Steering..........14 Specifications........ 26 Steering the Trolling Motor Trolling Motor........26 Manually.......... -
Page 5: Getting Started
Getting Started WARNING See the Important Safety and Product Information guide in the product box for product warnings and other important information. Do not run the motor when the propeller is out of the water. Contact with the rotating propeller may result in severe injury. -
Page 6: Deploying The Motor From The Stowed Position
Deploying the Motor from the Stowed Position 1 Hold down the pedal to release the latch 2 Slide the motor out , release the pedal, and raise the motor slowly into the deployed position. 3 If necessary, push the shaft away to lock the motor in the deployed position. NOTICE The depth adjustment mechanism is keyed to align with the steering motor, and they should align automatically when you deploy the motor. -
Page 7: Trolling Motor Display Panel
Trolling Motor Display Panel The display panel on the trolling motor mount shows important information at a glance. NOTE: The backlight on the display panel reacts to the ambient light, and dims automatically at night. Getting Started... -
Page 8: Status Indicator
Shows the motor speed level (Adjusting the Speed of the Motor, page 13). Speed Green: the motor battery voltage is good. Yellow: the motor battery voltage is low. Red: the motor battery voltage is very low. Trolling motor Flashing red: the motor battery voltage is critically low. battery status NOTE: This applies only when the motor is connected to a lead acid battery. -
Page 9: Calibrating The Trolling Motor
Calibrating the Trolling Motor You must calibrate the compass in the trolling motor before you can use the autopilot features. For the best results, you should calibrate the motor on a day with little or no wind on calm water. You can repeat the calibration process if the autopilot features are not performing as expected. -
Page 10: Connecting To A Chartplotter
You can connect the trolling motor wirelessly to a compatible Garmin chartplotter on your boat. After you connect to a compatible chartplotter, you can control the trolling motor from the chartplotter in addition to the remote control and foot pedal. -
Page 11: Attaching A Lanyard
Attaching a Lanyard 1 Starting from the back of the remote control, insert the loop of the lanyard through the slot. 2 Thread the other end of the lanyard through the loop, and pull it tight. 3 If necessary, place the lanyard around your neck or wrist to tether it during use. Remote Control Buttons Remote Control... - Page 12 Press to exit the menu. Press to mark a waypoint. 1 through 4 Press to open the shortcut for the Garmin chartplotter assigned to the button. Requires a connection to a compatible Garmin chartplotter. See your chartplotter owner's manual for instructions.
-
Page 13: Remote Control Screen
Remote Control Screen Shows the operational status of the trolling motor. For example, when in manual control, Manual is shown, and when the heading hold is on, Heading Hold is shown, along with the heading-hold set point in degrees. Shows the trolling motor battery status. Green: the motor battery voltage is good. -
Page 14: Calibrating The Remote Control
Calibrating the Remote Control NOTICE Calibrate the electronic compass outdoors. To improve heading accuracy, do not stand near objects that influence magnetic fields, such as vehicles, buildings, and overhead power lines. You must calibrate the compass in the remote control before you can control the motor using gestures. If the gesture controls are not working properly after calibration, you can repeat this process as often as needed. -
Page 15: Foot Pedal
Foot Pedal NOTE: The foot pedal is an optional accessory that is sold separately. You can use the foot pedal to operate the trolling motor. Hold to turn on the propeller at the set speed. Momentary propeller control Release to turn off the propeller. Rotate the wheel away from you to increase the propeller speed or cruise control speed. -
Page 16: Installing Batteries
Installing Batteries The foot pedal can operate using two AA alkaline, NiMH, or lithium batteries (not included). Use lithium batteries for best results. 1 Lift up the front of the foot pedal as far as possible. 2 Pinch the sides of the battery cover , and pull up to remove it. -
Page 17: Disabling The Heading Hold Function On The Foot Pedal
6 times. The status LED turns green for 1 second to indicate that the heading hold function is enabled on the foot pedal. Operation You can use the remote control, the foot pedal, a compatible Garmin chartplotter, a compatible Garmin wearable, such as a Garmin quatix ®... -
Page 18: Maintaining Your Speed
Maintaining Your Speed Before you can use the cruise control feature, you must calibrate the trolling motor (Calibrating the Trolling Motor, page 5). The cruise control feature is an autopilot function that sets and maintains a specific speed over ground, adjusting for changes in current and wind automatically. NOTE: You can enable the cruise control feature from the remote control only, but can control the speed and direction from both the remote control and foot pedal. -
Page 19: Holding Your Position
Changing the Heading Hold Behavior You can change the how heading-hold feature maintains the heading of your boat when it is affected by the wind or the current. 1 On the remote control, select > Settings > Trolling Motor > Heading Hold. 2 Select an option: •... -
Page 20: Gesture Controls
Gesture Controls You can point or move the remote control to interact with the trolling motor. You must calibrate the compass in the trolling motor (Calibrating the Trolling Motor, page 5), and the compass in the remote control (Calibrating the Remote Control, page 10) before you can use gesture controls. -
Page 21: Viewing Waypoint Details
Viewing Waypoint Details 1 On the remote control, select > Waypoints. A list of the ten closest waypoints is shown. 2 Select a waypoint. 3 Select Review. Editing a Waypoint Name 1 On the remote control, select > Waypoints. A list of the ten closest waypoints is shown. 2 Select a waypoint. -
Page 22: Editing A Route Name
Editing a Route Name 1 On the remote control, select > Routes. A list of the ten closest routes is shown. 2 Select a route. 3 Select Edit. 4 Enter a new name for the route. Deleting a Route 1 On the remote control, select >... -
Page 23: Navigating A Saved Track
Navigating a Saved Track 1 Select > Tracks > Saved Tracks. A list of the ten closest saved tracks is shown. 2 Select a saved track. 3 Select Navigate To. 4 Select an option: • To navigate the saved track from the beginning of the track to the end, select Forward. •... -
Page 24: Pausing And Resuming Navigation
Pausing and Resuming Navigation 1 While navigating, on the remote control, select an option: • To pause navigation while continuing in the same direction at the same speed, select > Standby. • To pause navigation and set anchor lock, select Navigation stops, and the trolling motor returns to manual mode or maintains your position in anchor lock. -
Page 25: Wireless Network Settings
Wireless Network Settings On the remote control, select > Settings > Trolling Motor > Wi-Fi. NOTE: The active Wi‑Fi ® mode is shown at the top of the screen. Mode: Sets the Wi‑Fi mode. You can turn off Wi‑Fi technology, join the network of a chartplotter, or create a wireless access point to use the ActiveCaptain ®... -
Page 26: Maintenance Needs And Schedule
For detailed procedures and information on service and replacement parts, go to garmin.com/manuals/force _kraken_trolling_motor to download the Force Kraken Trolling Motor Maintenance Manual. • Examine the coil cable for wear, and replace it as necessary. • Check and clean the power cables •... -
Page 27: Updating Software With The Activecaptain App
Updating Software with the ActiveCaptain App Updating the trolling motor software also updates the software in all connected peripherals, such as the foot pedal and remote control. You can go to garmin.com/videos/trolling_motor_update/ and watch a video to assist with the software-update process. NOTICE Software updates may require the app to download large files. -
Page 28: Stowed Dimensions
Stowed Dimensions Item 63 in. Model 75 in. Model 90 in. Model 168.7 cm (66 in.) 199.2 cm (78 in.) 237.3 cm (93 in.) length on boat 26.2 cm (10 in.) 26.2 cm (10 in.) 26.2 cm (10 in.) mount height 1.7 cm ( in.) 1.7 cm ( in.) 1.7 cm ( in.) overhang height 20.7 cm (8... -
Page 29: Registering Your Device
Help us better support you by completing our online registration today. • Register using the ActiveCaptain app. • Keep the original sales receipt, or a photocopy, in a safe place. Contacting Garmin Support • Go to support.garmin.com for help and information, such as product manuals, frequently asked questions, videos, and customer support. -
Page 30: Specifications
Specifications Trolling Motor 63 in. white model: 24 kg (53 lb.) 63 in. black model: 24.5 kg (54 lb.) Weight (motor, mount, 75 in. white model: 24.5 kg (54 lb.) and cables) 75 in. black model: 25.4 kg (56 lb.) 90 in. white model: 25 kg (55 lb.) Weight (stabilizer) 0.66 kg (1.45 lb.) Operating temperature From -5° to 40°C (from 32° to 104°F) Storage temperature From -40°... -
Page 31: Motor Thrust And Current-Draw Information
You can refer to these tables to understand the relationship between the throttle level, output power, and current consumption of the motor. These values assume you are using an official Garmin high efficiency propeller, in relatively calm water, with the motor deployed deeply enough not to ventilate, and with tolerances of ±7 N (Newton) (5 lbf (pound-force)) and ±5 A. -
Page 32: Remote Control
Remote Control Dimensions (W×H×D) 152 x 52 x 32 mm (6 x 2 x 1 in.) Weight 109 g (3.8 oz.) without batteries Material Glass-filled nylon Display type Sunlight-visible, transflective memory-in-pixel (MIP) Display resolution R240 x 240 pixels Display size (diameter) 30.2 mm (1 in.) Operating temperature From -15°... - Page 34 September 2023 GUID-B3BCDA2E-E3B8-4864-840E-DA1DB2C5C670 v1...
Need help?
Do you have a question about the FORCE KRAKEN and is the answer not in the manual?
Questions and answers