
Related Manuals for Timeguard NTTHDA


Summary of Contents for Timeguard NTTHDA
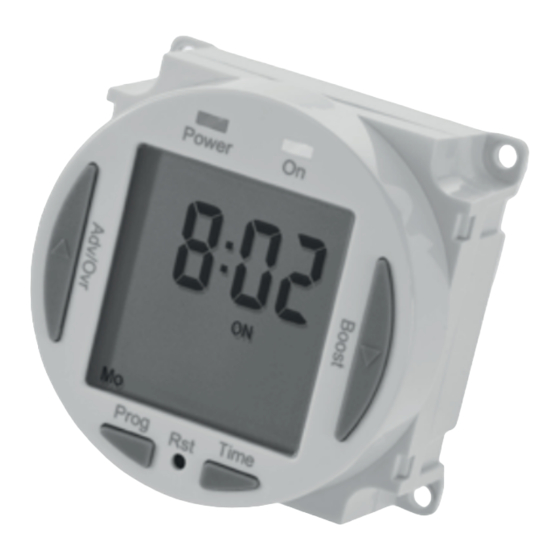
- Page 1 24 Hour / 7 Day Compact Digital Heavy Duty Timeswitches NTTHDA Patress Version NTTHDS Surface Version NTTHDM Module Version...
-
Page 2: General Information
1. General Information These instructions should be read carefully and retained for further reference and maintenance. Timeguard reserve the right to alter these instructions at any Note: time. Up to date instructions will always be available for download at www.timeguard.com 2. - Page 3 • CE / UKCA Approved • Dimensions: NTTHDM: H 60mm x W 60mm x D 47.6mm NTTHDA: H 92mm x W 92mm x D 56.2mm NTTHDS: H 120mm x W 74mm x D 53mm Note not suitable for use with Discharge Lighting.
-
Page 4: Installation
• Ensure the mains supply is switched off and the circuit supply fuses are removed or the circuit breaker turned off. • Follow section 4a for the NTTHDM installation, section 4b for the NTTHDA installation and section 4c for the NTTHDS installation. 4a. Installation (NTTHDM only) •... - Page 5 • Ease the module forward without disconnecting, so you have access to the wall plate and loosen the screws on the terminal block for both supply and load cables. • Fit the wall mounting screws through the wall plate and into the wall box threaded holes, and tighten until the wall plate is firmly fastened.
- Page 6 • Fix the top mounting screw and leave 2.5mm proud off of the wall. • Place the key hole in the top of the product, over the screw head, and slide down. • Mark the position of the lower mounting hole on the wall using the wall plate as a template.
- Page 7 Note: this device needs to be left to charge for a minimum of 15 minutes once powered up, before it will operate. 5b. Connection Diagram (NTTHDA) NTTHDA - 230V Mains Voltage Switching 230V 50Hz Link or ‘bridge wir e’ Load...
- Page 8 NTTHDA - Voltage Free Switching 230V 50Hz Load Mains Supply Note: this device needs to be left to charge for a minimum of 15 minutes once powered up, before it will operate. 230V 50Hz Mains Supply Load S IN Live...
- Page 9 5c. Connection Diagram (NTTHDS) NTTHDS - Mains Voltage Switching Note: this device needs to be left to charge for a minimum of 15 minutes once powered up, before it will operate. Link or ‘bridge wir e’ 230V 50Hz Load Mains Supply 230V 50Hz Mains Supply Live (Brown or Red) to Neutral (Blue or Black) to...
- Page 10 NTTHDS - Voltage Free Switching Note: this device needs to be left to charge for a minimum of 15 minutes once powered up, before it will operate. 230V 50Hz Load Mains Supply 230V 50Hz Mains Supply Live (Brown or Red) to Neutral (Blue or Black) to Earth (Green/Yellow) to Load...
-
Page 11: Setting The Clock
6. Battery • The time switch has a factory fitted rechargeable battery to give clock operation and programme memory back up during loss of mains supply. • Before programming for the first time, connect the unit to the mains for at least 15 minutes prior to pressing the Rst button and programming the unit. - Page 12 • Use the Adv/Ovr to increase (or the Boost buttons to decrease) the value and set to the correct year. • Press the Time button once to save the year, and the screen with show the month; • Use the Adv/Ovr or boost button to set the correct month.
- Page 13 9. Programming ON/OFF times The timer has 8 independent ON/OFF periods for programming each day, including a 24 hours repeat, weekdays + weekend and 7 individual days where each program will change daily. • Press and hold the Prg button for 3 seconds, the word Hold will show on the screen.
- Page 14 .• Use Adv/Ovr or Boost button to set the minutes. • Press the Prg button once to set and move you to the Prog 1 OFF time. • Use Adv/Ovr or Boost button to set the hour. • Press the Prg button once to set and move you to the minutes.
- Page 15 • If the time switch should be ON now, press the Adv button once and set it to ON ADVANCE; The time switch will automatically turn OFF at your desired OFF time, and will resume the next programme as normal. Note that dashes --:-- indicate an empty programme and will not trigger any ON/OFF sequence.
- Page 16 10. Suspending Programmes • Press and hold the Prg button for 3 seconds, the word Hold will show on the screen. • The MENU screen will be displayed; • If SUSP (suspend mode) is not displayed, press the Adv/Ovr button until this mode appears. •...
- Page 17 11. Loop Programmes The loop function allows for continuous ON/OFF switching. based on setting an ON period to then be followed by an OFF period in an indefinite loop until cancelled by the user. • Press and hold the Prg button for 3 seconds, the word Hold will show on the screen.
- Page 18 • The minutes for the loop off time will flash, use the Adv/Ovr or boost button to set the minute value for the loop OFF time. • Press the Prg button to exit loop mode and return to the home screen. The timer will now switch on the load for your set ON/OFF periods once loop mode is active.
-
Page 19: Boost Button
For years 2 to 3 or with any difficulty in the first year, telephone our helpline. Note: a proof of purchase is required in all cases. For all eligible replacements (where agreed by Timeguard), the customer is responsible for all shipping/postage charges outside of the UK. - Page 20 If you experience problems, do not immediately return the unit to the store. Email the Timeguard Customer Helpline: HELPLINE helpline@timeguard.com or call the helpdesk on 020 8450 0515 Qualified Customer Support Coordinators will be online to assist in resolving your query.
Need help?
Do you have a question about the NTTHDA and is the answer not in the manual?
Questions and answers