Advertisement
Quick Links
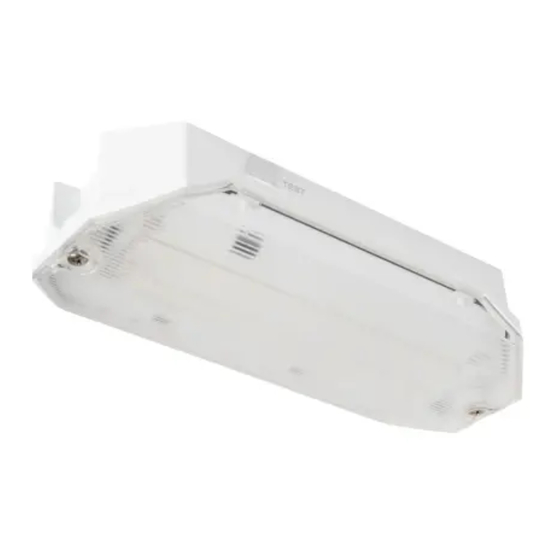
SAPPHIRE 4W EMERGENCY BULKHEAD IP65 WHITE C/W LEGENDS
RSI4L-01
PLEASE READ INSTRUCTION BEFORE COMMENCING INSTALLATION AND RETAIN FOR FUTURE REFERENCES.
! Electrical products can cause death or injury, or damage to property.
The luminaire must be disconnected before carrying out any insulation resistance testing.
Product technical information and specification may change over time without prior notification. For the latest technical
information please visit our web site www.robus.com or robusdirect.com
0°C < Ta < +40°C, 220V – 240V ~ 50/60Hz, Class II, Battery Warranty: 3 Years
Luminaire is non-dimmable.
Installation
1. Ensure mains supply is switched off before commencing
installation.
2. Open front cover by removing screws.
3. Drill three mounting holes and the cables holes on the base
of fitting.
4. Mark appropriated fixing points on the wall, ensure that the
holes do not impinge on joists, pipe work, cables or other
building services.
5. Insert wall plug and then fix the base onto the wall using
screws provided.
6. Feed power cables through knockout, and connect to
supply terminals: Brown to SL, Blue to N and Green/Yellow
to E. For fitting always on, link terminal SL to terminal PL.
For fitting controlled by switch, connect switched live wire to
terminal SL and permanent live to PL.
Note: a: Use IP Gland on the cable knockout in order to
ensure waterproof. b: Cable size: fit with 4*1.5mm. c: Don't
recommend loop in/out. d: Wired through one end which is
closest to the PCB terminal block. e: The fitting works as
non-maintained if SL terminal not connected.
7. Write installation date on the battery and connect battery to
PCB.
8. Refit the front cover.
9. Remove the protected film to reveal adhesive legend, and
label it onto the diffuser.
Please ensure the legend cannot wrinkle on the diffuser.
Market Surveillance:
LS Code of energy efficiency Class D. YGBH03-1BT
Remove front screws and take off diffuser.
Using soldering iron disconnect LED plate.
The light source contained in the luminaire shall only be
replaced by a qualified person.
Information for the Product user:
1. Please note the requirement to dispose of Waste Electrical & Electronic Equipment separately from household waste
(WEEE marked with crossed out wheelie bin symbol).
2. Please consider your role in contributing to re-use and recycling by returning this product at end of life to a collection centre
for waste electrical equipment or a Civic Amenity site, or to a retail outlet from which you are purchasing a replacement.
3. This equipment may contain substances that are hazardous to health and the environment if disposed of carelessly. It is
important that it is separated from normal household waste and recycled in the WEEE chain.
4. The "crossed out wheelie bin symbol" on a product indicates this equipment must not be disposed of in normal household
waste, but should be disposed of according to local WEEE regulations.
Issue 1 160921
INSTRUCTION MANUAL
The Installation must be carried out by a qualified
Note:
Testing
The emergency lighting must be inspected and tested
regularly in accordance with local codes of practice.
Note: for safety reasons tests should be carried out
during daylight hours.
The minimum recommended test schedule is as follows:
After installation, allow 24 hours to ensure full battery
charge and then interrupt the supply; the maximum
duration time is 3 hours. Check that LEDs are still
lighting.
1. Daily check that charge indicator LED is working.
2. Monthly, interrupt mains for a short period and
check LED lights.
3. Annual 12 month check, full duration test.
Interrupt mains supply, LEDs will light and
should last for a minimum 3 hours operation:
batteries must be replaced when they can no
longer support 3 hour operation.
4. Complete record sheet on installation and retain in
maintenance file.
5. Update file with ongoing test records for inspection
by fire officer or other duly authorised person.
Switch on supply:
The green led should come on indicating correct battery
charge status, all LEDs will come on. When supply to
the permanent live PL is lost, battery will operate fitting
in emergency mode. Interrupt supply by pressing the test
switch, the fitting will then operate in emergency mode
for a short period of time.
SAPPHIRE 4 W NOODSCHOT IP65 WIT C/W SYMBOLEN
EN
RSI4L-01
LEES DE INSTRUCTIES VOORDAT U BEGINT MET DE INSTALLATIE EN HOU ZE BIJ VOOR LATER.
! Elektrische producten kunnen de dood of letsel veroorzaken of eigendommen beschadigen.
electrician.
uitgevoerd door een
elektricien.
De lamp moet worden losgekoppeld voordat de isolatieweerstand wordt getest.
Technische gegevens en specificaties van dit product kunnen zonder voorafgaande kennisgeving wijzigen. Ga voor de meest
recente technische gegevens naar onze website www.robus.com of robusdirect.com
0°C < Ta < +40°C, 220V – 240V ~ 50/60Hz, Class II, Batterij Garantie: 3 Jaar
Niet-dimbare armatuur.
Installatie
1. Zorg dat het lichtnet is uitgeschakeld voordat u begint met
de installatie.
2. Open de voorste afdekking door de schroeven te verwijderen.
3. Boor drie montagegaten en de kabelgaten in de basis van
de armatuur.
4. Markeer de gepaste bevestigingspunten op de muur en zorg dat
u geen leidingen, kabels of andere voorzieningen van het
gebouw kunt beschadigen.
5. Steek de stekker in het stopcontact en bevestig de basis
aan de muur met de bijgeleverde schroeven.
6. Voer de voedingskabels door de uitsparing en sluit ze op de
aansluitklemmen aan: Bruin op SL, Blauw op N en Groen/Geel
op E. Om de armatuur permanent aan te hebben verbindt u
aansluitklem SL met aansluitklem PL. Bij een armatuur die met
een schakelaar wordt bediend, verbindt u de geschakelde
stroomdraad met aansluitklem SL en de permanente
stroomdraad met PL. Opmerking: a: Gebruik een IP pakking bij
de kabeluitsparing voor een waterdichte afdichting. b:
Kabelgrootte: met 4*1,5 mm. c: Lus in/uit niet aanbevolen. d:
Voer het kabeluiteinde door dat het dichtst bij de
PCB-aansluitstrook zit. e: De armatuur werkt niet zelfstandig als
aansluitklem SL niet is aangesloten.
7. Schrijf de installatiedatum op de batterij en sluit de batterij
aan op de PCB.
8. Bevestig de voorste afdekking.
9. Verwijder de beschermfolie om het zelfklevende symbool
zichtbaar te maken en plak het op de diffusor. Let erop dat
het symbool niet kan kreuken op de diffusor.
Markttoezicht:
LS-code voor energie-efficiëntieklasse D. YGBH03-1BT
Verwijder de schroeven aan de voorkant en neem de
diffusor weg. Gebruik een soldeerbout om de led-plaat
los te maken. De lichtbron in de armatuur mag alleen
worden vervangen door een gekwalificeerd persoon.
Informatie voor de gebruiker van het product:
1. Hou bij het verwijderen van afval rekening met de regeling voor afgedankte elektrische en elektronische apparatuur, gescheiden van
gewoon huishoudelijk afval (AEEA, pictogram van een kliko met een kruis erdoorheen).
2. Neem uw verantwoordelijkheid op het vlak van hergebruik en recycling door dit product aan het einde van zijn levenscyclus in te
leveren bij een inleverpunt voor elektronisch afval, een milieupark of een winkel waar u een nieuw product koopt.
3. Deze apparatuur kan stoffen bevatten die gevaarlijk zijn voor de gezondheid en het milieu indien ze onachtzaam wordt weggegooid.
Het is belangrijk dat ze gescheiden gehouden wordt van het normaal huishoudelijk afval en gerecycled wordt in het netwerk voor
AEEA.
4. Het pictogram van een kliko met een kruis erdoorheen op een product betekent dat dit apparaat niet samen met het gewone
huishoudelijk afval mag worden weggegooid, maar dat het dient te worden verwijderd in overeenstemming met de lokale regelgeving
voor AEEA (afgedankte elektrische en elektronische apparatuur).
De installatie dient te worden
Opmerkingen:
Testen
De noodverlichting moet regelmatig worden gecontroleerd
en getest in overeenstemming met de plaatselijke
praktijkrichtlijnen. Opmerking: om veiligheidsredenen
moeten testen tijdens daglichturen worden uitgevoerd. Het
minimum aanbevolen testschema ziet er als volgt uit:
Na installatie 24 uur wachten om ervoor te zorgen dat de
batterij volledig is opgeladen en daarna de
stroomvoorziening onderbreken; de maximum duur is 3 uur.
Controleer of de leds nog licht geven.
1. Controleer dagelijks of de ladingindicator van de led
werkt.
2. Schakel maandelijks de stroomvoorziening even uit en
controleer de ledlampen.
3. Verricht jaarlijks een complete inspectie, een test van
volledige duur. Schakel de stroomvoorziening uit. De leds
zullen oplichten en dienen ten minste 3 uur mee te gaan.
De batterijen moeten worden vervangen als ze geen 3
uur meer werken.
4. Vul het registratieblad van de installatie in en bewaar in
het onderhoudsbestand.
5. Werk het bestand bij met de verschillende testresultaten
ter inspectie van de brandweer of een andere naar
behoren bevoegde persoon.
Schakel de stroom in:
De groene led moet nu branden om aan te geven dat de
laadstatus van de batterij correct is, alle leds gaan branden.
Als de stroomvoorziening naar de permanente stroomdraad
PL wordt onderbroken, wordt de armatuur in noodmodus
gevoed door de batterij. Onderbreek de voeding door de
testschakelaar in te drukken, de armatuur werkt dan gedurende
korte tijd in de noodmodus.
NL
Page 1
Advertisement

Subscribe to Our Youtube Channel
Related Manuals for Robus RSI4L-01


Summary of Contents for Robus RSI4L-01
- Page 1 Product technical information and specification may change over time without prior notification. For the latest technical Technische gegevens en specificaties van dit product kunnen zonder voorafgaande kennisgeving wijzigen. Ga voor de meest information please visit our web site www.robus.com or robusdirect.com recente technische gegevens naar onze website www.robus.com of robusdirect.com 0°C <...
- Page 2 Les informations techniques et caractéristiques peuvent changer au fil du temps sans notification préalable. Pour rester informé de ces unsere Webseite www.robus.com oder robusdirect.com für aktuelle technische Informationen. possibles modifications, veuillez consulter le site internet www.robus.com ou robusdirect.com 0°C < Ta < +40°C, 220-240V ~ 50/60Hz, Classe II, Batterie Garantie: 3 Ans 0°C <...
- Page 3 Opomba: Pred preizkusi izolacijske upornosti svetilko obvezno izključite. Pridržujemo si pravico do sprememb proizvoda in tehničnih specifikacij brez predhodnega obvestila. Za najnovejše tehnične informacije obiščite našo spletno stran www.robus.com ali robusdirect.com 0°C < T < +40°C, 220V – 240V ~ 50/60Hz, Razred zaščite II, Garancija na baterijo: 3 leti Svetilka nima možnosti zatemnitve.
- Page 4 L.E.D Lighting & Electrical Distribution Group Ltd Tel: +353 1 7099000 IRE: Nangor Road, Dublin 12, D12 E7VP, Ireland Fax: +353 1 7099060 UK: Bracknell Enterprise & Innovation Hub, Ocean Email: info@robus.com House, 12th Floor, The Ring, Bracknell, Website: www.robus.com Berkshire RG12 1AX, UK Page 4...
Need help?
Do you have a question about the RSI4L-01 and is the answer not in the manual?
Questions and answers