
Related Manuals for Progress PVX1556


Summary of Contents for Progress PVX1556
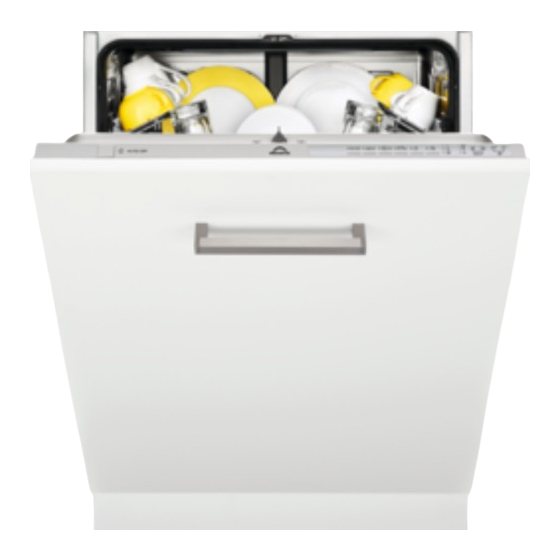
- Page 1 Gebruiksaanwijzing User Manual Notice d'utilisation Afwasautomaat Dishwasher Lave-vaisselle PVX1556...
-
Page 2: Table Of Contents
2 Progress INHOUDSOPGAVE Veiligheidsinformatie Voordat u het apparaat voor de eerste Veiligheidsvoorschriften keer gebruikt Beschrijving van het product Dagelijks gebruik Bedieningspaneel Aanwijzingen en tips programma’s Onderhoud en reiniging Instellingen Probleemoplossing Opties Technische informatie Wijzigingen voorbehouden. VEILIGHEIDSINFORMATIE Lees zorgvuldig de meegeleverde instructies voor installatie en gebruik van het apparaat. -
Page 3: Veiligheidsvoorschriften
Progress 3 door gasten in hotels, motels, bed & breakfast en – andere woonomgevingen. De specificatie van het apparaat mag niet worden • veranderd. De waterdruk (minimaal en maximaal) moet liggen tussen • 0.5 (0.05) / 8 (0.8) bar (MPa) Houd rekening met het maximale aantal 13 plaatsen. - Page 4 4 Progress Aansluiting op het • De watertoevoerslang heeft een elektriciteitsnet veiligheidsventiel en een omhulsel met een hoofdkabel aan de binnenkant. WAARSCHUWING! Gevaar voor brand en elektrische schokken. • Dit apparaat moet worden aangesloten op een geaard stopcontact. • Zorg ervoor dat de parameters op het...
-
Page 5: Beschrijving Van Het Product
Progress 5 • Verwijder de deurgreep om te voorkomen dat kinderen en huisdieren opgesloten raken in het apparaat. BESCHRIJVING VAN HET PRODUCT Top sproeiarm Glansmiddeldoseerbakje Bovenste sproeiarm Afwasmiddeldoseerbakje Onderste sproeiarm Bestekkorf Filters Onderkorf Typeplaatje Bovenkorf Zoutreservoir Luchtopening BEDIENINGSPANEEL Aan/uit-toets Indicatielampjes... -
Page 6: Programma's
6 Progress Indicatielampjes Aanduiding Beschrijving Einde-indicatielampje. XtraDry-indicatielampje. Glansmiddelindicatielampje. Dit indicatielampje is altijd uit als het programma in werking is. Zoutindicatielampje. Dit indicatielampje is altijd uit als het programma in werk‐ ing is. PROGRAMMA’S Programma Mate van vervui‐ Programmafasen Opties ling Type wasgoed •... -
Page 7: Instellingen
Progress 7 Verbruiksgegevens Water Energie- Bereidingstijd Programma (kWh) (min.) 10.5 0.932 12.5 - 14.5 1.4 - 1.7 170 - 190 1) De druk en temperatuur van het water, de variaties in stroomtoevoer, de opties en de hoeveelheid vaat kan de verbruikswaarden veranderen. - Page 8 8 Progress De waterontharder De waterontharder moet worden afgesteld op de hardheid van het water in uw De waterontharder verwijdert mineralen woonplaats. Uw waterleidingbedrijf kan u van de watertoevoer die een nadelige informeren over de hardheid van het water invloed hebben op de wasresultaten en in uw woonplaats.
- Page 9 Progress 9 niveau 10 wordt bereikt, begint het 2. Druk op om de instelling te tellen weer vanaf niveau 1. wijzigen. 3. Druk op aan/uit om de instelling te 3. Druk op aan/uit om de instelling te bevestigen en op te slaan.
- Page 10 10 Progress Na het beëindigen van het programma LET OP! Probeer de deur van klinkt er tevens een geluidssignaal. Dit het apparaat niet binnen 2 geluidssignaal is standaard uitgeschakeld, minuten na automatisch maar kan worden geactiveerd. openen te sluiten. Dit kan het apparaat beschadigen.
-
Page 11: Opties
Progress 11 OPTIES De optie XtraDry is een permanente optie De gewenste opties moeten voor alle programma's anders dan elke keer dat u een programma en hoeven niet iedere cyclus te worden start worden geactiveerd. gekozen. De opties kunnen niet worden in- of uitgeschakeld als een In de andere programma´s is de instelling... - Page 12 12 Progress Het vullen van het glansmiddeldoseerbakje 4. Schud de trechter voorzichtig bij het handvat om de laatste korrels erin te krijgen. 5. Verwijder het zout rond de opening van het zoutreservoir. LET OP! Gebruik alleen glansmiddel voor afwasautomaten. 1. Open het deksel (C).
-
Page 13: Dagelijks Gebruik
Progress 13 DAGELIJKS GEBRUIK Een programma instellen en 1. Draai de waterkraan open. starten 2. Druk op de aan-/uittoets om het apparaat te activeren. Zorg dat het apparaat in de De AUTO OFF-functie programmakeuzemodus staat. • Vul het zoutreservoir als het Deze functie verlaagt het energieverbruik zoutindicatielampje brandt. -
Page 14: Aanwijzingen En Tips
14 Progress De deur openen als het apparaat Het programma annuleren in werking is Houd tegelijkertijd ingedrukt tot Als u de deur opent terwijl een programma het apparaat in de loopt, stopt het apparaat. Dit kan het programmakeuzemodus staat. energieverbruik en de programmaduur Controleer of er vaatwasmiddel in het beïnvloeden. - Page 15 Progress 15 met afzonderlijk glansmiddel en zout • Maak aangebrande voedselresten op voor optimale reinigings- en de voorwerpen zachter. droogresultaten. • Plaats holle voorwerpen (bijv. kopjes, • Draai het apparaat minstens eenmaal glazen en pannen) met de opening per maand met een apparaatreiniger naar beneden.
-
Page 16: Onderhoud En Reiniging
16 Progress ONDERHOUD EN REINIGING WAARSCHUWING! Schakel het apparaat uit en trek de stekker uit het stopcontact voordat u onderhoudshandelingen verricht. Vuile filters en verstopte 2. Verwijder de filter (C) uit de filter (B). sproeiarmen verminderen de 3. Verwijder de platte filter (A). - Page 17 Progress 17 3. Reinig de sproeiarm onder stromend 7. Plaats de filters (B) en (C) terug. water. Gebruik een smal en puntig 8. Plaats de filter (B) terug in de platte gereedschap, bijv. een tandenstoker, filter (A). Rechtsom draaien tot het om de vuildeeltjes uit de gaten te vastzit.
-
Page 18: Probleemoplossing
18 Progress • Gebruik alleen neutrale kalkaanslag achterblijven in het schoonmaakmiddelen. apparaat. Om dit te voorkomen raden • Gebruik geen schuurmiddelen, wij aan om minstens twee keer per schuursponsjes of oplosmiddelen. maand langdurige programma´s te gebruiken. De binnenkant van de machine •... - Page 19 Progress 19 Probleem en alarmcode Mogelijke oorzaak en oplossing Het apparaat wordt niet gevuld met • Controleer of de waterkraan is geopend. water. • Zorg dat de waterdruk niet te laag is. Neem • Het eindlampje knippert 1 keer on‐...
- Page 20 20 Progress neemt u contact op met onze Raadpleeg "Voor het eerste klantenservice. gebruik", "Dagelijks Voor alarmcodes die niet in de tabel gebruik", of "Aanwijzingen vermeld zijn, neemt u contact op met de en tips" voor andere mogelijke service-afdeling. oorzaken.
-
Page 21: Technische Informatie
Progress 21 Probleem Mogelijke oorzaak en oplossing Opvallend veel schuim tijdens • Gebruik alleen wasmiddel voor afwasautomaten. het wassen. • Het glansmiddeldoseerbakje is lek. Neem contact op met de klantenservice. Roestresten op bestek. • Er wordt voor het wassen teveel zout in het water ge‐... - Page 22 22 Progress Voltage (V) 220 - 240 Elektrische aansluiting Frequentie (Hz) Watertoevoerdruk bar (minimaal en maximaal) 0.5 - 8 MPa (minimaal en maximaal) 0.05 - 0.8 Watertoevoer max. 60 °C Koud water of warm water Vermogen Couverts Energieverbruik Modus aan laten (W)
-
Page 23: Safety Information
Progress 23 CONTENTS Safety information Before first use Safety instructions Daily use Product description Hints and tips Control panel Care and cleaning Programmes Troubleshooting Settings Technical information Options Subject to change without notice. SAFETY INFORMATION Before the installation and use of the appliance, carefully read the supplied instructions. -
Page 24: Safety Instructions
24 Progress by clients in hotels, motels, bed & breakfast and other – residential type environments. Do not change the specification of this appliance. • The operating water pressure (minimum and maximum) • must be between 0.5 (0.05) / 8 (0.8) bar (MPa) Obey the maximum number of 13 place settings. - Page 25 Progress 25 • Do not use multi-plug adapters and WARNING! Dangerous extension cables. voltage. • Make sure not to cause damage to the • If the water inlet hose is damaged, mains plug and to the mains cable. immediately close the water tap and...
-
Page 26: Product Description
26 Progress PRODUCT DESCRIPTION Top spray arm Rinse aid dispenser Upper spray arm Detergent dispenser Lower spray arm Cutlery basket Filters Lower basket Rating plate Upper basket Salt container Air vent CONTROL PANEL On/off button Indicators Programme buttons Delay button... -
Page 27: Programmes
Progress 27 Indicators Indicator Description End indicator. XtraDry indicator. Rinse aid indicator. It is always off while the programme operates. Salt indicator. It is always off while the programme operates. PROGRAMMES Programme Degree of soil Programme phases Options Type of load •... -
Page 28: Settings
28 Progress Water Energy Duration Programme (kWh) (min) 12.5 - 14.5 1.4 - 1.7 170 - 190 1) The pressure and the temperature of the water, the variations of the mains supply, the options and the quantity of dishes can change the values. - Page 29 Progress 29 The water softener should be adjusted your area. It is important to set the right according to the hardness of the water in level of the water softener to assure good your area. Your local water authority can washing results.
- Page 30 30 Progress If standard detergent or multi-tablets – The levels of rinse aid range without rinse aid are used, activate the from 0 to 6. notification to keep the rinse aid refill – Level 0 means no rinse aid is indicator active.
-
Page 31: Options
Progress 31 To improve the drying performance refer to the XtraDry option or activate AirDry. CAUTION! If children have access to the appliance, it is advised to deactivate AirDry as opening the door may pose a danger. How to deactivate AirDry Make sure the appliance is in user mode. -
Page 32: Before First Use
32 Progress If the option is not applicable to the flashes quickly for a few seconds and then programme, the related indicator is off or it goes off. BEFORE FIRST USE 1. Make sure that the current level of the water softener agrees with the hardness of the water supply. -
Page 33: Daily Use
Progress 33 How to fill the rinse aid 1. Open the lid (C). dispenser 2. Fill the dispenser (B) until the rinse aid reaches the marking ''MAX''. 3. Remove the spilled rinse aid with an absorbent cloth to prevent too much foam. - Page 34 34 Progress detergent on the inner part of the Opening the door while the appliance door. appliance operates 4. Close the lid. Make sure that the lid locks into position. Opening the door while a programme is running stops the appliance. It may affect...
-
Page 35: Hints And Tips
Progress 35 HINTS AND TIPS General we recommend that you use the tablets with long programmes. The following hints will ensure optimal • Do not use more than the correct cleaning and drying results in daily use quantity of detergent. Refer to the and also help to protect the environment. -
Page 36: Care And Cleaning
36 Progress • Put light items in the upper basket. • The programme is applicable for the Make sure that the items do not move. type of load and for the degree of soil. • Make sure that the spray arms can •... - Page 37 Progress 37 CAUTION! An incorrect position of the filters can cause bad washing results and damage to the appliance. Cleaning the upper spray arm We recommend to clean regularly the upper spray arm to avoid soil to clog the holes.
-
Page 38: Troubleshooting
38 Progress arrow and simultaneously turn it • Do not use abrasive products, abrasive counterclockwise until it locks into cleaning pads or solvents. place. Internal cleaning • Carefully clean the appliance, including the rubber gasket of the door, with a soft damp cloth. - Page 39 Progress 39 Problem and alarm code Possible cause and solution The appliance does not fill with water. • Make sure that the water tap is open. • The end indicator flashes 1 time in‐ • Make sure that the pressure of the water supply termittently.
- Page 40 40 Progress the problem occurs again, contact an Refer to "Before first use", Authorised Service Centre. "Daily use", or "Hints and For alarm codes not described in the tips" for other possible causes. table, contact an Authorised Service Once you have checked the appliance, Centre.
-
Page 41: Technical Information
Progress 41 Problem Possible cause and solution Traces of rust on cutlery. • There is too much salt in the water used for washing. Refer to "The water softener". • Silver and stainless steel cutlery were placed together. Avoid to put silver and stainless steel items close togeth‐... - Page 42 42 Progress Water supply max 60 °C Cold water or hot water Capacity Place settings Power consumption Left-on mode (W) Power consumption Off-mode (W) 0.10 1) Refer to the rating plate for other values. 2) If the hot water comes from alternative source of energy, (e.g. solar panels, aeolian energy), use the hot water supply to decrease energy consumption.
-
Page 43: Informations De Sécurité
Progress 43 TABLE DES MATIÈRES Informations de sécurité Avant la première utilisation Consignes de sécurité Utilisation quotidienne Description de l'appareil Conseils Bandeau de commande Entretien et nettoyage Programmes En cas d'anomalie de fonctionnement Réglages Caractéristiques techniques Options Sous réserve de modifications. -
Page 44: Consignes De Sécurité
44 Progress bâtiments de ferme, cuisines réservées aux employés – dans les magasins, bureaux et autres lieux de travail ; pour une utilisation privée, par les clients, dans des – hôtels et autres lieux de séjour. Ne modifiez pas les caractéristiques de cet appareil. - Page 45 Progress 45 Utilisez toujours des gants de sécurité • Pendant et après la première utilisation et des chaussures fermées. de l'appareil, vérifiez qu'aucune fuite • Vérifiez que l'appareil est installé sous n'est visible. et à proximité de structures sûres. • Le tuyau d'arrivée d'eau comporte une vanne de sécurité...
-
Page 46: Description De L'appareil
46 Progress Mise au rebut • Coupez le câble d'alimentation et mettez-le au rebut. AVERTISSEMENT! Risque de • Retirez le dispositif de verrouillage de blessure ou d'asphyxie. la porte pour empêcher les enfants et les animaux de s'enfermer dans • Débranchez l'appareil de l'alimentation l'appareil. -
Page 47: Programmes
Progress 47 Touche Delay Voyants Voyants Indicateur Description Voyant de fin. Voyant XtraDry. Voyant du réservoir de liquide de rinçage. Ce voyant est toujours éteint pen‐ dant le déroulement du programme. Voyant du réservoir de sel régénérant. Ce voyant est toujours éteint pendant le déroulement du programme. -
Page 48: Réglages
48 Progress Valeurs de consommation Consommation Durée Programme électrique (min) (kWh) 10,5 0.932 12.5 - 14.5 1.4 - 1.7 170 - 190 1) Les valeurs de consommation peuvent changer en fonction de la pression et de la température de l'eau, des variations de l'alimentation électrique, de la quantité... - Page 49 Progress 49 Pour entrer en mode utilisateur, Plus la teneur en minéraux est élevée, plus l'eau est dure. La dureté de l'eau est maintenez simultanément les touches mesurée en échelles d'équivalence. enfoncées jusqu'à ce que les L'adoucisseur doit être réglé en fonction voyants du degré...
- Page 50 50 Progress ex. : 5 clignotements + pause + • Le voyant indique le réglage 5 clignotements = niveau 5). actuel. 2. Appuyez sur la touche plusieurs – Si le voyant est allumé = la fois pour modifier le réglage. Le niveau notification du distributeur de augmente d'un palier à...
- Page 51 Progress 51 2. Appuyez sur la touche plusieurs fois pour modifier le réglage. Le niveau augmente à chaque fois que vous appuyez sur la touche . Lorsque vous atteignez le niveau 6 et appuyez à nouveau sur la touche, le réglage revient au niveau 1.
-
Page 52: Options
52 Progress • Les voyants – Si le voyant est éteint = sont éteints. AirDry est désactivé. • Le voyant clignote toujours. 2. Appuyez sur pour modifier le réglage. • L'indicateur indique le réglage 3. Appuyez sur la touche Marche/Arrêt actuel. - Page 53 Progress 53 se trouver à l'intérieur de l'appareil. 5. Enlevez le sel qui se trouve autour de N'utilisez pas de produit de lavage et l'ouverture du réservoir de sel ne chargez pas les paniers. régénérant. Lorsque vous démarrez un programme, l'appareil peut prendre 5 minutes pour recharger la résine dans l'adoucisseur...
-
Page 54: Utilisation Quotidienne
54 Progress 2. Remplissez le distributeur (B) jusqu'à Si vous utilisez des pastilles de ce que le liquide de rinçage atteigne le détergent multifonctions et que repère « MAX ». les performances du séchage 3. Si le liquide de rinçage déborde, sont satisfaisantes, l'indication épongez-le avec un chiffon absorbant... -
Page 55: Conseils
Progress 55 Départ d'un programme Durant la phase de séchage, si la porte est ouverte pendant 1. Laissez la porte de l'appareil plus de 30 secondes, le entrouverte. programme en cours s'arrête. 2. Appuyez sur la touche Marche/Arrêt Ceci ne se produit pas si la pour allumer l'appareil. - Page 56 56 Progress • Ne rincez pas vos plats à la main au déposent sur la vaisselle, nous préalable. En cas de besoin, utilisez le recommandons d'utiliser des pastilles programme de prélavage (si de détergent avec des programmes disponible) ou sélectionnez un longs.
-
Page 57: Entretien Et Nettoyage
Progress 57 • Vérifiez que les verres ne se touchent • Vous avez utilisé du sel régénérant et pas pour éviter qu'ils ne se brisent. du liquide de rinçage (sauf si vous • Placez les petits articles dans le panier utilisez des pastilles tout en 1). - Page 58 58 Progress 2. Retirez le filtre (C) du filtre (B). 3. Retirez le filtre plat (A). 7. Remontez les filtres (B) et (C). 8. Remettez le filtre (B) dans le filtre plat (A). Tournez-le dans le sens horaire jusqu'à la butée.
- Page 59 Progress 59 Nettoyage extérieur direction indiquée par la flèche du bas, tout en le tournant vers la droite. • Nettoyez l'appareil avec un chiffon doux humide. • Utilisez uniquement des produits de lavage neutres. • N'utilisez pas de produits abrasifs, de tampons à...
-
Page 60: En Cas D'anomalie De Fonctionnement
60 Progress EN CAS D'ANOMALIE DE FONCTIONNEMENT Si l'appareil ne démarre pas ou s'il s'arrête Pour certains problèmes, le voyant de fin en cours de fonctionnement, vérifiez si clignote pour indiquer un vous pouvez résoudre le problème par dysfonctionnement. vous-même en vous aidant des La plupart des problèmes peuvent être... - Page 61 Progress 61 Problème et code d'alarme Cause et solution possibles Le système de sécurité anti-déborde‐ • Fermez le robinet d'eau et contactez le service ment s'est déclenché. après-vente agréé. • Le voyant Fin clignote 3 fois de fa‐ çon intermittente.
- Page 62 62 Progress Les résultats de lavage et de séchage ne sont pas satisfaisants Problème Cause et solution possibles Résultats de lavage insatisfai‐ • Reportez-vous aux chapitres « Utilisation quotidien‐ sants. ne », « Conseils » et au manuel de chargement du pa‐...
- Page 63 Progress 63 Problème Cause et solution possibles Mousse inhabituelle en cours • Utilisez uniquement des produits de lavage pour lave- de lavage. vaisselle. • Il y a une fuite dans le distributeur de liquide de rinçage. Faites appel à un service après-vente agréé.
-
Page 64: Caractéristiques Techniques
64 Progress Reportez-vous aux chapitres « Avant la première utilisation », « Utilisation quotidienne » ou « Conseils » pour connaître les autres causes probables. CARACTÉRISTIQUES TECHNIQUES Dimensions Largeur / hauteur / profondeur 596 / 818 - 898 / 550... - Page 65 Progress 65...
- Page 66 66 Progress...
- Page 67 Progress 67...
- Page 68 117878080-A-332017...
Need help?
Do you have a question about the PVX1556 and is the answer not in the manual?
Questions and answers