
Related Manuals for Miele MasterCool KWT 2602 SF


Summary of Contents for Miele MasterCool KWT 2602 SF
- Page 1 Operating and Installation Instructions Wine Conditioning Unit To prevent accidents and machine damage, read these instructions before installation or use. en-US, CA M.-Nr. 11 508 720...
-
Page 2: Table Of Contents
Guide to the appliance ..................44 Start screen ......................45 Settings mode ....................46 Accessories ....................... 48 Accessories supplied ..................48 Optional accessories................... 48 Before first use ....................49 Choosing the right Door Assistant (Push2Open/Pull2Open) ......49 Miele@home ....................49... - Page 3 Performing a Self Test ..................56 Switching on the Door Assistant ..............56 Switching off the Door Assistant ..............58 Miele@home ......................59 Switching off Demo Mode ................60 Resetting the settings to their default settings ..........61 Switching Sabbath Mode on or off ..............63 Switching Ambient Lighting ...
- Page 4 Contents Causes of noises ....................84 Customer Service....................85 Contact in the event of a fault ................85 Appliance warranty and product registration ............85 Declaration of conformity ................. 86 Copyrights and licenses ................... 87...
-
Page 5: Important Safety Instructions
Miele cannot be held liable for injury or damage caused by non- compliance with these instructions. Keep these instructions in a safe place and pass them on to any future owner. - Page 6 The wine conditioning unit is not suitable for use in areas where there is a risk of explosion. Miele cannot be held liable for damage resulting from improper or in- correct use of the appliance. ...
- Page 7 IMPORTANT SAFETY INSTRUCTIONS Safety with children Children near the wine conditioning unit must be supervised. Do not let children play with the wine conditioning unit. The wine conditioning unit door hinges can cause injury. Keep children away at all times. ...
- Page 8 - Disconnect the wine conditioning unit from the electricity supply. - Ventilate the room where the wine conditioning unit is located for several minutes. - Contact Miele Service. The more coolant there is in a wine conditioning unit, the larger the room it should be installed in.
- Page 9 If the power cord supplied is damaged, it must only be replaced by an original part to prevent a hazard for the user. Miele can only guarantee the safety of the appliance when original Miele parts are used.
- Page 10 Repairs and other work performed by unauthorized persons could be dangerous and may void the warranty. Faulty components must only be replaced by genuine Miele re- placement parts. Miele can only guarantee the safety standards of the appliance when Miele replacement parts are used.
- Page 11 Risk of explosion. Do not operate any electrical appliances inside the wine conditioning unit. Risk of sparking and explosion. Use only genuine original Miele parts. If parts or accessories from other manufacturers are used, the warranty may become invalid.
- Page 12 IMPORTANT SAFETY INSTRUCTIONS Stainless steel machines: Adhesives will damage the coated stainless steel surface and cause it to lose its dirt-repellent protective coating. Do not use sticky notes, transparent adhesive tape, masking tape, or other types of adhesive on the stainless steel surface. ...
- Page 13 IMPORTANT SAFETY INSTRUCTIONS Cleaning and maintenance Do not use any oil or grease on the door seals. They can cause the seals to deteriorate over time. Do not use a steam cleaning appliance to clean this wine condi- tioning unit.
- Page 14 IMPORTANT SAFETY INSTRUCTIONS Disposal of your old appliance Children could become trapped in the machine and could suffo- cate. - Remove the machine doors. - Leave the wooden shelves in the machine so children cannot climb inside. DANGER of electric shock! - Cut the plug off the power cord.
-
Page 15: Caring For The Environment
Consult with local authorities, dealers or Miele in order to dispose of and recycle electrical and electronic appliances. Miele assumes no responsibility for deleting any personal data left on the appliance being disposed. -
Page 16: Installation
*INSTALLATION* Installation If installation near a heat source is un- Installation location avoidable, observe the following mini- This appliance should be installed in a mum distances between the appliance dry, well-ventilated room. and the heat source: When deciding where to install your - At least 1 1/4"... -
Page 17: Climate Class
*INSTALLATION* Installation Climate class Impaired functionality due to This wine storage unit is designed for high humidity and high temperature. use in climate class SN-T (room tem- High humidity (over approx. 70%) perature range). Do not use in a climate combined with a high room tempera- class for which it is not designed. -
Page 18: Installation Notes
*INSTALLATION* Installation Load-bearing capacity of the niche Installation notes floor Risk of damage and injury from To ensure the safe installation of the the wine conditioning unit tipping wine conditioning unit and to guarantee over. its correct functioning, the floor of the The wine conditioning unit is very niche where the appliance is to be in- heavy and can tip forwards when the... -
Page 19: Ventilation
(top cover) for side-by-side installa- tioning unit. tion. Both are available from your It is essential to observe the required Miele dealer or the Miele Service. ventilation gaps. The ventilation gaps Instructions for installing wine storage must never be obstructed. - Page 20 *INSTALLATION* Installation If the partition wall a is narrower than 6 5/16" (160 mm), you will need the side panel heater from the side-by-side installation kit to prevent condensation from forming and any resulting damage. When planning installation niches, please note that the niche into which the appliance with the side panel heater is installed must be 3/16"...
-
Page 21: Installation Dimensions
*INSTALLATION* Installation Installation dimensions Position of the electrical connection - The electrical connection must not be positioned higher than 9" (228 mm) above the floor. The electrical socket must not be concealed behind the appliance and must be easily accessible in an emergency. - Page 22 *INSTALLATION* Installation KWT 26x2 SF(S) 84"–85 3/16" 24" (610 mm) 24" (610 mm) 3/4" (19 mm) (2,134– 2,164 mm)
- Page 23 *INSTALLATION* Installation 1 3/16" (30 mm) 7/8" 10 5/16" (22 mm) (262 mm) 3 3/8" 4" 4" (85 mm) (102 mm) (102 mm) Side view...
-
Page 24: Dimensions When The Appliance Door Is Open (Opening Angle 90°/115°)
*INSTALLATION* Installation Dimensions when the appliance door is open (opening angle 90°/115°) 3/8" (10 mm) 26 5/8" (677 mm) Cabinet front Door handle 11 5/8" (296 mm) -
Page 25: Installing The Wine Conditioning Unit
*INSTALLATION* Installation - in Canada: the Canadian Electrical Installing the wine conditioning Code C22.1 – latest edition/Provincial unit and Municipal codes and/or local codes. Before starting... It is essential to read these installa- tion instructions carefully before starting to install the wine condition- ing unit. -
Page 26: Tools Required
*INSTALLATION* Installation Tools required Aligning the installation niche - Cordless drill - TX 20 screwdriver - Hammer drill - Drill bits in various sizes, depending on materials - Hammer - Open-ended wrench - Ratchet wrench, attachment: socket, 5/16" (8 mm) - Adhesive tape - Utility knife - Pipe wrench The installation niche must be carefully... -
Page 27: Checking The Installation Niche
*INSTALLATION* Installation Checking the installation niche Before installation Check the installation dimensions Before installation, remove any ac- (see “Installation – Installation dimen- cessories from the back of the appli- sions”). ance. Check the position of the electrical ... -
Page 28: Preparing The Installation Niche
*INSTALLATION* Installation Preparing the installation niche Risk of damage and injury from the wine storage unit tipping over. This wine storage unit is very heavy and can tip forward when the doors are open. The installation niche must be se- cured to the wall behind it and/or above it with several screws. - Page 29 *INSTALLATION* Installation The anti-tip brackets prevent the wine Danger of injury and damage to storage unit from tipping. the appliance due to the wine stor- age unit tipping over. The anti-tip brackets are also used to fix the installation niche securely to the If the anti-tip brackets are fixed too surrounding walls.
- Page 30 *INSTALLATION* Installation Retaining screws for different uses and types of material are supplied in the accompanying pack: Securing with a wooden wedge Secure the installation niche to the wall behind it and/or above it as re- quired using the anti-tip brackets . Securing to a concrete wall Securing to a wooden wall...
-
Page 31: Pushing The Wine Conditioning Unit Into The Niche
*INSTALLATION* Installation Pushing the wine conditioning unit into the niche Then push the wine conditioning unit into the niche, taking care not to damage the electrical cord. If you are installing two wine storage units or a wine storage unit and an- other refrigeration appliance side by side, now secure the appliances to one another (see the instructions for... -
Page 32: Aligning The Wine Storage Unit
*INSTALLATION* Installation Tip: Secure the power cord to prevent it Aligning the wine storage unit becoming caught: tie a piece of string Align the wine storage unit with adja- to the middle of the cord and as the cent cabinet fronts as described be- wine storage unit is being pushed into low. - Page 33 *INSTALLATION* Installation Adjust the front feet with a ratchet (at- tachment: 5/16" (8 mm) socket) or a TX 20 screwdriver . Position the supplied spacers on both sides on the markings next to the adjustable feet at the front of the wine storage unit.
- Page 34 *INSTALLATION* Installation Risk of damage if the feet are adjusted too much. The rear adjustable feet can be dam- aged. Unscrew the feet only until the marking on the toe-kick is aligned to a maximum of 2 7/16" (62 mm) (max. niche height of 85 3/16"...
-
Page 35: Securing The Wine Conditioning Unit In The Niche
*INSTALLATION* Installation Securing the wine conditioning unit Securing the toe-kick board and in the niche cover Remove the film from the adhesive strips on the toe-kick cover provided . Use the screws supplied to secure the wine storage unit on both sides. In a side-by-side combination, only the external panels of the two appli- ances can be secured to the cabinet... -
Page 36: Aligning The Appliance Door
*INSTALLATION* Installation Aligning the appliance door Following installation, align the appli- ance door with adjacent cabinet fronts. To do this, check the gaps to the adja- cent cabinet fronts. Remove the covers from both sides of the appliance door. ... - Page 37 *INSTALLATION* Installation Remove the cover from the light contact switch. Align the height and sides of the ap- pliance door using the threaded bolts . Remove the nuts and washers from the threaded bolts . If necessary, also align the depth of the appliance door via the gaps in the angle trims.
- Page 38 *INSTALLATION* Installation Close the appliance door and check the distance between the door and adjacent cabinet fronts again. Then re-tighten all screws and . Place the washers and nuts back on the threaded bolts and tighten the nuts. The appliance door is now secured.
-
Page 39: Limiting The Opening Angle Of The Appliance Door
*INSTALLATION* Installation Limiting the opening angle of the ap- pliance door The door hinges are set ex works to en- able the appliance door to be opened wide. If, for example, the appliance door hits an adjacent wall when it is opened, you should limit the opening angle of the appliance door to 90°: ... -
Page 40: Electrical Connection
*INSTALLATION* Installation Wait for 1 hour after installation before Electrical connection plugging the wine conditioning unit into Risk of electric shock! the power supply. This allows coolant and refrigerator oil to settle in accor- The wine conditioning unit must only dance with regulations. - Page 41 *INSTALLATION* Installation Connecting the wine storage unit If the outlet is no longer accessible after installation, an additional means of dis- connection must be provided for all poles. Suitable means of disconnection include switches with an all-pole con- tact gap of at least 1/8" (3 mm). These can be circuit breakers, fuses, and re- lays.
-
Page 42: Saving Energy
Saving energy Normal Increased energy consumption energy consumption Installation / In a well-ventilated room. In an enclosed, poorly venti- Maintenance lated room. Protected from direct sun- In direct sunlight. light. Away from heat sources (ra- Near a heat source (radiator, diator, range/oven). - Page 43 Saving energy Normal Increased energy consumption energy consumption Wooden shelves arranged as they were when the appli- ance was delivered. Only open the door when Frequent opening of the necessary and for as short a door for long periods will time as possible.
-
Page 44: Guide To The Appliance
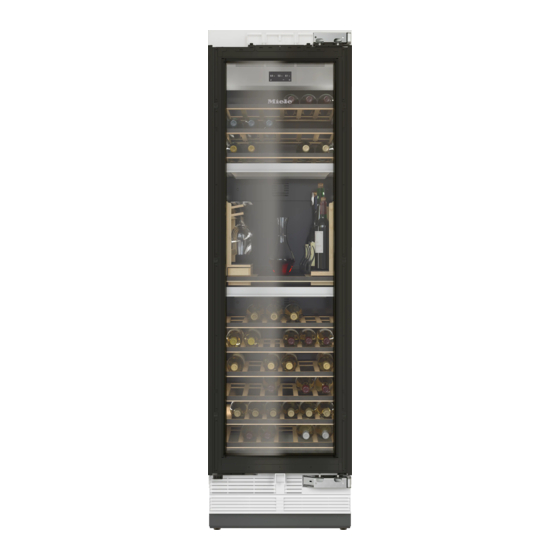
Guide to the appliance a Display b On/Off switch c Wooden shelves with labels d Interior lighting e Isolator plate for thermal separation of the wine conditioning zones f Glass door with UV filter g Automatic door opening (Push2open/Pull2open) -
Page 45: Start Screen
For switching the interior lighting on and off when the appliance door is closed (ambient lighting) d Display for Miele@home connection status (only visible when the Miele@home function has been set up) e Settings mode sensor control for adjusting various settings in Settings mode... -
Page 46: Settings Mode
Door Assistant Switch on ( Push2Open Pull2Open ) or switch off (see “Selecting additional settings”) Miele@home Set up, deactivate, or query WiFi connection sta- tus (see “Selecting additional settings”) * Demo Mode Switch off * (only visible when Demo Mode , is switched on see “Selecting additional settings”) - Page 47 Guide to the appliance Factory Default Reset to default settings (see “Selecting additional settings”) Ambient Lighting Choose between 5 different settings for ambient lighting (see “Selecting additional settings”) Ambient Display Set the appearance of the display when the door is closed (see “Selecting additional settings”) ...
-
Page 48: Accessories
Accessories Accessories supplied Optional accessories A range of useful Miele accessories and Appliance plug care products are available for your wine conditioning unit. Chalk Use the chalk supplied to write on the Side-by-side installation kit and Top magnetic strips on the wooden shelves... -
Page 49: Before First Use
Please refer to the relevant instruc- - the Miele app tions in “Cleaning and care”. - a Miele user account You can create a user account via the Miele app. Clean the inside of the wine condi- tioning unit and the accessories. - Page 50 There- fore, the availability of featured func- tions cannot be guaranteed. Miele@home availability The ability to use the Miele app de- pends on the availability of the Miele@home service in your country. The Miele@home service is not avail- able in every country.
-
Page 51: Operating The Wine Conditioning Unit
Before first use Settings mode Operating the wine condition- ing unit In Settings mode , you can select different wine conditioning unit func- The touch display can be scratched tions and alter their settings to some by pointed or sharp objects, e.g., extent (see “Selecting additional set- pens. -
Page 52: Starting Up For The First Time
- Set the Temperature Unit °C (degrees Celsius) or °F (degrees Fahrenheit) Set up Miele@home Select if you would like to set Continue Miele@home now. You will then be guided by the display and the Miele app. -
Page 53: Switching The Wine Conditioning Unit On And Off
On/Off switch. Miele will appear, followed by the main screen on the wine storage unit display: ... -
Page 54: Switching Off For Longer Periods Of Time
Switching the wine conditioning unit on and off Switching off for longer peri- ods of time If the wine storage unit is not going to be used for a longer period of time: Switch the wine storage unit off. ... -
Page 55: Selecting Additional Settings
Selecting additional settings In Settings mode , you can select dif- The display is unlocked briefly so you ferent wine conditioning unit functions can adjust the settings as required. and alter their settings to some extent, Closing the door of the wine condition- allowing you to adjust the appliance to ing unit will reactivate the keypad lock. -
Page 56: Performing A Self Test
Refrain from holding onto or closing displayed. the appliance door while automatic door opening is still extended. If you Contact Miele Service and inform have indeed closed the appliance them of the error message(s) on the door, leave it closed for 5 minutes. - Page 57 Selecting additional settings Switching on Push2Open – Adjusting the duration of the Auto- Close function In Settings mode , use the and sensor controls to select You can also adjust the duration for Door As- sistant and select OK to confirm your how long the appliance door will remain selection.
-
Page 58: Switching Off The Door Assistant
Selecting additional settings – Adjusting the intensity Switching off the Door Assis- tant You can also adjust the intensity of the function. The lower the set in- Pull2Open In Settings mode , use the and tensity, the less force required when sensor controls to select Door As- you pull the appliance door. -
Page 59: Miele@Home
Selecting additional settings Activating Miele@home Miele@home If you have already activated Setting up Miele@home Miele@home and then disconnected The message only Set up Miele@home the connection, you will need to reac- appears if your wine storage unit has tivate the connection. -
Page 60: Switching Off Demo Mode
Switching off Demo Mode If you have changed your WiFi network, Demo mode allows the wine condi- you can set up Miele@home again for tioning unit to be presented in the your wine conditioning unit. showroom without the cooling sys- tem being switched on. -
Page 61: Resetting The Settings To Their Default Settings
Selecting additional settings Resetting the settings to their default settings You can reset the wine conditioning unit‘s settings to their default settings. Reset the wine conditioning unit’s settings to the default settings when disposing of your wine conditioning unit, selling it, or putting a used wine conditioning unit into operation. - Page 62 (4 of 7 segments) °Fahrenheit °F ° C Temperature Unit / Keypad Lock Switched off Door Assistant Push2open Miele@home Switched off Ambient Lighting Ambient 2 Ambient Display Temperature display Sabbath Mode Switched off Humidity Not increased ...
-
Page 63: Switching Sabbath Mode On Or Off
Selecting additional settings Switching Sabbath Mode on You can still select: or off - the sensor control for Settings mode so that Sabbath Mode can be The wine conditioning unit offers a Sab- switched off bath Mode for the purposes of religious observance. -
Page 64: Switching Ambient Lighting On Or Off
Selecting additional settings Selecting the intensity of the Ambient Switching Ambient Lighting Lighting on or off You can set the intensity of the Ambient Ambient Lighting can be switched on Lighting in Settings mode . so your wines are on display even when the appliance door is closed. -
Page 65: Selecting The Ambient Display
Use the and sensor controls to select the required display settings: - Temperature Miele logo - Off (display switched off completely). Confirm your selection with OK. The display settings you have selected are now active when the appliance door is closed. -
Page 66: The Ideal Temperature And Humidity
The ideal temperature and humidity Wine continues to mature depending on Type of wine Recommended the surrounding conditions. The length drinking temper- of time for which wine can be kept in ature good condition will therefore depend Light, fruity red 57°... -
Page 67: Isolator Panels For Thermal Separation
The ideal temperature and humidity Isolator panels for thermal separation Setting the temperature Touch the sensor control to set the The wine conditioning unit has two fixed isolator panels that divide the inte- temperature. rior into three zones, which can be con- The previously set temperatures for the ditioned in different ways. -
Page 68: Humidity
The ideal temperature and humidity The temperature display always shows Risk of damage caused by ex- the required temperature. cess moisture This will lead to condensation on the If you have adjusted the temperature, interior walls, which can cause corro- wait for approx. - Page 69 The ideal temperature and humidity Not increasing the humidity Touch the sensor control to set the temperature. Use the and sensor controls to select the wine conditioning zone for which you do not want to increase the humidity and select OK to confirm your selection.
-
Page 70: Door Alarm
Door alarm Door alarm An alarm will sound if the appliance door has been left open for longer than approx. 2 minutes. Close the door message also ap- pears on the display. As soon as the door is closed, the alarm will stop and the message on the display will disappear. -
Page 71: Storing Wine Bottles
Storing wine bottles Always observe USDA food safety Risk of injury from falling wine guidelines. bottles. Wine bottles may become wedged in the wooden shelves above and fall WARNING! Fire hazard! out of the wine conditioning unit Do not operate any electrical equip- when the shelves are pulled out. -
Page 72: Wooden Shelves
Storing wine bottles Adjusting the wooden shelves Wooden shelves The slats in the wooden shelves can be individually adjusted to suit, so that ev- ery bottle is stored in perfect safety re- gardless of shape or size. The wooden shelves are mounted on telescopic runners which can be pulled out to make it easier to store and re- ... -
Page 73: Labeling The Wooden Shelves
Storing wine bottles Labeling the wooden shelves Maximum capacity For quick and easy identification of the Risk of damage due to heavy wines stored, you can write on the loads. blackboard-painted surface of the strips Excessive loads can damage the on the wooden shelves. -
Page 74: Automatic Defrosting
Automatic defrosting WARNING! DANGER of injury and damage! Do not use any mechanical or other types of aids which are not recom- mended by the manufacturer to ac- celerate the defrosting process. The wine conditioning unit defrosts au- tomatically. -
Page 75: Cleaning And Care
Cleaning and care Cleaning agents WARNING! DANGER of electric shock! To avoid damaging the surfaces of your Unplug the appliance or trip the cir- appliance, do not use: cuit breaker. - cleaning agents containing soda, am- monia, acids, or chloride ... -
Page 76: Before Cleaning The Wine Conditioning Unit
Cleaning and care Before cleaning the wine con- Interior, accessories, and ap- ditioning unit pliance door Switch the wine conditioning unit off Clean the wine conditioning unit reg- by pressing the On/Off switch. ularly, or at least once a month. Clean up any spills, stains, or food ... -
Page 77: Cleaning The Door Seal
The door seals should be cleaned regularly with clean water, and then Do not use Miele stainless steel wiped dry with a soft cloth. conditioning agent on these sur- faces, as it will cause noticeable Cleaning the ventilation gaps smearing. -
Page 78: Frequently Asked Questions
“Performing a ”). Self Test Test . Your appliance will Contact Miele Service and inform them of the error be checked for any message(s) on the display. faults or malfunctions. The wine conditioning The wine conditioning unit is not switched on. - Page 79 Frequently Asked Questions Problem Possible cause and solution Only open the appliance door when necessary and for as short a time as possible. After a while, the temperature will return to normal by itself. The appliance door is not properly closed. ...
- Page 80 Frequently Asked Questions Problem Possible cause and solution No alarm sounds de- You have switched off the audible signal. spite the appliance door Switch the audible signal back on using Settings being open. mode . Sabbath Mode function is switched on: the tem- perature display is dark and the symbol is shown on the display.
- Page 81 The voltage level is too high/low. Observe the connection data under “Electrical connections”. Contact Miele Service if necessary. To turn the alarm off, touch the symbol. The error message does not disappear from the dis- play until the error has been rectified.
- Page 82 Do not remove the lighting cover. The LED lighting may only be repaired or replaced by Miele Service. Risk of injury from LED lighting. This lighting corresponds to risk group RG 2. If the cover is defective, there is a risk of eye injury.
- Page 83 Frequently Asked Questions General problems with the wine conditioning unit Problem Possible cause and solution Bacteria has begun to Bacteria may form on the labels, depending on the form on the wine bottle type of label adhesive used. labels. Clean the wine bottles and remove any adhesive residue.
-
Page 84: Causes Of Noises
Causes of noises Normal Cause noises Brrrrr ... A humming noise is made by the motor (compressor). This noise can get louder for brief periods when the motor switches on. Blub, blub ... A gurgling noise can be heard when the refrigerant circulates through the pipes. -
Page 85: Customer Service
In the event of a fault which you cannot remedy yourself, please contact your Miele dealer or Miele Customer Service. You can book a Miele Service Call on- line at www.miele.com/service. Contact information for Miele Cus- tomer Service can be found at the end of this document. -
Page 86: Declaration Of Conformity
Declaration of conformity Frequency range 2.412 GHz – 2.462 GHz Maximum trans- < 100 mW mitting power... -
Page 87: Copyrights And Licenses
Copyrights and licenses Miele uses their own and third party software which is not subject to any so-called open source license for the operation and control of the device/appliance. This software/these software components are protected by copyright. The copyright powers of Miele and third parties have to be respected. - Page 91 Customer Service. U.S.A. Canada Miele, Inc. Importer Miele Limited National Headquarters 9 Independence Way Headquarters and Miele Centre Princeton, NJ 08540 161 Four Valley Drive Vaughan, ON L4K 4V8 Customer Service & Support www.miele.ca Phone: 888-99-MIELE(64353) Customer Care Centre info@mieleusa.com...
- Page 92 KWT 2602 SF, KWT 2612 SF en-US, CA M.-Nr. 11 508 720 / 02...
Need help?
Do you have a question about the MasterCool KWT 2602 SF and is the answer not in the manual?
Questions and answers