VEVOR YT60234 Manual
Meteorologicalstation
Hide thumbs
Also See for YT60234:
- Quick start manual (2 pages) ,
- Operation instruction (3 pages) ,
- Manual (734 pages)
Table of Contents
Advertisement
Technical Support and E-Warranty Certificate www.vevor.com/support
METEOROLOGICAL STATION
MODEL:YT60234
We continue to be committed to provide you tools with competitive price.
"Save Half", "Half Price" or any other similar expressions used by us only represents an
estimate of savings you might benefit from buying certain tools with us compared to the major
top brands and doses not necessarily mean to cover all categories of tools offered by us. You
are kindly reminded to verify carefully when you are placing an order with us if you are
actually saving half in comparison with the top major brands.
Advertisement
Table of Contents

Related Manuals for VEVOR YT60234


Summary of Contents for VEVOR YT60234
- Page 1 Technical Support and E-Warranty Certificate www.vevor.com/support METEOROLOGICAL STATION MODEL:YT60234 We continue to be committed to provide you tools with competitive price. "Save Half", "Half Price" or any other similar expressions used by us only represents an estimate of savings you might benefit from buying certain tools with us compared to the major top brands and doses not necessarily mean to cover all categories of tools offered by us.
- Page 3 CustomerService@vevor.com This is the original instruction, please read all manual instructions carefully before operating. VEVOR reserves a clear interpretation of our user manual. The appearance of the product shall be subject to the product you received. Please forgive us that we won't inform you again if there are any technology or software updates on our product.
-
Page 4: Safety Precautions
SAFETY PRECAUTIONS WARNING! Please read and understand all safety precautions, operating instructions, and care/maintenance instructions before operating this appliance. Keep this manual for future reference. This product is not a toy. Keep out of the reach of children. This product is designed for use in the home only as an indication of ... - Page 5 Leaving a battery exposed to extremely high temperatures in the surrounding environment can result in an explosion or leakage of flammable liquid or gas. Leaving a battery exposed to extremely low air pressure in the surrounding environment can result in an explosion or leakage of flammable liquid or gas.
-
Page 6: Product Features
PRODUCT FEATURES Colorful and big digit display with super bright backlight. 9 functional buttons: SET, TEMP/ALARM, RAIN, WIND/+, BARO/-/ , ALERT, MAX/MIN, CHANNEL, LIGHT/ SNOOZE Time automatically sychronizes to the internet. Alarm with snooze function. Daylight Saving Time (DST) function. ... -
Page 7: Package Contents
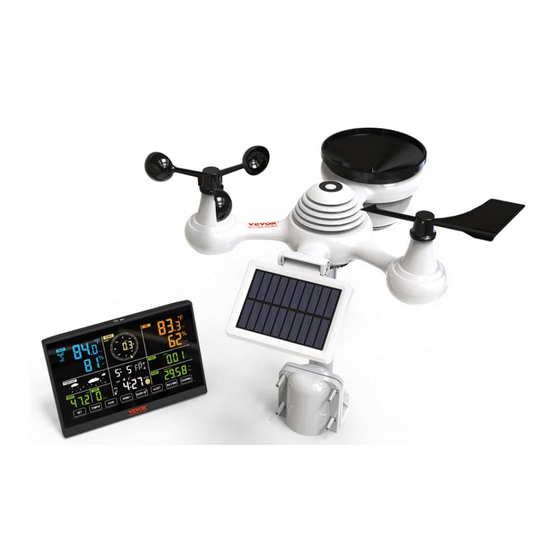
PACKAGE CONTENTS 1 Weather Station 2 Adapter 3 Wireless 7-In-1 Outdoor Sensor 4 Funnel 5 Wind Direction Vane with 1 Screw 6 Wind Speed Cups with 1 Screw 7 Mounting Pole with 4 Screws 8 Mounting Brackets with 6 Screws - 5 -... -
Page 8: Product Overview
9 Rubber Pads x 2 10 Screwdriver 1 11 Screwdriver 2 12 User Guide NOTE: 4 extra screws for wind direction vane and wind speed cups. PRODUCT OVERVIEW WIRELESS 7-IN-1 OUTDOOR SENSOR Solar panel Wind direction vane UV/light sensor Bubble level gradienter Rain collector Wind speed cups Mounting pole... - Page 9 - 7 -...
-
Page 10: Weather Station
WEATHER STATION - 8 -... - Page 11 Outdoor temperature/humidity reading, weather index - 9 -...
- Page 12 Wind direction & speed Indoor temperature/humidity reading Weather forecast Time & date, moon phase, Weekday Light intensity UV index Rain Barometer SET button TEMP/ (ALARM) button RAIN button WIND/+ button BARO/-/ (Wi-Fi) button ALERT button MAX/MIN button CHANNEL button LIGHT/ SNOOZE button Battery compartment (3.6 V Ni-MH rechargeable battery pack) SETTING UP THE WIRELESS 7-IN-1 OUTDOOR SENSOR The wireless 7-in-1 outdoor sensor measures wind speed, wind direction,...
- Page 13 screws (included). INSTALLING WIND SPEED CUPS AND WIND DIRECTION VANE ● Align the screw holes in the wind speed cups with the flat, vertical side of the metal rod. ● Insert the wind speed cups in the metal rod and screw them on tight to lock it in place.
- Page 14 SETTING UP RAIN COLLECTOR ● Align the notches on the funnel with the lock grooves inside the rain collector. ● Insert the funnel in the rain collector and screw them on tight to lock it in place. - 12 -...
- Page 15 INSTALLING THE BATTERIES ● Unscrew the battery door at the bottom of the 7-in-1 outdoor sensor using screwdriver 1. ● Connect the cable of the rechargeable battery pack (included) to the cable located in the battery compartment. - 13 -...
- Page 16 Adjust the connected cables so they fit comfortably in the compartment. Then, insert the battery pack into the compartment. Close and fasten the battery door back on the compartment. - 14 -...
- Page 17 ADJUSTING THE SOLAR CELL ● Loosen the screw at the joint so the gear on the other side of the joint pushes out. The solar cell should now be in an unlocked position. ● Adjust the vertical angle of the solar cell to get the most optimal usage out of the solar cell depending on your location.
- Page 18 When adjusting the solar cell set it to an angle closest to your latitude. View chart below to get an idea of how you should angle your solar cell. Latitude Proximity Solar Cell Angle Selection If your location is close to 84° 84°...
- Page 19 rainfall data. POINTING THE WIRELESS 7-IN-1 OUTDOOR SENSOR TO SOUTH (OPTIONAL) The outdoor wireless weather sensor is calibrated to be pointed north for maximum accuracy. However, for your convenience, if you are a user - 17 -...
- Page 20 located in the Southern Hemisphere, you can use the sensor with the rain collector pointing south. 1.) Mount and install the wireless weather sensor with the rain collector pointing South, instead of North. (Please refer to MOUNTING THE WIRELESS 7-IN-1 OUTDOOR SENSOR.) 2.) Select "STH"...
-
Page 21: Setting Up The Weather Station
SETTING UP THE WEATHER STATION POWERING UP THE WEATHER STATION ● Plug the power adapter into the power jack located in the back of the weather station. Insert 3 new AAA alkaline batteries (not included) for backup. ● Once the weather station is turned on, it will automatically enter pairing mode. -
Page 22: Setup Instruction
“RE-PAIRING SENSOR”. ● You will see the icon of an antenna scrolling in the temperature and humidity (outdoor) section of the display. ● Once the pairing process completes, the antenna icon will appear solid (not flashing), and the readings for outdoor temperature and humidity, wind speed, wind direction, UV, light intensity, and rainfall will appear in their designated sections of the LCD display RE-PAIRING SENSOR... - Page 23 【BARO/-/ 】 button over 3 seconds, the weather Press and hold station LCD display will show the letter “AP” that it has entered Access Point (AP) mode. At this time it will be ready for the Wi-Fi settings to be adjusted.
- Page 24 may interpret the address as a search query). We recommend using the latest version of reputable web browsers. Enter the following information into the web-interface (Figure 1). Make sure all of the information is entered prior to selecting Save. If you choose not to upload Wunderground.com, or upload weathercloud.net, leave the check boxes unchecked.
- Page 25 (Figure 1). If it does not, check your web interface information again. NOTES: When the Wi-Fi setup is complete, your computer or mobile device will return to the default Wi-Fi connection. If it does not, simply open your device’s wireless network settings and manually reconnect. 【BARO/-/ 】...
- Page 26 You may enter or change the offset and gain values for different measurement parameters. Once you have completed your calibrations, press the “APPLY” button. The current offset value will update to show the value that you entered (instead of the default value). If you want to change the value, you can enter a new value in the box beside the number (as in step 1).
- Page 27 distance above sea level to account for altitude effects. WI-FI CONNECTION STATUS When the weather station successfully connects to your Wi-Fi router, the Wi-Fi signal will appear on the LCD display. If the Wi-Fi signal is not stable or the weather station is trying to connect to the router, the icon will flash.
- Page 28 NOTE: The time will automatically synchronize to the internet per hour. CREATE AND SYNC YOUR WEATHER SERVER ACCOUNT CREATE YOUR WEATHER UNDERGROUND ACCOUNT 1.) Visit: https://Wunderground.com, and select the “Join” in the upper right and corner and create a Free Account. Enter a Username, Email and Password (It is your Login password for the website, not your email password.
- Page 29 After registration is done successfully, it will be shown below the message. Click “Login” and enter the email address and password you just registered. - 27 -...
- Page 30 Click “My profile ” and enter Member settings. Click “Update home location ”. - 28 -...
- Page 31 Click “My Devices”, and click “Add New Device”. - 29 -...
- Page 32 Select address by inputting an address or select Manual to position your address automatically. Then click “Next”. - 30 -...
- Page 33 Enter the weather information. Blanks with red (required) must be filled in. NOTE: You can select “other” of the Device Hardware. - 31 -...
- Page 34 10.) Once complete this session, click “I Accept” and “Next”. 11.) After registering successfully, please record your Weather Underground ID and Key information for later setup use. 12.) As shown below, registration is done successfully. - 32 -...
- Page 35 CREATE YOUR WEATHER CLOUD ACCOUNT Visit Weathercloud website at https://weathercloud.net/, and enter a Username, Email and Password and click “Sign up”. Following the instructions to create an account. NOTE: This is best done on a computer desktop or laptop. (It is your Login password for the website not your email password. So no privacy will be exposed).
- Page 36 3.) Open your mail and log in to the web address in the mail. Click “Activate your Weathercloud account ”. 4.) Click “ here ” to enter the homepage of the Weathercloud website. 5.) Enter the email address and password you just registered to enter the weathercloud website.
- Page 37 Click “Create device ” to add a weather station device. Enter all the requested information into the Create New Device page. Blanks with red *must be filled in. - 35 -...
- Page 38 NOTE: You can select “other” of the Model number and Link type in the above blanks. Click “Get coordinates” to identify your location on the map, then click“Done”to confirm. Once you have completed this section, click “Create”. After registering successfully, please record your Weathercloud ID and Key information for later setup use.
-
Page 39: Setting Order
OPERATING INSTRUCTIONS CLOCK Setting the Clock 【SET】over 2 seconds to enter time In Normal time display, press and hold 【WIND/+】 and 【BARO/-/ 】 to setting mode. Press and release adjust the values. 【WIND/+】 and 【BARO/-/ 】 over 2 seconds to adjust the Hold 【SET】to confirm and move to the next item. - Page 40 【WIND/+】 or 【BARO/-/ 】to change between Beep on and Press 【SET】 to select NTP on/off. Beep off. Press 【WIND/+】 or 【BARO/-/ 】to When NTP ON flashes, press 【SET】to slect Language. change between NTP on and NTP off . Press 【WIND/+】 or 【BARO/-/ 】...
- Page 41 【SET】to select day. adjust the calendar month. Press 【WIND/+】 or 【BARO/-/ 】 to adjust When Day flashes, press 【SET】to select 12/24-hour format. the calendar day. Press 【WIND/+】 or 【BARO/-/ 】 to change 10.) When 12 H flashes, press 【SET】 to select hour. between 12 hour and 24 hour format.
- Page 42 【WIND/+】 or 16.) When Light intensity unit flashes, press 【BARO/-/ 】 to change unit between Klux, fc and w/m2 . Press 【SET】 to select rainfall unit. 【WIND/+】 or 【BARO/-/ 】 to 17.) When Rain unit flashes, press 【SET】to select windspeed unit. change unit between in and mm.
-
Page 43: Moon Phase
Moon Phase - 41 -... -
Page 44: Setting The Alarm
The display console calculates the moon phase according to your time, date, and time zone. The table below explains the corresponding phases and their icons for both the Northern and Southern hemispheres. Northern Hemisphere Icons Moon Phase Southern Hemisphere Icons New Moon Waxing Crescent Moon First Quarter Moon... - Page 45 【SET】button to select minute of Alarm. Minute of alarm ● Press starts to flash. 【WIND/+】 【BARO/-/ 】 ● Press button button to set required 【WIND/+】 【BARO/-/ 】 alarm minutes. Hold button button to adjust alarm minutes quickly. 【SET】 button to save all settings and exit to normal display ●...
-
Page 46: Temperature/Humidity Trend
● If the alarm is on, its corresponding alarm icon will be shown on the display. 【 ● When the alarm is ringing, press any buttons except LIGHT/SNOOZE】button to stop the alarm signal. It is not necessary to reactivate the alarm. It will ring again this time next day. Snooze Function 【... -
Page 47: Pressure Trend
Humidity Trend Humidity has Humidity has not Humidity has risen > 3% in changed more than 3% in fallen < 3% in the past hour the past hour the past hour Indoor Comfort Index The indoor comfort displays a pictural representation based on the indoor air temperature and humidity levels to determine the approximate comfort level. -
Page 48: Wind Display
falling in a one-hour update period. Pressure has Pressure has not changed Pressure has risen > 2hpa/0.06inHg in more than 2hpa/0.06inHg fallen > 2hpa/0.06inHg in the past hour in the past hour the past hour WIND Wind Display Average/gust wind speed Real time wind direction indicator Selecting Wind Display Mode... - Page 49 The Rainfall shows information regarding the rainfall and rain rate. Select the Rainfall Display Mode 【RAIN】 button to switch between Rain In normal display mode, press Rate, Rain Event, Rain Hourly, Rain Daily, Rain Weekly, Rain Monthly and Rain Total. Increments of Rain Definition Rain Rate : current rainfall rate in the past hour.
- Page 50 【TEMP/ 】 When reading the Weather Index display, you can press button to cycle through different weather indexes in the following order: Feels Like > Heat Index > Wind Chill Feels Like The Feels Like temperature index determines what temperature it actually feels like outside, taking into account factors like wind speed, pressure, temperature and humidity.
- Page 51 and Snowy. NOTE: The accuracy of a general pressure-based forecast is about 65-70%. Forecasts are not guaranteed. It may not necessarily reflect the current situation. Ice Alert When outdoor temperature is lower than 1℃/33.8℉, the snowflake icon will appear on the LCD display. MAX/MIN 【MAX/MIN】button switching ●...
- Page 52 To View the Accumulated MAX/MIN ● Display Feel like, Wind Chill, Heat Index, Dew Point Max/Min Values 【TEMP/ 】 1.) When the max values are displayed, press button to interchange viewing the Outdoor temperature Feel like Wind Chill → → →...
- Page 53 【CHANNEL】 button to 2.) When the min values are displayed, press interchange viewing indoor and paired outdoor sensor(s) temperature and humidity. NOTE: If other channel sensors were paired, it could show the other channel’s max/min temperature and humidity values. If other channel sensors were not paired, it would only show current indoor max/min temperature and humidity values.
- Page 54 seconds to enter the alert setting mode. 【WIND/+】button and 【BARO/-/ 】 ● Press button to adjust the 【TEMP/ 】 value up or down, then press button to turn on/off the alert. 【ALERT】button to confirm and jump to next setting. ● Press ●...
-
Page 55: Display Backlight
(0.04 in/hr – 39 in/hr) (4 in/hr) High Daily Rain alert 1mm – 1000mm Rainfall Rate 101mm (0.03 in – 39.37 in) (4 in) UV index High Alert 1 - 15 UV Index Light Intensity High Alert 1 Klux – 200.0 Klux 100 Klux 7- 1580 W/M²... - Page 56 humidity section or the corresponding CH section of the LCD console display, this indicates that the batteries in your wireless weather sensor(s) are running low and should be replaced. Make sure to replace all batteries at the same time. FACTORY RESTART If there is malfunction, the Factory Restart is a great way to return your station to "out of the box"...
- Page 57 2.) Clean the Light Intensity/ UV sensor and solar panel every 3 months with damp cloth. 3.) When replacing the batteries, apply a corrosion preventive compound on the battery terminals. - 55 -...
-
Page 58: Specification
SPECIFICATION WEATHER STATION General Specifications Dimension 191.6 x 127 x 28.8mm (7.5 x 5 x 1.1inch) Power source AC-DC 5V, 1A adapter (included) Battery 3 x AAA battery (not included) Support sensors 1 x 7-in-1 sensor (included) Wi- Fi Communication Specifications 802.11 b/g/n Wi- Fi Standard Wi- Fi operation frequency... - Page 59 Temperature unit ℃ and ℉ -9.9℃ – 50℃ (-14.1℉ – 122℉) Indoor Display range -40℃ – 70℃ (-40℉ – 158℉) Outdoor Display range 10 – 50℃ ± 1℃ / 50 – 122℉ ± 1.8℉ -20 – 10℃ ± 1.5℃ / -4 - 50℉ ±2.7℉ In/ Out accuracy others : ±2℃...
- Page 60 High Daily Rainfall alert Alert UV Index Display & Function Specifications 0 - 16 Display range Current Display mode Daily Max Memory mode High UVI alert Alert Light Intensity Display & Function Specifications Klux, Kfc and W/m2 Light Intensity unit 0 –...
-
Page 61: Troubleshooting
TROUBLESHOOTING Problem Solution The wireless sensor may have initiated properly, and the data is registered by the weather station as invalid, and the weather station must be reset. With an open-ended paperclip, press the RESET button for 3 seconds to complete the display of the voltage. LED will flash every 20 seconds. - Page 62 Problem Solution Rain gauge reports An unstable mounting solution (sway in the mounting pole) may rain when it is not result in the tipping bucket incorrectly incrementing rainfall. Make sure raining. you have a stable, level mounting solution. (Refer page 17 ADJUSTING THE 7-IN-1 WIRELESS SENSOR LEVEL) Check your router for problems.
- Page 63 Made In China - 61 -...
- Page 64 Technical Support and E-Warranty Certificate www.vevor.com/support...
Need help?
Do you have a question about the YT60234 and is the answer not in the manual?
Questions and answers
How do you adjust the time?
To adjust the time on the VEVOR YT60234:
1. In normal time display, press and hold the SET button for over 2 seconds to enter the setting mode.
2. Use the WIND/+ and BARO/- buttons to adjust values.
- Tap to change slowly.
- Hold for over 2 seconds to change rapidly.
3. Press SET to confirm each value and move to the next setting.
4. Adjust settings in this order: Year → Month → Day → 12/24 Hour Format → Hour → Minute.
5. To exit the setting mode at any time, press the LIGHT/SNOOZE button.
This answer is automatically generated
The anemometer isn't reporting. All other sensors are fine. Have restarted and pressed the "channel" button a few times. No change.
If the VEVOR YT60234 anemometer is not reporting while other sensors are functioning properly, ensure it is correctly paired with the base unit and check for any obstructions or physical damage. Also verify that it is receiving power, especially from its solar source. If issues persist, try resetting the sensor or the entire system.
This answer is automatically generated
How do I make the backlight stay on
To keep the backlight on for the VEVOR YT60234, the DC adapter must be permanently connected. When the DC adapter is disconnected, the backlight can only be turned on temporarily for 15 seconds by pressing the LIGHT/SNOOZE button.
This answer is automatically generated
Pushing Wi-Fi button but AP address does not come up
If the AP address (192.168.1.1) is not appearing when pushing the Wi-Fi button on the VEVOR YT60234, it may be because the device is not entering AP mode. To enter AP mode, you need to press and hold the Wi-Fi button (with the barrel symbol) until "AP" appears and begins flashing. If this does not happen, ensure the device has power and try holding the button longer. If still unsuccessful, the device may not be functioning correctly or the button may not be pressed properly.
This answer is automatically generated
I cannot get the indoor panel to connect to my wifi
To connect the VEVOR YT60234 indoor panel to WiFi, follow these steps:
1. Enter AP Mode: Press and hold the button with the WiFi symbol until the display shows "AP" flashing.
2. Connect to the Device: On your phone or computer, go to WiFi settings and connect to the weather station’s network.
3. Access the Configuration Page: Open a web browser and enter `192.168.1.1` in the address bar.
4. Enter WiFi Credentials: Follow the on-screen instructions to enter your home WiFi network details.
5. Save and Reboot: Apply the settings, and the device should connect to your WiFi.
If the connection fails, restart the process and ensure the correct WiFi details are entered.
This answer is automatically generated
How do you adjust the date and time?
To adjust the date and time on the VEVOR YT60234 weather station:
1. Enter Setting Mode: Press and hold the SET button for over 2 seconds.
2. Navigate to Date and Time Settings:
- Use the WIND/+ or BARO/-/ buttons to adjust values.
- Press SET to confirm and move to the next item in the following order:
- Year
- Month
- Day
- 12/24 Hour Format
- Hour
- Minute
3. Adjust Values: Use WIND/+ or BARO/-/ to change the values. Hold these buttons for over 2 seconds to adjust values rapidly.
4. Exit Setting Mode: Press the LIGHT/SNOOZE button at any time to exit the setting mode.
This answer is automatically generated
How do i get a replacement part? The wind direction vane is broken. My husband received this weather station as a father's day gift and has not put it up yet due to this broken piece. Your help with getting new part will be appreciated. Thank you.
j'ai le voyant "out" allumé