Table of Contents
Advertisement
Introduction
To the owner or user: This service manual is
intended to provide you, and the maintenance or
service technician, with the information needed to
install, start up, clean, maintain and repair this
product.
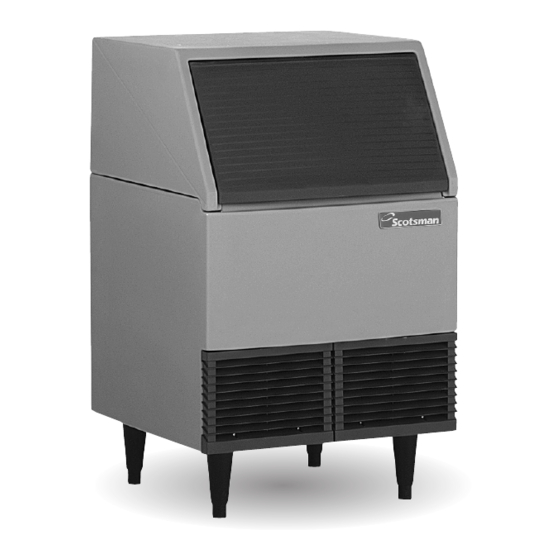
The SCE170 is an ice machine that produces
cubed ice on a grid type freezing surface. The
cubes form into a cluster that falls into the ice
storage bin where they break up into individual
and small groups of cubes.
Specifications . . . . . . . . . . . . . . . . . . . . . . . . . . . . . . . . . . . . . . . . . . . 2
For The Installer: Environmental Limitations . . . . . . . . . . . . . . . . . . . . . . . . . . . 3
Installation . . . . . . . . . . . . . . . . . . . . . . . . . . . . . . . . . . . . . . . . . . . . . 4
Removal of the Cabinet . . . . . . . . . . . . . . . . . . . . . . . . . . . . . . . . . . . . . . 7
Component Location . . . . . . . . . . . . . . . . . . . . . . . . . . . . . . . . . . . . . . . 8
Component Description . . . . . . . . . . . . . . . . . . . . . . . . . . . . . . . . . . . . . . 9
Initial Start Up . . . . . . . . . . . . . . . . . . . . . . . . . . . . . . . . . . . . . . . . . . . 10
Electrical Sequence . . . . . . . . . . . . . . . . . . . . . . . . . . . . . . . . . . . . . . . . 12
Maintenance and Cleaning . . . . . . . . . . . . . . . . . . . . . . . . . . . . . . . . . . . . 13
Sanitzing and Water System Cleaning . . . . . . . . . . . . . . . . . . . . . . . . . . . . . . 14
Maintenance and Cleaning . . . . . . . . . . . . . . . . . . . . . . . . . . . . . . . . . . . . 15
Water Schematic: . . . . . . . . . . . . . . . . . . . . . . . . . . . . . . . . . . . . . . . . . 16
Refrigeration Schematic: . . . . . . . . . . . . . . . . . . . . . . . . . . . . . . . . . . . . . 17
Technical Characteristics . . . . . . . . . . . . . . . . . . . . . . . . . . . . . . . . . . . . . 18
. . . . . . . . . . . . . . . . . . . . . . . . . . . . . . . . . . . . . . . . 19
Removal and Replacement: Cube Size Control . . . . . . . . . . . . . . . . . . . . . . . . . 22
Removal and Replacement: Water Pump . . . . . . . . . . . . . . . . . . . . . . . . . . . . 23
Removal and Replacement: Float Valve . . . . . . . . . . . . . . . . . . . . . . . . . . . . . 24
Removal and Replacement: Curtain & Bin Control . . . . . . . . . . . . . . . . . . . . . . . . 25
Removal and Replacement: Purge Valve . . . . . . . . . . . . . . . . . . . . . . . . . . . . . 26
Refrigeration System Service: HP62 . . . . . . . . . . . . . . . . . . . . . . . . . . . . . . . 28
The SCE170 automatically maintains the level of
ice by turning on when the ice level falls, and
switches off when the bin is full.
This unit is serviceable in place; the ice storage bin
and hood may be removed from the chassis to
allow service access without removing the ice
machine from its installed position. The
refrigeration system uses HP62 as the refrigerant.
Table of Contents
Parts lists and wiring diagrams are located in
the center of this manual, printed on yellow
paper.
October 1998
Page 1
SCE170
Advertisement
Table of Contents

Subscribe to Our Youtube Channel
Related Manuals for Scotsman SCE170


Summary of Contents for Scotsman SCE170
-
Page 1: Table Of Contents
The SCE170 is an ice machine that produces cubed ice on a grid type freezing surface. The cubes form into a cluster that falls into the ice storage bin where they break up into individual and small groups of cubes. -
Page 2: Specifications
SCE170 Specifications The unit is equipped with an electrical power cord, but should only be plugged into a circuit dedicated to the ice machine. THE NAMEPLATE IS LOCATED ON THE BACK PANEL. A SERIAL NUMBER PLATE IS LOCATED BEHIND THE RIGHT... -
Page 3: For The Installer: Environmental Limitations
Intake through the right front grill. Exhaust through the left front grill. Do not install where this air flow is obstructed. The SCE170 has a removable cabinet. When installed, the machine should have some extra clearance ( the cabinet may be easily removed when the machine is in place. -
Page 4: Installation
Electrical power is supplied through a cord connected to the unit. All local codes must be followed. Pre-installation: 1. Inspect the place where the ice machine is to be installed. Check for: space for the cabinet, water supply, drain availability and electrical power supply. -
Page 5: For The Plumber
A loop of copper tubing may be used between the ice machine and the water supply. This will allow the ice machine to be pulled out from its installed location without disconnecting the water line. No back-flow preventer should be needed in the inlet potable water line because provision for that is incorporated in this N.S.F. -
Page 6: After Utility Connections
11. Has the Customer Evaluation & Warranty Registration form been filled out? Check for correct model and serial numbers from the nameplate, then mail the completed form to Scotsman. 12. Has the owner/user been given the name and telephone number of the authorized Scotsman Service Agency serving that location? 13. -
Page 7: Removal Of The Cabinet
SCE170 Removal of the Cabinet One of the most useful features of this ice machine STEP 2 is the ability to remove the cabinet from the ice machine without removing the ice machine from its installed position. To Remove: 1. Switch the master switch to OFF. Be certain the ice machine has been switched off. -
Page 8: Component Location
SCE170 Component Location The ice machine is designed for front service. Many components are serviceable from the front without removing the cabinet. With the cabinet removed, nearly all components are serviceable. In the bin area can be found: Water pump... -
Page 9: Component Description
High Pressure Cut Out This is a switch that opens to stop the ice machine when the internal refrigeration pressures become too high (over 450 PSIG). It is a manual reset on... -
Page 10: Initial Start Up
Note: In most cases some slush will form in the reservoir. This is temporary and normal. 9. Allow the ice machine to operate for about 15-20 minutes. The ice should be fully formed and should be harvested within a few minutes. - Page 11 This simulates the bin being full of ice and after a few seconds with the curtain open the ice machine should switch itself off. Release the curtain and the machine will restart.
-
Page 12: Electrical Sequence
SCE170 Electrical Sequence This describes the sequence through a complete cycle. Freeze Cycle (curtain closed): When the ON/OFF/CLEAN switch is at the ON position, power is connected to the primary of the transformer, which supplies power to the: Control board and curtain sensor. If the curtain is closed, the control board connects power to: The compressor contactor coil. -
Page 13: Maintenance And Cleaning
Scotsman recommends that only the surface of the condenser be cleaned with the bin in place. A vacuum cleaner with a soft brush attachment will extract most loose dust stuck to the surface of the condenser fins. -
Page 14: Sanitizing And Water System Cleaning
13. Discard the next batch of cubes. 14. The unit is now ready for automatic operation or sanitizing of the ice storage bin. * Scotsman Nickel Safe Cleaner is available by ordering part number 19-0636-06 (8 oz bottle). October 1998... -
Page 15: Sanitizing And Cleaning
Scale that may form on the plastic liner can be removed by scrubbing the surface with a mixture of Scotsman Ice Machine Cleaner and hot water. Remove any scale prior to cleaning. To Remove Scale: 1. -
Page 16: Water Schematic
SCE170 Water Schematic: Water flows into the ice machine from its inlet connection at the back of the cabinet, through the float valve and into the reservoir. The water in the reservoir is pumped up and through the water distributor tube at the top of the evaporator. From there, the water flows over freezing surface of the evaporator and back into the reservoir. -
Page 17: Refrigeration Schematic
The remaining ice will then fall off into the bin. REFRIGERATION SCHEMATIC: Hot Gas Valve Compressor Valve Liquid Line October 1998 Page 17 SCE170 Evaporator Hot Gas Line Fan Motor Condenser Dryer... -
Page 18: Technical Characteristics
SCE170 Technical Characteristics Typical Cycle Time 15 - 20 minutes (time depends upon how clean unit is, plus the air and water temperatures). Typical Harvest Ice Weight 1.6 to 1.8 lb. ice harvested per cycle. Typical Low Side Pressure 25 PSIG just before harvest... -
Page 19: Service Diagnosis
Curtain in open position High pressure cut out open, reset and check: Control board open Curtain sensor does not work. October 1998 Page 19 SCE170 PROBABLE FIX Reconnect water supply. Clean out float. Replace float. Replace purge valve. Repair leak. - Page 20 SCE170 Service Diagnosis SYMPTOM Unit shuts off before bin is full. Makes ice, but cubes are mal-formed. Cubes/bridge too thick. Cubes too small, unit may stay in harvest because ice will not push curtain open. Machine goes into harvest, but ice on evaporator will not defrost - freezes up.
- Page 21 Curtain not closed properly Sensor not in correct position Curtain missing Curtain sensor has failed. October 1998 Page 21 SCE170 PROBABLE FIX Check for curtain stuck closed. Cubes too small, adjust bridge thickness, see Cube Size/Bridge thickness section Locate leak, repair, replace dryer,...
-
Page 22: Removal And Replacement: Cube Size Control
Timed Freeze Light. With no ice on the evaporator, switch the ice machine to ON. The temperature of the suction line where the cube size control bulb is located should be about 8-10 into the freeze cycle (with the water pump unplugged). -
Page 23: Removal And Replacement: Water Pump
When the unit is built in, they can be loosened using a 7. Pull discharge hose from pump discharge port. 8. Remove pump from ice machine. 9. Reverse above steps to replace. October 1998 Page 23 SCE170 " socket. -
Page 24: Removal And Replacement: Float Valve
SCE170 Removal and Replacement: Float Valve Float Valve The float valve allows water to enter the reservoir but not overfill it. If the float sinks, or the valve will not seat, the float valve should be replaced. The float may plug-up from minerals in the water, and may be cleaned rather than replaced. -
Page 25: Removal And Replacement: Curtain & Bin Control
Curtain Hanger Slot. Pivot Pin Metal Evaporator Bracket Removal/Replacement of Bin Control Sensor Evaporator Bracket Control Sensor Removal/Replacement of Curtain Metal Evaporator Bracket Thin Groove (Front Edge View) Curtain Hanger Slot October 1998 Page 25 SCE170 Slot Hole Curtain Curtain Pivot Pin... -
Page 26: Removal And Replacement: Purge Valve
SCE170 Removal and Replacement: Purge Valve Removal: 1. Unplug unit. Electrical shock hazard. Electrical shock can cause personal injury. Disconnect power before beginning to service components. 2. Open bin door, remove hood fasteners and pull hood from ice machine. 3. Remove one screw and pump shield. - Page 27 21. Examine seat & plunger for dirt/damage. Clean and reassemble. If damaged, replace valve. Plunger Seat 22. Reverse above steps with original parts or new valve to reassemble. October 1998 Page 27 SCE170 Plastic Retainer Coil Stem Spring Valve Body Service of Purge Valve...
-
Page 28: Water Distributor
SCE170 Water Distributor Inner Distributor Wing Nut The water distributor tube will typically not require Tube Water Outlet any service beyond removal for cleaning. If Evaporator Stud needed, remove the water distributor by: Outer Distributor 1. Remove the hood. Tube 2. -
Page 29: Refrigeration System Service: Hp62
"flash off" the liquid before it enters the ice machine. Do this until the proper amount of refrigerant has been weighed into the system. -
Page 30: Liquid Charging
9. Shut off the valve on the refrigerant drum. 10. Re-open the manifold valves until all liquid has flowed out of the hoses. 11. Shut the low side access valve on the ice machine. 12. Remove hoses from ice machine and replace all caps. -
Page 31: Refrigeration Service
Scotsman also recommends that, at the time of initial start up, gauges not be used. If gauges must be used, don’t always check the high side pressure. - Page 32 Refer to it for installation instructions. 3. Remove the box containing the legs from the ice storage bin. CARTON 4. The ice machine is fastened to the skid. The bolts securing the ice machine to the skid screw in from the bottom. To remove: Use part of the carton as a cushion and tip the ice machine onto its back.
Need help?
Do you have a question about the SCE170 and is the answer not in the manual?
Questions and answers