Table of Contents
Advertisement
Introduction
To the owner or user: This service manual is
intended to provide you, and the maintenance or
service technician, with the information needed to
install, start up, clean, maintain and repair this
product.
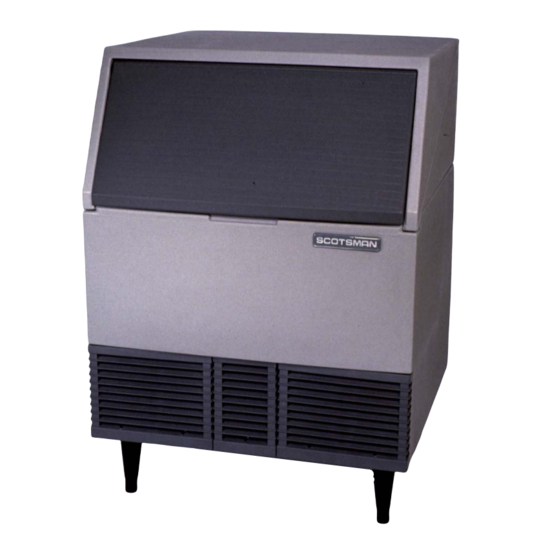
The SCE275 is an ice machine that produces
cubed ice on a vertical freezing surface. The cubes
fall into the ice storage bin where they break up
into individual cubes.
Specifications · · · · · · · · · · · · · · · · · · · · · · · · · · · · · · · · · · · · · · · · · · · 2
For The Installer: Environmental Limitations · · · · · · · · · · · · · · · · · · · · · · · · · · · 3
Installation · · · · · · · · · · · · · · · · · · · · · · · · · · · · · · · · · · · · · · · · · · · · · 4
Installation · · · · · · · · · · · · · · · · · · · · · · · · · · · · · · · · · · · · · · · · · · · · · 5
For The Plumber· · · · · · · · · · · · · · · · · · · · · · · · · · · · · · · · · · · · · · · · · · 6
Installation · · · · · · · · · · · · · · · · · · · · · · · · · · · · · · · · · · · · · · · · · · · · · 7
Removal of the Cabinet · · · · · · · · · · · · · · · · · · · · · · · · · · · · · · · · · · · · · · 8
Component Location · · · · · · · · · · · · · · · · · · · · · · · · · · · · · · · · · · · · · · · 9
Component Description · · · · · · · · · · · · · · · · · · · · · · · · · · · · · · · · · · · · · · 10
AutoIQ Controller · · · · · · · · · · · · · · · · · · · · · · · · · · · · · · · · · · · · · · · · · 11
Initial Start Up · · · · · · · · · · · · · · · · · · · · · · · · · · · · · · · · · · · · · · · · · · · 12
Notes On Operation · · · · · · · · · · · · · · · · · · · · · · · · · · · · · · · · · · · · · · · · 13
Adjustments · · · · · · · · · · · · · · · · · · · · · · · · · · · · · · · · · · · · · · · · · · · · 14
How To Operate The AutoIQ Controller · · · · · · · · · · · · · · · · · · · · · · · · · · · · · · 15
How The Electronic Cuber Works · · · · · · · · · · · · · · · · · · · · · · · · · · · · · · · · · 16
Water System · · · · · · · · · · · · · · · · · · · · · · · · · · · · · · · · · · · · · · · · · · · 17
Technicians Only: Freeze Cycle Operational Sequence · · · · · · · · · · · · · · · · · · · · · 18
Technicians Only: Harvest Cycle Operational Sequence · · · · · · · · · · · · · · · · · · · · · 19
Sanitizing and Water System Cleaning · · · · · · · · · · · · · · · · · · · · · · · · · · · · · · 20
Sanitizing and Cleaning · · · · · · · · · · · · · · · · · · · · · · · · · · · · · · · · · · · · · · 21
Additional Maintenance · · · · · · · · · · · · · · · · · · · · · · · · · · · · · · · · · · · · · · 22
Additional Maintenance · · · · · · · · · · · · · · · · · · · · · · · · · · · · · · · · · · · · · · 23
Additional Maintenance: Bin Controls · · · · · · · · · · · · · · · · · · · · · · · · · · · · · · · 24
Technical Characteristics · · · · · · · · · · · · · · · · · · · · · · · · · · · · · · · · · · · · · 25
Service Diagnosis · · · · · · · · · · · · · · · · · · · · · · · · · · · · · · · · · · · · · · · · · 26
Service Diagnosis · · · · · · · · · · · · · · · · · · · · · · · · · · · · · · · · · · · · · · · · · 27
Service Diagnosis · · · · · · · · · · · · · · · · · · · · · · · · · · · · · · · · · · · · · · · · · 28
PTCR · · · · · · · · · · · · · · · · · · · · · · · · · · · · · · · · · · · · · · · · · · · · · · · 29
Removal and Replacement: AutoIQ Controller · · · · · · · · · · · · · · · · · · · · · · · · · · 30
Removal and Replacement: Water Pump, Water Level Sensor · · · · · · · · · · · · · · · · · · 31
Removal and Replacement: Inlet Valve & Water Trough · · · · · · · · · · · · · · · · · · · · · 32
Removal and Replacement: Bin Control Set · · · · · · · · · · · · · · · · · · · · · · · · · · · 33
Removal and Replacement: Thermistors · · · · · · · · · · · · · · · · · · · · · · · · · · · · · 34
Water Distributors · · · · · · · · · · · · · · · · · · · · · · · · · · · · · · · · · · · · · · · · · 35
Refrigeration System Service: R-404A · · · · · · · · · · · · · · · · · · · · · · · · · · · · · · 36
This manual was printed on recycled paper.
The SCE275 automatically maintains the level of
ice by turning on when the ice level falls, and
switches off when the bin is full.
This unit is serviceable in place; the ice storage bin
and hood may be removed from the chassis to
allow service access without removing the ice
machine from its installed position. The
refrigeration system uses R-404A as the
refrigerant.
Table of Contents
Parts lists and wiring diagrams are located in
the center of this manual.
January 2003
Page 1
SCE275
Advertisement
Table of Contents

Subscribe to Our Youtube Channel
Related Manuals for Scotsman SCE275


Summary of Contents for Scotsman SCE275
-
Page 1: Table Of Contents
The SCE275 is an ice machine that produces cubed ice on a vertical freezing surface. The cubes fall into the ice storage bin where they break up into individual cubes. -
Page 2: Specifications
SCE275 Specifications 6.00 IN 15.2 CM. The unit is equipped with an electrical power cord, but should only be plugged into a circuit dedicated to the ice machine. THE NAMEPLATE IS LOCATED ON THE BACK PANEL A Serial Number Plate is Located... -
Page 3: For The Installer: Environmental Limitations
Intake through the left front grill. Exhaust through the right front grill. Do not install where this air flow is obstructed. The SCE275 has a removable cabinet. When installed, the machine should have some extra clearance ( cabinet may be easily removed when the machine is in place. -
Page 4: Installation
It may be necessary to add a course filter ahead of the fine filter to prolong filter life. The SCE275 is factory set for a water purge that will work in most water conditions. While the amount of purge is adjustable, only change it if necessary. -
Page 5: Installation
A loop of copper tubing may be used between the ice machine and the water supply. This will allow the ice machine to be pulled out from its installed location without disconnecting the water line. No back-flow preventer should be needed in the inlet potable water line because provision for that is incorporated in this N.S.F. -
Page 6: For The Plumber
SCE275 For The Plumber Drain Configuration: Water cooled models must use a separate drain tube from the reservoir/bin drain. The water cooled condenser drain should not be vented. Drain tube material must be rigid and meet local code. Traps in the bin drain line without vents ahead of them will cause poor draining. -
Page 7: Installation
11. Has the Customer Evaluation & Warranty Registration form been filled out? Check for correct model and serial numbers from the nameplate, then mail the completed form to Scotsman. 12. Has the owner/user been given the name and telephone number of the authorized Scotsman Service Agency serving that location? 13. -
Page 8: Removal Of The Cabinet
SCE275 Removal of the Cabinet One of the most useful features of this ice machine is the ability to remove the cabinet from the ice machine without removing the ice machine from its installed position. To Remove: To remove the cabinet base the hood must be removed first. -
Page 9: Component Location
Component Location The ice machine is designed for front service. Many components are serviceable from the front without removing the cabinet. With the cabinet removed, nearly all components are serviceable. Water Distributors Evaporators Cube Deflector Water Inlet Valve Fan Motors... -
Page 10: Component Description
SCE275 Component Description High Pressure Cut Out - Water Cooled Only This is a switch that opens to stop the ice machine when the internal refrigeration pressures become too high (over 450 PSIG). It is an automatic reset. Evaporators Where the ice is formed. There are two vertical evaporator plates that form vertical strips of cubes. -
Page 11: Autoiq Controller
Clean: The Inlet Water Valve opens to fill the reservoir. The Water Pump starts. The Clean indicator light is switched ON. A manually initiated rinse flushes the system. January 2003 Page 11 SCE275 PUSH BUTTON CONTROL SWITCHES INDICATOR LIGHTS: BIN FULL FREEZE... -
Page 12: Initial Start Up
Note: The first 1-2 harvest cycles will be very long to establish a typical harvest time. 9. Fill out the Customer Evaluation and Warranty Registration. Send it to Scotsman. 10. Replace the front grill. 11. Inform the user of the location and telephone number of the local service company. -
Page 13: Notes On Operation
Note: Ice will normally fill up to the bottom of the evaporators before the machine shuts off. 2. After the bin has filled the ice machine will not be able to restart for 4 minutes. However, if needed, the Freeze button may be pushed and the unit will restart. -
Page 14: Adjustments
Water cooled models use a water regulating valve to control how much cooling water flows thru the water cooled condenser. At the top of that valve, located in the bottom rear of the ice machine, is an adjustment stem. To Adjust: 1. -
Page 15: How To Operate The Autoiq Controller
Harvest cycle. 3. Clean Button: Pushing and releasing this button will cause the machine to only power the water pump for circulation of ice machine cleaner. After the ice machine cleaner has circulated for about 10 minutes, a second push of this... -
Page 16: How The Electronic Cuber Works
SCE275 How The Electronic Cuber Works Controller Inputs: 1. Reservoir water temperature. This is measured by a thermistor located in the water pump outlet. 2. Discharge line temperature. This is measured by a thermistor located on the compressor discharge line. -
Page 17: Water System
Water System Water flows into the ice machine during the harvest cycle thru the inlet water valve. The water valve will NOT be open the complete length of the harvest cycle. The water pump forces water to the top of the evaporators, both in the Freeze and Harvest cycles. -
Page 18: Technicians Only: Freeze Cycle Operational Sequence
This section is intended for the technician. It is not necessary for the normal operation and maintenance of the machine. The AutoIQ Controller operates the ice machine by monitoring several input measures and switching various loads on and off. Assuming the machine has been operational,... -
Page 19: Technicians Only: Harvest Cycle Operational Sequence
The controller will try to operate the machine two additional times before a manual reset is needed. January 2003 Page 19 SCE275 Refrigeration Light Very long ice harvest No harvest of... -
Page 20: Sanitizing And Water System Cleaning
4 times a year. This ice machine will perform at its best when kept clean. There are three areas to keep clean: The water system including the water reservoir, distributors and evaporator surface;... -
Page 21: Sanitizing And Cleaning
5. Push and release the Clean button. The Clean indicator light will be blinking and the pump will re-start. 6. Pour 8 ounces (235 ml) of Scotsman Ice Machine Cleaner into the reservoir water (below the evaporators). 7. After the ice machine cleaner has circulated for 10 minutes, push and release the Clean button. -
Page 22: Additional Maintenance
Soak or scrub the distributors in or with a solution of Scotsman Ice Machine Cleaner and warm potable water. 9. Return the water distributors to their normal installed position. -
Page 23: Additional Maintenance
Note: Screen is not replaceable, and may only be removed by taking off the covering bracket. The bracket forms part of the inlet water system, and must be water tight to the valve body, removal is not recommended. 9. Reverse to reassemble. January 2003 Page 23 SCE275... -
Page 24: Additional Maintenance: Bin Controls
7. Examine the bottom of the brackets, there are two sensors in each bracket, check that they are clear of mineral build up. They may be wiped clean with ice machine cleaner to assist in removal of the build up. Use a toothbrush if necessary to remove scale. -
Page 25: Technical Characteristics
F. water 15 minutes 2.5 minutes 24 PSIG 245 PSIG 90 PSIG 175 PSIG January 2003 Page 25 SCE275 F. air and 70 F. water 18 minutes 1.5 minutes 29 PSIG 306 PSIG 118 PSIG 240 PSIG F. air and 70 F. -
Page 26: Service Diagnosis
SCE275 Service Diagnosis Proper service diagnosis begins with observation, comparing the complaint to the operation of the unit. Ice machine service diagnosis should proceed from water, to electrical and then to refrigeration. Problem or Symptom Possible Cause Bin is full, ice in cube port Power is off, check LEDs. -
Page 27: Service Diagnosis
Note: Leaving #4 unplugged and jumped for 20 seconds will shut the machine down on a bin full. It will restart after 5 minutes or may be reset by pushing the Freeze button. January 2003 Page 27 SCE275... -
Page 28: Service Diagnosis
SCE275 Service Diagnosis Problem or Symptom Possible Cause Open motor windings, or seized bearings, or blade stuck against shroud Fan motor(s) do not turn. No power to fan motors Open motor windings, or seized bearings Pump motor does not turn No power to pump Open solenoid coil. -
Page 29: Ptcr
If not, wait 5 minutes for it to cool off. 3. Disconnect both leads to the PTCR and measure its resistance with an ohmmeter. If the PTCR reads less than 22 ohms or more than 40 ohms, replace it. January 2003 Page 29 SCE275... -
Page 30: Removal And Replacement: Autoiq Controller
SCE275 Removal and Replacement: AutoIQ Controller Begin by disconnecting the electrical power. Electrical shock hazard. Electrical shock can cause personal injury. Disconnect power before beginning to service 1. Remove 2 screws and the right front grill. 2. If the machine is operating, push and hold the Off button until the machine switches off. -
Page 31: Removal And Replacement: Water Pump, Water Level Sensor
11. From below the reservoir cover, push the mounting tabs together to release the water level sensor from the reservoir cover. 12. Reverse steps 11-1 to replace the water level sensor. Water Pump January 2003 Page 31 SCE275 Water Level Sensor... -
Page 32: Removal And Replacement: Inlet Valve & Water Trough
SCE275 Removal and Replacement: Inlet Valve & Water Trough Water Inlet Valve The water inlet valve is located in the lower back of the cabinet. The hood and bin must be removed to gain access to this part. The valve is directly connected to the incoming water supply. -
Page 33: Removal And Replacement: Bin Control Set
Bin Control Note: They MUST be changed as a set. The bin controls must be positioned so that the flange of the bin control is behind the water trough. January 2003 Page 33 SCE275 Bin Control Edge of Water Trough... -
Page 34: Removal And Replacement: Thermistors
SCE275 Removal and Replacement: Thermistors There is a thermistor to sense reservoir water temperature and another to sense compressor discharge temperatures. If the AutoIQ Controller senses a fault with the thermistors, both diagnostic indicator lights will be glowing continuously. Electrical shock hazard. -
Page 35: Water Distributors
SCE275 Water Distributors Water Distributors are a snap-fit on the top edge of the evaporators. They are interchangeable left to right and front & back. Water Distributors When the water distributor’s have been removed, the top edge of the evaporator is exposed. That edge has small slots in it. -
Page 36: January
4. Open the valve on the drum and purge the charging hose. 5. Zero out the scale. 6. Shut the low side access valve at the ice machine. 7. Open the discharge manifold valve full open. 8. Watch the scale, when the correct charge is shown, shut the manifold valve.
Need help?
Do you have a question about the SCE275 and is the answer not in the manual?
Questions and answers