
Related Manuals for Jetson Lumino


Summary of Contents for Jetson Lumino
- Page 1 Lumino Hoverboard. A guide for your ride. IMPORTANT: READ CAREFULLY AND RETAIN FOR FUTURE REFERENCE. MODELS: JLMNO-BLK...
- Page 3 Jetson's top two riding rules: Be safe. Have fun!
-
Page 5: Table Of Contents
Contents Safety Warnings ................................4 Warranty Coverage ..............................6 Specs & Features ..............................7 Product Overview ..............................8 Online Resources ..............................10 1. Getting Started Charging the Battery ............................11 Powering On & Off ..............................12 Understanding the Battery Indicator Lights .......................13 Understanding the Status Indicator Lights ......................15 How to Recalibrate ...............................16... -
Page 6: Safety Warnings
• Applying brakes too hard or too suddenly can lock up a wheel, which could cause you to lose control and fall. Sudden or excessive application of the brake may result in injury or death. • If the brake loosens, please adjust with the hexagon wrench, or please contact Jetson Customer Care. • Replace worn or broken parts immediately. - Page 7 - Risque d'incendie - Aucune des pieces ne peut être réparée par l'utilisateur. MODIFICATIONS Do not attempt to disassemble, modify, repair, or replace the unit or any components of the unit without instruction from Jetson Customer Care. This will void any warranty, and can lead to malfunctions which may cause injury.
-
Page 8: Warranty Coverage
Your new Jetson product is warranted against defects in materials and workmanship as indicated on ridejetson.com/warranty for a period of time from the date of original retail purchase when used in accordance with Jetson's user manuals (refer to ridejetson.com/support). Under this warranty, you will be able to direct your claims to Jetson even in situations where you purchased the Jetson Product from one of our authorized retailers. -
Page 9: Specs & Features
Specs & Features • WEIGHT LIMIT: 220 LBS • PRODUCT WEIGHT: 14 LBS • WHEEL SIZE: 6.5″ • PRODUCT DIMENSIONS: 24.7″ (L) X 7.3″ (W) X 6.5″ (H) • MAX SPEED: 12 MPH • MAX RUN TIME: 60 MINUTES* • BATTERY: 25.2V 4.0AH LITHIUM-ION •... -
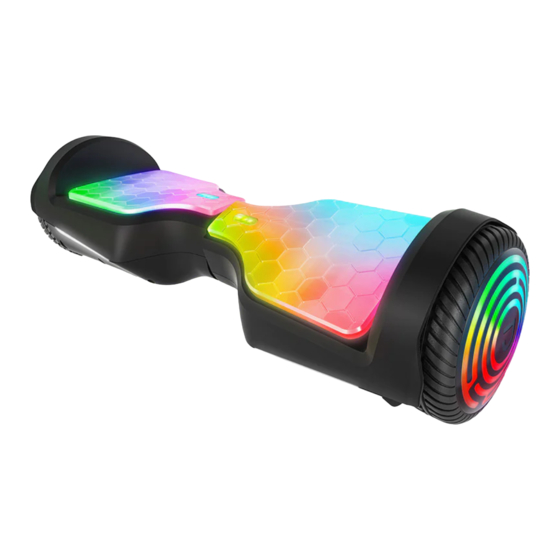
Page 10: Product Overview
Product Overview 1. HEADLIGHTS 2. STATUS INDICATOR LIGHTS 3. BATTERY INDICATOR LIGHTS 4. FOOTPADS 5. WHEELS 6. POWER BUTTON 7. CHARGING PORT 8. CHARGER... - Page 11 TOP VIEW REAR VIEW NOTE: IMAGES MAY NOT REFLECT EXACT APPEARANCE OF ACTUAL PRODUCT.
-
Page 12: Online Resources
Online Resources Scan for our most updated Lumino onboarding materials and support resources. WARNING FAILURE TO COMPLY WITH THE FOLLOWING INSTRUCTIONS MAY RESULT IN INJURY TO THE CHILD OR OTHERS. • KEEP SMALL PARTS AWAY FROM CHILDREN DURING ASSEMBLY. • ACCESSORY MUST BE ASSEMBLED AND REMOVED BY AN ADULT. -
Page 13: Getting Started Charging The Battery
1. Getting Started Charging the Battery · ONLY USE THE INCLUDED CHARGER. · PLUG THE CHARGER INTO THE WALL OUTLET BEFORE PLUGGING INTO THE CHARGING PORT ON THE HOVERBOARD. · NEVER TURN ON THE HOVERBOARD WHILE IT IS CHARGING. · CHARGE THE BATTERY UNTIL IT IS FULLY CHARGED—ABOUT 5 HOURS. -
Page 14: Powering On & Off
Powering On & Off TO POWER ON OR OFF: QUICK-PRESS THE POWER BUTTON. POWER BUTTON THE HOVERBOARD WILL AUTOMATICALLY SHUT OFF AFTER STANDING IDLE FOR 10 MINUTES. -
Page 15: Understanding The Battery Indicator Lights
Understanding the Battery Indicator Lights BATTERY INDICATOR LIGHTS STATUS INDICATOR LIGHTS (PAGE 15) - Page 16 WHEN POWERED ON FOR USE, BATTERY INDICATOR LIGHTS WILL ILLUMINATE TO INDICATE CHARGE PERCENTAGES AS INDICATED IN THE TABLE BELOW. WARNING: AS A SAFETY PRECAUTION, THE FRONT BATTERY OF THE HOVERBOARD WILL AUTOMATICALLY TILT CHARGE PERCENTAGE INDICATOR LIGHTS UP AND IT WILL SLOW DOWN WHEN THE BATTERY CHARGE DIPS BELOW 10%.
-
Page 17: Understanding The Status Indicator Lights
Understanding the Status Indicator Lights STATUS LIGHT RECALIBRATE YOUR LUMINO! STATUS YOUR LUMINO IS ALL SET. (SEE PAGE 16.) -
Page 18: How To Recalibrate
How to Recalibrate SOMETIMES THE INTERNAL BALANCE MECHANISMS ON A HOVERBOARD NEED TO BE RESET, OR "RECALIBRATED." IMPORTANT: RECALIBRATE YOUR HOVERBOARD STRAIGHT OUT OF THE BOX. THEN, RECALIBRATE AS NECESSARY. SIGNS YOUR HOVERBOARD MIGHT NEED RECALIBRATING INCLUDE CONSTANT BEEPING AND/OR SPINNING OF THE WHEELS. FOOTPADS HOLD POWER BUTTON FOR 5 SECONDS TO RECALIBRATE:... -
Page 19: Making Moves
2. Making Moves STARTING NOTES: · WHEN IT COMES TO RIDING, THERE IS NO TECHNICAL FRONT OR BACK OF THE HOVERBOARD. THE RIDER CAN STEP ON FROM EITHER SIDE. · THE DIRECTIONS GIVEN IN THIS MANUAL—RIGHT, LEFT, FRONT/FORWARD, AND REAR/BACK—ARE ORIENTED AS THE RIDER WOULD SEE THEM WHEN STANDING ON THE HOVERBOARD. -
Page 20: Riding The Hoverboard
Riding the Hoverboard TO MOVE FORWARD: APPLY EQUAL PRESSURE TO THE FRONT OF EACH FOOTPAD WITH YOUR TOES. TO MOVE BACKWARDS: APPLY EQUAL PRESSURE TO THE BACK OF EACH FOOTPAD WITH YOUR HEELS. IMPORTANT: WHEN THE HOVERBOARD IS TRAVELING NEAR OR AT MAX SPEED, IT WILL START BEEPING CONTINUOUSLY AS A WARNING TO SLOW DOWN. -
Page 21: Making Turns
Making Turns THE MORE PRESSURE YOU APPLY TO A FOOTPAD, THE FASTER THE WHEEL ON THAT SIDE WILL ROTATE. TO TURN RIGHT: APPLY EXTRA PRESSURE TO THE FRONT OF THE LEFT FOOTPAD WITH THE TOES ON YOUR LEFT FOOT. - Page 22 TO TURN LEFT: APPLY EXTRA PRESSURE TO THE FRONT OF THE RIGHT FOOTPAD WITH YOUR RIGHT FOOT.
-
Page 23: Slowing Down & Stopping
Slowing Down & Stopping TO SLOW DOWN WHILE RIDING FORWARDS, EASE UP ON THE PRESSURE BEING APPLIED TO THE FRONT OF THE FOOTPADS. BRING YOUR BODY WEIGHT OVER THE CENTER OF EACH FOOTPAD TO COME TO A STOP. Dismounting the Hoverboard ONCE THE BOARD HAS COME TO A STOP, DISMOUNT IT BY STEPPING OFF BEHIND IT ONE FOOT AT A TIME. -
Page 24: Using The Bluetooth® Speaker
TO CONNECT YOUR HANDHELD DEVICE TO THE LUMINO'S BLUETOOTH® SPEAKER: 1. POWER ON THE HOVERBOARD. 2. IN THE SETTINGS SECTION ON YOUR HANDHELD DEVICE, ENABLE BLUETOOTH AND LOOK FOR "LUMINO" IN THE LIST OF OPTIONS. SELECT IT. 3. PLAY MUSIC THROUGH YOUR FAVORITE APP, AND IT WILL STREAM THROUGH THE HOVERBOARD'S SPEAKERS. -
Page 25: Helmet Safety
Helmet Safety A HELMET SHOULD BE WORN AT ALL TIMES. PROPER POSITIONING: IMPROPER POSITIONING: THE FOREHEAD IS COVERED THE FOREHEAD IS EXPOSED. BY THE HELMET. A FALL COULD RESULT IN SERIOUS INJURY. * WEAR A HELMET, APPROPRIATE CLOTHING, SHOES, AND SAFETY GEAR. AVOID CLOTHING THAT CAN GET CAUGHT INTO OR UNDER THE WHEELS. -
Page 26: Care & Maintenance
WATER DIRECTLY TO THE HOVERBOARD, AS THE ELECTRICAL AND ELECTRONIC SYSTEMS MAY GET WET, WHICH COULD LEAD TO A MALFUNCTION THAT PUTS RIDER SAFETY AT RISK. · IF THE ELECTRIC PARTS OR BATTERY GET WET, DO NOT POWER ON THE HOVERBOARD. CONTACT THE JETSON CARE TEAM FOR ASSISTANCE. BATTERY CARE AND PRECAUTIONS ·... - Page 27 Stay connected. Be sure to follow @ridejetson on social media to learn about fantastic offers, giveaways, and all the latest Jetson news. Loving your ride? Then be sure to leave a review at ridejetson.com/reviews. We can’t wait to hear from you!
- Page 28 Date Code: 07/2023 Document Edition: v1.1 © 2023, JETSON. ALL RIGHTS RESERVED. Manufactured by JETSON ELECTRIC BIKES LLC. No portion of this document, including shape, copy, graphics, and design, may be reproduced or transmitted in any form or by any means.
Need help?
Do you have a question about the Lumino and is the answer not in the manual?
Questions and answers