Table of Contents
Advertisement
Advertisement
Table of Contents

Related Manuals for Aquos R8 pro


Summary of Contents for Aquos R8 pro
- Page 1 AQUOS R8 pro User Guide...
-
Page 3: Table Of Contents
Getting Started Package Contents............... 6 Parts & Functions.............. 6 eSIM..................8 SIM Card................11 Internal Storage and SD Card......... 14 AQUOS R8 pro Charging Handset..............19 User Guide Contents Power On/Off..............21 Making Initial Settings............ 22 Google Account..............25 Unlocking Screen...............27 Basic Operations Basic Operations............... - Page 4 Handset Settings About Settings............... 122 Data Usage Settings............123 Battery Settings.............128 Sound & Vibration Settings.......... 131 Display Settings............. 138 AQUOS Tricks Settings..........143 Security & Privacy Settings.......... 150 Location Settings............164 System Settings..............165 Other Handset Settings..........172 Global Services Global Roaming............... 192 Calling from Outside Japan...........193...
-
Page 5: About The User Guide
Display. Key labels in the User Guide are simplified for description purposes and differ with actual Display. Other Notations In the User Guide, the product is referred to as "handset." microSD™/microSDHC™/microSDXC™ Card is referred to as "SD Card." "A301SH" here refers to this mobile phone "AQUOS R8 pro."... -
Page 7: Getting Started
Getting Started Package Contents............... 6 Parts & Functions.............. 6 eSIM..................8 SIM Card................11 Internal Storage and SD Card......... 14 Charging Handset..............19 Power On/Off..............21 Making Initial Settings............ 22 Google Account..............25 Unlocking Screen...............27... -
Page 8: Package Contents
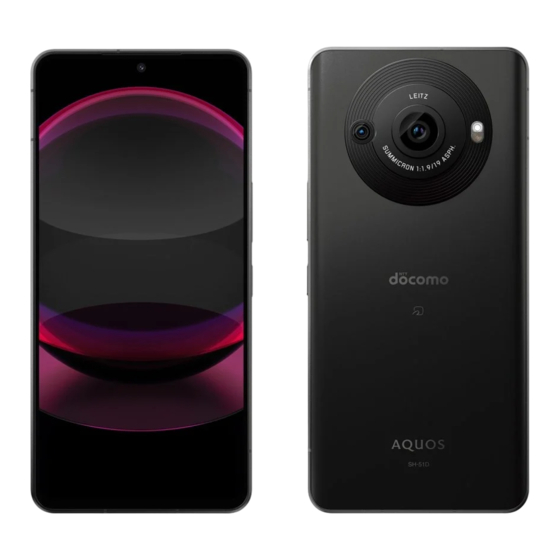
Package Contents Parts & Functions Package Contents Handset (Front) ・Handset (AQUOS R8 pro) ・Battery is built into handset. ・Handset back cover is not removable. ・Quick Switch Adapter (Complimentary sample) ・SIM Removal Tool (Complimentary sample) ・クイックスタート (Japanese) ・お願いとご注意 (Japanese) Name Description Earpiece/ Hear the other party's voice here. - Page 9 Handset (Back and Sides) Handset Keys Name Description Volume Up Increase volume. Name Description Volume Decrease volume. Use while recording videos or when talking Down Key through Speakerphone. Turn Display off/on. Long Press to power Make sure not to cover Mic. Power Key on or activate Google Assistant™.
-
Page 10: Esim
eSIM Next eSIM is a type of SIM that is embedded in a device. If your device supports an eSIM, you only need to set up a service plan that you purchased with eSIM and start using it. You don't need a USIM card. Handling eSIM To learn about setting up your service plan with eSIM, see the following website. - Page 11 Enable or disable eSIM Close In Home Screen, (Settings) Network & internet Your service plan with eSIM is downloaded. ・ To set up eSIM, Tap Settings . Continue by following onscreen prompts. SIMs SoftBank XXXX for "DOWNLOADED SIM" Use SIM...
- Page 12 Erase your service plan with eSIM In Home Screen, (Settings) Network & internet You can set enabling or disabling eSIM. ・ Tap Use SIM to enable eSIM. SIMs SoftBank XXXX for "DOWNLOADED SIM" Erase SIM...
-
Page 13: Sim Card
SIM Card Erase SIM Card is an IC card containing phone number and other customer information. Handling SIM Card Check the following regarding SIM Card handling. IC (gold) chip ・For SIM Card handling, see SoftBank Website. https://www.softbank.jp/mobile/support/protect/usim/ Your service plan with eSIM is erased. (Japanese) ・Avoid applying labels. - Page 14 With Display upward, insert SIM Removal Tool in removal hole Insert Card Tray in SIM Card Tray Slot in Card Tray ・Press firmly and straight until Card Tray ejects. SIM Card is inserted. ・Do not insert Card Tray upside down. ・Insert gently all the way horizontally in direction shown.
- Page 15 Removing SIM Card Insert Card Tray in SIM Card Tray Slot Always power off beforehand. With Display upward, insert SIM Removal Tool in removal hole in Card Tray SIM Card is removed. ・Do not insert Card Tray upside down. ・Insert gently all the way horizontally in direction shown. ・Press firmly and straight until Card Tray ejects.
-
Page 16: Internal Storage And Sd Card
Internal Storage and SD Card Inserting SD Card Handset supports SD Card up to 1 TB. Some SD Cards may not Always power off beforehand. operate properly. Internal storage can be used for saving data including system data, applications, and video and photos taken with Camera. With Display upward, insert SIM Removal Tool in removal hole in Card Tray Internal Storage/SD Card Cautions... - Page 17 Formatting SD Card Insert Card Tray in SIM Card Tray Slot When using a new SD Card for the first time, always format it on handset. ・Formatting erases all data on SD Card. Format SD Card with caution. ・When formatting, keep handset charged or charge it adequately beforehand.
- Page 18 SD card Done All data on SD Card is erased. Format FORMAT SD CARD...
- Page 19 Unmounting SD Card In Home Screen, (Settings) Eject Storage SD Card is unmounted. Storage menu opens. Mounting SD Card In Storage menu, This device SD card This device Mount SD card...
- Page 20 Removing SD Card Insert Card Tray in SIM Card Tray Slot Always power off beforehand. With Display upward, insert SIM Removal Tool in removal hole in Card Tray SD Card is removed. ・Do not insert Card Tray upside down. ・Insert gently all the way horizontally in direction shown. ・Push Card Tray firmly where circled (○) so that there is no ・Press firmly and straight until Card Tray ejects.
-
Page 21: Charging Handset
Charging Handset Charging with AC Adaptor Battery is built into handset. Use an AC Adaptor (USB Type-C™ quick charge AC Adaptor for USB PD-PPS [ZSDBAV] (SBAC22-TCPD)) (optional accessory). For information on other peripheral devices, see SoftBank Internal Battery Website. A lithium-ion battery is built into handset; it is not removable. - Page 22 Charging Cautions Charging with a Wireless Charger Water Resistance A third party wireless charger can be used to charge the Handset. See the User Guide for your wireless charger for AC Adaptor is not waterproof. Never connect a USB Type-C information on charging the Handset.
-
Page 23: Power On/Off
Power On/Off Powering Off Powering On Power Key + Volume Up Key Long Press Power Key until SHARP logo appears Power menu opens. Power off Handset powers on, and lock screen appears after a while. ・An initial settings wizard may appear the first time handset is powered on. -
Page 24: Making Initial Settings
Making Initial Settings Making Initial Settings When powering on the first time, an initial settings wizard appears for optionally making Wi-Fi, Google™ account, and other settings. Follow onscreen instructions to set items. Select language then Start You can also easily transfer data from a previously used smartphone, by connecting the included Quick Switch Adapter to handset External Connection Jack and then connecting the smartphone using a cable. - Page 25 Set up a Google Account Power on previous smartphone and unlock it Next ・See "Google Account" for details on a Google Account. ・ If previous smartphone is unusable, Tap Can't use old ・After setting a Google account, a list of transferable data device? and follow onscreen prompts.
- Page 26 Set/check each item Skip ・ After Tapping Add a card follow onscreen prompts to save card information. Accept Set each item Next SKIP Done ・ Tap method NEXT to set selected method. See "Using Fingerprint Authentication Function," "Setting Screen to Unlock by Tracing Pattern,"...
-
Page 27: Google Account
Google Account Google Use a Google Account and get more convenience with Google services. A Google Account is required to use some services or fully use some applications. Google Account Cautions Google Account Mail Address & Password Be careful not to forget your Google account mail address and password. - Page 28 Set/enter date of birth and gender Next Next Select a mail address Next Check the privacy policy and terms of use I agree ・ To create another mail address, Tap Create your own Gmail address Enter user name (mail address) Next Select whether to enable data backup Accept...
-
Page 29: Unlocking Screen
Unlocking Screen Signing in to a Google Account Screen Lock In window for logging in to a Google account, enter mail address Next After a period of inactivity, Display turns off to save battery power (screen lock active). Screen lock prevents accidental Touchscreen operation. Enter password Next ・To activate screen lock manually, Press Power Key when... - Page 30 Unlocking Screen When Display is turned off (screen lock active), Power Key Lock screen appears. Flick lock screen up Screen is unlocked. ・To change the unlock method for enhanced security, set handset to require pattern drawing or lock no. (PIN)/ password entry for unlocking screen or set screen to be unlocked with your fingerprint/face as needed.
- Page 31 Basic Operations Basic Operations............... 30 Using Touchscreen............31 Using Manner Mode............32 Using Airplane Mode............34 Text Entry.................35 Using Fingerprint Authentication Function....36 Updating the System............39...
-
Page 32: Basic Operations Basic Operations
Basic Operations Menu Operations Selecting Options and Navigating Screens at Display top for available settings and items. Tap items, icons, onscreen keys, etc. to open assigned items. ・To return to the previous screen, Flick the edge of screen to Screens may also have settings and items that are available by the left/right. -
Page 33: Using Touchscreen
Using Touchscreen Touch & Hold Handset uses a touchscreen-type Display. Operate with your Contact Display lightly; release finger when screen changes. fingers on Display. About Touchscreen In Case of Unintended Operation If handset initiates operation without Touchscreen (Display) being operated or does not respond after Touchscreen being operated, Press Power Key to turn off Display, Press Power Key again to turn on Display and then operate handset. -
Page 34: Using Manner Mode
Using Manner Mode Pinch/Spread Mute ringtones and other handset sounds to avoid disturbing Contact Display lightly, then move fingers toward each other others around you. (Pinch) or away from each other (Spread). Manner mode setting is also accessible from Quick Settings Window. - Page 35 Activating Manner Mode (Mute) (Vibe) Press Volume Up/Down Key Handset enters Manner mode (vibe). Volume bar appears. Manner Mode (Vibe) Operations Setting from Quick Settings (Manner OFF) Manner mode (vibe) setting is also accessible from Quick Settings Window. Flick Status Bar down Flick Notifications Window down Manner mode OFF...
-
Page 36: Using Airplane Mode
Using Airplane Mode Canceling Manner Mode (Mute) Leaving power on, suspend signal-transmitting functions. Press Volume Up/Down Key for volume bar, (Mute) (Manner OFF) Activating Airplane Mode Handset exits Manner mode. Flick Status Bar down Notifications Window opens. Flick Notifications Window down Quick Settings Window opens. -
Page 37: Text Entry
Text Entry Canceling Airplane Mode In Quick Settings Window, Airplane mode On Keyboards Use onscreen keyboards for text entry. Airplane Mode Caution ・ Tap Text entry field for keyboard. To hide it, Tap ・Text entry descriptions are for Google Keyboard (default Wi-Fi and Bluetooth functions can be enabled after ®... -
Page 38: Using Fingerprint Authentication Function
Using Fingerprint Authentication Switching Keyboards Function In a text entry window, Fingerprint Authentication Function Hold finger to sensor to authenticate and use handset. Use this function to unlock screen. Fingerprint Authentication Function Cautions Observe the following when using the fingerprint authentication function. - Page 39 Saving Fingerprints Register fingerprint In Home Screen, (Settings) Follow onscreen prompts and set pattern / lock no. (PIN) / password for unlocking screen Security & privacy ・This is a backup method for unlocking the screen if unable to authenticate with your fingerprint. ・If method for unlocking screen is setting other than Security &...
- Page 40 Setting Whether to Use Two Fingers when Hold finger to sensor until handset vibrates Authenticating In fingerprint settings, for "Two-finger authentication" ・ Tap to toggle on ( to toggle off ・Save at least two fingerprints beforehand. ・If confirmation appears, follow onscreen prompts. Setting Whether to Use Two Fingers on All Authentication Prompts when using Two ・If finger is already saved, use another finger.
-
Page 41: Updating The System
Updating the System Performing Fingerprint Authentication Check whether system updates are required via the network, and update manually as required. Checking/updating does not In authentication window, hold finger to sensor incur transmission fees. Software Update Cautions Applications Applications may be updated or newly added, or names, icons, operations and user interfaces of applications may be changed. - Page 42 System update System update window appears. Check for update Continue by following onscreen prompts System update begins. ・Use other functions during a system update. However, for 10 days after a system update notification, update installation pauses while using other functions. Tap Resume to restart the installation and also use other functions.
- Page 43 Handset Interface Handset Screens............... 42 Icons at Display Top (Status Bar)........50 Checking Notifications (Notifications Window).....52 Checking Notifications (Quick Settings Window)..54...
-
Page 44: Handset Screens
See "Display Settings" and "Notifications" for details. 2 Appear when emopa is configured. See "エモパーを利用 する (https://www.softbank.jp/mobile/support/manual/ smartphone/aquos-r8-pro/menu/25730/)" (Japanese) for details. 3 Appears when Add text on lock screen is set. See "Display Settings" for details. Home Screen & App List Most handset operations start in Home Screen or in app list. - Page 45 App List Layout Multi-Window Split screen to view and operate two applications. ・Viewing in Multi-Window is not available for some applications. Drag bottom of Display up Search for application View predicted applications App list Tap to activate applications. See "Activating Applications"...
- Page 46 ・Alternatively, use Clip Now and Touch & Hold corner of Display to capture a screenshot. See "スクリーンショットを撮 Changing Top/Bottom Areas of Multi-Window る(Clip Now) (https://www.softbank.jp/mobile/support/ manual/smartphone/aquos-r8-pro/menu/25732/)" (Japanese) Drag pane bar ( ) up or down for details. Switching Top/Bottom Display of Multi-Window...
- Page 47 Changing Wallpaper Select wallpaper from bottom of "Preset wallpapers"/Tap application from bottom of "Choose wallpaper from" and select wallpaper Touch & Hold open area of Home Screen ・After selecting wallpaper, Pinch/Spread/Drag to adjust the display area. ・Operations may vary depending on selected item. Follow onscreen prompts.
- Page 48 Lock Home Photo Shuffle to use Lock Photo Shuffle/Home Photo Shuffle. Function Shortcuts Using My AQUOS With some applications, Touch & Hold for shortcuts to Touch & Hold open area of Home Screen Wallpaper & functions. Touch & Hold function shortcut then release...
- Page 49 Adding Widgets Drag to location to add widget Add Chrome™ bookmarks, Analog clock, etc. as follows. Touch & Hold open area of Home Screen Widget is added. ・Drag to sheet visible at edge of Display to toggle sheets and add. Drag to rightmost sheet to add one more sheet and add.
- Page 50 Adding Folders Deleting Folders Add folders to collect icons. In Home Screen, Touch & Hold folder Drag to "Remove" ・Folders can also be created in Favorites Tray and app list. ・Delete folders the same way in Favorites Tray. ・Applications in folder are also deleted. In Home Screen, Touch &...
- Page 51 Making Home Screen Settings Set items Settable items are the following. Settings are complete. Item Description Set the number of applications to be Home screen placed vertically and horizontally in Home grid Screen and App List. Set whether to show dots with application Notification icons for notifications.
-
Page 52: Icons At Display Top (Status Bar)
Icons at Display Top (Status Bar) Main Notification Indicators Indicators (new message notification, handset status, etc.) Notification Indicators appear on the left. appear at the top of Display. ・Notification Indicators do not appear in lock screen. Status Bar Layout Indicator Description Time Glove Mode On... - Page 53 3 Appears when application starts using the camera/ Main Status Indicators microphone. Displayed as a green dot while the camera/ microphone is in use. Status Indicators appear on the right. Indicator Description Battery Strength(100%) Battery Strength (less than about 15%) Energizing Battery Saver On Signal Strength (Strong) Signal Strength (Fair)
-
Page 54: Checking Notifications (Notifications Window)
Checking Notifications Notifications Window Layout (Notifications Window) Open notifications and check handset status. Opening Notifications Window Flick Status Bar down Notifications and active functions. Use corresponding functions. Silent notifications. Manage notifications. Delete all notifications and close Notifications Window. Notifications Window opens. 1 Usable functions depend on the notification. - Page 55 Deleting Notifications Deleting All Notifications Flick Status Bar down Flick Status Bar down Notifications Window opens. Notifications Window opens. Flick notification left/right Clear all Notification is deleted. All notifications are deleted. ・Some notifications may not be deleted. ・Some notifications may not be deleted.
-
Page 56: Checking Notifications (Quick Settings Window)
Checking Notifications (Quick Quick Settings Window Layout Settings Window) Tap icons to toggle functions on/off, etc. Opening Quick Settings Window Flick Status Bar down Adjust Display brightness. Toggle Wi-Fi on/off. Toggle Manner mode (OFF / Vibe / Mute). Toggle Auto-rotate screen on/off. Open Device controls. - Page 57 Toggle Dolby Atmos on/off. ® Open QR code scan window. Open Security & privacy menu. Open Alarm. Toggle Charge share on/off. Indicate position of Setting key sheet. Open Edit screen for Quick Settings Window. Open Settings. Open Power menu ( Power off Restart , etc.) .
-
Page 59: Phone
Phone Placing/Answering Calls........... 58 Optional Services..............63 Handset Phone Number............ 70 Address Book..............71... -
Page 60: Placing/Answering Calls
Placing/Answering Calls Use onscreen dialpad to enter number How to dial directly to make a call and answer a call, as well as options when a call is arriving/during a call are described. Support for VoLTE/VoLTE (HD+) and HD Voice Handset supports VoLTE/VoLTE (HD+) and HD Voice for high-quality call sound. - Page 61 Emergency Calls Phone Window Layout Emergency Location Report Making emergency calls (110, 119 or 118) automatically reports handset location to corresponding agency (police, etc.). This system is referred to as Emergency Location Report, and notifies location based on positioning from base stations.
- Page 62 Enter subject name Copying Answer Phone Messages to Internal Storage/SD Card In Home Screen, (Answer phone) Touch & Hold message Export AQUOS R8 pro card Select where message is saved USE THIS FOLDER ALLOW Rejecting Arriving Calls Call ends. As call is arriving, Flick...
- Page 63 Answering Calls (Display On) Call Window Layout/In-Call Operation When call is arriving, ANSWER Other party photo. Other party name/number. Call connects. HD Voice ( )/HD+ Voice ( ) call in progress. Mute own voice. Show dialpad. To end call, Add call. End call.
- Page 64 Touch & Hold message Export ringtones sound are possible. VoLTE (HD+) provides a clearer AQUOS R8 pro SD card Select where message is and more natural quality call than conventional VoLTE. saved...
-
Page 65: Optional Services
Optional Services Call Forwarding Use these optional services for voice calls: In Home Screen, (Phone) Optional Services The following optional services are available. Service Description Call Divert all/unanswered calls to a preset Forwarding number. Divert all/unanswered calls to Voicemail Voicemail Center;... - Page 66 Voice Mail / Call Forwarding CONFIRM Voice Mail/Call Forwarding opens. Call Forwarding is set. Canceling Call Forwarding Voice Mail / Call Forwarding Call Forwarding ON In Voice Mail/Call Forwarding screen, Tap Voice Mail / Call Forwarding All OFF CONFIRM Ring Time Tap the ring time Telephone Number of Forwarding Destination the phone number input area...
- Page 67 Voicemail Voice Mail / Call Forwarding In Home Screen, (Phone) Voice Mail/Call Forwarding opens. Phone opens. Voice Mail / Call Forwarding Voice Mail ON Settings Calling accounts Ring Time Tap the ring time SoftBank Call service settings CONFIRM Call service settings open. Voicemail is set.
- Page 68 Voicemail Call Waiting Voicemail and Answer Phone Requires separate subscription. Voicemail and Answer Phone differ mainly in the following ways. ・Voicemail:Messages are held at the Voicemail Center. In Home Screen, (Phone) Messages are held even when handset is not turned on or outside a service area.
- Page 69 Group Calling for "Call Waiting" ( Requires separate subscription. During a call, Add call Call Waiting is set. When Call Arrives during Another Call Dialpad window opens. A tone sounds; Flick up to begin call. Enter number Call Canceling Call Waiting for "Call Waiting"...
- Page 70 Notify Caller ID Caller ID Network default Hide number Show number In Home Screen, (Phone) Caller ID is set. Phone opens. ・ Set to Network default to notify number. Settings Calling accounts SoftBank Additional settings Additional settings appear.
- Page 71 Call Barring SoftBank Call service settings Restrict outgoing/incoming calls and SMS messages. ・SMS may not be restricted in some areas. Restriction Description - Barring of All Outgoing Calls Restrict all outgoing calls. - Barring of All Outgoing International Calls Restrict international calls; while outside Japan, calls within current country are Outgoing Call allowed.
-
Page 72: Handset Phone Number
Handset Phone Number Troubleshooting Calling is not barred Checking Your Phone Number Are you using Call Forwarding or Voicemail? Calling may not be barred even if Barring of All Outgoing Calls and Barring of All Incoming Calls are set. In Home Screen, (Settings) Settings appear. -
Page 73: Address Book
Address Book Save phone numbers and mail addresses as well as birthdays, nicknames, etc. Set ringtones for each contact as needed. Address Book Caution Contacts may be altered/lost if handset is left uncharged or due to accidents, malfunctions, repairs, handset upgrade/replacement, mishandling, etc. - Page 74 Dialing from Contacts Syncing with Contacts on Server Sync handset Address Book with Google contacts on server. Also sign in to a Google Account before syncing with a In Home Screen, (Phone) non-Google Account. In Home Screen, (Settings) Passwords & accounts Tap account to sync Account sync...
- Page 75 Tap number Handset dials number. Call begins when other party answers. ・ Alternatively, Tap Call to make a call.
-
Page 77: Messaging
Messaging Sending Messages (+メッセージ (+Message))....76 Using Gmail............... 77... -
Page 78: Sending Messages (+メッセージ (+Message))
Sending Messages (+メッセージ (+Message)) Tap recipient Sending New Messages In Home Screen, (+メッセージ) Message window opens. ・To send to a phone number/email address not saved in contacts, enter phone number/email address in Enter name and phone number field and create message. Tap message entry field Message Enter message... -
Page 79: Using Gmail
Using Gmail Tap account type Use Gmail (Google's webmail service) as well as your work/ personal email. Setting an Account Set up a Google Account or an email account to use Gmail. When activating (Gmail) for the first time, account setup menu appears;... - Page 80 Creating/Sending Gmail In Home Screen, (Google) Message is sent. Operations when Creating Message (Gmail) Adding Cc/Bcc Recipients In message composition window, in Recipient field Enter recipient Attaching Files In message composition window, Attach file Select where file is saved Select file ・...
- Page 81 Opening New Gmail Opening Gmail When message arrives, new message notification appears in lock screen. In Home Screen, (Google) In lock screen, Tap new message notification (Gmail) Message window opens. ・For two or more new messages, message list opens; Tap one. ・...
- Page 82 Forwarding Messages In message window, for message to forward Forward Create message ・Alternatively, at bottom of message window, Tap Forward Archiving Messages In message window, ・Alternatively, in message list, Tap icon for message to archive ( Deleting Messages In message window, ・Alternatively, in message list, Tap icon for message to delete ( Resetting Messages as Unread...
-
Page 83: Internet
Internet Using the Internet (Chrome)..........82... -
Page 84: Using The Internet (Chrome)
Using the Internet (Chrome) Enter search string or URL Use Chrome simply by entering words to search for or URLs. TLS (Transport Layer Security) is a protocol for encrypting sent/received data. While in a screen connected by TLS, data is encrypted to safely send/receive private information, credit card numbers, corporate secrets, etc., and provide protection against online threats (eavesdropping, falsification, impersonation, etc.). - Page 85 Adding Bookmarks Opening Saved (Downloaded) Image, Etc. In Home Screen, (Google) (Files) Browse Downloads Tap image, etc. In Home Screen, (Chrome) ・If confirmation appears, follow onscreen prompts. Chrome activates. Show Website to add Current Website is added to Bookmarks.
- Page 86 Bookmark Operations Checking Browsing History Editing Bookmarks In Chrome, Bookmarks Mobile bookmarks In Home Screen, (Chrome) for bookmark to edit Edit Edit each item Moving Bookmarks In Chrome, Bookmarks Mobile bookmarks for bookmark to move Move to... Select location ・SoftBank folder and bookmarks in SoftBank folder cannot be moved.
- Page 87 Setting Chrome Settings Set items Make Chrome settings. Settable items are the following. Item Description Sign in to your Google Account and make Turn on sync settings for bookmarks, history, etc. View account information. Google Set whether to use Google services. services Search engine Select a search engine.
-
Page 89: Camera
Camera Capturing Photos/Videos..........88 Viewing & Managing Photos/Videos (Photos)....93... -
Page 90: Capturing Photos/Videos
"撮影モードを切り替える (https:// images. Wipe lens with a soft cloth beforehand. www.softbank.jp/mobile/support/manual/smartphone/ aquos-r8-pro/detail/76357/)" (Japanese) for other shooting modes. Avoid Exposure to Direct Sunlight ・Alternatively, Drag Viewfinder left/right to switch shooting Be careful not to expose lens to direct sunlight for long modes. - Page 91 Photo Viewfinder (Back Camera/Front Camera) Layout / Volume Up/Down Key Shutter clicks and photo is saved. ・ To capture continuously, Touch & Hold or Press Volume Up/Down Key for 1+ seconds. Continuously captured photos are saved to internal storage. ・ When Movie shooting is selected for Press and hold...
- Page 92 5 For Front Camera, the entire screen lights up as a flash when enabled, allowing for bright pictures of people even Handset stable indicator when taking selfies at night (selfie flash). Appears when handset is stabilized. 6 Shot is captured with recognized scene or optimal quality HDR indicator or shutter speed for subject.
- Page 93 ・ Enable AI Live Story , and AI may create a short movie www.softbank.jp/mobile/support/manual/smartphone/ separately from the captured video. See "AIライブス aquos-r8-pro/detail/76357/)" (Japanese) for other shooting トーリーが作成したショートムービーを再生する (https:// modes. www.softbank.jp/mobile/support/manual/smartphone/aquos- ・Alternatively, Drag Viewfinder left/right to switch shooting r8-pro/menu/25723/)" (Japanese) for details.
- Page 94 Video Viewfinder Layout Tone sounds and video is saved. Zoom magnification ・Alternatively, Press Volume Up/Down Key to stop recording. Tap for zoom magnification adjustment bar. Drag left/ right to adjust zoom magnification. Angle of view changes automatically according to zoom Troubleshooting magnification.
-
Page 95: Viewing & Managing Photos/Videos (Photos)
Viewing & Managing Photos/ Video Viewfinder Layout While Capturing Videos (Photos) View photos/videos saved in internal storage, on SD Card and in Google online storage. Viewing after logging in to a Google account is described. Viewing Photos/Videos View captured/downloaded photos and videos. Image File format Photo... - Page 96 Icons in Photos Archiving Photos/Videos Icons below appear according to shooting mode, settings, In file view window, Move to Archive etc. used. ・ appears for photos captured with Intelligent Framing. Shown image is moved to Archive. Tap photo for original image (captured photo) and ・...
- Page 97 Setting Whether to Play Back Videos in Loop In file view window for video, Loop video off Loop video on ・ If is hidden, Tap Display first. Saving Frame from Video as Photo (Atokara Capture) In file view window for video, Edit in Atokara Capture Drag...
-
Page 99: Application Basics
Application Basics Confirmation when First Activating Applications..98 Applications..............102 Adding/Deleting Applications........104... -
Page 100: Confirmation When First Activating Applications
Confirmation when First Activating Applications WHILE USING THE APP Set the operation of applications when activating for the first time. The type and content of a confirmation differ with the application. The following explains confirmation: First things first. Setting Required Permissions for Applications ・... - Page 101 When permission setting screen for エモパー appears, NEXT ALLOW WHILE USING THE APP ONLY THIS TIME ALLOW ・ Tap ONLY THIS TIME to temporarily permit usage of application. ALLOW ALLOW ・ Normally, select ALLOW to permit usage of the function. 設定する...
- Page 102 エモパー 設定する Allow display over other apps Allow notification access ALLOW...
- Page 103 Setting Whether to Pause Notifications by Proceed to the setting Removing Permissions and Temporary Files for Applications That Have Not Been Used for Several Months In Home Screen, (Settings) Apps See all XX apps Tap application name Pause app activity if unused ・...
-
Page 104: Applications
Applications Function Shortcuts With some applications, Touch & Hold for shortcuts to Activating Applications functions. Tap function shortcut to launch function directly. Flick Home Screen up Exiting Applications Tap application Flick the edge of screen to the left or right again and again while applications are running Application activates. - Page 105 Opening Recent Apps Window Recent Apps Window Layout Drag bottom of Display up Show application menu. Remove all applications from the list. Activate recently used applications. Split screen (Multi-Window). Recent apps window opens. Capture Screenshots. ・In app list, recent apps window does not open by Dragging bottom of Display up.
-
Page 106: Adding/Deleting Applications
Adding/Deleting Applications Tap free application Download a variety of applications (free/paid) from Google Play. Change the setting of downloaded applications to enable manual or automatic updates. Sign in to a Google Account beforehand. Getting Help with Google Play In Google Play, Help &... - Page 107 Purchasing Applications Enter password for Google account Verify In Home Screen, (Play Store) Application downloads and installs. ・If confirmation appears, follow onscreen prompts. Google Play opens. ・If confirmation appears, follow onscreen prompts. Purchased Applications Payment Tap paid application Pay once. Re-downloads of uninstalled applications are free of charge.
- Page 108 Updating Installed Applications Setting Automatic Update by Application In Google Play, Manage apps & device Manage Tap application Enable auto In Home Screen, (Play Store) update ・If confirmation appears, follow onscreen prompts. ・ Tap Enable auto update to toggle on ( )/off ( ・Automatic update is not available for some applications.
- Page 109 Uninstalling Applications Manage Applications installed via Google Play can be deleted (uninstalled). In Home Screen, (Play Store) Tap application Google Play opens. ・If confirmation appears, follow onscreen prompts. Uninstall Manage apps & device Uninstall Application is deleted.
-
Page 111: Wi-Fi/Bluetooth
Wi-Fi/Bluetooth ® Connecting by Wi-Fi............110 Using Bluetooth Function..........116 ®... -
Page 112: Connecting By Wi-Fi
Connecting by Wi-Fi Wi-Fi Handset supports Wi-Fi (wireless LAN). Access the Internet via household Wi-Fi networks. Connecting Selected Access Points In Home Screen, (Settings) Wi-Fi is enabled. ・Access point search starts; available access points appear upon completion. ・ Tap Wi-Fi to toggle on ( )/off ( Tap access point... - Page 113 Wi-Fi Operations Disconnecting Saved Access Points Updating Wi-Fi and Mobile Network Setting In Wi-Fi and Mobile Network menu, Saved networks Status Tap access point to disconnect DISCONNECT In Wi-Fi and Mobile Network menu, ・ Tap CONNECT to connect to disconnected access point. Enabling/Disabling Automatic Use of Wi-Fi when High-Quality Network Is Saved (Home Troubleshooting...
- Page 114 Entering Details Manually to Connect Wi-Fi In Home Screen, (Settings) Wi-Fi is enabled. ・ Tap Wi-Fi to toggle on ( )/off ( Network & internet Add network ・ Tap for Add network to open QR code scan window. After scanning QR code, password is shared and Wi-Fi Wi-Fi and Mobile Network connection is possible.
- Page 115 Deleting Connected Access Points Select security In Home Screen, (Settings) Tap Password field Network & internet Enter password Wi-Fi and Mobile Network SAVE Wi-Fi and Mobile Network menu opens. Tap connected access point Handset is connected. ・Entering a password is not required if an access point is not security protected.
- Page 116 Deleting Saved Access Points FORGET In Home Screen, (Settings) Handset disconnects from the access point. ・After disconnecting from an access point connection, the password may need to be entered again to reconnect. Network & internet Wi-Fi and Mobile Network Wi-Fi and Mobile Network menu opens. Saved networks...
- Page 117 Using Wi-Fi Direct Tap access point Use Wi-Fi Direct to establish a Wi-Fi connection with other Wi-Fi Direct compatible devices with no need for an access point or Internet connection. In Home Screen, (Settings) Network & internet FORGET Wi-Fi and Mobile Network Wi-Fi The access point is deleted.
-
Page 118: Using Bluetooth ® Function
Using Bluetooth Function ® Wi-Fi Direct Connect handset to other Bluetooth devices (e.g., headset) ® for handsfree conversations, or connect to other Bluetooth ® capable mobile phones, etc. to exchange data. Bluetooth Connectivity ® The Bluetooth function is a technology that enables wireless ®... - Page 119 Enabling Bluetooth Function ® Use Bluetooth In Home Screen, (Settings) Bluetooth is enabled. ® ・ Tap Use Bluetooth to toggle on ( )/off ( Renaming Handset Name that Appears Connected devices on Other Devices In Bluetooth menu, Device name Enter name ®...
- Page 120 Pairing Bluetooth Devices ® Tap target device Search for and pair nearby Bluetooth devices. Paired ® Bluetooth devices can be connected easily. ® ・Set Bluetooth devices pair to be discoverable on handset ® first. In Home Screen, (Settings) Continue by following onscreen prompts to authenticate Connected devices Pairing completes;...
- Page 121 ® Receiving Data via Bluetooth ® In Home Screen, (Settings) Connected devices "Bluetooth でデータを受信する(例:電話帳) (https:// ® www.softbank.jp/mobile/support/manual/smartphone/aquos- r8-pro/detail/76464/)" (Japanese) and "Bluetooth で電話帳 ® データを取り込む(データ引継) (https://www.softbank.jp/ mobile/support/manual/smartphone/aquos-r8-pro/ detail/76465/)" (Japanese) for details. Connected devices menu opens. Tap target device Handset connects to the device.
- Page 122 Sending Data via Bluetooth (e.g., ® Address Book) Bluetooth In Home Screen, (Google) (Contacts) ・ If Bluetooth is hidden, Flick share menu up first. Tap target device Contacts opens. ・If confirmation appears, follow onscreen prompts. Tap contact Data is sent. Sending to Several Contacts In Contacts, Touch &...
-
Page 123: Handset Settings
Handset Settings About Settings............... 122 Data Usage Settings............123 Battery Settings.............128 Sound & Vibration Settings.......... 131 Display Settings............. 138 AQUOS Tricks Settings..........143 Security & Privacy Settings.......... 150 Location Settings............164 System Settings..............165 Other Handset Settings..........172... -
Page 124: About Settings
Set Display brightness, font size, etc. Wallpaper & Make settings for wallpapers and icons, style etc. Set useful functions such as ScrollAuto, AQUOS Tricks Simple mode, and Clip Now. Home Change the home application. applications Set captions, magnification gestures, and Accessibility other useful accessibility functions. -
Page 125: Data Usage Settings
Data Usage Settings Mobile Data Usage Operations Check the amount of your mobile data usage (per month) and Setting Whether to Permit Restriction on Use restrict usage. of Data when Data Saver Set Data usage is only as tracked by handset, and may differ from In Mobile data usage window, Tap application name actual data usage statement. - Page 126 Setting Reset Date for Data Usage Flick date up/down to set reset date In Home Screen, (Settings) Network & internet Reset date is set. SIMs Data warning & limit Mobile data usage cycle...
- Page 127 Setting an Alert Amount for Increased Data Usage Enter amount for alert In Home Screen, (Settings) Network & internet Amount for data alert is set. ・ Tap to change the unit (MB or GB). ・Data usages are approximate, and may differ from the actual data usage.
- Page 128 Setting a Limit on Mobile Data Usage Enter amount for limit In Home Screen, (Settings) Network & internet Limit on data is set. ・ Tap to change the unit (MB or GB). ・Data usages are approximate, and may differ from the actual data usage.
- Page 129 Restrict Background Mobile Data Background data In Home Screen, (Settings) Network & internet Restriction on background data is set. ・ Tap Background data to toggle on ( )/off ( SIMs App data usage Mobile data usage window opens. Tap application name...
-
Page 130: Battery Settings
Battery Settings Setting Whether to Limit Battery Usage of Check battery usage, or save battery power by restricting Seldom-Used Applications some handset features. In Home Screen, (Settings) Battery Adaptive Battery Use Adaptive Battery Battery Settings ・ Tap Use Adaptive Battery to toggle on ( )/off Settable items are the following. - Page 131 Battery Saver Operations Using Battery Saver Enabling Battery Saver Automatically when Battery Level Falls to Specified Level In Home Screen, (Settings) Battery In Battery Saver menu, Set a schedule Based on percentage Drag bar to adjust battery level ・ To cancel the setting, Tap No schedule Setting Whether to Automatically Disable Battery Saver when Battery Level is 90%...
- Page 132 Using Charge Share Place handset and Qi compatible device so that Charge Share Power Qi compatible wireless chargeable device by stacking it position on back of handset overlaps wireless charging on the back of handset (Charge share). position of Qi compatible device ・Using Charge share consumes handset's battery.
-
Page 133: Sound & Vibration Settings
Sound & Vibration Settings ・Device to be charged is not detected for a certain period of time. ・Handset is hot. Set ringtone, notification sound, etc. ・USB device (e.g., charger) is connected to External Connection Jack. Sound & Vibration Settings ・Other abnormal condition is detected. Settable items are the following. - Page 134 Dolby Atmos Making Application Interruption Settings Handset supports Dolby Atmos. In Sound & vibration menu, In Home Screen, (Settings) Sound & vibration Dolby Sound Apps and enable Dolby Atmos ( ) to Do Not Disturb Apps Add apps Follow enjoy 3D surround effect with Dolby Atmos contents. onscreen prompts The audio effect is also present with media sound, ringtones, and alarms other than Dolby Atmos contents.
- Page 135 Setting Whether to Show Captions Setting Whether Handset Vibrates when Automatically when Playing Media Receiving Messages In Home Screen, (Settings) Sound & vibration In Home Screen, (Settings) Sound & vibration Live Caption Use Live Caption Vibration & haptics Notification vibration ・...
- Page 136 Setting Ringtones Setting Default Alarm Sound In Home Screen, (Settings) Sound & vibration Default alarm sound Follow onscreen prompts In Home Screen, (Settings) Setting Whether Dialpad Tones Sound In Home Screen, (Settings) Sound & vibration Dial pad tones ・ Tap Dial pad tones to toggle on ( )/off (...
- Page 137 Setting Volume for Ringtones for Incoming Calls and Notifications In Home Screen, (Settings) Setting is complete. Sound & vibration Sound & vibration menu opens. Drag "Ring & notification volume" left/right Ringtone plays to check volume. ・ Drag right to increase volume, and left to decrease volume.
- Page 138 Setting Volume of Music and Videos Setting Alarm Volume In Home Screen, (Settings) In Home Screen, (Settings) Sound & vibration Sound & vibration Sound & vibration menu opens. Sound & vibration menu opens. Drag "Alarm volume" left/right Drag "Alarm volume" left/right Alarm sound plays.
- Page 139 Setting Vibration for Incoming Calls Ring vibration Vibrate first then ring gradually Make vibration settings for incoming calls. In Home Screen, (Settings) Setting is complete. ・ Tap Ring vibration Vibrate first then ring gradually toggle on ( )/off ( ・ Available when Use vibration &...
-
Page 140: Display Settings
Set the font type of text on Display. Lock Screen so New Notifications Are Easier to View Make Home Screen settings. Customize "Making Home Screen Settings" for AQUOS Home In Home Screen, (Settings) Display Lock details. screen Organize notifications on the lock screen... - Page 141 Setting Whether to Display Controls of Device Setting Whether Holding Finger to Fingerprint Connected to Handset on Lock Screen Sensor Unlocks Screen while Screen Is Turned Off (Screen Lock) In Home Screen, (Settings) Display Lock In Home Screen, (Settings) Display Lock screen Show device controls...
- Page 142 Setting Whether to Make Text Easier to Read Setting Brightness for RelaxView by Outlining, etc. In Home Screen, (Settings) Display In Home Screen, (Settings) Display Display RelaxView Drag "Intensity" slider to adjust size and text High contrast text ・ Available when Use RelaxView is enabled.
- Page 143 Setting Display Timeout Setting Whether to Rotate Display with Handset Orientation Automatically In Home Screen, (Settings) Display Auto- In Home Screen, (Settings) Display rotate screen ・ Tap Auto-rotate screen to toggle on ( )/off ・ Disable Auto-rotate screen to save battery power. ・The feature may not follow the setting with certain applications.
- Page 144 Setting Font Size Setting Size of Images and Icons In Home Screen, (Settings) In Home Screen, (Settings) Display Display Display menu opens. Display menu opens. Display size and text Display size and text Drag "Font size" left/right Font size is changed. ・Check the set font size in Preview.
-
Page 145: Aquos Tricks Settings
AQUOS Tricks Settings Drag "Display size" left/right Set useful functions such as ScrollAuto, Simple mode, and Clip Now. AQUOS Tricks Settings Settable items are the following. Item Description Set screen display and quality according Rich color to use. technology "Display Settings"... - Page 146 ROBOQUL swivels when Display lights up, at start of ROBOQUL charging, for incoming calls, alarms, etc. setting "ロボクルを設定する (https:// www.softbank.jp/mobile/support/ manual/smartphone/aquos-r8-pro/ detail/76392/)" (Japanese) for details. AQUOS Tricks AQUOS Tricks menu opens. High-speed display High-speed display window opens.
- Page 147 Setting Smoothness Type when sensor even turned off (Screen Lock). Smoothing Video when the screen is In Home Screen, (Settings) AQUOS Tricks turned off High-speed display Increase video smoothness Increase motion smoothness Increase fineness to Fingerprint Sensor and Pay Trigger achieve smoothness...
- Page 148 Authentication Prompts when using Two Sensor Unlocks Screen while Screen Is Turned Fingers for Fingerprint Authentication Off (Screen Lock) In Home Screen, (Settings) AQUOS Tricks In Home Screen, (Settings) AQUOS Tricks Fingerprint sensor and Pay Trigger Two-finger Fingerprint sensor and Pay Trigger...
- Page 149 Quick Operation Settings AQUOS Home Settings Set what action occurs when pressing Power Key, and make Switch to and make settings for the AQUOS-brand home Navigation Bar settings. Settable items are the following. application. Item Description Item Description Press and hold...
- Page 150 Parental Controls In Home Screen, (Settings) AQUOS Tricks Junior Home Using Family Link Follow onscreen prompts AQUOS Tricks menu opens. Setting Whether to Use Light Theme and Black Text Simple mode In Home Screen, (Settings) AQUOS Tricks Junior Home Prioritize text readability ・...
- Page 151 Setting Whether to Turn on Display when Handset Is Picked Up (E.G., from a Desk) and Held Still. In Home Screen, (Settings) AQUOS Tricks Bright Keep Turn screen on by holding ・ Tap Turn screen on by holding to toggle on ( )/off ・Whether handset is picked up is determined from handset...
-
Page 152: Security & Privacy Settings
Desk) while Display Other Than Home Screen is feature access history and permissions, etc. Turned On Security & Privacy Settings In Home Screen, (Settings) AQUOS Tricks Bright Keep Keep display outside of home screen Settable items are the following. ・ Tap Keep display outside of home screen... - Page 153 Setting Whether Traced Pattern is Visible when Setting Whether Camera is Accessible for All Unlocking Screen Applications and Services In Home Screen, (Settings) Security & privacy In Home Screen, (Settings) Security & privacy Device lock for "Screen lock" Make Privacy Privacy controls Camera access pattern visible...
- Page 154 Setting Screen to Remain Unlocked while in Setting Whether to Allow Applications Access Specific Place to Trusted Certificates and Other Credentials In Home Screen, (Settings) Security & privacy In Home Screen, (Settings) Security & More security settings Smart Lock Enter privacy More security settings Encryption &...
- Page 155 Setting Screen of Only Specified Application to Deleting Data Stored by Android System Be Kept in View Intelligence In Home Screen, (Settings) Security & privacy In Home Screen, (Settings) Security & More security settings App pinning Use app privacy More Privacy settings Android System pinning Activate application to pin...
- Page 156 Center Access Code Setting Google Activity Controls Center Access Code is a four-digit code set in subscription In Home Screen, (Settings) Security & privacy contract; necessary to use optional services from landlines, More Privacy settings Activity controls etc. Follow onscreen prompts ・Do not forget Center Access Code.
- Page 157 Enabling SIM PIN Lock SIM card Enter SIM PIN When SIM PIN is enabled, PIN entry is required for handset use each time handset is powered on with SIM Card installed/eSIM enabled. It is effective for preventing unauthorized use by others.
- Page 158 Changing SIM PIN Change SIM PIN Enter current PIN Enter Enable SIM card lock first. See "Enabling SIM PIN" for details. new PIN Re-enter new PIN In Home Screen, (Settings) Security & privacy SIM PIN is changed. Security & privacy menu opens. More security settings SIM card lock...
- Page 159 Setting Screen to Unlock by Flicking Screen Swipe In Home Screen, (Settings) Setting is complete. ・If confirmation appears, follow onscreen prompts. Security & privacy Security & privacy menu opens. Device lock Screen lock ・If method for unlocking screen before change is setting other than None Swipe...
- Page 160 Setting Screen to Unlock by Tracing Pattern Pattern In Home Screen, (Settings) Enter new pattern Security & privacy Next Security & privacy menu opens. Device lock ・ Tap Clear to erase entered pattern. Enter new pattern again Screen lock ・If method for unlocking screen before change is setting other than None Swipe...
- Page 161 Requiring Lock No. (PIN) Entry for Unlocking Screen Confirm In Home Screen, (Settings) ・If method for unlocking screen before change is setting other than None Swipe , setting is complete. Select method of notification display Security & privacy Security & privacy menu opens. Done Device lock Setting is complete.
- Page 162 Confirm ・If method for unlocking screen before change is setting other than None Swipe , setting is complete. ・ Tap Clear to erase entered lock no. (PIN). Enter new lock no. (PIN) Select method of notification display Next Done ・ Tap Clear to erase entered lock no.
- Page 163 Setting Screen to Unlock with Password Password In Home Screen, (Settings) Enter new password Security & privacy Next Security & privacy menu opens. Device lock ・ Tap Clear to erase entered password. Enter new password again Screen lock ・If method for unlocking screen before change is setting other than None Swipe...
- Page 164 Using Face Authentication Confirm When face data is saved, handset authenticates with face when Display is on, and screen unlocks. In Home Screen, (Settings) Security & privacy ・If method for unlocking screen before change is setting other than None Swipe , setting is complete.
- Page 165 Follow onscreen prompts and set pattern / lock no. (PIN) / Align face with onscreen guides Make settings for "Face password for unlocking screen recognition even when you are wearing a mask" ・This is a backup method for unlocking the screen if unable to authenticate with your face.
-
Page 166: Location Settings
Location Settings Checking Overview and Precautions for Face Authentication after Saving Face Data Make settings for location information. In Security & privacy menu, Device lock Face Location Settings Unlock Enter pattern / lock no. (PIN) / password Face authentication Precautions Settable items are the following. -
Page 167: System Settings
Location services Google Location Sharing (データ引継) (https://www.softbank.jp/ Follow onscreen prompts mobile/support/manual/smartphone/ ・Log in to a Google account beforehand. Data transfer aquos-r8-pro/detail/76465/)" (Japanese) "SDカードからデータを取り込む(データ 引継) (https://www.softbank.jp/mobile/ Setting Whether to Use Wi-Fi Scanning to support/manual/smartphone/aquos- Increase Accuracy of Location r8-pro/detail/76466/)" (Japanese) for... - Page 168 Adding Languages Shown on Display Setting Main Language to Use in Google Voice Typing In Home Screen, (Settings) System In Home Screen, (Settings) System Languages & input Languages Add a language Languages & input On-screen keyboard Google Tap language Voice Typing Primary language Tap language ・Available when two or more languages are selected during...
- Page 169 Making Settings for Voice Input Service to Use Setting Whether to Check Spelling During Entry In Home Screen, (Settings) System In Home Screen, (Settings) System Languages & input for "Voice input" Follow Languages & input Spell checker Use spell onscreen prompts checker ・...
- Page 170 Setting Whether to Use One-handed Mode Setting Whether Manner Mode Is Activated by Pressing Power Key and Volume Up Key In Home Screen, (Settings) System In Home Screen, (Settings) System Gestures One-handed mode Use one-handed Gestures for "Prevent ringing" mode ・...
- Page 171 Setting Backup to Google One Deleting eSIM In Home Screen, (Settings) System Backup In Home Screen, (Settings) System Reset options Erase downloaded SIMs ERASE ・ Log in to a Google account beforehand. Backup by ・To use eSIM again after eSIM is deleted, QR code to Google One will be enabled ( ) automatically.
- Page 172 Setting 24-Hour Time Indication Use locale default In Home Screen, (Settings) 24-hour or 12-hour format is automatically set depending on your language and region. ・ Tap Use locale default to toggle on ( )/off ( ・ When Use locale default is disabled, Tap Use 24-hour System...
- Page 173 Resetting Handset Erase all data In Home Screen, (Settings) ・ To also erase SD Card data, Tap Erase SD card ・Unlocks screen when unlock method is setting other than None Swipe System Erase all data Handset is reset. Reset options Cautions when Erasing All Data (Factory Reset) Observe the following when erasing all data (factory...
-
Page 174: Other Handset Settings
Set whether to stop signal-transmitting Airplane mode functions Make tethering settings. "テザリング機能を利用する (https:// Hotspot & www.softbank.jp/mobile/support/manual/ tethering smartphone/aquos-r8-pro/menu/25762/)" (Japanese) for details. Data Saver Make settings for Data Saver. Add VPN destinations. Private DNS Set private DNS. Proxy settings Make proxy settings. - Page 175 Setting SIM to Use for Sending SMS Setting Whether to Exclude Application(s) from Data Saver In Home Screen, (Settings) Network & internet In Home Screen, (Settings) Network & internet Calls & SMS Follow onscreen prompts Data Saver Unrestricted data ・Available when multiple SIMs are enabled. application name ・...
- Page 176 Setting Codec for Bluetooth Connection ® "NFC/おサイフケータイ を利用す ® る (https://www.softbank.jp/mobile/ In Home Screen, (Settings) Connected devices Connection support/manual/smartphone/aquos-r8- Codec preferences Follow onscreen prompts preferences pro/menu/25748/)" (Japanese). For details on files received with Bluetooth , see "Bluetooth でデータ ® ®...
- Page 177 Apps Setting Integration with Other Applications, Etc. Make application settings. Settable items are the following. In Home Screen, (Settings) Apps Default ・Any recently used applications appear in "Recently opened apps." apps Opening links Follow onscreen prompts Item Description Checking Unused Applications See all XX Check and make settings for installed apps...
- Page 178 Do Not Disturb. Make settings for Urgent News. "緊急速報メールを利用する (https:// Setting Whether to Allow Applications to Show Wireless www.softbank.jp/mobile/support/manual/ Bubbles emergency smartphone/aquos-r8-pro/menu/25736/)" alerts In Home Screen, (Settings) Notifications (Japanese) for details on emergency broadcasts. Bubbles Allow apps to show bubbles Hide silent ・...
- Page 179 In Home Screen, (Settings) Storage Document & other Audio Videos Images Setting Whether to Allow Notification Snoozing AQUOS R8 pro ・If confirmation appears, follow onscreen prompts. In Home Screen, (Settings) Notifications Allow notification snoozing ・ Tap Allow notification snoozing to toggle show...
- Page 180 Google Play. Item Description Item Description Set Wallpaper for Home Screen/lock AQUOS Home Change home application to AQUOS Home. CHOOSE AN screen. AQUOS Junior Change home application to AQUOS Junior IMAGE "Changing Wallpaper" for details.
- Page 181 Accessibility Caption Make settings for captions. preferences Audio Set whether to read out description of Set captions, magnification gestures, and other useful description screen content. accessibility functions. Settable items are the following. Audio Set whether audio playback is monaural, adjustment and left/right balance of audio.
- Page 182 Setting Whether to Read Out Tapped Text on Setting Whether to Correct Color by Using Screen by Using Shortcut Shortcut In Home Screen, (Settings) Accessibility In Home Screen, (Settings) Accessibility Select to Speak for "Select to Speak Color and motion Color correction shortcut"...
- Page 183 Setting Screen Brightness Setting Whether to Use Accessibility Menu to Adjust Volume, Brightness, etc. by Using In Home Screen, (Settings) Accessibility Shortcuts Extra dim Drag "Intensity" bar to adjust intensity In Home Screen, (Settings) Accessibility ・ Available when Make screen extra dim is enabled.
- Page 184 When Using Mouse/Trackpad, Setting Time until Setting Size and Transparency of Shortcut Clicking when Pointer Is Stopped Button That Opens Accessibility Menu In Home Screen, (Settings) Accessibility In Home Screen, (Settings) Accessibility Timing controls Autoclick (dwell timing) Accessibility shortcuts Accessibility button & Autoclick Off Short Medium...
- Page 185 In Home Screen, (Settings) Safety & www.softbank.jp/mobile/support/manual/ emergency emergency Emergency SOS Try a demo smartphone/aquos-r8-pro/menu/25736/)" alerts Follow onscreen prompts (Japanese) for details on emergency broadcasts. Setting Whether to Sound Alarm when Emergency SOS is Initiated Emergency Information and Emergency Call Operation...
- Page 186 Setting Whether to Share Emergency Location Setting Whether to Receive Notifications Information, etc. with Emergency Contacts About Nearby Natural Disasters, etc. In Home Screen, (Settings) Safety & In Home Screen, (Settings) Safety & emergency Emergency SOS emergency Crisis alerts Crisis alerts "Share info with emergency contacts"...
- Page 187 Passwords & accounts Managing Account Information, Privacy, Security, etc. Make settings for password management and Google Autofill. Also, make settings to create/add accounts, sync accounts. In Home Screen, (Settings) Passwords & Settable items are the following. accounts Tap account Google Account each item Item Description...
- Page 188 Digital Wellbeing & Parental Controls Setting Limit on Daily Use Time for Each Application Prevent excessive handset use by setting timers for each application or showing number of notifications received and In Home Screen, (Settings) Digital Wellbeing & frequency of screen unlocking, etc. Settable items are the parental controls Dashboard Show all XX apps...
- Page 189 Setting Whether to Hide Screen Colors while Setting Time to Activate Focus Mode Bedtime Mode is Activated In Home Screen, (Settings) Digital Wellbeing In Home Screen, (Settings) Digital Wellbeing & & parental controls Focus mode Show all XX parental controls Bedtime mode Customize apps...
- Page 190 Check the Android version. version using shared Set whether to allow use of shared data. data AQUOS UX Check the AQUOS UX version version Make settings for work profile and nearby Set up & devices, and restore contacts from a IP address Check the IP address.
- Page 191 Troubleshooting Checking Third-Party Licenses, Google Terms of Service, Etc. Check FAQ on Sharp Website and do a self-check. In Home Screen, (Settings) About phone Item Description Legal information Follow onscreen prompts Check FAQ on Sharp Website. Search for Checking Technical Conformance Certification Search for items in settings menu.
- Page 192 Performing Self-Check Viewing Self Check Diagnostic History In Home Screen, (Settings) Troubleshooting In Home Screen, (Settings) Troubleshooting Self check DIAGNOSE CHOOSE FROM THE Self check Tap the diagnostic history to view SYMPTOMS. CHOOSE THE PLACE THAT YOU WANT TO Follow onscreen prompts DIAGNOSE.
-
Page 193: Global Services
Global Services Global Roaming............... 192 Calling from Outside Japan...........193... -
Page 194: Global Roaming
Global Roaming Tap provider Handset is Global Roaming Service eligible. Use the same handset number outside Japan. Handset connects to an appropriate cellular provider automatically by default. A specific carrier can also be selected manually. Change carrier and roaming settings. Setting a Cellular Provider In Home Screen, (Settings) -
Page 195: Calling From Outside Japan
Calling from Outside Japan Changing Roaming Setting See SoftBank Website to learn about roaming areas/rates, etc. http://mb.softbank.jp/en/global_services/ Print out roaming area/rate information to carry while In Home Screen, (Settings) Network & internet traveling abroad as needed. International Calls to Japan and Other Countries from Abroad In Home Screen, (Phone) - Page 196 Calling Landlines & Mobiles within Current Country Enter country code then other party number (omit first 0) Place calls the same way you would within Japan. ・Do not enter country code or omit first 0 from phone numbers. In Home Screen, (Phone) ・Do not omit first 0 from phone numbers when dialing Italy (39).
- Page 197 Call Handset dials number. Call begins when other party answers.
-
Page 199: Warranty/Specifications/Customer Service
Warranty/Specifications/ Customer Service Warranty & After-Sales Service........198 Specifications..............198 Customer Service............200... -
Page 200: Warranty & After-Sales Service
Warranty & After-Sales Service Specifications Some information may differ due to specification changes. Warranty Handset ・Handset warranty is for 1 year from date of purchase. ・Repair may be made free of charge under the terms of Handset specifications are as follows. repair service. - Page 201 Materials (Handset) Materials (SIM Removal Tool) Parts Materials Used/Surface Finish Parts Materials Used/Surface Finish Display SIM Removal Stainless steel Surface (Glass Tempered glass/AF coating Tool Part) Outer Casing (Metal Part), Power Key, Volume Key (Up/Down), Camera Aluminum/anodizing Ornament, Camera Ornament Periphery, Card Tray (Exterior)
-
Page 202: Customer Service
Customer Service If you encounter any difficulties or are unsure of anything, contact customer service. SoftBank Customer Support ・From a SoftBank handset, dial toll free at 157 ・From a landline/IP phone, dial toll free at 0800-919-0157 ・Business hours : Call 10:00am - 7:00pm / Chat 9:00am - 8:00pm Smartphone Technical Support Center ・From a SoftBank handset, dial toll free at 151... - Page 203 Safety Precautions Safety Precautions............202 Important Product Information........212 Handset & Hardware Care..........213 General Notes..............215 RF Exposure Information of This Product....218 Water & Dust Resistance..........219...
-
Page 204: Safety Precautions
Safety Precautions Handset, SIM Card, Quick Switch Adapter, SIM Removal Tool, AC Adaptor (Optional Accessory), Wireless Charger Read Safety Precautions before using handset. (Sold Separately) (Common) Observe precautions to avoid injury to self or others, or damage to property. Safety Precautions These labels show degree of risk from improper use. - Page 205 Do not apply excessive force to or break Use optional accessories specified by SoftBank handset. Particularly when carrying handset in Corp. your clothes pocket, do not bump it or place it Using third party accessories or those whose manufacturer, between objects. distributor, or specifications are unclear may result in fire, Internal Battery breakage may cause fire, burns, injury, burns, injury, electric shock, etc.
- Page 206 Power off handset near electronic devices that employ high precision control systems or weak Do not drop, stomp, throw or subject to signals. excessive force or strong impact/vibration. Radio waves may cause electronic devices to malfunction or May cause fire, burns, injury, electric shock, etc. may adversely affect the operation.
- Page 207 Handset Do not use if broken. May cause fire, burns, injury, etc. Do not throw into a fire or apply heat. May cause fire, burns, injury, etc. Do not place on unstable surfaces; take added care when vibration is set. Handset or related hardware may fall, resulting in injury, Do not pierce with a sharp object (nail, etc.), etc.
- Page 208 Power off handset or activate Airplane mode before boarding an airplane. Do not shine Mobile Light close to eyes. Maintain a safe distance, especially from small Handset use on airplanes is restricted; follow the children. instructions given by the respective airlines. Radio waves may adversely affect an airplane's electronic May cause visual impairment or other problems;...
- Page 209 If Display or Camera lens breaks, be careful with broken parts and exposed handset parts. When using the motion sensor and electromagnetic sensor, make sure of the Touching the broken or exposed parts may cause burns, safety around you and hold handset firmly; do injury, electric shock, etc.
- Page 210 AC Adaptor (Optional Accessory), Wireless Charger (Sold Separately) Before using handset in a vehicle, check with the manufacturer or dealer of the vehicle on radio wave effects. In rare cases, radio waves may adversely affect operation of on-vehicle electronic devices, depending on the type of Do not use AC Adaptor or Wireless Charger if vehicle.
- Page 211 Do not use wireless charger to charge anything If you are using an implanted pacemaker, that is wet due to contact with water or other implanted defibrillator, or other electronic fluids (beverages, sweat, seawater, pet urine, medical device, consult a doctor fully before etc.).
- Page 212 Quick Switch Adapter Do not touch AC Adaptor for long periods when it is plugged into the outlet. May cause burns, etc. Do not short-circuit terminals while connected to handset. Do not touch terminals with hands, fingers or any part of body. SIM Card May cause fire, burns, electric shock, etc.
- Page 213 Handset Use & Electronic Medical Devices Do not touch Quick Switch Adapter continuously while it is plugged into handset. May cause burns, etc. If you are using an electronic medical device (implanted pacemaker, implanted defibrillator, etc.), carry or use handset at least 15 cm away For any skin abnormalities associated with from where the device is.
-
Page 214: Important Product Information
Manner mode setting (can be changed). ・Beware of eavesdropping. ・See "緊急速報メールを利用する (https://www.softbank.jp/ Because this service is completely digital, the possibility mobile/support/manual/smartphone/aquos-r8-pro/ of signal interception is greatly reduced. However, some menu/25736/)" (Japanese) for details on Urgent News transmissions may be overheard. settings. -
Page 215: Handset & Hardware Care
Handset & Hardware Care Display (Touchscreen) ・Touchscreen is designed to be touched lightly with fingers. Handset & Hardware Care Do not press Display strongly with fingers or press on it with sharp objects (fingernails, ballpoint pens, pins, etc.). ・Touchscreen may not respond even if touched in these ・Use handset within 5 C - 35 C and 35% - 85% humidity. - Page 216 Earphones-Microphone Wi-Fi (Wireless LAN) Some earphones-microphones may not work properly. Wireless LAN (hereafter "Wi-Fi") uses radio waves to enable communication between compatible devices within range. ・Do not subject Earphones-Microphone Jack to strong impact However, it is advisable for the user to configure security while using earphones-microphone;...
-
Page 217: General Notes
・W56 (5.6 GHz band; channels 100, 104, 108, 112, 116, 120, 124, 128, 132, 136, 140, 144) "A301SH" here refers to this mobile phone "AQUOS R8 pro." Use of 5.2 GHz or 5.3 GHz band wireless LAN for outdoor communication is prohibited by law (excluding communication... - Page 218 Regulatory Information Frequency Range of Supported Bands in In some countries/regions including Europe , there are restrictions on the use of 5/6GHz WLAN that may limit the Item Description use to indoors only. Tx 880.2 to 914.8 MHz Please check the local laws and regulations beforehand. GSM 900 Rx 925.2 to 959.8 MHz ...
- Page 219 Volume Level Caution GPS:Rx L1 (1575.42 MHz) GLONASS:Rx G1 (1598.0625 to 1605.375 MHz) To prevent possible hearing damage, do not listen at high Galileo:Rx E1 (1575.42 MHz) volume levels for long periods. GNSS BeiDou:Rx B1I (1561.098 MHz) BEIDOU:Rx B1C (1575.42MHz) GPS:Rx L5 (1176.450 MHz) Galileo:Rx E5a (1176.450 MHz) BEIDOU:Rx B2a (1176.450MHz)
-
Page 220: Rf Exposure Information Of This Product
RF Exposure Information of This World Health Organization https://www.who.int/news-room/fact-sheets/detail/ Product electromagnetic-fields-and-public-health-mobile-phones List of Specific Absorption Rates (SAR) for radio waves 【A301SH】 here refers to this mobile phone 【AQUOS R8 https://www.softbank.jp/mobile/support/sar/ (Japanese) pro】. *1 The technical regulations are provided in the Article 14-2 of the Ministry Ordinance Regulating Radio Equipment. -
Page 221: Water & Dust Resistance
Water & Dust Resistance FCC RF Exposure Information This mobile phone 【A301SH】 is a radio transmitter and Handset Water & Dust Resistance receiver. It is designed and manufactured not to exceed the emission limit for exposure to radio frequency (RF) energy required by the Federal Communications Commission (FCC). - Page 222 Precautions Cautions for Use in a Bathroom ・Do not subject handset to soap, detergent, bath powder/oil, ・Do not let handset get wet with liquids other than tap sea/pool/spa water, hot water, etc. water at room temperature (spa water, soapy water, ・Rinse off sea/pool water, beverage, dirt, sand, mud, etc.
- Page 223 Care & Maintenance Drying Handset ・Proper care of Card Tray gasket is crucial for continued After exposing handset to water, be sure to dry Earpiece/ handset water and dust resistance. Observe the following: Speaker, Volume Keys, Power Key, Speaker, External ・Do not remove or damage gasket.
- Page 224 After Drying Procedure Do not use handset in wet conditions. ・Calls may fail, or moisture may transfer to clothes, bag, etc. ・Moisture may short-circuit Earphones-Microphone Jack, External Connection Jack or other parts. ・Exposure to cold may freeze moisture and cause malfunction.
- Page 225 A About Settings............... 122 About the User Guide............3 Adding/Deleting Applications........104 Address Book..............71 Applications..............102 AQUOS Tricks Settings..........143 AQUOS R8 pro User Guide Index B Basic Operations............... 30 Battery Settings.............128 C Calling from Outside Japan...........193 Capturing Photos/Videos..........88 Charging Handset..............19...
- Page 226 M Making Initial Settings............ 22 O Optional Services..............63 Other Handset Settings..........172 P Package Contents............... 6 Parts & Functions.............. 6 Placing/Answering Calls........... 58 Power On/Off..............21 R RF Exposure Information of This Product....218 S Safety Precautions............202 Security & Privacy Settings.......... 150 Sending Messages (+メッセージ...
- Page 228 AQUOS R8 pro User Guide July 2023, First Edition SoftBank Corp. Visit SoftBank Shop for assistance Model : AQUOS R8 pro Manufacturer : SHARP CORPORATION...
Need help?
Do you have a question about the R8 pro and is the answer not in the manual?
Questions and answers