
Subscribe to Our Youtube Channel
Related Manuals for Liesegang ddv 1500


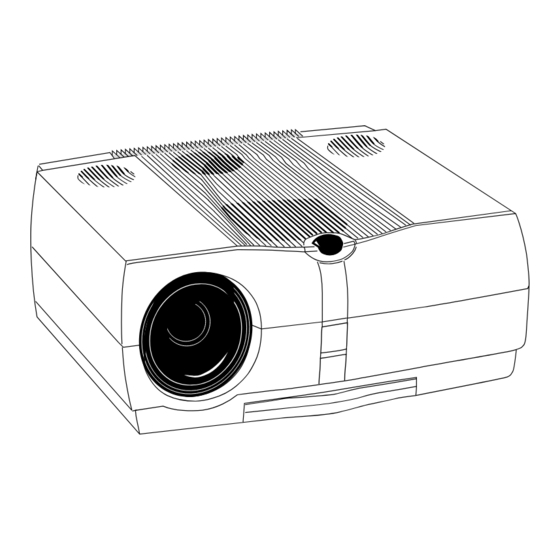
Summary of Contents for Liesegang ddv 1500
- Page 1 Liesegang ddv 1500 d'emploi Bediener-Handbuch - User Manual - Mode Guía del operador Istruzioni per l'uso - Gebruiksaanwijzing...
-
Page 2: Table Of Contents
Table of contents Before use 1. Scope of delivery, accessories 1.1 Disposal of packing material 2. Quick Setting Up 2.1 Setting up and Connecting the Projector 2.2 Projector Terminal Connections 2.3 Control Panel Keypad 2.4 Mouse Connection 2.5 Cable Connections 2.6 Image Size 2.7 Image Height 3. -
Page 3: Before Use
Before use Before use The following notes are intended to be a help for handling the product in accordance with its designated purpose. Warnung: A person could be killed or injured if the wrong operation is done by ignoring this indication. - Page 4 Before use Do not forget the protective conductors. Only use extension leads or cables with a minimum cross-section of 1.5 mm² and protective conductors. Do not apply any shock. If you drop this unit or if the casing is broken, turn off the power switch, disconnect the power plug and contact your dealer.
- Page 5 Before use Do not look directly into the lens when the lamp is switched on. Do not look directly into the lens when the lamp is switched on. Since a powerful lamp is used, it could damage your vision, etc. Do not put a container, etc, with liquid on this unit.
- Page 6 Before use Caution ! Non-observance can lead to injury or damage. _______________________________________________________________ Caution when carrying the unit. When the unit is to be moved, be sure to disconnect the power plug and check that all external connection cords are removed before moving it. If not, the cord may be damaged and it may cause a fire, an electric shock, etc.
- Page 7 Before use Do not step on this unit. Do not put a heavy object on it. Do not step on this unit or put a heavy object on it. Pay attention when children are present. If you do, the unit may fall over or may be broken causing an injury. Never block the ventilation slots.
- Page 8 Before use Volume. Use a volume level that does not bother persons in the neighborhood. Especially, since the sound is likely to carry well at nighttime even at a low volume, be careful to choose a suitable level. Clean the projector inside at least once a year! Ask your dealer to clean the unit inside once a year.
-
Page 9: Scope Of Delivery, Accessories
Scope of delivery / Accessories / Packing Scope of delivery, accessories The packing contains the following parts: 1 projector 1 infrared remote control with batteries 1 connecting cable for IBM compatible PC 1 mouse cable for serial Microsoft mouse 1 PS/2 mouse adapter 1 video / audio cable 1 S-VHS cable 1 Scart adapter... -
Page 10: Quick Setting Up
Quick Setting Up: Setting up and connecting the projector Quick Setting Up Setting up and connecting the projector These instructions are intended to get you going fast. Attention: To avoid damage to the equipment, all power to projector and input sources must be turned off during cable hook up. 1. -
Page 11: Control Panel Keypad
Quick Setting Up: Connections / Projector Keypad 1 - AUX: Not yet used. 2 - SVHS/AUDIO IN: SVHS and audio input 3 - VIDEO1/AUDIO IN: Input no. 1 for video and audio 4 - VIDEO2/AUDIO IN: Input no. 2 for video and audio 5 - RS-232C: Mouse emulation and external projector control 6 - MONITOR:... -
Page 12: Mouse Connection
Mouse Connection / Connecting Cables Mouse Connection The projector has internal mouse emulation capability. Connect computer and projector with the mouse cable (supplied with projector). Then the computer mouse functions can be controlled via the projector’s remote control. 1. Power down computer and projector. 2. -
Page 13: Image Size
Image Size / Height / Starting up the Projector Image Size Adjust the size of the projected image on the screen by using the zoom control buttons or by moving the projector closer to the screen for a smaller image or further away from the screen for a larger image size. Details on page 27. -
Page 14: Standby Mode
Standby / Projector Power Down Standby Mode When the projector is not being used, place it into standby mode. 1. Press the Standby button 2. The lamp will switch off and the Standby button will illuminate red. Note: The fan motor will continue to run for a few minutes until the projector cools down and then the fan will turn off. -
Page 15: Using System Menu
Using System Menus Using System Menus Note: The main menu and submenu windows may be moved to another position. Keep the VT button of the remote control depressed and move the respective window with the help of the diskpad to the desired position. Main Menu Press the Menu button on the touch panel keypad or the remote control to display the Main Menu:... -
Page 16: Menu Adjustments / Settings
Menu Adjustments / Settings Menu Adjustments / Settings The following charts lists all the menu items that can be adjusted along with the default settings. Main Menu Description / Action Default setting Picture Display picture submenu Audio Display audio submenu Tools Display tools submenu Source... - Page 17 Menu Adjustments / Settings Submenu Description / Action Default Picture (video) setting Height Adjust projected image height Brightness Adjust the brightness Contrast Adjust contrast Colour Adjust colour saturation Tint Adjust hue for NTSC Submenu Audio Description / Action Default (Video / PC) Setting Volume Adjust volume...
- Page 18 Menu Adjustments / Settings Submenu Description / Action Default User Interface Setting (Video / PC) Language Select user interface language Deutsch (drop down window) (English / Deutsch / Français / Español / Italiano / Nederlands / Svenska) Graphics Activate on-screen status bar indicators and icons Reset window position Reset all menu window positions...
- Page 19 Menu Adjustments / Settings Submenu Test Description Default (Video / PC) Setting Parameter display Parameter display window on/off Colour test picture Display colour test picture Frame test picture Display frame test picture. It shows the dimensions of the available picture, so that the projection may be adjusted to the screen.
-
Page 20: Infrared Remote Control
Infrared Remote Control Infrared Remote Control How to use the Infrared Remote Control Aim the remote control toward the projection screen or at the sensor. Press desired remote button to send a signal to the projector. Note: The infrared remote control can be switched to another address, if there is interference from other infrared-controlled high-end units: Display main menu, select submenu Advanced Setup, select line RC address and input new RC address, e.g. - Page 21 Infrared Remote Control Button Description DRAG Drag button. The left mouse button is held down. Under Microsoft-Windows, for example, objects can be selected and moved. Pressing the drag button again releases the mouse button. OPTIMIZE Optimizes the level setting so that light areas of the image are projected with optimal intensity.
-
Page 22: Battery Replacement
Infrared Remote Control / Battery Change Battery Replacement The remote control uses two AAA batteries. The battery cover is located on the back of the remote control. 1. Press the locking tab (1) to release door. 2. Lift up on the door (2) to remove it and set it to the side. 3. -
Page 23: Replacing The Air Filter
Air Filter Change Replacing the Air Filter For best performance, replace the air filter at the very latest after 300 hours of normal use. In case of continuous projection there are special recommen- dations. Note: Periodically check air filter for excess dust or dirt. Replace or clean as needed. -
Page 24: Replacing Projection Lamp
Lamp Change Replacing Projection Lamp The metal halide lamp of the projector has a limited lifetime of approximately 2,000 hours. If the projected image appears dark or a red lamp life indicator bar displays during projector startup, you should change the lamp and air filter. -
Page 25: Lamp Life Indicator
Lamp Life Indicator / Cleaning the Projector Lamp Life Indicator The elapsed operating time of the lamp is displayed on the Info sub-menu. From the Main menu, select INFO to display the lamp life. As long as the lamp indicator bar is green, the lamp is good. When the bar changes to red, the lamp should be changed. -
Page 26: Troubleshooting Problems And Solutions
Troubleshooting Problems and Solutions Troubleshooting Problems and Solutions Problem Probable Cause Possible Solution Image is disturbed Wrong Sync setting Set to factory default setting.* or unstable. Wrong Tracking value Change Sync setting in the Picture menu for optimum performance. For vertical interference stripes, change the Tracking in the Picture menu for optimum performance. -
Page 27: Service Hotline
Service Hotline In case of technical problems please feel free to call Liesegang at +49 211 39 01 444. For information about Liesegang products and if you have problems with operation of Liesegang products please do not hesitate to call Liesegang at +49 211 39 01 245. -
Page 28: Projection Table
Projection Table / Non-Standard Video Modes Projection Table Below information refers to the standard f=25-45 mm lens. Maximum (f=25 mm) Minimum (f=45 mm) Distance Image Image Max. Image width Image Max. to screen width height height ad height height ad. 2.00 1.42 1.06... -
Page 29: Glossary Of Terms
Glossary of Terms Glossary of Terms Hz, KHz, MHz (Hertz, Kilohertz, Megahertz) Hertz is a unit of measurement used to express the frequency, in cycles per second, of an electrical signal or event. (Megahertz = 1 million cycles per second) Lumens A measure of light output on a screen or other surface. -
Page 30: Technical Details
Technical Details Technical Details Power supply: 100-130 V /200-240 V ~ , 50-60 Hz Connections: RGB data input 1: 15 pin DSub RGB data input 2: 15 pin DSub (analog, TTL, HSync/CSync, VSync) Analog monitor output: 15 pin DSub Serial mouse connection: 9 pin DSub Video1: Koax (Cinch) - Page 31 Technical Details VESA 800 x 600 60 Hz VESA 800 x 600 72 Hz VESA 800 x 600 75 Hz VESA 800 x 600 85 Hz VESA 1024 x 768 43 Hz VESA 1024 x 768 60 Hz VESA 1024 x 768 70 Hz VESA 1024 x 768 75 Hz VESA 1280 x 1024 60 Hz Mac LC 640 x 480...
-
Page 32: Index
Index Index Air filter 22, 23 Batteries 7, 8, 21, 29 Factory default settings 15, 16, 17, 18, 26 Frame test picture 9, 18 Lamp 4, 6, 13, 17, 18, 23, 24, 28, 29 Lumen 28, 29 RC address 17, 18, 19, 20, 26 Reset (see factory default settings) Resolution 27, 28, 29... - Page 33 This equipment complies with the requirements of the EU guidelines 89/336/EWG for electromagnetic compatibility and therefore bears the CE sign. The equipment satisfies the following standards: EN 55022 Interference voltage and perturbing radiation EN 50082-1 Immunity to interference EN 61000-4-2 Electrostatic discharge EN 61000-4-3 HF irradiation...
Need help?
Do you have a question about the ddv 1500 and is the answer not in the manual?
Questions and answers