
Related Manuals for WWBeds DIY Alpha Murphy Bed


Summary of Contents for WWBeds DIY Alpha Murphy Bed
- Page 1 DIY Alpha Murphy Bed (Vertical Pre-Cut Version) Assembly Instructions Questions call 501.753.9699 Designed to exceed International ISO 9002 Standards for Residential Specifications Revised 5/20/2017...
-
Page 2: Table Of Contents
Table of Contents Step 1: Check Your Components Hardware Single/Twin Full/Double Queen What we have done for you! Step 2: Build the Header Step 3: Finish all wood components Step 4: Install the springs on the Lift Mechanism Step 5: Assemble the Bed Cabinet Step 6: Attach Bed Cabinet Securely to Wall Step 8: Install the Bed Face Panel Unit Lights... -
Page 3: Step 1: Check Your Components
Step 1: Check Your Components Thank you for your purchase of this DIY Murphy bed. We try to make this projects as easy as possible for you. Take a minute and check your contents. Hardware... -
Page 4: Single/Twin
Single/Twin Overall Cabinet Dimensions Mattress Size: 39” x 75” (12” Max Thickness) 44 ½”w x 85 ¼”h x 16”d (Projection from wall: 85”) Qty. Description Width Length ☑ (A) Bed Face Panels 21 ¼” 77 5/16 (B) Verticals 16” 85 1/4 (C) Headboard 14 ¼”... -
Page 5: Full/Double
Full/Double Overall Cabinet Dimensions Mattress Size: 54” x 75” (12” Max Thickness) 59 ½”w x 85 ¼”h x 16”d (Projection from wall: 85”) Qty. Description Width Length ☑ (A) Bed Face Panels 14 ⅜” 77 5/16 (B) Verticals 16” 85 1/4 (C) Headboard 14 ¼”... -
Page 6: Queen
Queen Overall Cabinet Dimensions Mattress Size: 60” x 80” (12” Max Thickness) 65 ½”w x 90 ¼”h x 16”d (Projection from wall: 90” Qty. Description Width Length ☑ (A) Bed Face Panels 15 ⅞” 82 5/16” (B) Verticals 16” 90 ¼” (C) Headboard 14 ¼”... -
Page 7: What We Have Done For You
What we have done for you! ● 4-(A) Bed Face Panels ○ Cut to width and length ○ Edge band edges (Top and left for left pane, top and right on right panel and top on center panels) ○ Broke over edges ○... -
Page 8: Step 2: Build The Header
Step 2: Build the Header Using the (D) Top Panel, (E) Top Facia and, 2- (H) Header Cleats assemble the Header. 2-1 Most versions will have holes in the Top Facia and Top Panel to insert dowels. Insert 3 on each side of the Top Panel. - Page 9 2-3 Attach the Header Cleats with 4- 1 4” screws (supplied) on each end. Flush the cleats with the edge of the Top Facia (see figure 2-2) Figure 2-2 2-4 Attach the Header Stop to the underside of the Header toward the front. Attach with 1 ½” screws. Your header is now complete!
-
Page 10: Step 3: Finish All Wood Components
Step 3: Finish all wood components -Finish both sides of all components. Tip: By placing pieces like the verticals, headboard and header on legs made from scrap material, you can finish both sides at the same time and save time flipping. Install the Murphy Bed Step 4: Install the springs and the Lift Mechanism 4-1: The left and right mechanism hole pattern will line up with the hole pattern on the Side Panel (B). -
Page 11: Step 5: Assemble The Bed Cabinet
Step 5: Assemble the Bed Cabinet The following installation will be done with the bed face down on the floor. Place the verticals finished edge down and dowel holes toward the inside on a clean floor. You may even lay a soft blanket down to protect the finish from being scratched. - Page 12 5-3: Stand the bed up in place. Use Angle Brackets to assemble Bottom Rear Base and Bottom Kick in position shown in Drawings 6 & 7. Use two Angle Brackets on each end. Attaching using supplied ¾” screws. NOTE: The Bottom Rear base can be moved closer to the front if there is a...
-
Page 13: Step 6: Attach Bed Cabinet Securely To Wall
Step 6: Attach Bed Cabinet Securely to Wall (Note: For your header I changed the bracket shown to mount to wall to a solid strip (see step 6-2) We cut out for your base molding so you don’t have to remove base molding off the wall. If our cutout was not large enough more may need to be done. -
Page 14: Step 8: Install The Bed Face Panel Unit
Holding one foot against the bottom front edge of the side panel and using the 13” (330mm) PVC tube, lever the tension arm out until you can set the arm lock to the hex nut at the hole A (see drawing 13.). This is the hex nut at the top front corner of the mechanism. - Page 16 7-1 Lay the Bed Face Panels down on a non-scratch surface such as a carpet or blanket. Make sure they the better side is face down and banded edges facing out and toward the foot of the bed. (Note: both sides are finished but there usually is a better side. Better side is facing down. Also there may be edges that are raw with the plywood exposed.
- Page 17 7-9 When all bolts are securely tightened, you may tilt the panel outward to approximately 45 degrees to release the arm locks. You will hear a click as they disengage. Caution: Hold the Face Panel securely, Do Not let it slam shut. Balance is not achieved until the mattress is loaded in the bed.
-
Page 18: Step 8: Install Handle = Legs - Mechanism Covers - Mattress
Step 8: Install Handle = Legs - Mechanism Covers - Mattress 8-1 Position and secure handles for ease of operation. Measure down approximately 36” (914mm) from the panel top to the top of the handles. 8-2 Install legs with the washers on the inside of the Rails and the Nylon washer on the outside. Tighten nut to have a small amount of friction when leg assembly is rotated from the up to down position. -
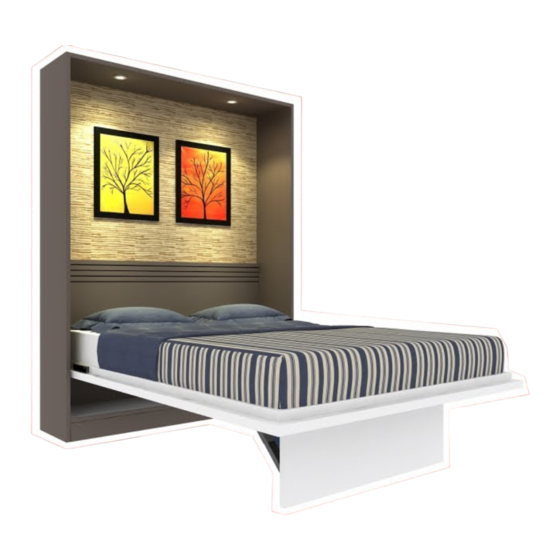
Page 19: Complete Bed Assembly
Complete Bed Assembly Follow up to Initial Assembly Check that the Bed Cabinet is level and square so the Bed Face has equal clearance of the Cabinet on both sides, top to bottom. If the Cabinet is leaning to one side, nudge it at the floor level. If the top is uneven, place shims under the Side Panels.
Need help?
Do you have a question about the DIY Alpha Murphy Bed and is the answer not in the manual?
Questions and answers