
Related Manuals for WWBeds DIY Alpha Murphy Bed


Summary of Contents for WWBeds DIY Alpha Murphy Bed
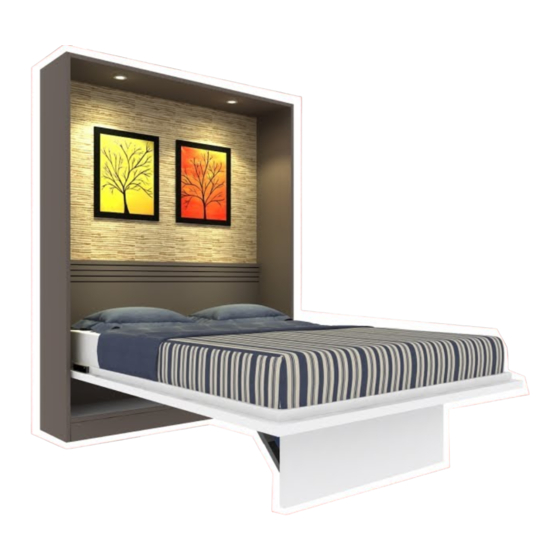
- Page 1 DIY Alpha Murphy Bed (Vertical Pre-Cut Version) Build Instructions Pre-cut Questions call 501.753.9699 Designed to exceed International ISO 9002 Standards for Residential Specifications Revised 12/14/19...
- Page 2 Step 1: Check Your Components What we have done for you! Step 2: Build the Header Step 3: Finish all wood components Installing The Springs Mounting Lift Mechanism Assemble the Bed Cabinet Attach Bed Cabinet Securely to Wall Assemble the Face Install Legs Install the Bed Face Panel Unit Frame Bolts and Straps...
- Page 3 Step 1: Check Your Components Thank you for your purchase of this DIY Murphy bed. We try to make this projects as easy as possible for you. Take a minute and check your contents. Hardware...
- Page 4 Single/Twin Overall Cabinet Dimensions Mattress Size: 39” x 75” (12” Max Thickness) 44 ½”w x 85 ¼”h x 16”d (Projection from wall: 85”) Qty. Description Width Length ☑ (A) Bed Face Panels 21 ¼” 77 5/16 (B) Verticals 16” 85 1/4 (C) Headboard 14 ½”...
- Page 5 Full/Double Overall Cabinet Dimensions Mattress Size: 54” x 75” (12” Max Thickness) 59 ½”w x 85 ¼”h x 16”d (Projection from wall: 85”) Qty. Description Width Length ☑ (A) Bed Face Panels 14 ⅜” 77 5/16 (B) Verticals 16” 85 1/4 (C) Headboard 14 ½”...
- Page 6 Queen Overall Cabinet Dimensions Mattress Size: 60” x 80” (12” Max Thickness) 65 ½”w x 90 ¼”h x 16”d (Projection from wall: 90” Qty. Description Width Length ☑ (A) Bed Face Panels 15 ⅞” 82 5/16” (B) Verticals 16” 90 ¼” (C) Headboard 14 ½”...
- Page 7 King Cut List Overall Cabinet Dimensions Mattress Size: 76” x 80” (12” Max Thickness) 81 ½”w x 90 ¼”h x 16”d (Projection from wall: 90” Qty. Description Width Length Material (A) Bed Face Panels 19 ⅞” 82 5/16” (¾” Plywood) (B) Verticals 16”...
- Page 8 XL Single/XL Twin Overall Cabinet Dimensions Mattress Size: 39” x 75” (12” Max Thickness) 44 ½”w x 85 ¼”h x 16”d (Projection from wall: 85”) Qty. Description Width Length ☑ (A) Bed Face Panels 21 ¼” 82 5/16 (B) Verticals 16”...
- Page 9 What we have done for you! ● 4-(A) Bed Face Panels ○ Cut to width and length ○ Edge band edges (Top and left for left pane, top and right on right panel and top on center panels) ○ Broke over edges ○...
- Page 10 Step 2: Build the Header Using the (D) Top Panel, (E) 2 - Top Facia and, 2- (H) Header Cleats and (J) Support Cleats assemble the Header. 2-1 Insert 3 dowels on each side of the Top Panel. Figure 2-1...
- Page 11 2-2 Attach the Top Facia to the Top Panel with Glue and 6 -1 1/2” Pocket Screws. Run the bead of glue along the front edge of the Top Panel. Top Facia will overlap the lower side of the Top panel by ½” (see figure 2-2) Figure 2-2 2-3 Attach the Back Facia to the top panel with Glue and 6 - 1 ½”...
- Page 12 2-3 Attach the Header Cleats with glue and 4 - 2” screws (supplied) on each end. Flush the cleats with the edge of the Top Facia (see figure 2-2) Figure 2-4 2-4 Attach the Header Stop to the underside of the Header toward the front. Attach with 1 ½” screws. Figure 2-5...
- Page 13 2-5 Add two Support Cleats to the back side of the assembly. Position them by measuring from the Header Cleat. 20” for king, 16” or queen, 15” for full, and 12” for twin. Glue and secure with 6 - 1 ¼” screws on each cleat.
-
Page 14: Installing The Springs
Step 3: Finish all wood components -Finish both sides of all components. Tip: By placing pieces like the verticals, headboard and header on legs made from scrap material, you can finish both sides at the same time and save time flipping. Installing The Springs Video: Adding Springs... - Page 15 Mounting Lift Mechanism Video: Mounting the Lift Mechanism NOTE: Some models may have the Lift Mechanism already mounted to the verticals. If this is the case with your Murphy bed than you can skip this section. 2-1. The left and right Lift Mechanism hole pattern will line up with the hole pattern on the Side Panels (B).
- Page 16 3-2. Lay the verticals in the floor with the mechanism facing up and the foot of the bed toward the wall. 3-3. Place the dowels in the end of the headboard into the dowel holes in the vertical making sure the headboard screw pockets are facing toward the back and the finished edge of the headboard is facing what would be up (with lying on the floor finish edge will be away from the wall) 3-4.
- Page 17 STOP IF YOU HAVE LIGHTS Video: Lights If you have lights, you will want to make sure your wiring and control box is in place. L-1 Mount control box to the back of the headboard using 1-½” screws. Mount this centered and toward the bottom of the headboard.
- Page 18 BACK TO REGULAR INSTRUCTIONS Video: Cabinet part 2 Stand the unit up and into its approximate place in the room. Check that the cutout made to clear your base molding is sufficient. If not make the height it needs to be. Lay the unit back down on the face, and adjust the cutout.
-
Page 19: Attach Bed Cabinet Securely To Wall
Attach Bed Cabinet Securely to Wall Video: Attaching to wall 4-1: Find Studs Prior to placing cabinet against the wall, locate 3 studs (you may only find 2 on a twin size) or other wall frame members at the level of the Top Panel (top of bed). Alert: The cabinet must be secured to studs or other wall structural members or injury and damage could occur. - Page 20 Assemble the Face Lock the arm into place Videos: Locking Spring Frame Bolts and Straps Caution: If possible have a helper assist in the setting of the mechanism and loading of the bed face panel. DO NOT reach behind the tension arm when you are doing the setting procedure. To avoid reaching behind the Tension Arm, use a pencil or screw driver to move the Arm Lock into place.
- Page 21 Install Legs Video: Legs 7-1 Install legs with the washers on the inside of the Rails and the Nylon washer on the outside. Tighten nut to have a small amount of friction when leg assembly is rotated from the up to the down position. 7-2 Install leg connector rod between legs and secure with 1/4”x1 1/4”...
- Page 22 Install the Bed Face Panel Unit Video: Face Part 1...
- Page 24 F-1 Lay the Bed Face Panels down on a non-scratch surface such as a carpet or blanket. Make sure they the better side is face down and banded edges facing out and toward the foot of the bed. The foot of the bed will be away from the assembled cabinet.
-
Page 25: Mounting The Legs
Frame Bolts and Straps Three holes used in the frame starting at the head end. Hole 1. Starting with Hole #1 inset the Alen Head bolt and secure it with a Nylock Nut on the inside. Use the Allen wrench provided and a ½” wrench or socket to tighten. - Page 26 L-5 Attach the connector bar to the legs using the 1-¼ bolts and star washer. See diagram. L-6 Feed the 1 ¼” bolt with the star washer thought the hole in the leg and into the Steel Leg Rod. Tighten with a 7/16” wrench or socket.
-
Page 27: Follow Up To Initial Assembly
6-3 When all bolts are securely tightened, you may tilt the panel outward to approximately 45 degrees to release the arm locks. You will hear a click as they disengage. Caution: Hold the Face Panel securely, Do Not let it slam shut. Balance is not achieved until the mattress is loaded in the bed and will not stay down. -
Page 28: Additional Options
Slip the Mechanism Cover over the Mechanism so that the tabs on the cover fit into the notches. Line up the hole with the barrel support and anchor in place using the 1-½” screw provided Repeat on the other Mechanism. 7-2 Strap the mattress into place. - Page 29 Desk Step D-2 | Attach the Desk Mechanism to Desk The Desk Mechanism has holes in the Desk Upper Bracket that forms an “L”. Attach the desk to the mechanism using 20 - ⅝” pan head screws.
- Page 30 Desk Step D-3 | Place Desk Hinge into Hinge Clip With the Dask rotated 90° up, place to loose end of the hinge into the Hinge Clip and secure with ⅝” flat-head screws. Desk Step D-4 | Reattach Base Rotate the desk back down and re-insert the ⅝” pan-head screws that were removed from Step D-1.
Need help?
Do you have a question about the DIY Alpha Murphy Bed and is the answer not in the manual?
Questions and answers