Table of Contents
Advertisement
Available languages
Available languages
Quick Links
UTILITECH and logo design are trademarks
or registered trademarks of LF, LLC. All
rights reserved.
3M and VHB are trademarks of 3M
Serial Number
Questions, problems, missing parts? Before returning to your retailer, call our customer service department at 1-866-994-4148,
8 a.m. - 8 p.m., EST, Monday - Sunday. You could also contact us at partsplus@lowes.com or visit www.lowespartsplus.com.
AS21279
Purchase Date
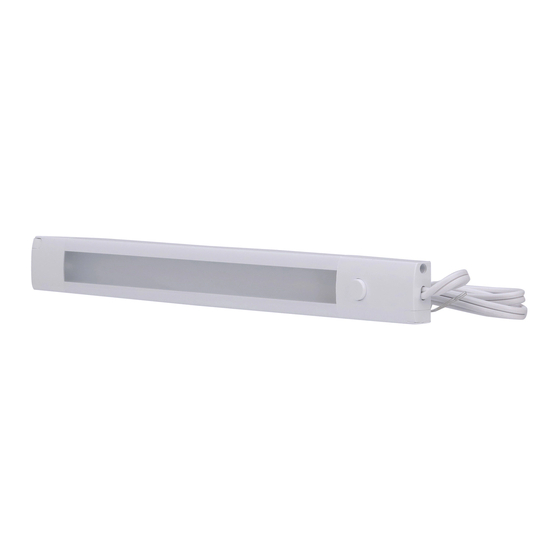
LED UNDER CABINET BAR
1
MODEL #
UC1139-WHG-12LF0-U
UC1139-WHG-18LF0-U
UC1139-WHG-24LF0-U
Français p. 9
Español p. 17
ATTACH YOUR RECEIPT HERE
JOIGNEZ VOTRE REÇU ICI
ADJUNTE SU RECIBO AQUÍ
ITEM #
877634
877635
877636
Français p.
Français p.
Advertisement
Chapters
Table of Contents

Related Manuals for Utilitech UC1139-WHG-12LF0-U


Summary of Contents for Utilitech UC1139-WHG-12LF0-U
- Page 1 ITEM # 877634 877635 877636 LED UNDER CABINET BAR UTILITECH and logo design are trademarks or registered trademarks of LF, LLC. All rights reserved. MODEL # UC1139-WHG-12LF0-U 3M and VHB are trademarks of 3M UC1139-WHG-18LF0-U UC1139-WHG-24LF0-U Français p. Français p. 9 Français p.
-
Page 2: Table Of Contents
TABLE OF CONTENTS PACKAGE CONTENTS ............................2 HARDWARE CONTENT ............................3 PREPARATION ................................ 3 SAFETY INFORMATION ............................4 EASY INSTALLATION 3M™ VHB™ TAPE ......................5 SCREW MOUNT INSTALLATION ..........................6 CARE AND MAINTENANCE ............................ 7 TROUBLESHOOTING ............................. 7 WARRANTY ................................7 REPLACEMENT PARTS LIST .......................... -
Page 3: Hardware Content
HARDWARE CONTENT (shown actual size) 3M™ VHB™ Tape Clear Plastic Cord Clips Wood Screw Qty. 4 Qty. 2 Qty. 2 Cord Clips Qty. 2 PREPARATION Before beginning assembly of product, make sure all parts are present. Compare parts with package contents list and hardware contents list. -
Page 4: Safety Information
SAFETY INFORMATION Please read and understand this entire manual before attempting to assemble, operate or install the product. DO NOT USE THIS FIXTURE WITH A DIMMING CIRCUIT. DO NOT ATTEMPT TO INSTALL LED LIGHT BAR WHILE PLUGGED IN. 1. Use only insulated staples or plastic ties to secure the cords. 2. -
Page 5: Easy Installation 3M™ Vhb™ Tape
ASSEMBLY INSTRUCTIONS EASY INSTALLATION 3M™ VHB™ TAPE 1. NOTE: For any unfinished wood, drywall surfaces, or difficult bonding surfaces, apply a primer (not included) to better seal the bonding area. NOTE: Ensure mounting location is within 5ft. of an electrical outlet. Clean surface with rubbing alcohol. Peel off protective plastic liners that cover the VHB adhesive tape and press two tapes to the back of the fixture on each end for 12” bar. Apply additional tape in the middle for 18” and 24” bars. Remove the other side liners. DO NOT touch the... -
Page 6: Screw Mount Installation
SCREW MOUNT INSTALLATION 1. Remove screw covers (D) on both ends. Mark the general area where fixture will be mounted. Using a small drill or nail, make two small pilot holes at the marked locations. NOTE: Ensure mounting location is within 5ft. of an electrical outlet. 2. Hold the fixture in the marked location and drive wood screws (CC) until they contact the bottom surface of the cabinet. The wood screws (CC) must be driven in straight for the fixture to mount properly. DO NOT OVERTIGHTEN to prevent stripping the screw hole. -
Page 7: Care And Maintenance
CARE AND MAINTENANCE Periodically clean the fixture and diffuser using a mild, non-abrasive cleaner and soft cloth. When cleaning the fixture, make sure the power is turned off. Do not spray cleaner directly onto any part of the fixture or LEDs. TROUBLESHOOTING PROBLEM POSSIBLE CAUSE CORRECTIVE ACTION Light does not come on. 1. Power/ light switch is off. 1. Verify power supply and light switch are on. 2. Fixture not properly wired to junction box. 2. Check wiring connections. 3. -
Page 8: Replacement Parts List
REPLACEMENT PARTS LIST For replacement parts, call our customer service department at 1-866-994-4148, 8 a.m. - 8 p.m., EST, Monday - Sunday. You could also contact us at partsplus@lowes.com or visit www.lowespartsplus.com. PART DESCRIPTION PART # ZH-UC1139F00-WHG Made in Vietnam... - Page 9 877634 877635 877636 RAMPE D’ÉCLAIRAGE À DEL À UTILITECH et le logo sont des marques de commerce ou des marques de commerce INSTALLER SOUS UNE ARMOIRE déposées de LF, LLC. Tous droits réservés. 3M et VHB sont des marques de commerce de 3M MODÈLE #...
-
Page 10: Contenu De L'emballage
TABLE DES MATIÈRES CONTENU DE L’EMBALLAGE ..........................10 QUINCAILLERIE INCLUSE............................11 PRÉPARATION ................................ 11 CONSIGNES DE SÉCURITÉ ........................... 12 INSTALLATION FACILE : RUBAN 3M™ VHB™ ..................... 13 INSTALLATION À L’AIDE DE VIS ..........................14 ENTRETIEN ................................15 DÉPANNAGE ................................15 GARANTIE ................................ -
Page 11: Quincaillerie Incluse
QUINCAILLERIE INCLUSE (Grandeur réelle illustrée) Ruban 3M™ VHB™ Brides de cordon en Vis à bois Qté 4 plastique transparent Qté 2 Qté 2 Brides de cordon Qté 2 PRÉPARATION Avant de commencer l’assemblage de l’appareil, assurez-vous d’avoir toutes les pièces. Comparez le contenu de l’emballage avec la liste de la quincaillerie incluse. -
Page 12: Consignes De Sécurité
CONSIGNES DE SÉCURITÉ Assurez-vous de lire et de comprendre l’intégralité du présent manuel avant de tenter d’assembler, d’installer ou d’utiliser l’article. N’UTILISEZ PAS CE LUMINAIRE SUR UN CIRCUIT AVEC GRADATEUR. NE TENTEZ PAS D’INSTALLER LA RAMPE D’ÉCLAIRAGE À DEL LORSQU’ELLE EST BRANCHÉE. 1. N’utilisez que des agrafes isolées ou des attaches en plastique pour fixer les fils électriques. -
Page 13: Installation Facile : Ruban 3M™ Vhb
INSTRUCTIONS POUR L’ASSEMBLAGE INSTALLATION FACILE : RUBAN 3M™ VHB™ 1. REMARQUE : Pour les surfaces en bois non fini, les cloisons sèches ou les surfaces dont l’adhésion est difficile, appliquez un apprêt (non inclus) pour mieux sceller la zone de collage. REMARQUE : Assurez-vous que l’emplacement choisi ne se trouve pas à plus de 1,52 m d’une prise électrique. Nettoyez la surface avec de l’alcool à... -
Page 14: Installation À L'aide De Vis
INSTALLATION À L’AIDE DE VIS 1. Retirez les cache-vis (D) aux deux extrémités. Marquez l’endroit où vous installerez le luminaire. À l’aide d’une petite perceuse ou d’un petit clou, percez deux avant-trous aux endroits que vous avez marqués. REMARQUE : Assurez-vous que l’emplacement choisi ne se trouve pas à... -
Page 15: Entretien
ENTRETIEN Nettoyez périodiquement le luminaire et le diffuseur à l’aide d’un nettoyant pour vitres doux et non abrasif et d’un linge doux. Assurez-vous que le luminaire est éteint avant de le nettoyer. Ne vaporisez pas de produit nettoyant directement sur les pièces du luminaire ou sur les ampoules à DEL. DÉPANNAGE PROBLÈME CAUSE POSSIBLE... -
Page 16: Liste Des Pièces De Rechange
LISTE DES PIÈCES DE RECHANGE Pour obtenir des pièces de rechange, veuillez communiquer avec notre service à la clientèle au 1 866 994-4148, entre 8 h et 20 h (HNE), du lundi au dimanche. Vous pouvez également communiquer avec nous à l’adresse partsplus@lowes.com ou visiter le site www.lowespartsplus.com. PIÈCE DESCRIPTION Nº... - Page 17 ARTÍCULO # 877634 877635 877636 BARRA CON LUZ LED PARA UTILITECH y el diseño del logotipo son marcas comerciales o marcas registradas DEBAJO DEL GABINETE de LF, LLC. Todos los derechos reservados. 3M y VHB son marcas comerciales de 3M...
-
Page 18: Contenido Del Paquete
ÍNDICE CONTENIDO DEL PAQUETE ..........................18 ADITAMENTOS ................................ 19 PREPARACIÓN ................................ 19 INFORMACIÓN DE SEGURIDAD ..........................20 INSTALACIÓN FÁCIL DE CINTA 3M™ VHB™ ....................... 21 INSTALACIÓN DE MONTAJE CON TORNILLOS ....................22 CUIDADO Y MANTENIMIENTO ..........................23 SOLUCIÓN DE PROBLEMAS ..........................23 GARANTÍA ................................ -
Page 19: Aditamentos
ADITAMENTOS (Se muestran en tamaño real) Cinta 3M™ VHB™ Sujetadores para cable Tornillo para Cant. 4 de plástico transparente madera Cant. 2 Cant. 2 Sujetadores para cable Cant. 2 PREPARACIÓN Antes de comenzar a ensamblar el producto, asegúrese de tener todas las piezas. Compare las piezas con la lista del contenido del paquete y la lista de aditamentos. -
Page 20: Información De Seguridad
INFORMACIÓN DE SEGURIDAD Lea y comprenda completamente este manual antes de intentar ensamblar, usar o instalar el producto. NO USE ESTA LÁMPARA CON UN CIRCUITO REGULADOR DE INTENSIDAD. NO INTENTE INSTALAR LA BARRA CON LUZ LED CUANDO ESTÁ ENCHUFADA. 1. Utilice solamente grapas aisladas o amarres plásticos para fijar los cables. 2. Pase y fije los cables de forma que no se dañen ni queden atrapados. -
Page 21: Instalación Fácil De Cinta 3M™ Vhb
INSTRUCCIONES DE ENSAMBLAJE INSTALACIÓN FÁCIL DE CINTA 3M™ VHB™ 1. NOTA: para madera sin acabado, superficies de paneles de yeso o superficies de difícil unión, aplique pintura base (no se incluye) para sellar mejor el área de unión. NOTA: asegúrese de que la ubicación de instalación se encuentre a menos de 1,52 m de un tomacorriente. Limpie la superficie con alcohol de frotar. Despegue los revestimientos protectores de plástico que cubren la cinta adhesiva VHB y presione dos cintas en la parte posterior del accesorio en cada extremo para una barra de 30,48 cm. -
Page 22: Instalación De Montaje Con Tornillos
INSTALACIÓN DE MONTAJE CON TORNILLOS 1. Retire las cubiertas de tornillo (D) en ambos extremos. Marque el área general donde vaya a instalar la lámpara. Use un clavo o taladro pequeño para hacer dos orificios guía pequeños en las ubicaciones marcadas. NOTA: asegúrese de que la ubicación de instalación se encuentre a menos de 1,52 m de un tomacorriente. -
Page 23: Cuidado Y Mantenimiento
CUIDADO Y MANTENIMIENTO Limpie la lámpara y el difusor periódicamente con un paño suave y un limpiador suave y no abrasivo. Cuando limpie la lámpara, asegúrese de desconectar la fuente de alimentación. No use limpiador directamente en ninguna parte de la lámpara o de las luces LED. -
Page 24: Lista De Piezas De Repuesto
LISTA DE PIEZAS DE REPUESTO Para obtener piezas de repuesto, llame a nuestro Departamento de Servicio al Cliente al 1-866-994-4148, de lunes a domingo de 8 a.m. a 8 p.m., hora estándar del Este. También puede comunicarse con nosotros a través de partsplus@lowes.com o visitar www.lowespartsplus.com. PIEZA DESCRIPCIÓN PIEZA #...
Need help?
Do you have a question about the UC1139-WHG-12LF0-U and is the answer not in the manual?
Questions and answers