
Related Manuals for BH FITNESS R311


Summary of Contents for BH FITNESS R311
- Page 1 R311 Instrucciones de montaje y utilización Instructions for assembly and use Instructions de montage et utilisation Montage- und Gebrauchsanleitung Istruzioni di montaggio e uso Montage-en gebruiksinstrukties...
- Page 2 Fig.0 Fig.1...
- Page 3 Fig.2 Fig.3...
- Page 4 Fig.4...
- Page 5 Fig.5 Fig.6 Fig.7...
- Page 6 Fig.8...
-
Page 7: Instrucciones De Seguridad
Español INSTRUCCIONES DE situaciones y conductas que pueden resultar peligrosas. SEGURIDAD.- Esta unidad no ha de utilizarse en Antes comenzar cualquier ningún caso como juguete. programa de ejercicio, consulte a su 7 Su unidad sólo puede ser usada por médico. Se recomienda la realización una persona al mismo tiempo. -
Page 8: Instrucciones De Montaje
Realice cada estiramiento aproximada- 2.- MONTAJE DEL SOPORTE mente durante 30 segundos, no fuerce TRASERO.- los músculos. Si siente dolor, PARE. Posicione el soporte trasero (A4) en la Guarde estas instrucciones. parte inferior del carril (A2), Fig.2. Coloque los tornillos (26) junto con las INSTRUCCIONES DE arandelas (38) y apriete fuertemente. - Page 9 nivelación sean correctos. Esto se PLEGADO DE SU UNIDAD.- conseguirá girando más o menos los Sujetando el soporte trasero (A4) tacos de apoyo (64) como muestra la levante la unidad en dirección de la Fig.7, I. flecha, Fig.8, posiciónela taco apoyo (51) debería...
-
Page 10: Exercise Instructions
English SAFETY INSTRUCTIONS.- accidents. Under no circumstances should this appliance be used as a Consult your doctor before starting toy. any exercise program. It is advisable 7 Your unit can only be used by one undergo complete physical person at a time. examination. - Page 11 1.- ASSEMBLY INSTRUCTIONS.- 3.- MOUNTING THE SEAT.- Take the unit out of its box and make Insert seat (A5) in rail (A2), in the sure that all of the pieces are there direction indicated by the arrow, as Fig.0: shown in figure Fig.3. The assistance of a second person is recommended when assembling 4.- MOUNTING THE ALUMINIUM...
- Page 12 position, by lifting the rear of the unit Do not hesitate to get touch with the up slightly and pushing it. Technical Assistance Service if you Store your unit in a dry place, have any queries by phoning customer preferably not subject to changes in services (see last page in manual) temperature.
- Page 13 Français CONSIGNES DE SÉCURITÉ.- n’est pas un jouet. 7 Cette machine ne peut être utilisée Avant de commencer tout exercice, que par une personne à la fois. demandez l’avis de votre médecin. Il 8 L’utilisateur de la machine doit est conseillé de passer un examen porter vêtements médical complet.
- Page 14 Chaque étirement doit durer environ 2.- MONTAGE DU SUPPORT 30 Secondes. Ne pas forcer les ARRIÈRE.- muscles. douleur, Positionner le support arrière (A4) en ARRÊTEZ l’exercice. bas du rail (A2), Fig.2. Placer les vis (26) avec les rondelles Conservez cette notice. (38) et serrer fermement.
- Page 15 bon nivellement, tournez les taquets PLIER VOTRE UNITÉ.- d’appui (64) comme indiqué sur la En tenant le support arrière (A4) Fig.7, I. soulever l'ensemble dans le sens de la Le bloc de support (51) doit être à 5- flèche, Fig.8, positionner 10 mm du sol, Fig.7, II.
-
Page 16: Allgemeine Hinweise
Deutsch SICHERHEITSHINWEISE.- oder im Freien. 6 Eltern bzw. Aufsichtspflichtige von Bevor einem Kindern sollten deren natürliche Trainingsprogramme beginnen, Neugier berücksichtigen, u.U. konsultieren Sie bitte Ihren Arzt. Wir gefährliche Situationen empfehlen dabei eine komplette Verhaltensweisen mit sich bringen Untersuchung. kann. Dieses Gerät darf unter keinen Arbeiten Sie mit dem empfohlenen Umständen als Spielzeug verwendet Trainingsniveau,... - Page 17 Schlüssel 1.- ANBRINGEN DER STÄNDERROHRE.- Führen Sie das vordere Ständerrohr (A3) an den Hauptrahmen (A1) Fig.1. Setzen Sie die Schrauben (24), die Unterlegscheiben (37) und die Muttern Führen jeder dieser (19) auf und ziehen Sie gut fest. Streckübungen ca. 30 Sekunden lang durch, ohne jedoch die Muskeln zu 2.- MONTAGE DER HINTEREN überlasten.
-
Page 18: Transport Und Lagerung
6.- MONTAGE DER gewünschten transportieren. Bewahren Sie das Gerät an einem PEDALACHSE trockenen Ort mit möglichst geringen Heben Sie das Gerät in Pfeilrichtung Temperaturschwankungen auf. Fig.6 an und stellen Sie es senkrecht auf. ZUSAMMENKLAPPEN DES Montieren Hilfe GERÄTES.- Kombischlüssels, Pedalachse (A8), mit der Schraube (22) und der Halten Sie die hintere Stützvorrichtung Mutter (18) zusammen. - Page 19 Italiano ISTRUZIONI DI SICUREZZA.- natura curiosa di questi che li può portare a situazioni e comportamenti Prima cominciare qualsiasi che possono risultare pericolosi. Questo programma d’ allenamento, chiedere apparecchio non si deve usare in una consulenza medica. Si consiglia nessun caso come un giocattolo. realizzare controllo fisico...
- Page 20 muscoli. Se sente dolore, si FERMI. Posizionare le viti (26) e le rondelle Conservi queste istruzioni. (38) e avvitarle saldamente. ISTRUZIONI DI MONTAGGIO.- 3.-MONTAGGIO SELLINO.- Togliere l’unità dalla cassa e verificare Inserire il sellino (A5) nella staffa che ci siano tutti i pezzi Fig.0. guida (A2), seguendo il verso della raccomanda l’aiuto...
- Page 21 Il pezzo d’appoggio (51) deve trovarsi RIPIEGAMENTO DEL a 5-10 mm da terra, Fig. 7, II. DISPOSITIVO.- Reggendo il supporto posteriore (A4), SPOSTAMENTO ED sollevare il dispositivo in direzione IMMAGAZZINAGGIO.- della freccia, Fig. 8, e posizionarlo L’ apparecchio è munito di ruote (50) verticalmente in modo che i supporti che rendono più...
-
Page 22: Algemene Aanwijzingen
Nederlands VEILIGHEIDSAANWIJZINGEN.- dat dit tot gevaarlijke situaties en gedrag kan leiden. Dit apparaat mag onder Raadpleeg uw geneesheer alvorens u geen beding als speelgoed gebruikt met een oefe ningenprogramma worden. begint. Het wordt aangeraden om een 7 Dit apparaat kan slechts door één volledig onderzoek te laten doen. - Page 23 MONTAGE INSTRUCTIES.- 3.- HET ZADEL BEVESTIGEN.- Haal het toestel uit de doos en Bevestigt u het zadel (A5) op de rail controleer of alle onderdelen er zijn (A2) in de door de pijl aangegeven Fig.0: richting zoals weergegeven in Fig.3. De hulp van een tweede persoon wordt aanbevolen bij het monteren 4.- DE ALUMINIUM RAIL...
- Page 24 VERPLAATSING EN UW TOESTEL VOUWEN.- OPBERGEN.- Terwijl u de achterste steun (A4) vasthoudt, tilt u het apparaat op in de Dit apparaat is uitgerust met wieltjes richting van de pijl, Fig.8, en plaatst u (50), Fig.7, verplaatsen het verticaal zodat de steunen (49) en vergemakkelijkt.
- Page 25 ESPAÑOL TECNICA DEL REMO 1.- ATAQUE 4.- FINAL - Brazos parcialmente estirados. - El tirador del remo se coloca a la - Piernas recogidas contra el cuerpo. altura del pecho. - Cuerpo ligeramente hacia delante. - Piernas parcialmente estiradas. - Cuerpo ligeramente inclinado hacia 2.
- Page 26 ENGLISH ROWING TECHNIQUE 1.- ATTACK 4.- END - Arms partially stretched. - The rowing bar is brought to chest - Legs brought up against the body. level. - Body leaning slightly forward. - Legs partially straightened out. - Body leaning slightly backward. 2.- BEGIN THE ACTION 5.- RECOVERY - Arms stretched fully out.
- Page 27 FRANÇAIS TECHNIQUE DU RAMEUR 1. ATTAQUE 4. FIN - Bras partiellement etires. - La corde du rameur est placee au - Jambes repliees contre le corps. niveau de la poitrine. - Corps legerement en avant. - Jambes partiellement etirees. - Corps legerement incline en arriere. 2.
- Page 28 DEUTSCH RUDERTECHNIK 1.ANGRIFF 4. ENDE - Die Arme teilweise gestreckt. - Die Zugvorrichtung des Ruders wird - Die Beine gegen Korper auf Brusthohe gebracht. angezogen. - Die Beine sind teilwelse gestreckt. - Den Korper leicht nach vorn - Der Korper ist leicht nach hinten gebeugt.
- Page 29 PORTUGUES TECNICA DO REMO 1.- ATAQUE 4.- FINAL - Os braços deverao estar - O puxador do remo devera ser parcialment esticados. colocado na zona do peito. - As pemas deverao estar recolhidas - As pernas deverao estar de encontro ao corpo. parcialmente esticadas.
- Page 30 ITALIANO TECNICA DELLA VOGATA 1.- ATTACCO 4.- FINE DELLESERCIZIO - Braccia parcialmente tese. - Maniglia del vogatore allaltezza del - Gambe flesse verso it corpo. petto. - Corpo leggermente in avanti. - Gambe parcialmente inclinato allindietro. 2.- INIZIO DELLESERCIZIO 5.- RECUPERO - Braccia tese.
- Page 31 NEDERLANDS TECHNIEK VAN HET ROEIEN 1.- AANZET 4.- EINDE - Armen gedeeltelijk gestrekt. - De riem op borsthoogte. - Benen gebogen tegen het lichaam. - Benen gedeeltelijk gestrekt. - Lichaam licht naar voren. - Lichaam licht naar achteren heliend. 2.- BEGIN VAN DE ACTIE 5.- HERSTEL - Armen gestrekt.
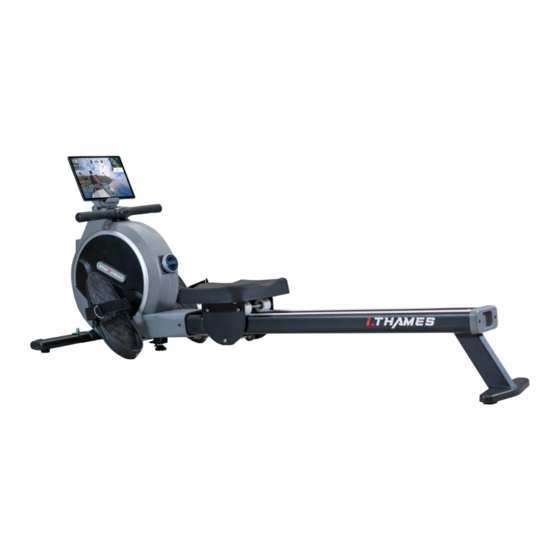
- Page 32 R311...
- Page 33 Para pedido de repuesto: Indicar el código de la pieza y la cantidad To order replacement parts: State the part code and Quantity Pour toute commande pièces détachées: Indiquer le code de la pièce et la quantité Besellung von Ersatzteilen: Bitte angeben Teil-code und Menge Para encomenda de peça de recambio: Indicar o código da peça ea quantidade Per ordinare pezzi di ricambio: Indicare il codice del pezzo e la quantità...
- Page 34 Seat Sillín R311055 Seat cushion limit pulley Polea tope sillín R311056 Rail cover Tapa rail R311057 Limit pad Tope R311058 Handle pad Tapa R311059 Pulley limit tube Polea R311060 Handle grip Espuma manillar R311061 Ribbon wheel Rueda cinta R311062 Outer bushing Casquillo R311063 Adjustable foot pad...
- Page 35 Español Por medio de la presente Exercycle S.L. declara que este producto cumple con los requisitos esenciales y cualesquiera otras disposiciones aplicables o exigibles de las Directivas 2009/125/CE, 2011/65/CE, 2004/108/CE y 2006/95/CE. English Hereby, Exercycle S.L, declares that this product is in compliance with the essential requirements and other relevant provisions of Directives 2005/32/EC, 2011/65/EC, 2004/108/EC and 2006/95/EC.
- Page 36 BH FITNESS SPAIN BH GERMANY GmbH BH FITNESS ASIA EXERCYCLE,S.L. Grasstrasse 13 BH Asia Ltd. (Manufacturer) 45356 ESSEN No.80, Jhongshan Rd., P.O.BOX 195 GERMANY Daya Dist., 01080 VITORIA (SPAIN) Taichung City 42841, Tel.: +34 945 29 02 58 Tel: +49 2015 997018 Taiwan.
Need help?
Do you have a question about the R311 and is the answer not in the manual?
Questions and answers