Table of Contents
Advertisement
Available languages
Available languages
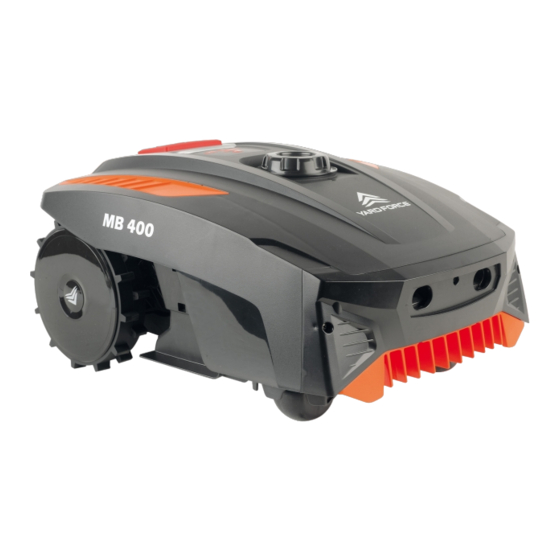
MB 400
ROBOTMAAIER
ROBOTIC MOWER
NL
GB
Originele handleiding
Original Installation Guide
ROBOT KOSZĄCY
MÄHROBOTER
PL
DE
Oryginalna instrukcja
Original Installationsanleitun g
ROBOT-TONDEUSE
FR
Guide d'installation d'origine
ROBOT RASAERBA
IT
Guida all'installazione originale
ROBOSEKACKA
CZ
Originální instalační průvodce
> 10 cm
30 cm
A
5 cm
<
30 cm
30 cm
< 10 cm
max
30 cm
. 8 m
min.
2 m
Advertisement
Chapters
Table of Contents

Related Manuals for Yard force MB 400


Summary of Contents for Yard force MB 400
- Page 1 30 cm < 10 cm > 10 cm 30 cm . 8 m 30 cm MB 400 min. ROBOTMAAIER ROBOTIC MOWER Originele handleiding Original Installation Guide ROBOT KOSZĄCY MÄHROBOTER Oryginalna instrukcja Original Installationsanleitun g 5 cm < ROBOT-TONDEUSE Guide d’installation d’origine ROBOT RASAERBA Guida all’installazione originale...
-
Page 2: Table Of Contents
Description of product CONTENT STOP button Charging port Description of the product ..........1 Rear wheel Height adjustment knob Installation ..............2 Control panel USB interface Operation ..............10 On/Off switch Front wheel Technical data..............12 Cutting blade Maintenance and storage ..........13 Troubleshooting .............15 Scope of delivery Robotic Mower Docking station... -
Page 3: Installation
Installation Installation Guide Introduction Stones Pre Cut your lawn or less > 45 mm < 45 mm Slopes <45mm Cutting limitations >30% <30% >10% Paths, Driveways and Roads Trees... - Page 4 > +/- 5 ° ° > +/- 5 Uneven lawn surfaces Placing the docking station Pegging your boundary wire 30 cm 30 cm 30 cm >0.3 m 30 cm > 1.5 >0.5 m 80 cm 80 cm...
- Page 5 Corridor Flowerbeds < 8 m > 5 cm >5 cm > 2 m Connect the docking station to the boundary wire see below < 5 cm <5cm Ponds and Pools...
- Page 6 >10 m >0.5 m >10 m Garage installation Signal selection Note:...
-
Page 7: Operation
Return to Docking station Operation Control panel Boundary signal select button: Emergency Stop Working time select button: Home button Start button: Cutting height adjustment STOP button: NOTE! We recommend using an ordinary lawn mower or trimmer to cut the lawn below 45 mm before using the Robotic Mower. -
Page 8: Technical Data
Technical Data Maintenance and storage Model MB 400 Maintenance Battery Life Winter Storage Degree of protection: Spare parts Preparing for spring Cleaning the mower body Disposal... -
Page 9: Troubleshooting
Cleaning the underside Troubleshooting Robotic Mower cannot dock with docking station Robotic Mower runs in circles while mowing or while following boundary wire back to docking station Clean the contact pins and the charging strips The Robotic Mower is noisy Reversing or replacing the blades WARNING! Mower remains at or returns to docking station when pressing START... - Page 10 Related to before/during/after charging Problem Possible cause Corrective action Problem Possible cause Corrective action Related to mowing Problem Possible cause Corrective action...
- Page 11 Produktbeschreibung INHALT STOP-Taste Ladekontakte Produktbeschreibung .............1 Hinterrad Drehknopf zur Schnitthöheneinstellung Vorbereitung ..............2 Bedienfeld USB-Schnittstelle (Service) Betrieb ...............10 An/Aus-Schalter Vorderrad Technische Daten ............12 Schneidklinge Wartung und Lagerung ..........12 Fehlerbehebung ............14 Lieferumfang Mähroboter Ladestation Netzteil Heringe für das Ersatzmesser Kabelverbinder Garage Verlängerungskabel Begrenzungskabel Bedienungsanleitung...
-
Page 12: Vorbereitung
Vorbereitung Installationsanleitung Einleitung Steine Schneiden Sie Ihren Rasen vor > 45 mm Steigung < 45 mm <45mm Eingrenzung des Mähbereichs >30% <30% >10% Wege, Einfahrten und Straßen Bäume... - Page 13 > +/- 5° Unebene Rasenflächen > +/- 5° Verlegen Ihres Begrenzungskabels Aufstellen der Ladestation 30 cm 30 cm 30 cm 30 cm >0.3 m > 1.5 m >0.5 m 80 cm 80 cm...
- Page 14 Blumenbeete Grenzkorridor < 8 m > 2 m > 5 cm >5 cm Verbindung der Ladestation mit dem Begrenzungskabel < 5 cm <5cm Teiche und Pools...
- Page 15 >10 m >0.5 m >10 m Garageninstallation Signalauswahl...
-
Page 16: Betrieb
Rückkehr zur Ladestation Betrieb Bedienfeld Auswahltaste für Grenzsignal: Schnellstopp Auswahltaste Arbeitszeit: Home-Taste: Starttaste: Einstellen der Schnitthöhe STOP-Taste: HINWEIS! Wir empfehlen, mit einem normalen Rasenmäher oder Rasentrimmer den Rasen auf eine Höhe unter 45 mm zu kürzen, bevor Sie den Mähroboter einsetzen. Dadurch wird sichergestellt, dass Sie optimale Ergebnisse mit Ihrem Mähroboter erzielen. -
Page 17: Technische Daten
Technische Daten Akkulebensdauer Modell MB 400 Überwinterung Vorbereitung für den Frühling Schutzklasse: Ersatzteile Reinigung des Mährobotergehäuses Reinigung der Unterseite Wartung und Lagerung Wartung Reinigen der Kontaktstifte und Ladestreifen... -
Page 18: Fehlerbehebung
Umdrehen oder Ersetzen der Messer Mähroboter fährt beim Mähen im Kreis oder während er dem Begrenzungskabel zurück zur Ladestation folgt. ACHTUNG! ACHTUNG! Der Mähroboter ist laut. Mähroboter bleibt bei oder kehrt zur Ladestation zurück, wenn die START-Taste gedrückt wird. Ersatzteilliste LED-Signalanzeige an der Ladestation Software-Aktualisierung Entsorgung... - Page 19 In Verbindung mit vor/während/nach dem Aufladen Problem Mögliche Ursache Abhilfemaßnahmen Problem Mögliche Ursache Abhilfemaßnahmen In Verbindung mit dem Mähen Problem Mögliche Ursache Abhilfemaßnahmen...
- Page 20 Description du produit SOMMAIRE Bouton STOP Capteur ultrasonique Description du produit ............1 Prise de chargement Roue arrière Installation ..............2 Molette de réglage de la hauteur Panneau de commandes Utilisation ..............10 Interface USB Roue avant Données techniques .............12 Lame de coupe Entretien et rangement ..........12 Dépannage ............14 Éléments fournis...
-
Page 21: Installation
Installation Guide d’installation Introduction Pierres Découpez votre pelouse > 45 mm Pentes < 45 mm <45mm Limitations de coupe >30% <30% >10% Chemins, allées et routes Arbres... - Page 22 > +/- 5° > +/- 5° Surfaces irrégulières Installation du câble de délimitation et des piquets Positionnement de la station de chargement 30 cm Important 30 cm 30 cm 30 cm >0.3 m > 1.5 m >0.5 m 80 cm 80 cm...
- Page 23 Plates-bandes Couloir de délimitation < 8 m > 2 m > 5 cm >5 cm Connexion de la station de chargement au câble de délimitation voir plus bas emplacement A < 5 cm <5cm Mares et piscines...
- Page 24 >0.5 m >10 m Pose de garage Sélection du signal...
-
Page 25: Utilisation
Retour à la station de chargement Utilisation Panneau de commandes Bouton de sélection du signal de limite : Arrêt d'urgence Bouton de sélection du temps de travail : « Maison » Bouton Bouton Démarrer : Réglage de la hauteur de coupe Bouton STOP : REMARQUE : Nous vous conseillons d’utiliser une tondeuse ordinaire ou un coupe-bordures pour que la pelouse soit d’une hauteur inférieure à... -
Page 26: Données Techniques
Données techniques Longévité de la batterie MB 400 Rangement pour l’hiver Préparation au printemps Degré de protection Pièces de rechange Nettoyage de l’extérieur de la tondeuse Nettoyage du dessous de la tondeuse Entretien et rangement Entretien... -
Page 27: Dépannage
Nettoyage des bornes de contact et des bandes de chargement Le Robomower tourne en rond pendant la tonte ou lorsqu’il suit le câble de délimitation pour retourner à la station de chargement. Inversion ou remplacement des lames ATTENTION ! Le Robomower fait beaucoup de bruit. ATTENTION ! Le robot tondeuse reste ou retourne à... - Page 28 Problème intervenant avant/pendant/après la recharge Problème Cause possible Solution Problème Cause possible Solution Problème en lien avec la tonte Problème Cause possible Solution...
- Page 29 Nettoyge/Entretiemn...
- Page 30 Éclates pieces Éclates pieces...
- Page 31 Liste des Bom Numéro de Numéro de Code pièce Nom de la pièce QTÉ Code pièce Nom de la pièce QTÉ poste poste 1920001MB Plaque de base de la station de charge 1920790MB Faisceau clé STOP 1920065 Capot avant de la station de charge 1920806MB Panneau PCBA 1920702...
- Page 33 Descrizione del prodotto INDICE Pulsante STOP Sensore ultrasonico Descrizione del prodotto ..........1 Porta di ricarica Ruota posteriore Installazione ..............2 Manopola di regolazione dell'altezza Pannello di controllo Funzionamento .............10 Interfaccia USB Ruota anteriore Specifiche tecniche ............12 Lama di taglio Manutenzione e conservazione ........12 Risoluzione dei problemi ..........14 Contenuto della confezione Tagliaerba...
- Page 34 Installazione Guida all'installazione Introduzione Pietre Pre Taglia il tuo prato Pendenze > 45 mm < 45 mm <45mm Limitazioni di taglio >30% <30% >10% Strade e vialetti Alberi...
- Page 35 > +/- 5° > +/- 5° Superfici irregolari Fissaggio del cavo di delimitazione Posizionamento della stazione di ricarica 30 cm 30 cm Importante! 30 cm 30 cm >0.3 m > 1.5 m >0.5 m 80 cm 80 cm...
- Page 36 Aiuole Corridoio di delimitazione < 8 m > 5 cm 3 3 5 cm > 2 m Collegamento della stazione di ricarica al cavo di delimitazione come illustrato di seguito punto A < 5 cm <5cm Stagni e piscine...
- Page 37 >10 m >0.5 m >10 m Installazione in garage Selezione del segnale...
- Page 38 Ritorno alla stazione di ricarica Funzionamento Pannello di controllo Pulsante di selezione del Arresto di emergenza segnale di confine: Pulsante di selezione dell'orario di lavoro: Pulsante Home: Pulsante Start Pulsante STOP Regolazione dell'altezza di taglio NOTA Avvio del tagliaerba...
- Page 39 Specifiche tecniche Durata di vita della batteria MB 400 Stoccaggio invernale Preparazione per la primavera Pulizia del corpo del tagliaerba Grado di impermeabilità Parti di ricambio Pulizia della parte inferiore del tagliaerba Manutenzione e conservazione Manutenzione Pulizia dei contatti e delle strisce di ricarica...
- Page 40 Inversione o sostituzione delle lame Il robot tagliaerba è molto rumoroso. AVVERTENZA! AVVERTENZA! Il tagliaerba rimane collegato o ritorna alla stazione di ricarica dopo aver premuto il pulsante START. Indicatori del segnale sulla stazione di ricarica Elenco delle parti di ricambio Aggiornamento del software Risoluzione dei problemi Il robot tagliaerba non si collega alla stazione di ricarica.
- Page 41 Prima/durante/dopo la ricarica Problema Possibile causa Azione correttiva Problema Possibile causa Azione correttiva Funzionamento Problema Possibile causa Azione correttiva...
- Page 42 Popis výrobku OBSAH Tlačítko STOP Ultrazvukový senzor Popis výrobku ............1 Nabíjecí port Zadní kolo Instalace ..............2 Kolečko pro nastavení výšky Ovládací panel Provoz ..............10 USB rozhraní Přední kolo Technické údaje ...........12 Řezací čepel Údržba a skladování ..........12 Řešení problémů ............15 Rozsah dodávky Robotická...
- Page 43 Instalace Pokyny k instalaci Úvod Kameny Předřezejte trávník > 45 mm Svahy < 45 mm <45mm Omezení sekání >30% <30% >10% Stezky, příjezdové cesty a silnice Stromy...
- Page 44 > +/- 5° > +/- 5° Nerovný povrch trávníku Zakolíkování ohraničujícího kabelu Umístění nabíjecí stanice 30 cm 30 cm 30 cm 30 cm >0.3 m > 1.5 m 80 cm 80 cm >0.5 m...
- Page 45 Květinové záhony Hraniční průchod > 5 cm >5 cm < 8 m > 2 m Připojte nabíjecí stanici k ohraničujícímu kabelu níže polohy A < 5 cm <5cm Rybníky a bazény...
- Page 46 >10 m >0.5 m >10 m Nstalace garáže Výběr signálu...
- Page 47 Návrat do nabíjecí stanice Provoz Ovládací panel Tlačítko pro výběr hraničního signálu: Nouzové zastavení Tlačítko pro výběr pracovní doby: Tlačítko Domů: Tlačítko Start: Nastavení výšky sekání Tlačítko STOP: POZNÁMKA! Před použitím robotické sekačky doporučujeme použít běžnou nebo strunovou sekačku pro posečení trávníku pod 45 mm. Tím zajistíte optimální výkonnost robotické...
- Page 48 Technické údaje Životnost baterie MB 400 Zimní uskladnění Příprava na jaro Čištění tělesa sekačky Stupeň ochrany Náhradní díly Čištění spodní strany Údržba a skladování Údržba Vyčistěte kontaktní kolíčky a nabíjecí proužky...
- Page 49 Převrácení nebo výměna čepelí Řešení problémů VAROVÁNÍ! Robotická sekačka se nedokáže připojit k nabíjecí stanici VAROVÁNÍ! Robotická sekačka se pohybuje v kruzích během sekání nebo při sledování ohraničujícího kabelu zpět do nabíjecí stanice. Robotická sekačka je hlučná. Seznam náhradních dílů Sekačka zůstane stát na nabíjecí...
- Page 50 Souvisí s nabíjením před / během / po Závada Možná příčina Nápravné opatření Závada Možná příčina Nápravné opatření Souvislost se sečením Závada Možná příčina Nápravné opatření...
- Page 51 Beschrijving van het product INHOUD STOP knop Oplaadaansluiting Beschrijving van het product .........1 Achterwiel Regelaar voor hoogte/instelling Installatie ..............2 Bedieningspaneel USB-interface Werking ..............10 Aan/uit-schakelaar Voorwiel Technische gegevens ..........12 Reservemesjes Onderhoud en opslag ..........13 Probleemoplossing ............15 Inhoud van de verpakking Robotmaaier Laadstation Transformator...
- Page 52 Installatie Installatiehandleiding Inleiding Stenen Maai uw gazon vooraf > 45 mm Hellingen < 45 mm <45mm Maaibeperkingen >30% <30% >10% Tuinpaden, opritten en wegen Bomen...
- Page 53 > +/- 5° > +/- 5° Oneffen gazonoppervlak Het laadstation plaatsen 30 cm 30 cm 30 cm 30 cm Uw omheiningsdraad met haringen vastzetten >0.3 m > 1.5 m 80 cm 80 cm >0.5 m...
- Page 54 Gang Bloemenperken < 8 m > 2 m > 5 cm >5 cm Het laadstation met de omheiningsdraad verbinden zie afbeelding positie A < 5 cm <5cm Vijvers en zwembaden...
- Page 55 >10 m >0.5 m >10 m Garage installatie Een signaal kiezen...
- Page 56 Naar het laadstation terugkeren Werking Bedieningspaneel Grenssignaalselectieknop: Noodstop Selectieknop werktijd: Home-knop: Startknop: De maaihoogte afstellen STOP-knop: POZNÁMKA! Před použitím robotické sekačky doporučujeme použít běžnou nebo strunovou sekačku pro posečení trávníku pod 45 mm. Tím zajistíte optimální výkonnost robotické sekačky. Start met maaien...
- Page 57 Technische gegevens Onderhoud en opslag MB 400 Onderhoud Opslag tijdens de winter Beschermingsgraad Reserveonderdelen Op de lente voorbereiden De romp van de maaier reinigen De onderkant reinigen...
- Page 58 Reinig de contactpennen en de laadstroken. Probleemoplossing Robotmaaier kan niet met laadstation worden verbonden. De messen omdraaien of vervangen WAARSCHUWING! De robotmaaier rijdt in cirkels tijdens het maaien of tijdens het volgen van de omheiningsdraad op weg naar het laadstation. WAARSCHUWING! De robotmaaier maakt veel lawaai.
- Page 59 In verbinding met voor/tijdens/na het laden Probleem Mogelijke oorzaak Corrigerende actie Probleem Mogelijke oorzaak Corrigerende actie In verbinding met het maaien Probleem Mogelijke oorzaak Corrigerende actie...
- Page 60 Opis produktu SPIS TREŚCI Przycisk STOP Port ładowania Opis produktu ............1 Koło tylne Pokrętło regulacji wysokości Instalacja ............... 2 Panel sterowania Interfejs USB Użytkowanie ..............10 Przełącznik wł./wył. Przednie koło Dane techniczne ............12 Zapasowe ostrza Konserwacja i przechowywanie ........13 Rozwiązywanie problemów ..........15 Zakres dostawy Robokosiarka Stacja ładowania...
- Page 61 Instalacja Instrukcja instalacji Wstęp Kamienie Wstępnie przyciąć trawnik > 45 mm Pochyłości < 45 mm <45mm Koszenie – ograniczenia >30% <30% >10% Ścieżki, podjazdy i drogi Drzewa...
- Page 62 > +/- 5° > +/- 5° Nierówne powierzchnie trawników Mocowanie przewodów granicznych kołkami Umiejscowienie stacji ładowania 30 cm 30 cm 30 cm 30 cm >0.3 m > 1.5 m >0.5 m 80 cm 80 cm...
- Page 63 Klomby z kwiatami Korytarze graniczne < 8 m > 5 cm >5 cm > 2 m Podłączenie stacji ładowania do przewodu granicznego < 5 cm <5cm Oczka wodne i baseny...
- Page 64 >10 m >0.5 m >10 m Instalacja garażowa Wybór sygnału...
- Page 65 Powrót do stacji ładowania Użytkowanie Panel sterowania Przycisk wyboru sygnału granicznego: Zatrzymanie awaryjne Przycisk wyboru Czas pracy: Przycisk Home: Przycisk Start: Regulacja wysokości koszenia Przycisk STOP: UWAGA! Zalecamy, aby przed użyciem robokosiarki, do skoszenia trawnika do wysokości poniżej 45 mm użyć...
- Page 66 Dane techniczne Przechowywanie zimą MB 400 Przygotowanie na wiosnę Czyszczenie korpusu kosiarki Stopień ochrony Czyszczenie od spodu Części zamienne Konserwacja i przechowywanie Konserwacja...
- Page 67 Czyszczenie styków, bolców i listew do ładowania Rozwiązywanie problemów Robokosiarka nie jest w stanie zaparkować w stacji ładowania W czasie koszenia lub wracając do stacji ładowania wzdłuż przewodu Odwracanie lub wymiana ostrzy granicznego robokosiarka zatacza koła. OSTRZEŻENIE! OSTRZEŻENIE! Robokosiarka jest zbyt głośna. Po wciśnięciu przycisku START kosiarka pozostaje w stacji ładowania lub wraca do niej Lista części zamiennych...
- Page 68 Przed/w czasie/po ładowaniu Problem Możliwa przyczyna Działanie naprawcze Problem Możliwa przyczyna Działanie naprawcze Kwestie dotyczące koszenia Problem Możliwa przyczyna Działanie naprawcze...
Need help?
Do you have a question about the MB 400 and is the answer not in the manual?
Questions and answers
It just won’t work I can’t get it to mow atall it just spins around and I’ve followed the set up perfectly watched u tube etc - loosing the will to live now
@Julia bailey
How do I get my mb400 online? Also cannot connect via the app
Just purchased MB 400 today but no boundary wire within box. Where can I aquire suitable wire to go round 300m perimeter