Advertisement
Quick Links
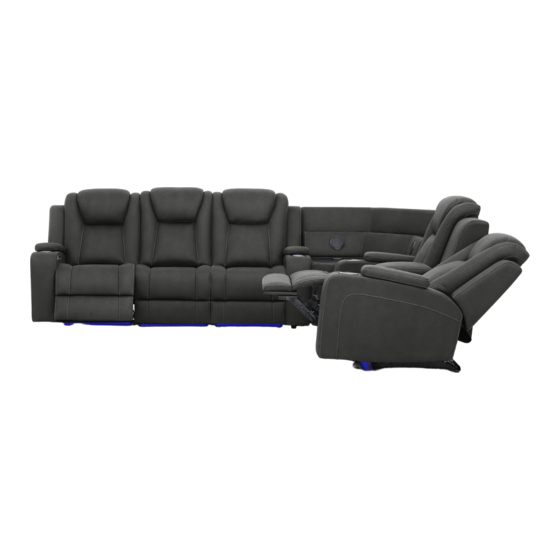
106cm
Imported by Amart Furniture Pty Ltd, Qld, Brisbane Australia.
For any assistance with assembly or for missing parts please phone
Amart Furniture, Customer Service Free call 1800 351 084
ASSEMBLY INSTRUCTION
SENTINAL MK2 CNR3C2wC
ITEM CODE 77425
Imported by Amart Furniture Pty Ltd, Qld, Brisbane Australia.
For any assistance with assembly or for missing parts please phone
Amart Furniture, Customer Service Free call 1800 351 084
1
Advertisement

Subscribe to Our Youtube Channel
Related Manuals for Amart Furniture SENTINAL MK2 CNR3C2wC


Summary of Contents for Amart Furniture SENTINAL MK2 CNR3C2wC
- Page 1 ASSEMBLY INSTRUCTION SENTINAL MK2 CNR3C2wC ITEM CODE 77425 Imported by Amart Furniture Pty Ltd, Qld, Brisbane Australia. For any assistance with assembly or for missing parts please phone Amart Furniture, Customer Service Free call 1800 351 084 106cm Imported by Amart Furniture Pty Ltd, Qld, Brisbane Australia. For any assistance with assembly or for missing parts please phone Amart Furniture, Customer Service Free call 1800 351 084...
-
Page 2: Pre-Assembly Preparation
PRE‐ASSEMBLY PREPARATION Before you start: Choose a clean, level, spacious assembly area. Avoid hard surfaces that may damage the product Take care when lifting. Product should be assembled as near as possible to the point of use Ensure that you have all required contents for complete assembly Always read the assembly instructions carefully before beginning assembly. Keep all hardware parts and packaging out of reach of small children. Do not over tighten the screws and bolts as this may damage the threads WARNING Do Not allow children to play on this mechanised furniture or operate the mechanism. Leg rest folds down on closing so that a child could possibly be injured. Always leave in an upright and closed position. Keep hands and feet clear of mechanism. Only the occupant should operate it. - Page 3 Step1: Locate the left hand facing recliner power pack which is fixed on the mechanism at the bottom of the recliner. Power Parts Connection Transformer cable Transformer Power cable Power Pack Transformer Power cable Transformer cable 1pcs 1pcs 1pcs Step2: Slide receivers into steel mechanism posts at seat of the left hand facing recliner, and press both sides of the back firmly into place to ensure fully locked. Receiver at bottom of back rest Mechanism post at rear of seat slide receiver into post...
- Page 4 Step3: Connect the cords ‘A’ and ‘B’ for power connection between headrest and seat. One cord comes from the back and the other from the seat of left hand facing recliner. Step4: Slide receivers into steel mechanism posts at seat of the right hand facing chair, and press both sides of the back firmly into place to ensure fully locked. Receiver at bottom of back rest Mechanism post at rear of seat slide receiver into post...
- Page 5 Step5: Locate reading light power cable which is attached to the mechanism post of the armless chair. Keep the power cable to the side. Then unravel the cable ‘E’ with a plug on the end of it. The cable is from the armless chair back that need be plugged into a wall socket to connect power for charge station on the drop‐down console. Charge Station Power Cable Reading Light Power Cable Reading Light Power Cable 1pcs Step6: Slide receivers into steel mechanism posts at seat of the armless chair, and press both sides of the back firmly into place to ensure fully locked. Receiver at bottom of back rest Mechanism post at rear of seat slide receiver into post...
- Page 6 Step7: Connect the cords ‘C’ and ‘D’(below) in the armless chair to connect power for reading lights. One cord comes from the back and the other from the seat. Step8: Locate the right hand facing recliner power pack which is fixed on the mechanism at the bottom of the recliner. Power Parts Connection Transformer cable Transformer Power cable Power Pack Transformer cable Transformer Power cable 1pcs 1pcs 1pcs...
- Page 7 Step9: Slide receivers into steel mechanism posts at seat of the right hand facing recliner, and press both sides of the back firmly into place to ensure fully locked. Receiver at bottom of back rest Mechanism post at rear of seat slide receiver into post Step10: Connect the cords ‘A’ and ‘B’ for power connection between headrest and seat. One cord comes from the back and the other from the seat of right hand facing recliner. ...
- Page 8 Step11: Slide receivers into steel mechanism posts at seat of the left hand facing chair, and press both sides of the back firmly into place to ensure fully locked. Receiver at bottom of back rest Mechanism post at rear of seat slide receiver into post Step12: Locate the knockdown console back and fittings that are placed inside the zipper pocket on the bottom of console. Console back Bolt 2pcs 1pcs 2pcs...
- Page 9 Step13: Screw the short ends of the bolts into the holes on the bottom of console back. Step14: Poke the console back into holes on the rear of console and then fix the back by two nuts screwed inside the console. ...
- Page 10 Step15: Locate and remove the Wedge Sofa Feet and Sound Power Cable from the zipper pocket underneath the Wedge base. Keep the power cable to the side. With 2 people, carefully turn lounge onto back of a piece of cardboard or carpet to protect covering Sound Power Cable Plastic Foot 1pcs 6pcs Step16: Secure the 6 x plastic feet provided to the bottom of the wedge piece, turning in clockwise direction to tighten. Turn the plastic round feet clockwise to tighten...
- Page 11 Step17: Remove protective packaging from the wedge back packaged with fittings individually. Then screw the short ends of the bolts into the holes on the bottom of wedge back. Wedge Back Bolt 1pcs 4pcs 4pcs Step18: Poke the wedge back into holes on the rear of wedge base and then fix the back by four nuts screwed inside the wedge base. ...
- Page 12 Step19: Connect the cords of two speakers being out from the wedge back with cords which are out from the hub box inside the wedge base. Step20: Connect the 3 Seater and 2 Seater with console respectively from right to left. For 3 Seater, begin with the right hand facing chair, then armless chair, then left hand facing recliner. And for 2 Seater, begin with the right hand facing recliner, then console, then left hand facing chair. Slide the base clips together then press the front and rear sides to ensure the clips are connected all the way to the bottom.
- Page 13 Step21: Unfold connection clips to poke out from bottom of the left hand facing chair and place slideway parts at bottom of wedge into the clips. Then, unfold connection clips to poke out from bottom of the wedge and place slideway parts at bottom of right hand facing chair into the clips. Slideway Parts Connection Clips at right hand at wedge facing chair Slideway Parts Connection Clips at left at wedge hand facing chair Step22: At the rear and base of lounge, connect the cords for the light strip between each piece of 3 Seater, 2 Seater with console and Wedge. SAFETY NOTE: PLEASE ENSURE THAT ALL ELECTRICAL CORDS AND CABLES ARE CLEAR OF THE FRAME AND MECHANISM. A FAILURE TO DO SO MAY SEVER YOUR POWER CORD RESULTING IN SERIOUS INJURY OR DEATH.
-
Page 14: Safety Note
Step23: Plug the left hand facing recliner power cable into the back socket of the left hand facing recliner. SAFETY NOTE: PLEASE ENSURE THAT ALL ELECTRICAL CORDS AND CABLES ARE CLEAR OF THE FRAME AND MECHANISM. A FAILURE TO DO SO MAY SEVER YOUR POWER CORD RESULTING IN SERIOUS INJURY OR DEATH. Step24: Plug the right hand facing recliner power cable into the back socket of the right hand facing recliner. SAFETY NOTE: PLEASE ENSURE THAT ALL ELECTRICAL CORDS AND CABLES ARE CLEAR OF THE FRAME AND MECHANISM. A FAILURE TO DO SO MAY SEVER YOUR POWER CORD RESULTING IN SERIOUS INJURY OR DEATH. - Page 15 Step25: Plug the reading light power cable into the back socket of the armlees chair. SAFETY NOTE: PLEASE ENSURE THAT ALL ELECTRICAL CORDS AND CABLES ARE CLEAR OF THE FRAME AND MECHANISM. A FAILURE TO DO SO MAY SEVER YOUR POWER CORD RESULTING IN SERIOUS INJURY OR DEATH. Step26: Plug the sound power cable into the back socket of the wedge. SAFETY NOTE: PLEASE ENSURE THAT ALL ELECTRICAL CORDS AND CABLES ARE CLEAR OF THE FRAME AND MECHANISM. A FAILURE TO DO SO MAY SEVER YOUR POWER CORD RESULTING IN SERIOUS INJURY OR DEATH.
- Page 16 Step27: Plug all power cables into power source / wall. The left recliner power cable, right recliner power cable, reading light power cable, charge station power cable and sound power cable. SAFETY NOTE: PLEASE ENSURE THAT ALL ELECTRICAL CORDS AND CABLES ARE CLEAR OF THE FRAME AND MECHANISM. A FAILURE TO DO SO MAY SEVER YOUR POWER CORD RESULTING IN SERIOUS INJURY OR DEATH.
- Page 17 READ THESE INSTRUCTIONS THOROUGHLY BEFORE USE: DANGER: TO REDUCE THE RISK OF ELECTRIC SHOCK: Always unplug from electric outlet before cleaning. WARNING: RISK OF INJURY Keep children away from extended footrest and any moving parts. CAUTION: • Do not allow children to play on this electric recliner or operate the powered mechanism. The leg rest folds when closing and could possibly cause injury to a child. Always leave the recliner in an upright and closed position when not in use. Keep hands and feet clear of mechanism. Only the occupant should operate it. • Do ensure fully enter the normal sitting position before using of the recliner. Improper sitting, such as sitting in the front of recliner may result in damage to both mechanism and motor drive bar. POWER CORD SAFETY WARNING: Unplug and remove power cord from wall when not in use and store out of reach of children. Take care when moving recliner that wall and transformer cords are not under the base or they may get damaged. ‐ NEVER OPERATE ELECTRIC RECLINER IF IT HAS A DAMAGED CORD OR PLUG. WARNING: TO REDUCE RISK OF BURNS, FIRE, ELECTRIC SHOCK OR PERSONAL INJURY TO PERSONS: • Use only for its intended purpose • Never press or activate control switch if you are not seated in recliner • Only the occupant should activate the control switch • Never operate with more than one person occupying seat • Never sit or stand on the footrest...
- Page 19 Speaker Control Panel Manual Wireless Charger USB Port USB Port Skip ‐ Volume Power/Play/Pause Replay + Volume Speaker Instruction: Bluetooth • Bluetooth Name: Cassius • How to Connect: Hold down the power button for 3 seconds. When the blue light (BT) starts flashing, connect your device. Ensure your device is within range. Once successfully connected the blue light (BT) will stay lit. Speaker Control Panel • How to use: Hold the power button for 3 seconds to turn on/off. Press the “replay” and “skip” buttons to navigate. Press the “+ volume” and “‐ volume” buttons to control the sound. Wireless Charge: • How to use: Place the device in the center of the red wireless charging panel. When the green light is on, wireless charge is successfully in operation. NOTE: • To indicate that the console is connected to power, the red light (power) will stay lit . • When the phone is paired and you receive a call or text, the sound will pause. • The speakers will only work through Bluetooth connection, not USB or Wireless connection.
-
Page 20: Speaker Specifications
Speaker Specifications • Reproduction system • Woofer∙∙∙∙∙∙∙∙∙∙∙∙∙∙∙∙∙∙∙∙∙∙ φ104mm Magnet: 370g • Tweeter∙∙∙∙∙∙∙∙∙∙∙∙∙∙∙∙∙∙∙∙∙∙ φ78mm • Nominal impedance∙∙∙∙∙∙∙∙∙∙∙∙∙∙∙∙∙∙∙∙∙∙ 6Ω ‐ 4Ω ‐ 4Ω • Sensitivity∙∙∙∙∙∙∙∙∙∙∙∙∙∙∙∙∙∙∙∙∙∙ 92±3dB 82±3dB • Frequency response∙∙∙∙∙∙∙∙∙∙∙∙∙∙∙∙∙∙∙∙∙∙ F0~10KHZ F0‐12KHz • Nominal power∙∙∙∙∙∙∙∙∙∙∙∙∙∙∙∙∙∙∙∙∙∙ 20W • Maximum music power∙∙∙∙∙∙∙∙∙∙∙∙∙∙∙∙∙∙∙∙∙∙ 32W • Grille material∙∙∙∙∙∙∙∙∙∙∙∙∙∙∙∙∙∙∙∙∙∙ Steel net, ABS • Weight (per speaker including accessory parts) ∙∙∙∙∙∙∙∙∙∙∙∙∙∙∙∙∙∙∙∙1377g/198g • Gross weight (2 speakers including packaging) ∙∙∙∙∙∙∙∙∙∙∙∙∙∙∙∙∙∙∙∙1774g IMPORTANT INFORMATION • DO NOT play the speakers for more than 6 hours continuously. In doing so may cause damage to your speakers. - Page 21 Wireless Charger Applications All cell phones with wireless charging function can be charged. The list below shows only some of the phones for your reference. Brand Model Number Brand Model Number iPhone 13 series Note 20 series iPhone 12 series S20 series iPhone SE2 S21 series Apple iPhone 11 series Galaxy Fold iPhone X series SM‐G9298 iPhone 8 series Galaxy S Lite SAMSUNG P50 Pro 4G Kelly(SM‐W2018) P30 Pro W2017(SM‐W2017) Mate 40 series W2016 HUAWEI P40 Pro series S10, S9, S8, S7, S6 series Mate 30 series Note 10 series Mate 20 Pro&RS Note 9, Note 8, Note 7 Optimus series Note FE, Note 5 Spectrum 2 Evolve series LG Lucid series PRIV Black Berry V50 series Classic SQC100 series...
Need help?
Do you have a question about the SENTINAL MK2 CNR3C2wC and is the answer not in the manual?
Questions and answers
what do the controls do on sentinel mark 2 2 seater electric recliner