Table of Contents
Advertisement
Available languages
Available languages
Advertisement
Table of Contents

Related Manuals for TEFAL Speedy Cook


Summary of Contents for TEFAL Speedy Cook
- Page 1 Speedy Cook www.tefal.com...
-
Page 2: Table Of Contents
Technical Troubleshooting Guide ---------------------------------------------------------------------------65 Tefal International Limited Guarantee--------------------------------------------------------------------68 Welcome to the world of fast & delicious cooking! With Speedy Cook, we took up the challenge of speeding up the cooking while enhancing the flavors. Designed to make every user happy, Speedy Cook allows you to save time and cook homemade delicious meals in total simplicity and convenience. - Page 4 Bang!
-
Page 5: Tefal Khuyến Nghị Đặt An Toàn Lên Hàng Đầu
− nhà ở trang trại; TEFAL KHUYẾN NGHỊ AN TOÀN LÀ TRÊN HẾT − khách hàng trong khách sạn, nhà nghỉ và các môi An toàn là ưu tiên số một của chúng tôi. Chúng tôi thiết kế và sản trường dạng dân cư... - Page 6 • Trẻ em phải được giám sát để đảm bảo trẻ không nghịch • Lưu ý rằng một số công thức món ăn chứa sữa có thể phá thiết bị. tạo bọt, sùi bọt, bị trào và làm tắc các van. Hãy sử dụng thận trọng khi nấu các món ăn này và...
- Page 7 5. Cách sử dụng an toàn – trong khi nấu • Không đặt đồ vật lên van và nút xả áp suất. Không được tự thay van. • Không cố mở nắp trước khi áp suất đã giảm xuống thích •...
- Page 8 • Rút phích cắm ra khỏi ổ điện khi không sử dụng và • Chỉ sử dụng phụ kiện thay thế được bán tại Trung tâm trước khi vệ sinh. Để nguội trước khi lắp hoặc tháo các bảo dưỡng được phê chuẩn. •...
-
Page 9: Tất Cả Các Bộ Phận Sản Phẩm
LÀM QUEN VỚI BẢNG ĐIỀU KHIỂN TẤT CẢ CÁC BỘ PHẬN SẢN PHẨM Van đi u áp Van phao Ch báo cài đ t Đ t th i gian n u Đ t nhi t đ n u Đ t th i gian b t đ u tr Nút x áp su t Núm trên n p Làm nóng trư... -
Page 10: Hướng Dẫn Cách Sử Dụng & Vệ Sinh
THÔNG BÁO TRẠNG THÁI HƯỚNG DẪN CÁCH SỬ DỤNG & VỆ SINH Thông báo chào mừng khi bật thiết bị. Bạn có thể thoải mái tham khảo các chỉ số được biểu thị dưới dạng (Hình x) trong phần Hướng dẫn sử dụng nhanh. Màn hình hiển thị... - Page 11 • Nếu bạn vô tình nhúng thiết bị vào nước hoặc làm tràn nước trực • Để vệ sinh nắp van điều áp, tháo nắp van điều áp ra khỏi mặt trong tiếp trên mâm nhiệt, hãy mang thiết bị đến Trung tâm bảo dưỡng của nắp (Hình 13).
- Page 12 BẢNG CHƯƠNG TRÌNH NẤU • Giữ núm trên nắp, đậy nắp lên trên thiết bị và xoay núm theo chiều kim đồng hồ để khóa nắp (Hình 22). Trạng thái nắp 4. Gắn van điều áp • Đặt van điều áp đúng cách lên trên nắp (Hình 23). Vui lòng lưu ý rằng van sẽ...
- Page 13 • Thiết bị bắt đầu giai đoạn làm nóng trước. Màn hình hiển thị theo Chương trình hầm & tùy chọn và đèn báo làm nóng trước bật. • Cho nguyên liệu vào nồi nấu, đồng thời đóng và khóa hoàn toàn •...
- Page 14 • Nhấn để bắt đầu chương trình nấu. Chương trình Hấp • Thiết bị bắt đầu giai đoạn làm nóng trước. Màn hình hiển thị theo • Cho 150 ml nước (3⁄4 cốc) vào nồi nấu, đặt giá ba chân dưới đáy nồi &...
- Page 15 • Khi kết thúc thời gian đếm ngược, thiết bị phát ra tiếng bíp và màn • Khi ủ bột, bạn có thể nhào trực tiếp bột trong nồi nấu, sau đó đặt hình hiển thị nồi nấu vào vỏ, đồng thời đóng và khóa hoàn toàn nắp. •...
- Page 16 • Sau vài giây, thiết bị sẽ tự động chuyển sang chế độ chờ. Màn hình • Nhấn để bắt đầu chương trình nấu. hiển thị • Thiết bị bắt đầu giai đoạn làm nóng trước. Màn hình hiển thị theo •...
- Page 17 • Tùy chọn: Đặt thời gian mong muốn bằng cách nhấn (để giảm các bộ phận của thiết bị trong phần TRƯỚC KHI SỬ DỤNG LẦN thời gian) hoặc (để tăng thời gian). ĐẦU. • Nhấn . Màn hình hiển thị thời gian đếm ngược để bắt đầu trễ. •...
-
Page 18: Hướng Dẫn Xử Lý Sự
HƯỚNG DẪN XỬ LÝ SỰ CỐ KỸ THUẬT Vấn đề Lý do có thể Giải pháp Cẩn thận xoay/nhấn van điều áp để van rơi vào vị trí. Cẩn Vấn đề Lý do có thể Giải pháp Van điều áp không nằm ở thận với hơi nước nóng. -
Page 19: Tefal Recommends Safety First
TEFAL RECOMMENDS SAFETY FIRST Vấn đề Lý do có thể Giải pháp Gửi thiết bị đến Trung tâm E0 hiển thị trên màn Safety is our number one priority. We design and manufacture Công tắc áp suất bị hỏng. bảo dưỡng được phê chuẩn hình kỹ... - Page 20 − farm houses; 3. How to use safely – general usage? − by clients in hotels, motels and other residential type • Do not use appliance for other than the intended purpose. environments; • Do not use the appliance to fry food in oil. Only browning −...
- Page 21 4. How to use safely – before cooking? • Do not use the appliance empty, without its cooking pot or without ingredients inside the cooking pot. This • Before using your appliance, check that the float valve could cause serious damage to the appliance. and the pressure limit valve are clean.
- Page 22 8. What to do in case of damage? • Do not remove the cooking pot while the appliance is working. • Do not operate any appliance with a damaged power • While browning, be careful of risks of burns caused by cord or plug or after the appliance malfunctions or has spattering when you add food or ingredients into the been damaged in any manner.
-
Page 23: All Parts Of Your Product
Environment protection first! ALL PARTS OF YOUR PRODUCT Your appliance contains valuable materials which Pressure limit Float valve valve can be recovered or recycled. Pressure Leave it at a local civic waste collection point. release button Lid knob 9. When does warranty apply? •... -
Page 24: Getting Familiar With The Control Panel
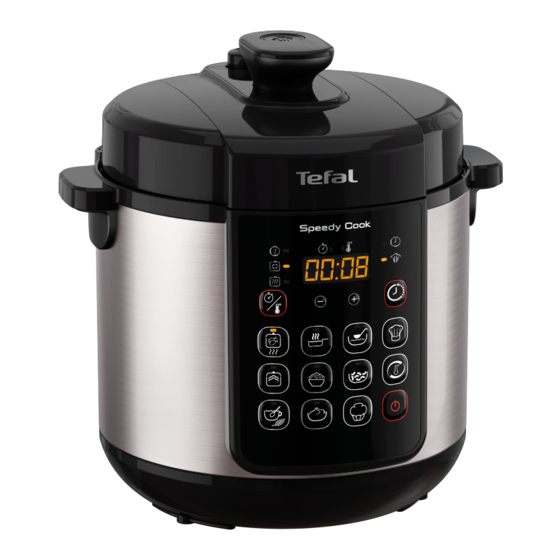
GETTING FAMILIAR WITH THE CONTROL PANEL STATUS MESSAGES Welcome message when appliance is turned on. Settings indicators Time display. In this example: 1 hour 30 minutes. Set cooking time Set cooking temperature Set delayed start time Temperature display. In this example: 114 degrees Celsius. Indicates that the program has a default automatic temperature/ time setting. -
Page 25: How To Use & Clean Guide
• Do not use a scourer or abrasive sponge to clean the cooking HOW TO USE & CLEAN GUIDE pot as it could damage the coating in the cooking pot (Fig.40). Feel free to refer to the figures indicated as (Fig.x) from Quick •... - Page 26 3c. Clean the valves INSTRUCTIONS FOR USE • To clean the pressure limit valve, remove the pressure limit 1. Place ingredients in the cooking pot valve from the pipe on top of the lid (Fig.10). Clean it with a • Remove the cooking pot from the housing. soft sponge and soapy hot water (Fig.11).
- Page 27 COOKING PROGRAMS TABLE Note: When cooking, you may notice slight steam leakage from the lid, especially from the pressure limit valve. This is normal Lid status and occurs when pressure builds up. Please refer to the figures from Quick Start Guide (from Fig.25 to Fig.36) from •...
- Page 28 • Optional: Set the desired time by pressing (to decrease time) Stir-fry program (to increase time). • Press Stir-fry program button . The screen displays the de- • Press to start the cooking program. fault cooking time. • The appliance starts the pre-heating phase. The screen dis- •...
- Page 29 • The appliance starts the pre-heating phase. The screen • When the pre-heating phase is completed, the appliance switches displays alternatively & and the pre-heating automatically to cooking phase. The screen displays the count light indicator turns on. down and the cooking in progress light indicator turns on.
- Page 30 • During cooking process, pressure builds up in the appliance and • After a few seconds, the appliance will automatically switch pushes the float valve up. The under pressure light indicator to keep warm phase. The screen displays and the keeping turns on to notify that the lid cannot be opened without releasing warm light indicator turns on.
- Page 31 • At the end of the count down, the appliance beeps and the • After a few seconds, the appliance will automatically switch screen displays to keep warm phase. The screen displays and the keeping warm light indicator turns on. •...
- Page 32 • Optional: Set the desired time by pressing (to decrease time) Reheat program (to increase time) • Place the ingredients in the cooking pot and close but don’t • Press . The screen displays the delayed start count down. lock the lid. When preset time is elapsed, the appliance will start cooking •...
-
Page 33: Technical Troubleshooting Guide
10. Clean after use TECHNICAL TROUBLESHOOTING GUIDE • Clean your appliance after each use. • Before cleaning, let your appliance cool down for at least 2 hours. Problem Possible reasons Solutions • For cleaning instructions, refer to part 3. Clean all parts of the Press continuously the pressure release button to remove the appliance in BEFORE FIRST USE section. - Page 34 Problem Possible reasons Solutions Problem Possible reasons Solutions Carefully rotate/press the Try again by following Solid/liquid ingredients ratio pressure limit valve to make it precisely the quantities of The pressure limit valve is in is incorrect. fall into place. Be careful of the the recipe.
- Page 35 TEFAL/T-FAL INTERNATIONAL GUARANTEE: COUNTRY LIST SMALL HOUSEHOLD APPLIANCES www.tefal.com INTERNATIONAL GUARANTEE GROUPE SEB ARGENTINA S.A. www.tefal.com 2 años Billinghurst 1833 3° 0800-122-2732 ARGENTINA FRAN 2 years C1425DTK Guade Capital Federal Buenos Aires Ré SEB Ուկրանիա խումբ» ընկերություն...
- Page 36 01510 Vantaa 1680 София GROUPE SEB France GROUPE SEB MALAYSIA SDN. BHD FRANCE Continentale + 2 ans Service Consommateur Tefal Unit No. 402-403, Level 4, Uptown 2, 09 74 50 47 74 Guadeloupe, Martinique, 603 7802 3000 2 years MALAYSIA 2 years 112 Ch.
- Page 37 Bảo hành : TEFAL/T-FAL đảm bảo sản phẩm này không có bất kỳ khuyết điểm sản xuất hoặc tay nghề trong thời gian bảo hành tại các quốc gia *** như đã nêu trong danh sách quốc gia ở trang...
- Page 39 3206000863...
Need help?
Do you have a question about the Speedy Cook and is the answer not in the manual?
Questions and answers