
Related Manuals for EuroLite LED ML-56 COB PCL 100W


Summary of Contents for EuroLite LED ML-56 COB PCL 100W
- Page 1 BEDIENUNGSANLEITUNG USER MANUAL LED ML-56 COB PCL 100W Für weiteren Gebrauch aufbewahren! © Copyright Keep this manual for future needs! Nachdruck verboten! Reproduction prohibited!
-
Page 2: Table Of Contents
This user manual is valid for the article numbers 41607310, 41607330 Das neueste Update dieser Bedienungsanleitung finden Sie im Internet unter: You can find the latest update of this user manual in the Internet under: www.eurolite.de 2/28 00085615.DOC, Version 1.0... -
Page 3: Einführung
- sich die letzte Version der Anleitung im Internet herunter laden EINFÜHRUNG Wir freuen uns, dass Sie sich für einen EUROLITE LED ML-56 COB PCL 100W entschieden haben. Wenn Sie nachfolgende Hinweise beachten, sind wir sicher, dass Sie lange Zeit Freude an Ihrem Kauf haben werden. - Page 4 Bitte überprüfen Sie vor der ersten Inbetriebnahme, ob kein offensichtlicher Transportschaden vorliegt. Sollten Sie Schäden an der Netzleitung oder am Gehäuse entdecken, nehmen Sie das Gerät nicht in Betrieb und setzen sich bitte mit Ihrem Fachhändler in Verbindung. Der Aufbau entspricht der Schutzklasse I. Der Netzstecker darf nur an eine Schutzkontakt-Steckdose angeschlossen werden, deren Spannung und Frequenz mit dem Typenschild des Gerätes genau übereinstimmt.
-
Page 5: Bestimmungsgemäße Verwendung
BESTIMMUNGSGEMÄßE VERWENDUNG Bei diesem Gerät handelt es sich um einen Effektstrahler, mit dem sich dekorative Lichteffekte erzeugen lassen. Dieses Produkt ist für den Anschluss an 100-240 V, 50/60 Hz Wechselspannung zugelassen und wurde ausschließlich zur Verwendung in Innenräumen konzipiert. Dieses Gerät ist für professionelle Anwendungen, z. B. auf Bühnen, in Diskotheken, Theatern etc. vorgesehen. -
Page 6: Gerätebeschreibung
Beachten Sie bitte, dass eigenmächtige Veränderungen an dem Gerät aus Sicherheitsgründen verboten sind. Der Serienbarcode darf niemals vom Gerät entfernt werden, da ansonsten der Garantieanspruch erlischt. Wird das Gerät anders verwendet als in dieser Bedienungsanleitung beschrieben, kann dies zu Schäden am Produkt führen und der Garantieanspruch erlischt. -
Page 7: Installation
(6) DMX-Eingang (7) Display (8) Menu-Taste (9) Enter-Taste (10) Spannungsversorgung (11) Up-Taste (12) Down-Taste (13) DMX-Ausgang INSTALLATION Überkopfmontage LEBENSGEFAHR! Bei der Installation sind insbesondere die Bestimmungen der BGV C1 und EN 60598-2-17 zu beachten! Die Installation darf nur vom autorisierten Fachhandel ausgeführt werden! Die Aufhängevorrichtungen des Gerätes muss so gebaut und bemessen sein, dass sie 1 Stunde lang ohne dauernde schädliche Deformierung das 10-fache der Nutzlast aushalten kann. - Page 8 Vorgehensweise: Das Gerät sollte idealerweise außerhalb des Aufenthaltsbereiches von Personen installiert werden. WICHTIG! ÜBERKOPFMONTAGE ERFORDERT EIN HOHES MAß AN ERFAHRUNG. Dies beinhaltet (aber beschränkt sich nicht allein auf) Berechnungen zur Definition der Tragfähigkeit, verwendetes Installations- material und regelmäßige Sicherheitsinspektionen des verwendeten Materials und des Gerätes. Versuchen Sie niemals, die Installation selbst vorzunehmen, wenn Sie nicht über eine solche Qualifikation verfügen, sondern beauftragen Sie einen professionellen Installateur.
-
Page 9: Anschluss Ans Netz
Anschluss ans Netz Schließen Sie das Gerät über den Netzstecker ans Netz an. Die Belegung der Anschlussleitungen ist wie folgt: Leitung International Braun Außenleiter Blau Neutralleiter Gelb/Grün Schutzleiter Der Schutzleiter muss unbedingt angeschlossen werden! Wenn das Gerät direkt an das örtliche Stromnetz angeschlossen wird, muss eine Trennvorrichtung mit mindestens 3 mm Kontaktöffnung an jedem Pol in die festverlegte elektrische Installation eingebaut werden. -
Page 10: Bedienung
Standalone-Modus Der LED ML-56 COB PCL 100W lässt sich im Standalone-Betrieb ohne Controller einsetzen. Trennen Sie dazu den EUROLITE LED ML-56 COB PCL 100W vom Controller und rufen Sie das vorprogrammierte Programm, wie im Kapitel Control Board beschrieben, auf. Master/Slave Modus Im Master/Slave-Betrieb lassen sich mehrere Geräte synchronisieren, die dann von einem Mastergerät... -
Page 11: Control Board
Control Board Das Control Board bietet mehrere Möglichkeiten: so lassen sich z. B. die DMX-Startadresse eingeben, das vorprogrammierte Programm abspielen oder der DMX-Kanal-Modus auswählen. Durch Drücken der Menu-Taste können Sie sich im Hauptmenü bewegen. Zur Auswahl des gewünschten Menüpunktes drücken Sie die Enter-Taste. Durch Drücken der Up/Down-Taste können Sie die Auswahl verändern. -
Page 12: Dmx-Gesteuerter Betrieb
Wenn Sie die Startadresse im 11-Kanal-Modus z. B. auf 12 definieren, belegt das Gerät die Steuerkanäle 12 bis 22. Ansteuerung: Nachdem Sie die Startadresse definiert haben, können Sie den LED ML-56 COB PCL 100W über Ihren Controller ansteuern. DMX-Protokoll Mode/Channel Decimal Hexad. - Page 13 Weiß 100% Weiß 0 - 100 % zunehmend Dimmerintensität Allmähliche Einstellung der Dimmerintensität von 0 bis 100 100% Strobe Keine Funktion Strobe-Effekt mit 100% zunehmender Geschwindigkeit Farbvoreinstellungen Keine Funktion Farbwechsel Keine Funktion Rot 100% / Grün zunehmend / Blau 0% / Amber 0% / Weiß 0 Rot abnehmend / Grün 100% / Blau 0% / Amber 0% / Weiß...
- Page 14 Control Board-Einstellung WT.10 - Farbpreset aus Control Board-Einstellung WT.11 - Farbpreset aus 100% Control Board-Einstellung Interne Programme Keine Funktion Internes Programm AT.01 Internes Programm AT.02 Internes Programm AT.03 Internes Programm AT.04 Internes Programm AT.05 Internes Programm AT.06 Internes Programm AT.07 Internes Programm AT.08 Internes Programm AT.09 Internes Programm AT.10...
-
Page 15: Reinigung Und Wartung
REINIGUNG UND WARTUNG LEBENSGEFAHR! Vor Wartungsarbeiten unbedingt allpolig vom Netz trennen! Das Gerät sollte regelmäßig von Verunreinigungen wie Staub usw. gereinigt werden. Verwenden Sie zur Reinigung ein fusselfreies, angefeuchtetes Tuch. Auf keinen Fall Alkohol oder irgendwelche Lösungsmittel zur Reinigung verwenden! Im Geräteinneren befinden sich keine zu wartenden Teile. -
Page 16: Introduction
- download the latest version of the user manual from the Internet INTRODUCTION Thank you for having chosen a EUROLITE LED ML-56 COB PCL 100W. If you follow the instructions given in this manual, we are sure that you will enjoy this device for a long period of time. - Page 17 Please make sure that there are no obvious transport damages. Should you notice any damages on the A/C connection cable or on the casing, do not take the device into operation and immediately consult your local dealer. This device falls under protection-class I. The power plug must only be plugged into a protection class I outlet.
-
Page 18: Operating Determinations
OPERATING DETERMINATIONS This device is a lighting effect for creating decorative effects. This product is allowed to be operated with an alternating voltage of 100-240 V, 50/60 Hz and was designed for indoor use only. This device is designed for professional use, e.g. on stages, in discotheques, theatres etc. Lighting effects are not designed for permanent operation. -
Page 19: Description
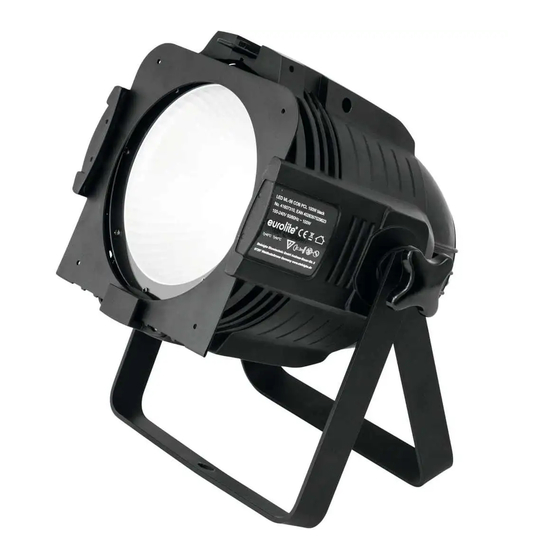
DESCRIPTION Features Professional COB spot with pentacolor LED • Equipped with a 100 W PCL (pentacolor) with RGBAW colors • Flicker-free projection • HSV, 5, 7, 8 or 11 DMX channels selectable • Functions: static colors, RGBAW color blend, automatic color change, internal programs and user defined auto programs, user defined color presets, dimmer and strobe settings, power limitation •... -
Page 20: Installation
(6) DMX Input (7) Display (8) Menu button (9) Enter button (10) Power supply (11) Up button (12) Down button (13) DMX Output INSTALLATION Overhead rigging DANGER TO LIFE! Please consider the EN 60598-2-17and the respective national standards during the installation! The installation must only be carried out by an authorized dealer! The installation of the device has to be built and constructed in a way that it can hold 10 times the weight for 1 hour without any harming deformation. - Page 21 The device has to be installed out of the reach of people. If the device shall be lowered from the ceiling or high joists, professional trussing systems have to be used. The device must never be fixed swinging freely in the room. Caution: Devices may cause severe injuries when crashing down! If you have doubts concerning the safety of a possible installation, do NOT install the device! Before rigging make sure that the installation area can hold a minimum point load of 10 times the device's...
-
Page 22: Connection With The Mains
Connection with the mains Connect the device to the mains with the power-plug. The occupation of the connection-cables is as follows: Cable International Brown Live Blue Neutral Yellow/Green Earth The earth has to be connected! If the device will be directly connected with the local power supply network, a disconnection switch with a minimum opening of 3 mm at every pole has to be included in the permanent electrical installation. -
Page 23: Operation
The master/slave-operation enables that several devices can be synchronized and controlled by one master- device. On the rear of the LED ML-56 COB PCL 100W you can find an XLR-jack (DMX Out) and an XLR-plug (DMX In), which can be used for connecting several devices. -
Page 24: Control Board
Control Board The Control Board offers several features: you can simply set the starting address, run the pre-programmed program or select a DMX channel mode. Browse through the menu by pressing Menu. Press Enter in order to select the desired menu. You can change the selection by pressing Up or Down. -
Page 25: Dmx-Controlled Operation
If you set, for example, the address in the 11 channel mode to channel 12, the device will use the channels 12 to 22 for control. Controlling: After having addressed the LED ML-56 COB PCL 100W, you may now start operating it via your lighting controller. DMX-protocol... - Page 26 100% Amber 0 - 100 % increasing White 100% White 0 - 100 % increasing Dimmer intensity Gradual adjustment of the dimmer intensity from 0 to 100 100% Strobe No function Strobe-effect with increasing 100% speed Color presets No function Color change No function Red 100% / green 100% / blue...
- Page 27 WT.10 - Control Board setting color preset WT.11 - Control Board setting 100% color preset Internal programs No function Internal program AT.01 Internal program AT.02 Internal program AT.03 Internal program AT.04 Internal program AT.05 Internal program AT.06 Internal program AT.07 Internal program AT.08 Internal program AT.09 Internal program AT.10...
-
Page 28: Cleaning And Maintenance
CLEANING AND MAINTENANCE DANGER TO LIFE! Disconnect from mains before starting maintenance operation! We recommend a frequent cleaning of the device. Please use a soft lint-free and moistened cloth. Never use alcohol or solvents! There are no serviceable parts inside the device. Maintenance and service operations are only to be carried out by authorized dealers.
Need help?
Do you have a question about the LED ML-56 COB PCL 100W and is the answer not in the manual?
Questions and answers