
Related Manuals for BH FITNESS R4


Summary of Contents for BH FITNESS R4
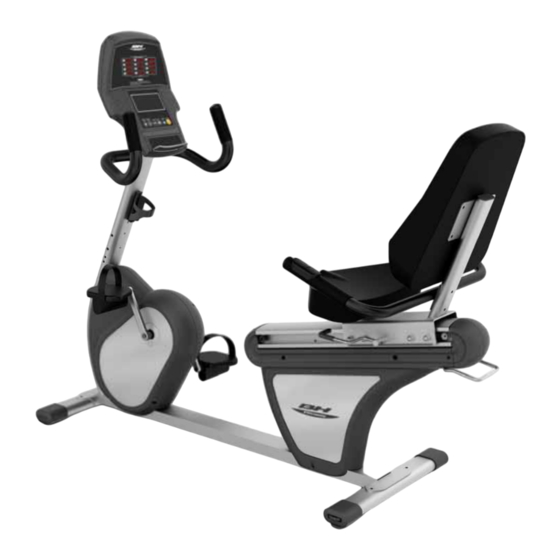
- Page 1 BH FITNESS R4 RECUMBENT CYCLE OWNER’S MANUAL BH FITNESS 20155 Ellipse Foothill Ranch, CA 92610 Phone: 949-206-8152 Fax: 949-206-0013 Email: fitness@bhnorthamerica.com Web: www.bhnorthamerica.com Revised: 6/27/07...
- Page 2 The R4 is designed to make your workouts more effective and enjoyable. Please read this manual carefully before using the R4. This will allow you to get a full understanding of all the features the BH Fitness Recumbent Cycle provides. If you have questions or concerns, please contact BH FITNESS or any authorized BH FITNESS distributors in your area.
-
Page 3: Table Of Contents
R4 RECUMBENT CYCLE TABLE OF CONTENTS SECTION PAGE 1. IMPORTANT SAFETY INSTRUCTIONS ............3 2. ASSEMBLY INST RUCTIONS ............... 5 3. COMPUTER CONSOLE ................19 4. POWER UP....................21 5. WORKOUT OPTIONS..................22 6. SLEEP MODE ....................34 7. WARRANTY....................35... -
Page 4: Important Safety Instructions
R4 RECUMBENT CYCLE SECTION 1 - IMPORTANT SAFETY IN STRUCTIONS Read all instructions before using the Recumbent Cycle. otice: Before using this or any other exercise equipment consult your family physician ealth care professional to develop a well planned exercise program to fit your he... - Page 5 IMPORTANT SAFETY INSTRUCTIONS CONTINUED POWER SUPPLY Your R4 Recumbent Cycle uses a two prong external power supply for use on a nominal 110-120-volt circuit. Use only the power supply provided with your R4 Recumbent Cycle. If you misplace this power supply, please cont act BH Fitness for an original replacement.
- Page 6 R4 RECUMBENT CYCLE SECTION 2 - ASSEMBLY INSTRUCTIONS SCREWS BAG )...
- Page 7 R4 RECUMBENT CYCLE ASSEMBLY INSTRUCTIONS CONTINUED ASSEMBLY PARTS...
- Page 8 R4 RECUMBENT CYCLE ASSEMBLY INSTRUCTIONS CONTINUED STEP 1. Assembling the Front Stabilizer Spring Washer M8х2.0t—2PCS(112) Washer 20х9х2.0t—2PCS(113) M8 Acorn Nut—2PCS (110) Screw M8х56—2PCS(109) Refer to the drawing to the right. Attach the Front Stabilizer (66) to the Frame (1) with Bolts (109),...
-
Page 9: Assembly Inst Ructions
R4 RECUMBENT CYCLE ASSEMBLY INSTRUCTIONS CO NSTRUCTIONS CONTINUED NTINUED STEP 2. Assembling the Rear Stabilizer STEP 2. Assembling the Rear Stabilizer pring Washer M8х2.0t—2PCS(112) asher 20х9х2.0t—2PCS(113) 8 Acorn Nut—2PCS (110) olt M8х56—2PCS(109) Refer to th e drawing to the right. - Page 10 R4 RECUMBENT CYCLE ASSEMBLY INSTRUCTIONS CONTINUED STEP 3. Assembly of the Upright Washer 18х9х2.0t—6PCS(5) Allen Bolt M8х15—6PCS( 108) Step A: 1. Connect the Hand Pulse Wires (17), (83) between the Frame and the ight, and then connect the Hand Puls e Wires (105), (122).
- Page 11 R4 RECUMBENT CYCLE ASSEMBLY INSTRUCTIONS CONTINUED STEP 4. Assembly of Computer Step A: Unfasten the Screws (100) from the Computer with Open Spanner (117). Step B: Connect the out wires from the Computer, connect (98) to (83) and (99) to (122).
- Page 12 R4 RECUMBENT CYCLE ASSEMBLY INSTRUCTIONS CONTINUED STEP 5. Assembly of Seat, Handrail, Seat Sliding Base, Spacers and Rear Covers Self Tapping Screw ST4.0х25--4PCS(41) Allen Bolt M6х35—2PCS(91) Washer 18х9х2.0t—6PCS(5) Allen Bolt M8х15—4PCS(108) Allen Bolt M8*45—2PCS (114) M8 Acorn Nut –2PCS (143) Spring Washer M8*2.0t—2PCS (142)
- Page 13 R4 RECUMBENT CYCLE ASSEMBLY INSTRUCTIONS CONTINUED Step B: Assemble Handrail (59) to Seat Sliding Base with Allen Bolt (114), Washer (5), (142) and Acorn Nut (143). Tighten Bolt with Open Spanner (117) and 6mm Allen Wrench (118). Step C: Turn the Handle (93) of...
- Page 14 R4 RECUMBENT CYCLE ASSEMBLY INSTRUCTIONS CONTINUED Step E: Attach the Rear Co vers (48) (49) to the Frame with S crews (41) and Open Spanner (117). Assembly of Backrest Washer 18х9х2.0t—4PCS(5) Allen Bolt M8х15—4PCS(108)
- Page 15 R4 RECUMBENT CYCLE ASSEMBLY INSTRUCTIONS CONTINUED Assemble the Backrest (103) and Seat Sliding Base with Bolts (108 ), Washers (5) and 6mm Allen nch (118). STEP 7. Assembly of Handlebar sher 18х9х2.0t—2PCS(5) t M8х15—2PCS(108) Assemble the Handlebar (96) and Frame (1) with Bolts (108), Washers...
- Page 16 R4 RECUMBENT CYCLE ASSEMBLY INSTRUCTIONS CONTINUED Step tep . Assembly of Bottle Holder . Assembly of Bottle Holder Step A: Unfasten the Bolts (82) from the Upright (80) with Open Spanner (117). Step B: 1. Attach the Bottle Holder (107) to the Upright (80) with Bolts (82) and Open Spanner (117).
- Page 17 R4 RECUMBENT CYCLE ASSEMBLY INSTRUCTIONS CONTINUED STEP 9. Assembly of Pedals Step A:Attach the Pedal Belt to the Pedal. Step B:Tighten the Pedal in the arrow’s direction in Picture B with Open Spanner (117). Step C:If needed, disassemble the Pedal in the arrow’s direction in...
- Page 18 R4 RECUMBENT CYCLE ASSEMBLY INSTRUCTIONS CONTINUED S EP 10. Assembly of Bookshelf Insert the Bookshelf (104) into the Computer (97). tep 11. Connecting the Transformer Step A: Plug one end of the Transformer (127) into the Frame (1) Power Jack.
- Page 19 R4 RECUMBENT CYCLE ASSEMBLY INSTRUCTIONS CONTINUED Step B:Plug the other end of the Transformer (127) into wall outlet and the Computer is ready for use. Note: Use only the power supply that came with your cycle. Assembly is now complete.
-
Page 20: Computer Console
R4 RECUMBENT CYCLE SECTION 3 – COMPUTER CONSOLE... - Page 21 R4 RECUMBENT CYCLE COMPUTER CONSOLE CONTINUED Dual function button. Starts and Pauses workouts. Note: Quick Start is initiated when the Start button is pressed prior to selecting a program or workout p arameters. Operates only when in Pause mode. Holding this button for 3 seconds will reset the unit to power-up condition.
-
Page 22: Power Up
R4 RECUMBENT CYCLE SECTION 4 – POWER UP o ON/OFF button. Begin pedaling or press any key to powe r up the display. re is n en turned on, ou will hear a long beep and all LCD displays will light up momentarily. -
Page 23: Workout Options
R4 RECUMBENT CYCLE SECTION 5 - WORKOUT OPTIONS QUICK START Quick Start may be used with all workout modes. Quick Sta rt at power up will default the Cycle to manual workout mode. Note: Quick start will set work out parameters... - Page 24 R4 RECUMBENT CYCLE WORKOUT OPTIONS CONTINUED HEART RATE M ONITORING & CONTROL All Recumbent Cycles have heart rate monitoring capability through contact heart rate grips. To use the Heart Rate Strap, wea r it directly against your skin, about one inch below the pectoral muscles/ breast line.
- Page 25 R4 RECUMBENT CYCLE WORKOUT OPTIONS CONTINUED MORE ABOUT WORKOUT PARAMETERS (Range from 70 to 240)
- Page 26 R4 RECUMBENT CYCLE WORKOUT OPTIONS CONTINUED MANUAL WORKOUT “MANUAL” Default program when the R4 is Quick started at power-up. adjusts work resistance levels. SETTING PARAMETERS FOR MANUAL After power on, press to switch to “Manual”, press twice. 1 parameter “Time” will flash so value can be adjusted using Press to save value &...
- Page 27 R4 RECUMBENT CYCLE WORKOUT OPTIONS CONTINUED “Calories” flashes “Pulse” flashes Begin W orkout! ote: Press to adjust resistance levels. PRE-PROGRAMMED WORKOUTS There are12 program profiles ready for use. All program profiles have 16 levels of resistance that can be user adjusted.
- Page 28 R4 RECUMBENT CYCLE WORKOUT OPTIONS CONTINUED PRE- PROGRAM O T C N INUED Profile #7 Profile #8 Profile #9 Profile #10 Profile #11 Profile #12 SELECTING A PROGRAM After power on, press to switch to “Program”, press to find desired program. Press to select program.
- Page 29 R4 RECUMBENT CYCLE WORKOUT OPTIONS CONTINUED “PROGRAM“ OPERATING INSTRUCTIONS fter power on, press “P rogram” flashes “P 1” Appears (Scroll through P1-P12 to select program) Quick start with default values. “T ime” flashes “Distance” flashes “Calories” flashes “Pulse” flashes Begin Workout! Note: Press to adjust resistance levels.
- Page 30 R4 RECUMBENT CYCLE WORKOUT OPTIONS CONTINUED USER WORKOUT “USER” User program allows the user t cr eate their own program that can be used immediately nd on subsequent wo uts. Create User Profile fter power on, press to switch to “User”, press to select “User”...
- Page 31 R4 RECUMBENT CYCLE WORKOUT OPTIONS CONTINUED “USER” OPERATING INSTRUCTION fter power on, press “User” flashes Quick start with default values Segment 1 flashes Segment 2 flashes Continue through 16 segmen ts. Begin 16 minute workout ! WORKOUT TIME ADJUSTMENT (0-99 MINUTES) “Time”...
- Page 32 The Target Heart Rate rkout llo a ws the user to maintain a specified desired heart pulse te throughout the workout. The R4 software will adjust resistance levels to maintain target ser cannot adjust resistance levels manually. There are 4 sel...
- Page 33 R4 RECUMBENT CYCLE WORKOUT OPTIONS CONTINUED “TARGET HR” OPERATING INSTRUCTIONS After power on, press “HR Target” flashes “Age 30” flashes . (To adjust user age.) “55%” flashes . (To select: 55%, 75%, 90%,THR) “100” flashes Adjust targ et he t rate pulse.
- Page 34 R4 RECUMBENT CYCLE WORKOUT OPTIONS CONTINUED Pulse recovery This function is used to me asure your Health Index accordin g to your heart rate change in he first minute after exerci sing. You can enter the pulse cove ry y pressing...
-
Page 35: Sleep Mode
R4 RECUMBENT CYCLE SECTION 6 - SLEEP MODE If the unit does not receive any signal (button press or pedal movement) for approximately 4 minutes the display will switch to SLEEP MODE. Press any button or simply begin pedaling to return to where you left off in your workout or to change workout settings. -
Page 36: Warranty
LABOR – 1 Year BH Fitness shall cover the labor cost for the repair of the device for a period of one year from the date of original purchase, as long as the device remains in the possession of the original owner.
Need help?
Do you have a question about the R4 and is the answer not in the manual?
Questions and answers