Table of Contents
Advertisement
Quick Links
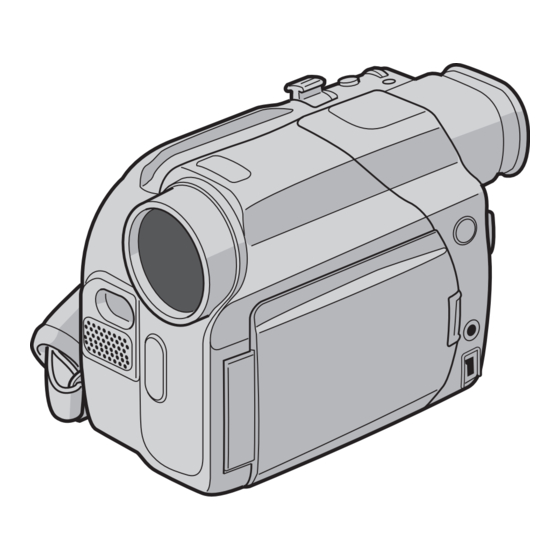
DIGITAL VIDEO CAMERA
GR-D54
Please visit our Homepage on the World Wide Web for
Digital Video Camera:
http://www.jvc.co.jp/english/cyber/
For Accessories:
http://www.jvc.co.jp/english/accessory/
INSTRUCTIONS
Dear Customer,
Thank you for purchasing this digital
video camera. Before use, please read
the safety information and precautions
contained in the pages 2 – 3 to ensure
safe use of this product.
GETTING STARTED
VIDEO RECORDING &
PLAYBACK
ADVANCED FEATURES
REFERENCES
TERMS
To deactivate the demonstration, set
"DEMO MODE" to "OFF".
(
pg. 18, 20)
LYT1259-001A
ENGLISH
5
11
18
31
43
EN
Advertisement
Table of Contents

Related Manuals for JVC GR-D54


Summary of Contents for JVC GR-D54
- Page 1 2 – 3 to ensure safe use of this product. ENGLISH DIGITAL VIDEO CAMERA GETTING STARTED GR-D54 VIDEO RECORDING & PLAYBACK Please visit our Homepage on the World Wide Web for Digital Video Camera: http://www.jvc.co.jp/english/cyber/...
- Page 2 LCD monitor/viewfinder playback are Do not use this equipment in a bathroom or places with possible anywhere. ● Use the JVC BN-V408U/V416U/V428U battery packs water. and, to recharge them or supply power to the camcorder Also do not place any containers filled with water or liquids...
- Page 3 Do not point the lens or the viewfinder directly into the sun. This can cause eye injuries, as well as lead to the malfunctioning of internal circuitry. There is also a risk of fire or electric shock. CAUTION! The following notes concern possible physical damage to This camcorder is designed exclusively for the digital video the camcorder and to the user.
-
Page 4: Table Of Contents
CONTENTS GETTING STARTED ADVANCED FEATURES Provided Accessories ............5 MENUS FOR DETAILED ADJUSTMENT ......18 Power ................6 Changing The Menu Settings ........18 Grip Adjustment .............7 Recording Menus ............19 Operation Mode .............8 Playback Menus ............21 Date/Time Settings ............8 FEATURES FOR RECORDING ........... 22 Viewfinder Adjustment ...........9 White LED Light ............ -
Page 5: Getting Started
GETTING STARTED How To Attach The Lens Cap Provided Accessories To protect the lens, attach the provided lens cap to the camcorder as shown in the illustration. NOTE: To confirm the lens cap is on correctly make sure the cap is flush to the camcorder. -
Page 6: Power
GETTING STARTED How To Attach The Core Filter (for USB Cable and Power optional S-Video Cable) Attach the core filters to the cables. The core filter Power Switch reduces interference. POWER/CHARGE lamp Release the stoppers on both ends of the core filter. Lock Button Stopper Battery pack... -
Page 7: Grip Adjustment
GETTING STARTED ● When charging the battery pack for the first time or after a The Benefits Of long storage period, the POWER/CHARGE lamp may not Lithium-Ion Batteries light. In this case, remove the battery pack from the Lithium-ion battery packs camcorder, then try charging again. -
Page 8: Operation Mode
GETTING STARTED Power-Linked Operation Operation Mode When the Power Switch is set to “A” or “M”, you can also To turn on the camcorder, set the Power Switch to any turn on/off the camcorder by opening/closing the LCD operation mode except “OFF (CHARGE)” while pressing monitor or pulling out/pushing in the viewfinder. -
Page 9: Viewfinder Adjustment
GETTING STARTED Viewfinder Adjustment Brightness Adjustment Of The Display Set the Power Switch to “A” or “M” while pressing Set the Power Switch to “M” MMENU/VOL. down the Lock Button located on the switch. or “PLAY” while pressing down the Lock Button located on the Make sure the LCD monitor is closed and locked. -
Page 10: Loading/Unloading A Cassette
GETTING STARTED Approximate recording time Loading/Unloading A Cassette Recording mode Tape The camcorder needs to be powered up to load or eject a cassette. 30 min. 30 min. 45 min. OPEN/EJECT 60 min. 60 min. 90 min. 80 min. 80 min. 120 min. -
Page 11: Video Recording & Playback
VIDEO RECORDING Remove the lens cap. Basic Recording Open the LCD monitor fully. ( pg. 12) Set the Power Switch to “A” or “M” while pressing NOTE: down the Lock Button located on the switch. Before continuing, perform the procedures listed below: ●... -
Page 12: Lcd Monitor And Viewfinder
VIDEO RECORDING LCD Monitor And Viewfinder Zooming While using the LCD monitor: Produces the zoom in/out effect, or an instantaneous Make sure the viewfinder is pushed back in. Press the change in image magnification. Monitor Opening Button and open the LCD monitor fully. Zoom In It can rotate 270°... -
Page 13: Journalistic Shooting
VIDEO RECORDING Journalistic Shooting Recording From The Middle Of A Tape In some situations, different 1) Play back a tape or use Blank Search ( pg. 14) to shooting angles may provide find the spot at which you want to start recording, then more dramatic results. -
Page 14: Video Playback
VIDEO PLAYBACK Shuttle Search MMENU/VOL. BLANK SEARCH Allows high-speed search in either direction during video playback. 1) During playback, press 5 for forward search, or 3 for reverse search. 2) To resume normal playback, press 4/9. ● During playback, press and hold 5 or 3. The search continues as long as you hold the button. -
Page 15: Playback Using The Remote Control
VIDEO PLAYBACK Buttons And Functions Playback Using The Remote Control The Full-Function Remote Control Unit can operate this camcorder from a distance as well as the basic operations (Playback, Stop, Pause, Fast-Forward and Rewind) of your VCR. It also makes additional playback functions possible. - Page 16 VIDEO PLAYBACK Playback Zoom Up Button or PAUSE Magnifies the recorded image up to 56X at any time SLOW Forward during video playback. Button SLOW Rewind 1) Press PLAY (U) to start video Button playback. Or perform normal playback of images.
-
Page 17: Connections To A Tv Or Vcr
VIDEO PLAYBACK Make sure all units are turned off. Connections To A TV Or VCR Connect the camcorder to a TV or VCR as shown in the illustration. These are some basic types of connections. When If using a VCR, go to step 3. making the connections, refer also to your VCR and TV If not, go to step 4. -
Page 18: Advanced Features
MENUS FOR DETAILED ADJUSTMENT Menus without Sub Menus Changing The Menu Settings v WIPE/FADER ( pg. 22) Selected menu icon This camcorder is equipped with an easy-to-use, on- r PROGRAM AE ( pg. 23) blinks. p EXPOSURE ( screen menu system that simplifies many of the more pg. -
Page 19: Recording Menus
MENUS FOR DETAILED ADJUSTMENT Recording Menus GAIN UP OFF: Allows you to shoot dark scenes with no picture brightness adjustment. CAMERA [AGC]: The overall appearance may be grainy, but the The “m” settings are effective when the Power Switch is image is bright. - Page 20 MENUS FOR DETAILED ADJUSTMENT NOTES: WIDE MODE ● If a cassette is in the camcorder, the demonstration cannot [OFF]: Records with no change in the screen ratio. For be turned on. playback on a TV with a normal screen ratio. ●...
-
Page 21: Playback Menus
MENUS FOR DETAILED ADJUSTMENT SYSTEM Playback Menus Each setting is linked with “s”, which appears when the Power Switch is set to “M”. ( pg. 18) VIDEO ● The parameters are the same as in the description on [ ] = Factory-preset page 20. -
Page 22: Features For Recording
FEATURES FOR RECORDING Night Scope SNAPSHOT Power Switch Makes dark subjects or areas even brighter than they Lock Button would be under good natural lighting. Although the Recording Start/Stop Button recorded image is not grainy, it may look as if it is strobing due to the slow shutter speed. -
Page 23: Program Ae With Special Effects
FEATURES FOR RECORDING WIPE/FADER PROGRAM AE OFF: Disables the function. (Factory-preset) OFF: Disables the function. (Factory-preset) SHUTTER 1/50: The shutter speed is fixed at 1/ FADER–WHITE: Fade in or out with a white 50th of a second. Black bands that usually appear when screen. -
Page 24: Snapshot (For Video Recording)
FEATURES FOR RECORDING Auto Focus FOCUS The camcorder’s Full Range AF SNAPSHOT system offers continuous shooting ability from close-up (as close as approx. 5 cm to the subject) to MMENU/VOL. infinity. However, correct focus may not be obtainable in the situations listed Focus detection zone below (in these cases perform Lock Button... -
Page 25: Exposure Control
FEATURES FOR RECORDING NOTES: Iris Lock ● Be sure to focus the lens in the maximum telephoto position when you use the Manual Focus mode. If you focus in on a Like the pupil of the human eye, the iris contracts in well- subject in the wide-angle position, sharply focused images lit environments to keep too much light from entering, cannot be obtained when zoomed up because the depth-... -
Page 26: Backlight Compensation
FEATURES FOR RECORDING Backlight Compensation Manual White Balance Adjustment Backlight compensation Adjust the white balance brightens the subject quickly. manually when shooting Press BACKLIGHT. The under various types of indicator is displayed and the lighting. subject is brightened. If Set the Power Switch to pressed again, “M”... -
Page 27: Editing
EDITING To use this camcorder as a player Dubbing To Or From A VCR Following the illustrations, connect the camcorder and the VCR. Also refer to page 17. Set the camcorder’s Power Switch to “PLAY” while pressing down the Lock Button located on the switch. Turn on the VCR’s power. -
Page 28: Dubbing To Or From A Video Unit Equipped With A Dv Connector (Digital Dubbing)
( pg. 7) ● If the remote control is used when both the player and recorder are JVC video units, both units will perform the DV cable same operation. To prevent this from happening, press the... -
Page 29: Connection To A Personal Computer
● When using a DV cable, be sure to use the optional JVC VC-VDV206U or VC-VDV204U DV cable depending Core filter on the type of DV connector (4 or 6 pins) on the PC. -
Page 30: Audio Dubbing
EDITING Audio Dubbing Insert Editing The audio track can be customised only when recorded You can record a new scene into a previously recorded in the 12-bit and SP modes. ( pg. 19) tape, replacing a section of the original recording with ●... -
Page 31: References
ADDITIONAL INFORMATION Power (pg. 6) VIDEO RECORDING (pg. 11) ● Perform charging where the temperature is between 10°C ● When you use the LCD monitor outdoors in direct sunlight, and 35°C. 20°C to 25°C is the ideal temperature range for the LCD monitor may be difficult to see. -
Page 32: Troubleshooting
TROUBLESHOOTING If the problem still exists after following the steps below, During recording, the date/ time does not appear. please consult your nearest JVC dealer. ● “DATE/TIME” is set to “OFF”. HSet “DATE/TIME” to “ON”. ( The camcorder is a microcomputer-controlled device. - Page 33 ● The built-in clock battery has run out and the previously set The colour of Snapshot looks strange. date/time has been erased. HConsult your nearest JVC dealer for replacement. ● The light source or the subject does not include white. Or there are various different light sources behind the subject.
- Page 34 ( pg. 38) To clean the viewfinder, please ● The light used to illuminate the LCD monitor causes it to consult your nearest JVC dealer. become hot. Time code does not appear. HClose the LCD monitor to turn it off or set the Power Switch to “OFF”, and let the unit cool down.
- Page 35 When it does, you can resume TAPE END using the camcorder. If the indication remains, consult Appears when the tape ends during recording or your nearest JVC dealer. playback. ( pg. 31) E03 or E04 SET DATE/TIME!
-
Page 36: Cautions
CAUTIONS Battery Packs Cassettes The supplied battery pack is To properly use and store your cassettes, be sure to read a lithium-ion battery. Before the following cautions: ● During use… using the supplied battery pack or an optional battery ... make sure the cassette bears the Mini DV mark.. - Page 37 ... in places where humidity is extremely low (below 35%) or If malfunctioning occurs, stop using the unit extremely high (above 80%). immediately and consult your local JVC dealer..in direct sunlight..in a closed car in summer.
-
Page 38: User Maintenance
● Mould may form if the lens is left dirty. cover ● When using a cleaner or chemically treated cloth refer to the cautions of each product. ● To clean the viewfinder, please consult your nearest JVC PUSH HERE dealer. Remove. -
Page 39: Specifications
SPECIFICATIONS Camcorder For Digital Video Camera Format For General DV format (SD mode) Signal format Power supply PAL standard DC 11.0 V (Using AC Adapter) Recording/Playback format DC 7.2 V (Using battery pack) Video: Digital component recording Power consumption Audio: PCM digital recording, 32 kHz 4-channel (12-bit), Approx. -
Page 40: Index
INDEX... - Page 41 INDEX Controls Connectors Menu Wheel [MMENU/VOL.] ( pg. 18) S-Video Input**/Output Connector [S-VIDEO] Speaker Volume Control [MMENU/VOL.] ( pg. 14) pg. 17, 27) Snapshot Button [SNAPSHOT] ( pg. 24) USB (Universal Serial Bus) Connector ( pg. 29) Power Zoom Lever [T/W] ( pg.
- Page 42 INDEX LCD Monitor/Viewfinder Indications During Video Playback During Video Recording b i t K LM N O 1h40m 40 x W BLANK SEARCH PUSH "STOP" BUTTON TO CANCEL BRIGHT 1 0 1 2 0 : SOUND 12 b i t 1 0 1 15:55 Sound Mode Indicator (...
-
Page 43: Terms
TERMS AC Adapter ..............6, 7 Night-Scope ..............22 Audio Dubbing .............30 Auto Focus ..............24 Playback sound (SOUND MODE, NARRATION) ..21 Auto Shut Off ...............11 Playback Special Effects ..........16 Playback Zoom ............16 Backlight Compensation ..........26 Power Switch Position ........... 8 Battery Pack ............6, 7, 36 Priority Setting (PRIORITY) ........ - Page 44 Printed in Malaysia COPYRIGHT© 2003 VICTOR COMPANY OF JAPAN, LTD. 1203-FO-ID-PJ...
Need help?
Do you have a question about the GR-D54 and is the answer not in the manual?
Questions and answers