Hanna HI 991300, HI 991301 - PH/EC/TDS/Temperature Meter Manual
- Instruction manual (2 pages)
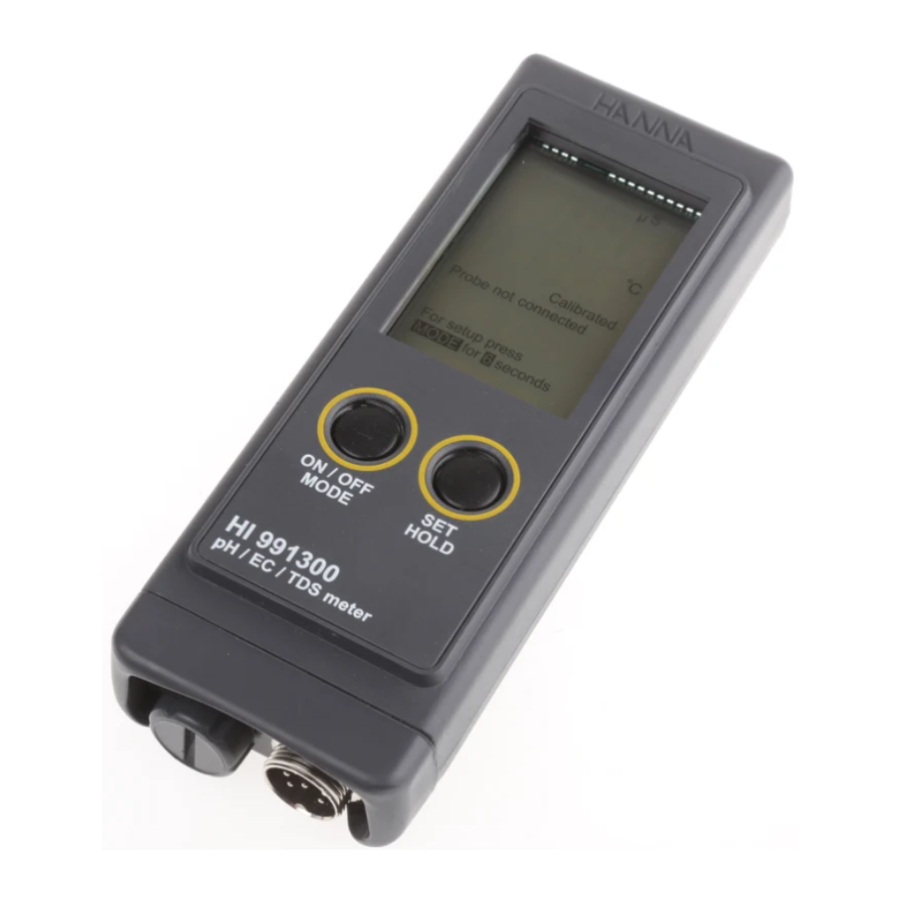
Advertisement
INTRODUCTION
Dear Customer,
Thank you for choosing a Hanna Instruments Product.
Please read this instruction manual carefully before using the instrument. If you need additional technical information, do not hesitate to e-mail us at tech@hannainst.com.
PRELIMINARY EXAMINATION
Remove the instrument from the packing material and examine it carefully to make sure that no damage has occurred during shipment. If noticeable damage is evident, notify your dealer.
Note:
Save all packing material until you are sure that the instrument functions correctly. All defective items must be returned in the original packing together with the supplied accessories.
GENERAL DESCRIPTION
HI 991300 and HI 991301 have been designed to offer you the combination of pH, conductivity, total dissolved solids and temperature measurements.
To increase precision, two models are available, with different conductivity ranges, for applications from purified to brackish waters. All operations and settings, including calibration buffers and temperature scale selections, are made through only 2 buttons.
The housing is waterproof and rated for IP 67 conditions. The supplied multi-parameter probe, HI 1288, includes pH, EC/TDS and temperature in one convenient, rugged probe. In addition, to ensure against interference from transient electrical noise to pH, a solid-state preamplifier is integrated into the probe.
Other user selectable features include different TDS factors from 0.45 to 1.00, and a range of temperature coefficients (β) from 0.0 to 2.4% for greater consistency and reproducibility. Each meter is supplied with:
- HI 1288 pH/EC/TDS probe with built-in temperature sensor, DIN connector and 1 m (3.3') cable
- Calibration and cleaning solution sachets • 3 x 1.5V AAA batteries
- Instruction manual.
LCD DESCRIPTION

- Automatic Temperature Compensation indicator
- Battery percentage (visible at power up)
- Secondary display
- Low battery indicator
- Stability indicator
- Calibration indicator
- Selectable temperature unit
- Primary display
- Measuring unit for primary display
ACCESSORIES
| HI 1288 | pH/conductivity probe with built-in temperature sensor, DIN connector and 1 m (3.3') cable | |||
| HI 7004M | pH 4.01 buffer solution, 230 mL bottle | |||
| HI 7006M | pH 6.86 buffer solution, 230 mL bottle | |||
| HI 7007M | pH 7.01 buffer solution, 230 mL bottle | |||
| HI 7009M | pH 9.18 buffer solution, 230 mL bottle | |||
| HI 7010P | pH 10.01 buffer solution, 230 mL bottle | |||
| HI 7030M | 12.88 mS/cm solution, 230 mL bottle | |||
| HI 7031M | 1413 µS/cm solution, 230 mL bottle | |||
| HI 7032M | 1382 ppm solution, 230 mL bottle | |||
| HI 7038M | 6.44 ppt solution, 230 mL bottle | |||
| HI 70442M | 1500 ppm solution, 230 mL bottle | |||
SPECIFICATIONS
| HI 991300 | HI 991301 | ||
| Range | pH | 0.00 to 14.00 pH | 0.00 to 14.00 pH |
| EC | 0 to 3999 µS/cm | 0.00 to 20.00 mS/cm | |
| TDS | 0 to 2000 ppm (mg/l) | 0.00 to 10.00 ppt (g/l) | |
| Temperature | 0.0 to 60.0°C / 32.0 to 140.0°F | ||
| Resolution | pH | 0.01 pH | 0.01pH |
| EC | 1 µS/cm | 0.01 mS/cm | |
| TDS | 1 ppm (mg/l) | 0.01 ppt (g/l) | |
| Temperature | 0.1°C / 0.1°F | ||
| Accuracy (@20°C/68°F) | ±0.01 pH ±2% F.S. (EC / TDS) ±0.5°C / ±1°F | ||
| pH Calibration | Automatic, 1 or 2 point, choose between 2 sets of buffers (pH 4.01/7.01/10.01 or Nist pH 4.01/6.86/9.18) | ||
| EC/TDS Calibration | Automatic, 1 point at 1413 µS/cm 12.88 mS/cm or 1382 ppm (CONV=0.5) or 6.44 ppt (CONV=0.5) or 1500 ppm (CONV=0.7) or 9.02 ppt (CONV=0.7) | ||
| Temperature | pH: Automatic | ||
| Compensation | EC/TDS: Automatic with β selectable from 0.0 to 2.4%/°C with 0.1 increments | ||
| TDS Conversion Factor | Selectable from 0.45 to 1.00 with 0.01 increments (default 0.50) | ||
| Probe (included) | HI 1288 pH/EC/TDS/temperature with DIN connector and 1 m (3.3') cable | ||
| Battery Type | 3 x 1.5V AAA | ||
| Battery Life | Approximately 500 hours of continuous use | ||
| Auto-off | After 8 minutes of non-use | ||
| Environment | 0 to 50°C (32 to 122°F); RH max. 100% | ||
| Dimensions | 152 x 58 x 30 mm (6.0 x 2.3 x 1.2") | ||
| Weight | 205 g (7.2 oz.) | ||

Hanna Instruments reserves the right to modify the design, construction and appearance of its products without advance notice.
OPERATIONAL GUIDE
First time you use the instrument open the battery compartment and put the batteries inside observing the polarity.
To connect the probe
With the meter turned off, connect the HI 1288 probe to the DIN socket on the bottom of the meter by aligning the pins and pushing in the plug. Tighten the nut to ensure a good connection. Remove the protective cap from the probe before taking any measurements.
To turn the meter ON and check the battery status
Press the ON/OFF/MODE button until the display lights up. At start-up, all the LCD segments are displayed for 1 second, then the percent indication of the remaining battery life is displayed for another second (E.g. "100% BATT"). The meter then enters the normal measuring mode.
Note:
If the display needs to be checked, keep the ON button pressed while turning the meter on. The meter will display all segments as long as the button is pressed.
To select the measurement range
While in normal measurement mode, press the SET/HOLD button quickly to select pH, EC or TDS value on the primary LCD, while temperature will be simultaneously displayed on the secondary LCD (E.g. "pH 5.73" and "22.5°C").
To freeze the display
While in measurement mode, press and hold the SET/HOLD button until "HOLD" appears on the secondary display and the reading will be frozen on the LCD (E.g. "pH 5.73 HOLD"). Press any button to return to normal mode.
To turn the meter OFF
While in normal measurement mode, press the ON/OFF/MODE button. "OFF" will appear on the secondary display. Release the button.
Note:
When the meter detects the absence of probe at its input, the message "Probe not connected" appears on LCD and ''--'' blinking on LCD lines. When a probe is connected, the "Probe not connected" tag is turned off, and the readings are displayed on LCD lines.
pH MEASUREMENT & CALIBRATION
- Make sure the meter has been calibrated before use.
- If the probe is dry, soak it in HI 70300 storage solution for 30 minutes to reactivate it.
- Submerge the probe in the sample to be tested while stirring it gently. Wait until the "Not Stable" tag on the LCD is turned off.
- The pH value automatically compensated for temperature is displayed on the primary LCD, while the secondary LCD displays the sample temperature.
- If measurements are taken in different samples successively, rinse the probe tip thoroughly to eliminate cross-contamination. After cleaning, rinse the probe tip with some deionized water and some of the sample to be measured.
pH calibration
- While in pH measurement mode, press and hold the ON/OFF/MODE button until "OFF" on the secondary display is replaced by "CAL". Release the button. Place the sensor into the first calibration buffer.
- The meter enters the calibration mode, displaying "pH 7.01 USE" (or "pH 6.86 USE" if the NIST buffer set was selected).
- For a single-point calibration place the probe in any buffer from the selected buffer set (E.g. pH 4.01, 9.18 or 10.01). The meter will automatically recognize the buffer value.
- If the buffer is not recognized or the calibration offset is out of the accepted range ''---WRONG'' is displayed.
- If the buffer is recognised ''REC" is displayed until the reading is stable and the calibration is accepted.
- If using pH 7.01 (or pH 6.86 from NIST buffer set), after acceptance of the buffer press any key to exit. ''OK1'' message is displayed and meter returns to pH measurment mode.
- If using 4.01 or 10.01 (9.18) buffer the ''OK1'' message is displayed and meter returns to pH measurment mode.
- For a two-point calibration, proceed as for the single point calibration selecting 7.01/6.86 pH buffer.
- The ''pH 4.01 USE'' message is displayed.
- Place the probe in the second calibration buffer (pH 4.01 or 10.01, or, if using NIST, pH 4.01 or 9.18). When the second buffer is accepted, the LCD will display "OK2" for 1 second and the meter will return to the normal measurement mode.
- If the buffer is not recognised or the slope is out of accepted range ''---WRONG'' is displayed. Change the buffer, clean the electrode or press any key to exit calibration.
- When the calibration procedure is completed, the "Calibrated" tag is turned on.
- It is always recommended to carry out a two-point calibration for better accuracy.
EC MEASUREMENT & CALIBRATION
- Place the probe in the sample to be tested. Use plastic beakers or containers to minimize any electromagnetic interference.
- Tap the probe lightly on the bottom of the container to remove air bubbles that may be trapped inside the tip.
- Wait for a few minutes for the temperature sensor to reach thermal equilibrium (i.e. until the "Not Stable" tag disappears).
- The LCD displays the EC or TDS value (automatically compensated for temperature) on the primary LCD, while the secondary LCD displays the temperature of the solution.
EC calibration
- From EC or TDS normal mode, press and hold the ON/OFF/ MODE button until "OFF" on the secondary display is replaced by "CAL". Release the button.
- The meter enters the calibration mode. Immerse the probe in the HI 7031 calibration solution ("µS 1413 USE") for HI 991300 or in HI 7030 calibration solution ("mS 12.88 USE") for HI 991301.
- If the standard value is recognised ''REC'' is displayed until the reading is stable and calibration is accepted.
- The LCD will display "OK" for 1 second and return to normal measurement mode.
- If the standard is not recognised or the slope is out of accepted range ''---Wrong'' is display. Change the calibration solution or the electrode or press any key to exit calibration.
- When the calibration procedure is completed, the "Calibrated" tag is turned on.
Notes:
- Beta should be set to 1.9 during calibration.
- Since there is a known relationship between the EC and TDS reading, it is not necessary to calibrate the meter in TDS. If the conversion factor is either 0.5 or 0.7, the meter will allow a direct calibration in TDS by using the Hanna calibration solutions.
To exit calibration and reset default values
- After entering the calibration mode and before the point is accepted, it is possible to quit the procedure and return to the last calibration data by pressing the ON/OFF/MODE button. The LCD displays "---ESC" for 1 second and the meter returns to normal mode.
- To reset the default values and clear a previous calibration, press the SET/HOLD button after entering the calibration mode, before the first point is accepted.
The LCD displays "---CLR" for 1 second, the meter resets to the default calibration and the "Calibrated" tag on the LCD disappears.
METER SETUP
While in measurement mode, press and hold the ON/OFF/MODE button until "TEMP" and the current temperature unit are displayed on the lower LCD (eg. "TEMP °C"). Then:
To select the temperature unit (°C / °F)
- Press the SET/HOLD button to change the temperature unit, and then press the ON/OFF/MODE button until the meter returns to normal measurement mode.
To change the type of calibration buffer set,
- While in pH measurement mode, after setting the temperature unit press the ON/OFF/MODE button again to show the current buffer set: "pH 7.01 BUFF" (for standard buffer set: 4.01/7.01/10.01) or "pH 6.86 BUFF" (for NIST buffer set: 4.01/6.86/9.18). Change the set with the SET/HOLD button, then press ON/OFF/MODE to return to normal mode.
To change the EC/TDS conversion factor (CONV) and the temperature compensation coefficient (BETA)
- While in EC or TDS measurement mode after setting the temperature unit press the ON/OFF/MODE button again to show the current conversion factor (eg. "0.50 CONV"), then press SET/HOLD to change the value.
- Press the ON/OFF/MODE button to show the current temperature compensation coefficient b (eg. "2.1 BETA"), then press SET/HOLD to change the temperature coefficient value.
- Press the ON/OFF/MODE button to return to normal operation.
BATTERY REPLACEMENT
The meter is supplied with batteries.
The meter displays the remaining battery percentage when turned on. When the level is below 5%, the "  " symbol on the LCD blinks to indicate a low battery condition. If the battery level is low enough to cause erroneous readings, the Battery Error Prevention System (BEPS) turns the meter off. It is recommended to replace the batteries as soon as the display will flash the battery symbol. To replace the batteries, follow the next steps:
- Open the battery compartment cap (on the bottom of the instrument).
- Remove old batteries.
- Replace new batteries observing the polarity on the rear of the instrument.
- Close the battery compartment cap.

Documents / Resources
References
Download manual
Here you can download full pdf version of manual, it may contain additional safety instructions, warranty information, FCC rules, etc.
Download Hanna HI 991300, HI 991301 - PH/EC/TDS/Temperature Meter Manual
Advertisement
Thank you! Your question has been received!


Need Assistance?
Do you have a question about the HI 991300 that isn't answered in the manual? Leave your question here.