Sage the Kitchen Wizz Peel & Dice BFP820 / SFP820 - Food Processor Manual
- Quick manual (168 pages) ,
- User manual (188 pages)
Advertisement
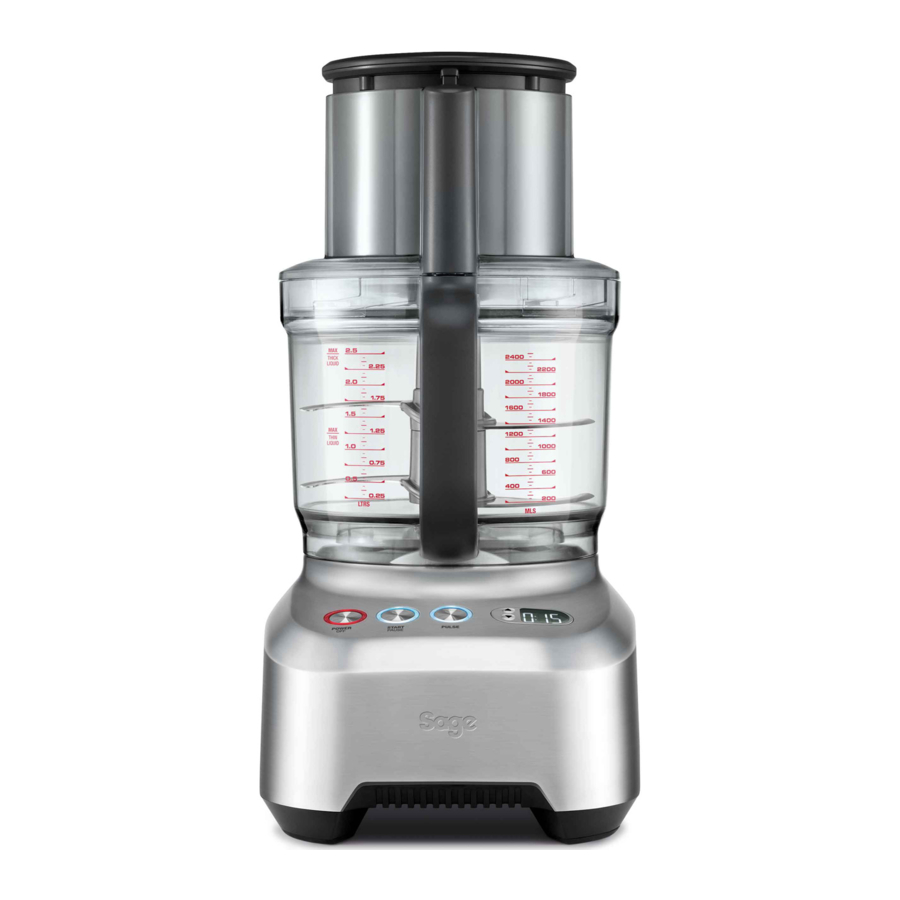
Components

- Small food pusher
- Medium pusher
- Large food pusher
The food processor will not start unless the large pusher is correctly in place. - Extra wide 14cm chute
- Feed chute safety system
Prevents the motor from operating unless the bowl and lid are correctly locked in position, and large feed pusher is inserted. - Processing lid
- Silicone seal
- Mini bowl
For better control when processing small quantities. - Processing bowl with handle
15 cup bowl for dry ingredients and 10 cups for diced and liquid (thick, wet ingredients e.g. soups). - LCD display
- Count up & count down timer
- POWER / OFF button
- START / PAUSE button
- PULSE button
- Direct drive motor base
- Non-skid rubber feet

- Dough blade
- Mini processing blade
- Quad ® processing blade
- Quad ® blade safety cover
- Whisk/emulsifying disc
- Adjustable slicer
- French fries cutter
- Julienne disc
- Reversible shredder
- Disc spindle
Use with the reversible shredder, julienne, chip cutting, whisk, potato peeler and adjustable slicing discs in position.

AA. Peeler disc
AB. Dicing disc
AC. Dicing grid
AD. Dicing Distributor
AE. Cleaning cap
AF. Geared spindle
Use with the dicing kit.
AG. Plastic spatula
AH. Cleaning brush
AI. Storage box
Assembly
BEFORE FIRST USE
- Before using your food processor for the first time, remove any packaging material and promotional labels. Ensure the POWER button is OFF and the food processor is unplugged.
- Be careful when handling the blades and discs as they are extremely sharp.
- Wash the processing bowl, processing lid and all attachments in warm soapy water with a soft cloth. Rinse and dry thoroughly. All attachments except the geared spindle and large food pusher may be washed in the dishwasher.
- When first using your food processor, you may notice an odour coming from the motor. This is normal and will dissipate with use.
- Always use the food processor on a dry, level work surface.
ASSEMBLY
Motor Base and Bowl
- Position the processing bowl onto the motor base with the handle in line with the ALIGN HANDLE graphic on the motor base.
![]()
- Turn the bowl clockwise until the handle locks to the front. The processing bowl should now be securely locked into position. The food processor will not operate unless the bowl is locked into position correctly.


Spindles and Discs
- Before placing the lid onto the processing bowl, choose your spindle and position it over the coupling in the centre of the processing bowl. Then position your chosen attachment over the spindle. Please note that the Quad® Blade and Dough Blade do not require a spindle for processing.
- The disc spindle is required when using the following discs: adjustable slicer, reversible shredder, julienne, french fries cutter and the peeler. Do not use the geared spindle for those attachments. Failing to use the disc spindle will damage the parts, and incorrect use this way may cause the parts to fuse together.
![]()
- The geared spindle is required when using the dicing kit. To dice vegetables or fruit insert the geared spindle into the bowl first, followed by the dicing grid, ensuring to align with the 4 tabs in the bowl, then insert the dicing disc.
Make sure you follow the right order.
If you intend to dice larger quantities (more than 5 cups) please insert the dicing distributor after placing your geared spindle into the bowl. The dicing distributor will help to distribute diced food evenly across the bowl.
Do not use your dicing kit with the disc spindle. Always use the geared spindle.
![]()
![]()
Do not touch the blades of the Dicing Grid. They are extremely sharp.
![]()


Mini Processing Bowl

The mini processing bowl fits inside the main bowl.

Do not use any spindle, or the processing discs. Use only the mini processing blade in the mini bowl. Please note that the mini blade cannot be used in the main processing bowl.
Lid
Place lid onto the processing bowl so that the ALIGN / LOCK graphics on the lid and handle align. To LOCK the lid, hold the chute and turn clockwise so that the handle parts align.
Locking the lid correctly will engage the interlocking safety catch on the handle, and allow the motor to run.

Functions
OPERATION
Getting started
The food processor will only operate when the processing bowl, lid and large pusher are correctly assembled. This engages the safety interlock, and allows the motor to run.
The chute has a CHUTE FILL MAX graphic to indicate the maximum volume of food that can be placed in the chute for the pusher to activate the safety locking catch.
Control buttons
The momentary PULSE button is ideal for processing foods that need sudden bursts of power. It also encourages ingredients to move around the bowl. PULSE is also best when processing foods that only require processing for a short period of time.
After Processing
After processing, wait until the blades/discs have stopped moving before unlocking the lid. To ensure safe handling, turn off at the POWER button and unplug at the power outlet before handling the blades.
When removing blades/discs, lift the part by carefully gripping the plastic hub in the centre.
DICING WITH THE DICING KIT
The dicing kit dices raw and cooked food into cubes of the size of 12 x 12mm.
Always remember to place the geared spindle, dicing grid and dicing disc into the food processor before adding the food.
Do not dice more than 10 cups (2.4l) in your food processor at a time. Exceeding this capacity could lead to the product jamming in the disc. It will also make the cleaning process of the dicing grid challenging.
Clean dicing grid each time after dicing 10 cups.
Vegetables and fruits
The dicing kit can process raw and cooked vegetables and also fruits. To improve dicing results for harder vegetables like carrots and pumpkin, par-cooking is recommended. Only par-cook vegetables that need to be cooked afterwards.
For best results when dicing with raw, hard vegetables feed carrots length-ways through the small feed chute, and feed pumpkin through the medium feed chute. Feeding this produce through the large feed chute may lead to jamming of the disc.
DO NOT DICE SWEET POTATO
(Yam/Kumara).
Due to its dry, fibrous texture dicing sweet potato is not recommended with the Dicing Kit. Sweet Potato places high load on the Dicing Kit which causes high friction and potential damage to the Bowl Lid.
Use the START / PAUSE button for control when dicing food.
PEELING WITH THE PEELER
Potato peeling made easy
Take the hard work out of peeling potatoes. The Sage peeler will peel potatoes in batches of 6–7, depending on the size. Peeling is very fast, and may finish quicker than expected. Keep your eye on progress, and it should be done in 25–30 seconds.
Size matters
The best size potatoes to use are around 70mm x 70mm, which is about the size of this illustration. Choose potatoes that are round, rather than elongated.
Use whole potatoes, as cutting potatoes into half or quarters creates square edges that won't peel efficiently. Using rounder potatoes will reduce the amount of waste.
Loading the potatoes
Position 6–7 potatoes evenly on top of the peeler. Potatoes should have enough room to freely roll and rumble. If potatoes are too tightly packed, the peeling won't be as effective. Keep in mind that the peeling works best with a complete batch, and peeling just a couple of potatoes won't be as efficient. Lock lid in place before starting, and never insert potatoes through the chute.

Peeling other produce
The peeler disc can peel potatoes very well but it can also be used to peel other firm, round produce such as beetroot.
It can also peel carrots and sweet potatoes. Depending on the size, we recommend cutting carrots and sweet potatoes in 2–3 pieces before placing them into the bowl.
CHOPPING WITH THE QUAD® BLADE
The micro-serrated Quad blade chops raw and cooked food to the consistency required, from coarsely chopped to minced. The blades process very efficiently, and may take less time than expected to process many large tasks.
Raw vegetables, fruit and cooked meats
Trim and cut food into 2.5cm cubes.
Process no more than 7 cups at a time using the PULSE button at 1–2 second intervals until chopped to desired size or consistency.
Raw meat, chicken and fish
Trim excess fat and sinew, and cut food into 2.5cm cubes. Ensure all bones are removed.
Chill well in freezer until firm as this will help to cut through the food more easily. Process no more than 4 cups (600g) of raw meat at a time. At this capacity the motor should run for no more than 30 seconds at a time. Use a combination of the START and the PULSE button until chopped or minced to the desired consistency.
Leafy herbs
Wash and dry herbs thoroughly. Remove any coarse stems. Process no more than 3 bunches of herbs (approx. 5½ cups) at a time using the PULSE button at 1–2 second intervals until chopped to the desired consistency.
Use leafy herbs immediately for the most aromatic results in your recipe.
Nuts
Process no more than 5 cups of shelled nuts at a time using the PULSE button at 1–2 second intervals until chopped to the desired consistency.
Nut butters
Process no more than 5 cups of shelled roasted nuts at a time using the START button until chopped to the desired consistency.
Soft breadcrumbs
Break stale bread into chunks (fresh bread will stick to blades). Process no more than 6–8 slices at a time with the processing bowl, using the PULSE button at 1–2 second intervals until crumbed to desired consistency.
Dried breadcrumbs
Tear bread into chunks and toast in oven until golden and crisp. Do not over brown. Process no more than 6–8 slices at a time with the processing bowl, using the PULSE button at 1–2 second intervals.
Biscuit crumbs
Break biscuits into quarters, and weigh a maximum of 500g (2 standard packets). Process using the PULSE button at 1–2 second intervals until chopped to the desired consistency. Sweet or savoury biscuit crumbs can be used as an alternative to pastry for sweet or savoury pies.
Do not process very hard biscuits (for example gingernut biscuits) as this may damage the blades.
Dried fruit
For dates and other larger dried fruits, remove pits and cut into quarters before processing. Process no more than 1 cup at a time.
Dried fruit can be sticky, and may stick to the blades during processing.
We recommend putting dried fruit in the freezer for about 10 minutes before processing. Process no more than 2 cups (1 cup for large fruits) at a time using the PULSE button at 1–2 second intervals until chopped to the desired consistency.
PURÉEING WITH THE QUAD® BLADE
The micro-serrated Quad blade purées raw and cooked food to the consistency required, including baby food. The blades process very efficiently, and cut the time needed to puree many tasks.
MIXING WITH THE QUAD® BLADE
The Quad blade mixes ingredients for cakes, batters, and cookie doughs.
The Quad blade can also emulsify egg-based sauces such as mayonnaise.
Pastry dough
Place flour and chilled, cubed butter into the processing bowl.
Do not process more than 3L cups (500g) of flour using the START / PAUSE button in intervals until the butter is absorbed into the flour.
Steadily add liquid through the small feed chute with the motor still running.
Process until the mixture forms a ball.
KNEADING WITH THE DOUGH BLADE
Always remember to place the dough blade into the processing bowl before adding the food. The edges of the plastic dough blade create a softer action for combining dough ingredients.
The dough blade encourages the gluten strands to be stretched rather than cut, and should be used for all yeast doughs, and any other doughs that require kneading.
Do not process more than 3 cups (500g) of flour or using the START / PAUSE button in intervals.
Steadily add liquid (including oil, if applicable) through the small feed chute with the motor still running. Process until the mixture until it forms a soft, elastic dough ball.
If processing more than two batches of dough (500g each), allow the motor base to cool for an extended period (approx.30 min) before subsequent kneading to prevent the motor from overloading.
SLICING, GRATING AND SHREDDING

The spindle must be used with both the adjustable slicer and the reversible shredder/grater.
Adjustable slicer
The adjustable slicer will slice food to an even and consistent thickness. It can be adjusted to 24 settings, from very fine (0.3mm) to thick (8.0mm). To adjust the slicing thickness, hold the adjustable slicing disc by the outer edge with one hand, keeping hand away from blade, and turn the adjustment dial on the underside with the other hand. An arrow graphic indicates the thickness of the slice you have chosen.

Reversible grater and shredder
This disc has an array of small blades on both sides of the disc. Align the disc so larger holes face up for courser textured results, or with the smaller holes facing up for finer results. The discs are labelled showing which side faces up.
CONTROLLING THE INGREDIENTS
For optimal results, position food in the chute and use the pusher to apply light downward force prior to starting the food processor.
Always use the small or medium size feed chute for processing hard produces like pumpkin and sweet potato. Feeding hard produces through the large feed chute could cause damage to the discs.
Smaller ingredients
For long thin foods such as carrots, cucumbers, zucchini, etc., use the small or medium feed chute. This will avoid the ingredient from tipping over during slicing.
Larger ingredients
Take care not to overfill the chute, as the pusher will not activate the interlock safety catch if the chute is too full. Do not fill over the MAX CHUTE FILL graphic.
Pressure
When processing, never force the food down the chute as this can damage the discs.
Cheese
Caution should be taken when processing cheese in a food processor. For soft cheese such as mozzarella, partially freeze it until firm. This will help prevent jamming the disc.
Round cheeses such as mozzarella should be trimmed at one end to encourage them to sit flat in the feed chute with the disc starts.
Hard cheeses such as parmesan must be checked first to ensure they are not too hard (to avoid damaging blade edges). The cheese should slice easily with a sharp knife and remove the rind before processing.
Wedged shaped cheeses such as parmesan can be packed side by side to form a rectangular shape in the chute.
Chocolate
Break a block of chocolate into small pieces, and chill until firm. Pack into the small or medium feed chute, and then shred.

Oils in citrus rind can damage the bowl and lid. When processing citrus rind clean out bowl and lid immediately after processing. Do not soak parts in hot water.
Food Processing Guide
For more information about preparation of food and how to process, refer to basic processing techniques.
| FOOD TYPE | RECOMMENDED TOOL | DISH TYPE SUGGESTIONS |
| Avocado | Dicing kit Quad blade or mini processing blade Slicing disc 2-5 mm | Chunky guacamole Guacamole Salad |
| Apple/Pear | Dicing kit Quad blade or mini processing blade Slicing disc 2–5mm Grating disc | Fruit salad Apple sauce Slaw |
| Apple/Pear (cooked) | Quad blade or mini processing blade | Baby food |
| Batters | Quad blade | Cakes, pancake, waffle batter |
| Beetroot | Dicing kit Slicing disc 2-5 mm Shredding disc Quad blade Peeler | Relish Salad Salad Puree |
| Breadcrumbs | Quad blade | Coatings, breadcrumb stuffing |
| Butternut Pumpkin (Peeled) | Quad blade Dicing kit (through medium feed chute, or large feed chute if par-cooked) Slicing Disc (through medium feed chute, or large feed chute if par-cooked) | Butternut pumpkin soup |
| Cabbage/Lettuce | Slicing disc 1–3mm Shredding disc | Salad Salad |
| Carrot | Dicing kit (through medium feed chute, or large feed chute if par-cooked) Quad blade or mini processing blade Slicing disc Shredding disc Peeler | Minestrone Meat pie Vegetable soup Salad Carrot cake |
| Cauliflower | Quad blade or mini processing blade | Cauliflower soup |
| Celery | Quad blade or mini processing blade Slicing disc 1–3mm Dicing kit | Vegetable soup Salad Soup |
| Cheese | Shredding disc | Garnish, sandwich filling Grated cheese for pizza |
| Chocolate | Quad blade Shredding disc | Chocolate ganache Dessert decoration |
| Cream | Whisk | Whole egg foams |
| Doughs | Dough blade | Bread, pizza |
| Herbs | Quad blade or mini processing blade | Seasoning, pesto |
| Leeks | Quad blade or mini processing blade Slicing disc 2–5mm | Soup Soup |
| Meat (raw) | Quad blade (use pulse function) | Meatloaf, burgers, meatballs |
| Meat (cooked) | Quad blade (use pulse function) | Sandwich fillings, pâté, baby food |
| Meat (deli) | Slicing disc 1–6mm | Sandwiches, antipasto, pizza toppings |
| Onion | Dicing kit Quad blade or mini processing blade Slicing disc 0–5mm Shredding disc | Salsa, soups Soups, sauces Salad |
| Pastry | Quad blade | Pies |
| Potatoes | Dicing kit Peeler Shredding disc French fries cutter Slicing disc | Potato salad Pomme purée, potato salad, french fries Hash browns French fries |
| Potatoes (cooked) | Quad blade or mini processing blade | Mash potato |
| Sweet Potato | Slicing disc Shredding disc Peeler | Sweet potato fries |
| Tomatoes | Dicing kit Quad blade or mini processing blade Slicing disc 2–5mm | Chunky salsa Salsa Caprese salad, sandwich filling |
| Zucchini | Dicing Julienne Cutter Slicing disc | Minestrone, quesadillas Zucchini fries Grilled zucchini |
Care & Cleaning
Remove the power cord from the power outlet after use for safety reasons.
Processing bowl and lid
Due to the interlock components, we do not recommend immersing the bowl in water for long periods.
To keep your bowl and lid clean, and to avoid food drying on, follow these steps as soon as possible after use:
- Rinse most of the ingredients off the bowl and lid.
- Hand wash in clean warm, soapy water using a mild liquid detergent and non-abrasive sponge.
- The processing bowl and lid may occasionally be washed in the dishwasher (top shelf only), however washing in the dishwasher is not recommended on a regular basis, as prolonged exposure to harsh detergents, hot water and pressure will damage and shorten the life of the plastic and the interlock components.
Geared spindle and Food Pushers
- The large food pusher and geared spindle should only be hand-washed. Do not place them into the dishwasher. Washing the geared spindle in the dishwasher will damage the spindle.

Do not touch the blades of the Dicing Grid. They are extremely sharp.
Blades and discs
- Blades and discs are razor sharp, do not touch. Always use a spatula or brush to remove food or when cleaning blades.
- Disc spindle, blades and discs can be washed in the dishwasher.
Dicer
Use the dicer cleaning cap to clear out excess food built up in the dicing grid after EACH USE or each 10 cups.
- Straight after dicing, remove the dicing disc from the bowl while leaving the dicing grid inside the bowl.
- Attach the cleaning cap to the bottom of the large pusher.
- Align the markings on the cleaning cap with the markings on the dicing grid, push down to clear out the food in the grid.
- Repeat four times going around the grid until the entire grid is cleared.
![]()

Motor base
To clean the motor base, wipe with a soft, damp cloth then dry thoroughly. Wipe any excess food particles from the power cord.
Cleaning agents
Do not use abrasive scouring pads or cleansers on either the motor base or the jug, as they may scratch the surface. Use only warm soap water with a soft cloth.
Stubborn food stains and odours
Strong smelling foods such as garlic, fish and some vegetables such as carrots may leave an odour or stain the bowl or lid.
To remove, pour warm soapy water and fill to the MAX LIQUID mark. Set aside to soak for 5 minutes, without immersing the whole bowl. Then wash with a mild detergent and warm water, rise well and dry thoroughly. Store the bowl with the lid off.
Storage
Place the large food pusher (with medium and small pushers inserted) into the feed chute for storage.
Store your food processor upright, with the bowl and lid resting in position, but not locked. Locking the bowl and lid can put unnecessary strain on the safety interlock.
All accessories should be kept in the storage container and out of the reach of children to avoid accidental cuts. It is not recommended to store the discs in a drawer with other utensils.
Do not place anything else on top of your food processor during storage.
Troubleshooting
| PROBLEM | EASY SOLUTION |
Food is unevenly processed |
|
Slices are slanted or uneven |
|
Food falls over in the feed chute |
|
French fries cutter |
|
| Some food remains on top of the disc after processing |
|
Motor slows down when kneading dough |
|
Dough doesn't clean inside of the processing bowl |
|
| Dough nub forms on top of dough blade and dough does not become uniformly kneaded |
|
Dough feels tough after kneading |
|
| Dough is too dry |
|
| Dough is too wet |
|
| The motor does not start |
|
| The food processor shuts off during operation |
|
| The motor slowed down during operation |
|
| The food processor vibrates/moves during processing |
|
| INSERT PUSHER flashing |
|
| The food processor stalls when dicing |
|

Documents / ResourcesDownload manual
Here you can download full pdf version of manual, it may contain additional safety instructions, warranty information, FCC rules, etc.
Download Sage the Kitchen Wizz Peel & Dice BFP820 / SFP820 - Food Processor Manual
Advertisement


Need help?
Do you have a question about the the Kitchen Wizz Peel & Dice BFP820 and is the answer not in the manual?
Questions and answers