SOMFY ELIXO 500 io Installation Manual
Sliding gate opener
Hide thumbs
Also See for ELIXO 500 io:
- User manual (120 pages) ,
- Installation instructions manual (80 pages)

Related Manuals for SOMFY ELIXO 500 io


Summary of Contents for SOMFY ELIXO 500 io
- Page 1 ELIXO 500 io Sliding Gate Opener FR MANUEL D’INSTALLATION DE INSTALLATIONSANLEITUNG EN INSTALLATION MANUAL NL INSTALLATIEHANDBOEK Ref. 5073265C...
-
Page 3: Table Of Contents
CARACTÉRISTIQUES TECHNIQUES io-homecontrol ® repose sur une technologie avancée, sécurisée et sans-fil, facile à installer. Les produits io-homecontrol ® communiquent entre eux pour offrir plus de confort, de sécurité et d’économies d’énergie. www.io-homecontrol.com Copyright © 2012 Somfy SAS. All rights reserved. -
Page 4: Consignes De Sécurité
L’utilisation de tout accessoire de sécurité non validé par Somfy est interdit. Somfy ne peut pas être tenu pour responsable des dommages résultant du non respect des instructions de ce manuel. Si un doute apparaît lors de l’installation de la motorisation ou pour obtenir des informations complémentaires, consulter le site internet www.somfy.com. - Page 5 être exigée, conformément à la réglementation du pays dans lequel la motorisation est mise en service. > Précautions vestimentaires Pour les opérations de manipulation, de perçage et de soudure, porter les protections adéquates (lunettes spéciales, gants, casque antibruit, etc.). Copyright © 2012 Somfy SAS. All rights reserved.
- Page 6 Elixo 500 3S io 1.6 Réglementation Somfy SAS déclare que le produit décrit dans ces instructions lorsqu’il est utilisé conformément à ces instructions, est conforme aux exigences essentielles des Directives Européennes applicables et en particulier à la Directive Machine Christian REY, Responsable réglementation, Cluses 1.7 Assistance...
-
Page 7: Description Du Produit
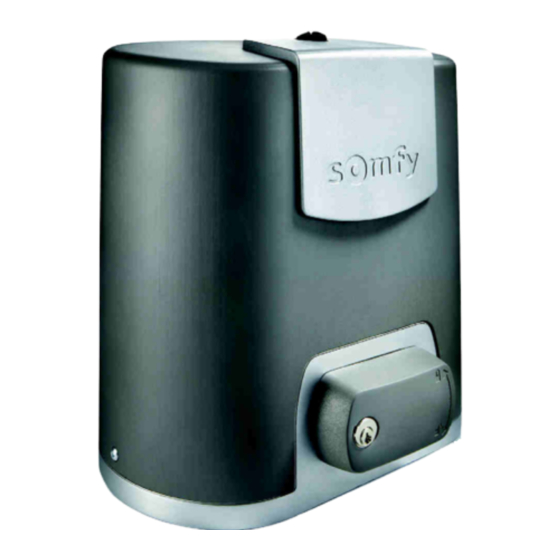
Base porte-batteries Carte de gestion de l’alimentation des batteries Batterie (en option, réf. 9001001) Fusible (250 V/5 A) de protection de la sortie éclairage 230 V Fusible (250 V/5 A) de rechange Copyright © 2012 Somfy SAS. All rights reserved. -
Page 8: Description De L'interface
- Utilisation du mode marche forcée Encombrement général du moteur Vue générale d’une installation type Moteur Crémaillère Antenne Feu orange Jeu de cellules photoélectriques Contact à clé Bord caoutchouc passif Butées d’arrêt au sol Copyright © 2012 Somfy SAS. All rights reserved. -
Page 9: Installation
• 85 mm pour un montage au sol* sur une surface bétonnée plane. Pour faciliter le vissage des tire-fond, utiliser 2 écrous pour faire “écrou contre écrou”. [6]. Visser un écrou et une rondelle sur chaque tire-fond. 100 ≤ h ≤ 130 jeu crémaillère-pignon. Copyright © 2012 Somfy SAS. All rights reserved. - Page 10 [1]. Tourner la poignée de déverrouillage vers la gauche. [2]. Manoeuvrer le portail manuellement jusqu’à ce que le dispositif d’entraînement vienne se reverrouiller. [3]. Tourner la clé d’un quart de tour vers la droite. Copyright © 2012 Somfy SAS. All rights reserved.
-
Page 11: Mise En Service Rapide
(appui sur une touche de commande : électronique moteur, télécommande mémorisée, point de commande câblé, etc.), basculer le curseur indiqué ci-contre puis relancer un auto-apprentissage. • C1”. • indique “H0”. AVERTISSEMENT Copyright © 2012 Somfy SAS. All rights reserved. -
Page 12: Essai De Fonctionnement
Occultation des cellules à l’ouverture = état des cellules pas pris en compte, le portail continu son mouvement. Fonctionnement de la barre palpeuse (fermeture uniquement) Fonctionnements particuliers Voir livret utilisateur. Formation des utilisateurs périodiques obligatoires. Copyright © 2012 Somfy SAS. All rights reserved. -
Page 13: Plan De Câblage Général
Permanent si auto-test non sélectionné, piloté si auto-test sélectionné 1,2 A max pour l’ensemble des accessoires sur toutes les sorties En 9 V, fonctionnement dégradé EOS O Fin de course moteur Commun EOS F Moteur Transformateur Copyright © 2012 Somfy SAS. All rights reserved. -
Page 14: Raccordement Des Périphériques
Fonctionnement normal : vitesse nominale, accessoires fonctionnels. Batterie 9,6 V (Fig. 8) Éclairage de zone (Fig. 9) Nota : Plusieurs éclairages peuvent être raccordés sans dépasser une puissance totale de 500 W. Copyright © 2012 Somfy SAS. All rights reserved. - Page 15 24V dc c BP Sec Cell 24V Cell 3 RX2 24V dc Sec Cell 24V Cell 24V dc Sec BP Sec Cell 24V Cell 24V dc Sec BP Sec Cell 24V Cell Copyright © 2012 Somfy SAS. All rights reserved.
- Page 16 Sec Cell 24V Cell Ant. 24V dc Sec Prog Test Sec BP Sec Cell 24V Cell 230V EOS F Motor 24Vac 500 W max..Flash Batt. EOS O Lamp 0Vac Copyright © 2012 Somfy SAS. All rights reserved.
-
Page 17: Paramétrage Avancé
0 à 30 ( valeur x 10 s = valeur Si la valeur 0 est sélectionnée, la fermeture automatique du portail est instantanée. fermeture automatique temporisation) en fonctionnement total 2 : 20 s Copyright © 2012 Somfy SAS. All rights reserved. - Page 18 “P14”. P13=2 est obligatoire pour un fonctionnement en mode automatique. Temporisation éclairage 0 à 60 ( valeur x 10 s = valeur de zone temporisation) mouvement du portail. 6 : 60 s Copyright © 2012 Somfy SAS. All rights reserved.
- Page 19 1 : vitesse la plus lente de la norme EN 12 453. ouverture à Le non respect de cette consigne pourrait gravement blesser des personnes, Valeur par défaut : 2 par exemple écrasées par le portail. Copyright © 2012 Somfy SAS. All rights reserved.
-
Page 20: Mémorisation Des Télécommandes
Mémorisation refusée d’une télécommande bidirectionnelle Mémoire pleine (seulement pour les télécommandes monodirectionnelles) Mémorisation des télécommandes Keygo io Mémorisation à partir de l’interface de programmation • Commande ouverture TOTALE • Commande ouverture PIETONNE • Commande ÉCLAIRAGE • Copyright © 2012 Somfy SAS. All rights reserved. -
Page 21: Mémorisation Des Télécommandes Keytis Io
• Télécommandes Keytis io, Telis io, Impresario io, Composio io : appuyer sur le bouton “KEY” jusqu’à allumage du voyant vert (2 s). • Autre télécommande : consulter la notice. [2]. Appuyer brièvement sur le bouton “KEY Télécommande mémorisée Télécommande à mémoriser Copyright © 2012 Somfy SAS. All rights reserved. - Page 22 [1]. Appuyer sur le bouton “PROG” de la télécommande déjà mémorisée jusqu’à l’allumage du voyant vert (2 s). [2]. Appuyer brièvement sur le bouton “PROG” de la nouvelle télécommande. Attendre le second bip et le clignotement rapide du voyant vert (quelques secondes). Télécommande mémorisée Télécommande à mémoriser Copyright © 2012 Somfy SAS. All rights reserved.
-
Page 23: Mémorisation Des Télécommandes 3 Touches (Telis Io, Telis Composio Io, Etc.)
[2]. Appuyer sur “PROG” à l’arrière de la télécommande 3 touches pour - - - mémoriser la fonction. Add”. Mémorisation par recopie d’une télécommande 3 touches io monodirectionnelles déjà mémorisée Télécommande mémorisée Télécommande à mémoriser Copyright © 2012 Somfy SAS. All rights reserved. -
Page 24: Effacement Des Télécommandes Et De Tous Les Réglages
Appuyer sur les touches “SET”, “+”, “-”. - l’appui doit débuter par “SET”. - l’appui simultané sur “+”et “-” doit survenir dans les 2 s suivantes. Pour accéder à nouveau à la programmation, répéter la même procédure. Copyright © 2012 Somfy SAS. All rights reserved. -
Page 25: Diagnostic
L’appui sur une touche de la télécommande permet d’affecter cette touche à la commande de l’éclairage déporté. pour commande sortie auxiliaire Un nouvel appui sur “PROG” permet de passer en mode “attente de mémorisation télécommande pour fonctionnement en ouverture totale : F0”. Copyright © 2012 Somfy SAS. All rights reserved. - Page 26 Pour tout autre code erreur ou panne, contacter Somfy. Pour accéder aux données mémorisées sélectionner le paramètre “Ud” puis appuyer sur “OK”. Données Désignation U0 à...
-
Page 27: Caractéristiques Techniques
Programmable : 5 valeurs possibles Diagnostic Enregistrement et consultation des données : compteur de cycles, compteur de cycles avec détection d’obstacles, nombre de canaux radio mémorisés, historique des 10 derniers défauts enregistrés Copyright © 2012 Somfy SAS. All rights reserved. - Page 28 Zugriff auf die gespeicherten Daten TECHNISCHE DATEN io-homecontrol ® bietet eine fortschrittliche und sichere Radio-Funktechnologie, die einfach zu installieren ist. io-homecontrol ® gekennzeichnete Produkte kommunizieren miteinander, wodurch Komfort, Sicherheit und Energieeinsparungen sichergestellt werden. www.io-homecontrol.com Copyright © 2012 Somfy SAS. All rights reserved.
-
Page 29: Sicherheitshinweise
Jede Verwendung des Produkts für Anwendungen, die nicht in dieser Anleitung beschrieben sind, ist untersagt (siehe Abschnitt „Anwendungsbereich“ der Installationsanleitung). Die Verwendung nicht von Somfy genehmigten Sicherheitszubehörs ist untersagt.Somfy kann nicht für Schäden haftbar gemacht werden, die auf die Nichtbeachtung der Hinweise in dieser Anleitung zurückzuführen sind. - Page 30 Antrieb funktioniert mindestens in einer Richtung ohne absichtliche Betätigung seitens des Benutzers. Im Fall des Automatikbetriebs oder, wenn das Tor auf einen öffentlichen Bereich öffnet, fordern die Vorschriften des Landes, in dem der Antrieb eingesetzt wird, möglicherweise die Installation einer gelben Signalleuchte. Copyright © 2012 Somfy SAS. All rights reserved.
- Page 31 Der vollständige Text der EG-Konformitätserklärung ist unter der Internet-Adresse www.somfy.com/ce verfügbar. Christian REY, Leiter Regulierung, Cluses Bitte zögern Sie nicht, sich an uns zu wenden: Unsere Spezialisten stehen Ihnen gern zur Verfügung. Internet: www.somfy.com WARNUNG Gefahrenvermeidung - Antrieb für Schiebetore im Wohnungsbau...
-
Page 32: Produktbeschreibung
Mechanismus zur manuellen Entriegelung Steuereinheit Batterie-Satz (Option, Artikelnr. 9016732): 2 Notstrombatterien Batteriehalterung Steuerkarte Batterieversorgung Batterie (optional, Artikelnr. 9001001) Schutzsicherung (250 V / 5 A) des 230 V-Beleuchtungsausgangs Ersatzsicherung (250 V / 5 A) Copyright © 2012 Somfy SAS. All rights reserved. -
Page 33: Beschreibung Des Bedienfelds
. kurzer Druck = Blättern von Parameter zu Parameter . langer Druck = Schnelldurchlauf der Parameter - "Zwangsbetrieb"-Modus verwenden Maße des Antriebs Übersicht über eine typische Anlage Antrieb Zahnstange Antenne Gelbe Warnleuchte Satz Fotozellen Schlüsselschalter Gummikante Endlagenstück Anschlagsnocken am Boden Copyright © 2012 Somfy SAS. All rights reserved. -
Page 34: Installation
[6]. Schrauben Sie je eine Mutter mit Unterlegscheibe auf alle Verankerungsschrauben. * Installieren Sie im Fall der Montage am Boden nach der Montage des Antriebs eine Zahnstange mit Langlöchern, um das Spiel zwischen Zahnstange und Ritzel einstellen zu können. Copyright © 2012 Somfy SAS. All rights reserved. - Page 35 [1]. Drehen Sie den Griff zum manuellen Entriegeln des Antriebs nach links. [2]. Verschieben Sie das Tor manuell, bis die Antriebsvorrichtung erneut greift. [3]. Drehen Sie den Schlüssel um eine Vierteldrehung nach rechts. Copyright © 2012 Somfy SAS. All rights reserved.
-
Page 36: Schnelle Inbetriebnahme
• Wenn der automatische Einlernzyklus nicht korrekt abgelaufen ist, zeigt das Display „H0“ an. WARNUNG Nach Abschluss der Montage muss unbedingt überprüft werden, ob die Hinderniserkennung die Anforderungen des Anhangs A der Norm EN 12 453 erfüllt. Copyright © 2012 Somfy SAS. All rights reserved. -
Page 37: Funktionstest
Aktivierung der Kontaktleiste beim Schließen = das Tor hält an und öffnet sich wieder ganz. Sonderfunktionen Siehe Benutzerhandbuch. Schulung der Benutzer Alle Benutzer müssen in die sichere Verwendung dieses elektrisch angetriebenen Tores eingewiesen werden (Standardbenutzung und Copyright © 2012 Somfy SAS. All rights reserved. -
Page 38: Allgemeiner Schaltplan
9 V - 24 V Niederspannungsversorgungseingang 9 V oder 24 V Kompatible Batterien 9,6V und 24V Bei 9 V, Notbetrieb Bei 24 V, Normalbetrieb EOS O Endlage des Antriebs Gemeinsam EOS F Antrieb Transformator 24 VAC Copyright © 2012 Somfy SAS. All rights reserved. -
Page 39: Anschliessen Von Peripheriegeräten
Hinweis: Für den Fall des Abreißens muss der Erdungsleiter immer länger als die Phase und der Nullleiter sein. Es können mehrere Leuchten angeschlossen werden, eine Gesamtleistung von 500 W darf jedoch nicht überschritten werden. Copyright © 2012 Somfy SAS. All rights reserved. - Page 40 24V dc c BP Sec Cell 24V Cell 3 RX2 24V dc Sec Cell 24V Cell 24V dc Sec BP Sec Cell 24V Cell 24V dc Sec BP Sec Cell 24V Cell Copyright © 2012 Somfy SAS. All rights reserved.
- Page 41 Sec Cell 24V Cell Ant. 24V dc Sec Prog Test Sec BP Sec Cell 24V Cell 230V EOS F Motor 24Vac 500 W max..Flash Batt. EOS O Lamp 0Vac Copyright © 2012 Somfy SAS. All rights reserved.
-
Page 42: Erweiterte Einstellungen
- Funkhandsender sind deaktiviert. Zeitverzögerung 0 bis 30 ( Wert x 10 s = Wird der Wert 0 gewählt, schließt das Tor sofort. automatisches Schließen Verzögerungswert) bei Vollöffnung 2: 20 s Copyright © 2012 Somfy SAS. All rights reserved. - Page 43 P13=2 ist bei Automatikbetrieb zwingend erforderlich. Zeitverzögerung 0 bis 60 ( Wert x 10 s = Wird der Wert 0 gewählt, verlischt die Umfeldbeleuchtung, sobald das Tor seine Umfeldbeleuchtung Verzögerungswert) Bewegung beendet hat. 6: 60 s Copyright © 2012 Somfy SAS. All rights reserved.
- Page 44 1: niedrigste Geschwindigkeit, Norm EN 12 453 konform ist. beim Öffnen 4: höchste Geschwindigkeit Die Nichtbeachtung dieser Anweisungen kann zu schweren Verletzungen wie Standardwert: 2 zum Beispiel Quetschungen durch das Tor führen. Copyright © 2012 Somfy SAS. All rights reserved.
-
Page 45: Einlernen Von Funkhandsendern
Speicher voll (nur bei monodirektionalen Funkhandsendern ) Einlernen der Funkhandsender Keygo io Einlernen über das Programmier-Bedienfeld • Befehl VOLLÖFFNUNG • Befehl FUSSGÄNGERÖFFNUNG • Befehl BELEUCHTUNG • Befehl HILFSAUSGANG(P15 = 4,5 oder 6) Copyright © 2012 Somfy SAS. All rights reserved. -
Page 46: Einlernen Der Funkhandsender Keytis Io
• Andere Funkhandsender: Beachten Sie deren Gebrauchsanleitung. [2]. Drücken Sie kurz auf die Taste “KEY” des neuen Funkhandsenders. Warten Sie auf die Bestätigung durch einen Piepston (dauert einige Sekunden). Eingelernter Funkhandsender Einzulernender Funkhandsender Copyright © 2012 Somfy SAS. All rights reserved. - Page 47 [1]. Drücken Sie solange auf die Taste “PROG [2]. Drücken Sie kurz auf die Taste “KEY” des Funkhandsenders. Warten Sie bis ein weiterer Piepston ertönt und die LED schnell grün blinkt (einige Sekunden). Eingelernter Funkhandsender Einzulernender Funkhandsender Copyright © 2012 Somfy SAS. All rights reserved.
-
Page 48: Einlernen Von Funkhandsendern Mit 3 Tasten (Telis Io, Telis Composio Io Usw.)
- - - Funkhandsenders mit 3 Tasten, um die Funktion zu speichern. Am Display wird „Add“ angezeigt. Einlernen durch Kopieren eines bereits eingelernten bidirektionalen Funkhandsenders mit 3 Tasten. Eingelernter Funkhandsender Einzulernender Funkhandsender Copyright © 2012 Somfy SAS. All rights reserved. -
Page 49: Löschen Der Funkhandsender Und Aller Einstellungen
Drücken Sie auf die Tasten “SET”, “+”, “-”. - Drücken Sie zuerst auf „SET“. - Drücken Sie anschließend innerhalb von 2 Sekunden auf die Tasten “+”und “-”. Der erneute Zugriff auf die Programmierfunktion erfolgt auf die gleiche Weise. Copyright © 2012 Somfy SAS. All rights reserved. -
Page 50: Diagnose
Durch Drücken einer Taste des Funkhandsenders wird dieser Taste die Steuerung der Außenbeleuchtung zugewiesen. Funkhandsenders für die Steuerung des Durch erneuten Druck auf die Taste „PROG“ gelangt man in den Modus „Wartet auf das Einlernen eines Hilfsausgangs Funkhandsenders für die Funktion Vollöffnung: F0“. Copyright © 2012 Somfy SAS. All rights reserved. -
Page 51: Anzeige Von Fehlercodes Und Störungen
Antrieb für die erstmalige Spannungsversorgung an die Netzstromversorgung durch die Notstrombatterie Bei anderen Fehlercodes oder Störungen wenden Sie sich bitte an Somfy. Zugriff auf die gespeicherten Daten Wählen Sie zum Zugriff auf die gespeicherten Daten den Parameter „Ud“ und drücken Sie dann auf „OK“. -
Page 52: Technische Daten
Programmierbar: 10 Werte möglich Anschlaggeschwindigkeit beim Programmierbar: 5 Werte möglich Schließen Diagnose Speicherung und Abfrage von Daten: Zykluszähler, Zähler der Zyklen mit Hinderniserkennung, Anzahl der gespeicherten Funkkanäle, Liste der 10 letzten gespeicherten Fehler Copyright © 2012 Somfy SAS. All rights reserved. - Page 53 Accessing memorised data TECHNICAL DATA ® io-homecontrol provides advanced and secure radio technology that is easy to install. io-homecontrol ® labelled products communicate with each other, improving comfort, security and energy savings. www.io-homecontrol.com Copyright © 2012 Somfy SAS. All rights reserved.
-
Page 54: Safety Instructions
The use of any safety accessories not validated by Somfy is prohibited. Somfy cannot be held liable for any damage resulting from failure to follow the instructions in this manual. In case of any doubts when installing the motorisation, or to obtain additional information, consult the website www.somfy. - Page 55 For operation in automatic mode, or if the gate faces a public road, an orange light type signalling device may be required to comply with the regulations in the country in which the motorisation is installed. > Clothing precautions etc.). Copyright © 2012 Somfy SAS. All rights reserved.
- Page 56 European Directives and, in particular, with the Machinery 1.7 Assistance Do not hesitate to contact us; our specialists are on hand to answer all your questions. Internet: www.somfy.com 1.8 Risk prevention WARNING...
-
Page 57: Product Description
Battery pack (optional, ref. 9016732): 2 backup batteries Battery holder tray Battery power supply management card Battery (option, ref. 9001001) Fuse (250 V/5 A) for 230 V lighting output Spare fuse (250 V/5 A) Copyright © 2012 Somfy SAS. All rights reserved. -
Page 58: Description Of The Interface
- Using manual override mode General motor size General view of a standard installation Motor Rack Aerial Orange light Set of photoelectric cells Key lock Passive rubber block End limit brackets End stops in the ground Copyright © 2012 Somfy SAS. All rights reserved. -
Page 59: Installation
To facilitate tightening of the lag screws, use 2 nuts to form a "double nut". [6]. Screw a nut and a washer onto each lag screw. 100 ≤ h ≤ 130 oblong mounting holes to allow the clearance between the rack and pinion Copyright © 2012 Somfy SAS. All rights reserved. - Page 60 Re-engage the motorisation [1]. Turn the release handle to the left. [2]. Move the gate manually until the drive mechanism re-locks. [3]. Turn the key a quarter of a turn to the right. Copyright © 2012 Somfy SAS. All rights reserved.
-
Page 61: Quick Commissioning
• If self-learning has not completed correctly, the display indicates "H0". WARNING At the end of installation, it is essential to check that the obstacle detection complies with appendix A of standard EN 12 453. Copyright © 2012 Somfy SAS. All rights reserved. -
Page 62: Operating Test
Activation of the safety edge when closing = stop + complete reopening. See the user booklet. User training All users must be trained on how to safely use this motorised gate (standard use and unlocking principle) and on the mandatory periodic checks. Copyright © 2012 Somfy SAS. All rights reserved. -
Page 63: General Wiring Diagram
9 V or 24 V low voltage supply input Compatible batteries 9.6V and 24V At 9 V, degraded operation At 24 V, normal operation EOS O Motor end limit Shared EOS F Motor Transformer 24VAC Copyright © 2012 Somfy SAS. All rights reserved. -
Page 64: Connecting Additional Devices
Note: The earth wire must always be longer than the live and neutral wires in case of detachment. Several lights may be connected provided the total power does not exceed 500 W. Copyright © 2012 Somfy SAS. All rights reserved. - Page 65 24V dc c BP Sec Cell 24V Cell 3 RX2 24V dc Sec Cell 24V Cell 24V dc Sec BP Sec Cell 24V Cell 24V dc Sec BP Sec Cell 24V Cell Copyright © 2012 Somfy SAS. All rights reserved.
- Page 66 Sec Cell 24V Cell Ant. 24V dc Sec Prog Test Sec BP Sec Cell 24V Cell 230V EOS F Motor 24Vac 500 W max..Flash Batt. EOS O Lamp 0Vac Copyright © 2012 Somfy SAS. All rights reserved.
-
Page 67: Advanced Parameter Setting
- the radio controls are inactive. Complete operating 0 to 30 ( value x 10 s = time delay If value 0 is selected, the gate immediately closes automatically. mode automatic timed value) closing 2: 20 s Copyright © 2012 Somfy SAS. All rights reserved. - Page 68 0 to 60 ( value x 10 s = time delay The auxiliary output time delay is only active if the value selected for P15 is 2 or 6. delay value) 6: 60 s Copyright © 2012 Somfy SAS. All rights reserved.
- Page 69 Appendix A of standard EN 12 453. opening Failure to follow this instruction may result in serious injury, e.g. due to crushing 4: fastest speed by the gate. Default value: 2 Copyright © 2012 Somfy SAS. All rights reserved.
-
Page 70: Memorising The Remote Controls
Memory full (only for monodirectional remote controls) Memorising the Keygo io remote controls Memorising via the programming interface • COMPLETE opening control • PEDESTRIAN opening control • LIGHTING control • AUXILIARY OUTPUT control (P15 = 4.5 or 6) Copyright © 2012 Somfy SAS. All rights reserved. -
Page 71: Memorising The Keytis Io Remote Controls
• Keytis io, Telis io, Impresario io, Composio io remote controls: press the "KEY" button until the green indicator light comes on (2 s). • Other remote control: refer to the instructions. [2]. Remote control memorised Remote control to be memorised Copyright © 2012 Somfy SAS. All rights reserved. - Page 72 [1]. Press the "PROG" button on the memorised remote control until the green indicator light comes on (2 s). [2]. PROG" button on the new remote control. Remote control memorised Remote control to be memorised Copyright © 2012 Somfy SAS. All rights reserved.
-
Page 73: Memorising 3-Button Remote Controls (Telis Io, Telis Composio Io, Etc.)
[2]. Press "PROG" at the rear of the 3-button remote control to memorise the function. - - - The screen displays "Add". Memorising by copying a previously memorised 3-button io remote control Remote control memorised Remote control to be memorised Copyright © 2012 Somfy SAS. All rights reserved. -
Page 74: Clearing The Remote Controls And All Settings
When the programming buttons are locked, a dot appears after the 1st digit. Pressing the “SET”, “+”, “-” buttons: - the "SET - the "+" and "-" buttons must be pressed within 2 seconds. To access the programming again, repeat this procedure. Copyright © 2012 Somfy SAS. All rights reserved. -
Page 75: Diagnostics
Pressing a button on the remote control allocates this button to the remote lighting control. for auxiliary output control Pressing "PROG" once more switches to "awaiting remote control memorisation for operation in complete opening mode: F0". Copyright © 2012 Somfy SAS. All rights reserved. -
Page 76: Fault And Breakdown Code Display
(except BUS), code keypad, safety edge) not operating Hardware fault The hardware autotests are not satisfactory Request a gate movement. If the fault is still present, contact Somfy. Accessories power supply fault The accessories power supply cuts N.B.: maximum accessories consumption = 1.2 A out following an overload (excessive Check the consumption of the connected accessories. - Page 77 Coupling speed when closing Programmable: 5 possible values Diagnostics Saving and consulting data: cycle counter, cycle counter with obstacle detection, number of memorised radio channels, log of the last 10 stored faults Copyright © 2012 Somfy SAS. All rights reserved.
- Page 78 ® biedt een geavanceerde en veilige radiografische technologie die eenvoudig te installeren is. Producten van het merk io-homecontrol ® communiceren met elkaar, wat het bedieningsgemak, de veiligheid en de energiebesparing bevordert. www.io-homecontrol.com Copyright © 2012 Somfy SAS. All rights reserved.
-
Page 79: Veiligheidsvoorschriften
Het gebruik van enig veiligheidsaccessoire dat niet is goedgekeurd door Somfy is verboden. Somfy is niet aansprakelijk voor schade die het gevolg is van het niet naleven van de aanwijzingen in deze handleiding. Raadpleeg, bij twijfel tijdens de installatie van de motorisatie of voor aanvullende informatie, de website www.somfy.com. - Page 80 Bij een automatisch werkend systeem of wanneer het hek uitkomt op de openbare weg, kan het installeren van een oranje licht vereist zijn, in overeenstemming met de reglementering van het land waarin de motorisatie in gebruik is. Copyright © 2012 Somfy SAS. All rights reserved.
- Page 81 Het is mogelijk dat u op problemen stuit bij de installatie van uw motorisatie of dat u hierbij bepaalde vragen hebt. Aarzel niet contact op te nemen met ons. Onze specialisten staan voor u klaar om u antwoord te geven. Internet: www.somfy.com 1.8 Risicopreventie...
-
Page 82: Productbeschrijving
2 noodaccu's Accuhouder Printplaat van de regeling van de accuvoeding Accu (optie, ref. 9001001) Beschermingszekering (250 V / 5 A) van de uitgang verlichting 230 V Reservezekering (250 V / 5 A) Copyright © 2012 Somfy SAS. All rights reserved. -
Page 83: Beschrijving Van De Motorisatie
. ingedrukt houden = snel doorlopen van de parameters - Handmatige instelmodus gebruiken Maatoverzicht van de motor Algemeen overzicht van een type-installatie Motor Tandheugel Antenne Oranje licht Set foto-elektrische cellen Contactslot Rubberen stootrand Beugel van eindpunt Stoppers op de grond Copyright © 2012 Somfy SAS. All rights reserved. -
Page 84: Installatie
* In het geval van een montage op de vloer moet u, na het vastzetten van de motor, een tandheugel monteren met langwerpige bevestigingsgaten om de speling van tandheugel-tandwiel mogelijk te maken. Copyright © 2012 Somfy SAS. All rights reserved. - Page 85 Weer koppelen van de motorisatie [1]. Draai de ontgrendelhendel naar links. [2]. Beweeg het hek met de hand tot het aandrijfsysteem weer vergrendeld is. [3]. Draai de sleutel een kwart slag naar rechts. Copyright © 2012 Somfy SAS. All rights reserved.
-
Page 86: Snel In Bedrijf Stellen
• Als de zelfprogrammeringscyclus niet correct verlopen is, geeft het display "H0" aan. WAARSCHUWING Controleer aan het einde van de installatie beslist of de obstakeldetectie voldoet aan de vereisten van bijlage A van de norm EN 12 453. Copyright © 2012 Somfy SAS. All rights reserved. -
Page 87: Test Van De Werking
Activering van de contactstrip bij het sluiten = stoppen + weer totaal openen. Bijzondere functies Zie gebruikersboekje. Informatie van de gebruikers Informeer altijd alle gebruikers over het veilig gebruiken van dit hek (standaard gebruik en ontgrendelingsprincipe) en over de verplichte periodieke controles. Copyright © 2012 Somfy SAS. All rights reserved. -
Page 88: Algemeen Bedradingsschema
Ingang voeding laagspanning 9 V of 24 V Geschikte accu's 9,6 V en 24 V Bij 9 V verminderde werking Bij 24 V normale werking EOS O Eindpunt van de motor Gemeenschappelijk EOS F Motor Transformator 24 VAC Copyright © 2012 Somfy SAS. All rights reserved. -
Page 89: Aansluiten Van De Randorganen
Verbind, voor een verlichting van Klasse I, de aardingsdraad met de aardingsklem van de grondplaat. N.B.: In geval van losrukken, moet de aardingsdraad altijd langer zijn dan de fasedraad en de nulleider. Verschillende verlichtingen kunnen aangesloten worden met een maximaal totaal vermogen van 500 W. Copyright © 2012 Somfy SAS. All rights reserved. - Page 90 24V dc c BP Sec Cell 24V Cell 3 RX2 24V dc Sec Cell 24V Cell 24V dc Sec BP Sec Cell 24V Cell 24V dc Sec BP Sec Cell 24V Cell Copyright © 2012 Somfy SAS. All rights reserved.
- Page 91 Sec Cell 24V Cell Ant. 24V dc Sec Prog Test Sec BP Sec Cell 24V Cell 230V EOS F Motor 24Vac 500 W max..Flash Batt. EOS O Lamp 0Vac Copyright © 2012 Somfy SAS. All rights reserved.
-
Page 92: Geavanceerde Instellingen
Vertraging van 0 tot 30 ( waarde x 10 s = tijdsduur) Als de waarde 0 geselecteerd is, wordt het hek onmiddellijk automatisch gesloten. automatisch sluiten in 2: 20 s totale werkingsmodus Copyright © 2012 Somfy SAS. All rights reserved. - Page 93 0 tot 60 ( waarde x 10 s = tijdsduur) Als de waarde 0 geselecteerd is, gaat de zoneverlichting onmiddellijk uit aan het zoneverlichting 6: 60 s eind van de beweging van het hek. Copyright © 2012 Somfy SAS. All rights reserved.
- Page 94 1: de laagste snelheid tot A van de norm EN 12 453. openen 4: de hoogste snelheid Standaardwaarde: 2 Het niet naleven van dit voorschrift kan ernstig letsel veroorzaken aan personen, bijvoorbeeld verplettering door het hek. Copyright © 2012 Somfy SAS. All rights reserved.
-
Page 95: Programmeren Van De Afstandsbedieningen
Geheugen vol (alleen voor eenrichtings afstandsbedieningen) Programmeren van de Keygo io afstandsbedieningen Programmeren vanaf de programmeringsinterface • Commando TOTAAL openen • Commando openen VOETGANGER • Commando VERLICHTING • Commando HULPUITGANG (P15 = 4,5 of 6) Copyright © 2012 Somfy SAS. All rights reserved. -
Page 96: Programmeren Van De Keytis Io Afstandsbedieningen
• Keytis io, Telis io, Impresario io, Composio io afstandsbedieningen: druk op de toets “KEY” tot de groene led brandt (2 s). • Andere afstandsbediening: raadpleeg de handleiding. [2]. Druk kort op de toets “KEY” van de nieuwe afstandsbediening. Wacht op de bevestigingspiep (een paar seconden). Geprogrammeerde afstandsbediening Te programmeren afstandsbediening Copyright © 2012 Somfy SAS. All rights reserved. - Page 97 [1]. Druk op de toets “PROG” van de reeds geprogrammeerde afstandsbediening tot de groene led brandt (2 s). [2]. Druk kort op de toets “PROG” van de nieuwe afstandsbediening. Wacht op de tweede piep en het snel knipperen van de groene led (enkele seconden). Geprogrammeerde afstandsbediening Te programmeren afstandsbediening Copyright © 2012 Somfy SAS. All rights reserved.
-
Page 98: Programmeren Van De Afstandsbedieningen Met 3 Toetsen (Telis Io, Telis Composio Io, Enz.)
- - - om de functie op te slaan. Het scherm geeft "Add" aan. Programmeren door kopiëren van een reeds geprogrammeerde eenrichtings io afstandsbediening met 3 toetsen Geprogrammeerde afstandsbediening Te programmeren afstandsbediening Copyright © 2012 Somfy SAS. All rights reserved. -
Page 99: Wissen Van De Afstandsbedieningen En Van Alle Afstellingen
- de druk moet beginnen met "SET". - de druk op "+" en "-" moet plaatsvinden binnen 2 seconden erna. Om weer toegang te krijgen tot de programmering, moet u dezelfde procedure herhalen. Copyright © 2012 Somfy SAS. All rights reserved. -
Page 100: Diagnose
Door op een toets van de afstandsbediening te drukken wordt deze toets toegewezen voor het bedienen van de afstandsbediening voor bediening hulpuitgang buitenverlichting. Door opnieuw op de "PROG" toets te drukken gaat het systeem over naar "in afwachting van inlezen afstandsbediening voor werking met totale opening: F0". Copyright © 2012 Somfy SAS. All rights reserved. -
Page 101: Weergave Van Foutcodes En Storingen
Voor elke andere foutcode of storing: neem contact op met Somfy. Toegang tot geprogrammeerde gegevens Voor toegang tot de geprogrammeerde gegevens, selecteert u de parameter "Ud" en drukt u daarna op "OK". -
Page 102: Technische Gegevens
Programmeerbaar: 10 mogelijke waarden Eindsnelheid bij het sluiten Programmeerbaar: 5 mogelijke waarden Diagnose Opslaan en raadplegen van de gegevens: cyclusteller, cyclusteller met obstakeldetectie, aantal geprogrammeerde radiokanalen, geschiedenis van de laatste 10 geregistreerde storingen Copyright © 2012 Somfy SAS. All rights reserved. - Page 104 Somfy SAS 50 avenue du Nouveau Monde BP 152 - 74307 Cluses Cedex France www.somfy.com...
Need help?
Do you have a question about the ELIXO 500 io and is the answer not in the manual?
Questions and answers