
Related Manuals for Miller Ultra HDV


Summary of Contents for Miller Ultra HDV
- Page 1 OM-288717B 2023-02 Ultra HDV Auto-Darkening Helmet w/ Clearlight Lens OWNER’S MANUAL...
-
Page 2: Table Of Contents
TABLE OF CONTENTS SECTION 1 – SAFETY PRECAUTIONS – READ BEFORE USING......1 Symbol Usage ............. 1 Arc Welding Hazards . -
Page 3: Section 1 - Safety Precautions - Read Before Using
SECTION 1 – SAFETY PRECAUTIONS – READ BEFORE USING Protect yourself and others from injury—read, follow, and save these important safety precautions and operating instructions. 1-1. Symbol Usage DANGER! – Indicates a hazardous situation which, if not avoided, will result in death or serious injury. - Page 4 � Before welding, adjust the auto-darkening lens sensitivity setting to meet the application. � Stop welding immediately if the auto-darkening lens does not darken when the arc is struck. NOISE can damage hearing. Noise from some processes or equipment can damage hearing. �...
-
Page 5: California Proposition 65 Warnings
� Do not weld in locations near degreasing, cleaning, or spraying operations. The heat and rays of the arc can react with vapors to form highly toxic and irritating gases. � Do not weld on coated metals, such as galvanized, lead, or cadmium plated steel, unless the coating is removed from the weld area, the area is well ventilated, and while wearing an air- supplied respirator. -
Page 6: Principal Safety Standards
1-5. Principal Safety Standards Safety in Welding, Cutting, and Allied Processes, American Welding Society standard ANSI Standard Z49.1. Website: http://www.aws.org. Safe Practice For Occupational And Educational Eye And Face Protection, ANSI Standard Z87.1, from American National Standards Institute. Website: www.ansi.org. Safety in Welding, Cutting, and Allied Processes, CSA Standard W117.2 from Canadian Stand- ards Association. -
Page 7: Section 2 - Definitions
SECTION 2 – DEFINITIONS 2-1. Additional Safety Symbol Definitions Warning! Watch Out! There are possible haz- ards as shown by the symbols. Accidental ingestion prevention. Keep battery away from children. Battery is harmful if swallowed. 2-2. Miscellaneous Symbols And Definitions Positive Negative Power On/... -
Page 8: Section 3 - Specifications
If head protection is required consult your safety officer. For Australia & New Zealand the helmet does not meet the requirements of AS/NZS 1801. Specification Ultra HDV Viewing Field 3.81 x 2.62 in. (97 x 60 mm) Reaction Time 0.0000400 sec (1/25,000) -
Page 9: Section 4 - Operating Instructions
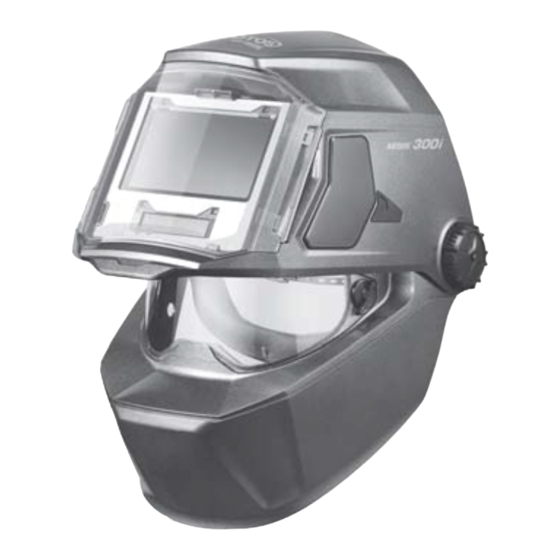
SECTION 4 – OPERATING INSTRUCTIONS 4-1. Helmet Configurations The Ultra HDV helmet fea- tures a flip-up auto-darkening lens and a separate, clear grinding shield. Flip the lens up when grinding and per- forming other non-welding work. Flip the lens down when welding or cutting. -
Page 10: Helmet Controls
4-2. Helmet Controls � After One-Touch system is activated (Section 4- 3), the auto-darkening lens turns on (darkens) automatically when welding begins turns off when welding stops. 1 Mode (On/Off) Button (On/ Off) (Section 4-3) 2 Grind/Memo Low Battery Light (Section 4-3) 3 Variable Shade Control... -
Page 11: Mode Control And Grind/Memo/Low Battery Light
4-3. Mode Control And Grind/Memo/Low Battery Light the helmet if the lens does not function as � After One-Touch system is activated), described. the auto-darkening lens turns on (dark- ens) automatically when welding be- 2 Grind/Memo/Low Battery Light gins and turns off when welding stops. 1 Mode Button The Grind/Memo/Low Battery light blinks red when the lens is in the Grind mode. -
Page 12: Mode Control Settings
4-4. Mode Control Settings X-Mode - Used for outdoor or low current 1 Mode (On/Off) Button welding applications. In this mode the lens turns on when it senses weld current. Adjust 2 Grind Mode Button shade, sensitivity, and delay settings as needed. -
Page 13: Variable Shade Control
4-5. Variable Shade Control 1 Mode Control Button 2 Variable Shade Adjust- ment Buttons Use the Light and Dark adjust- ment buttons to adjust the lens shade in the darkened state. Use the table in Section 1-4 to select proper shade control setting based on your welding process. -
Page 14: Lens Delay Control
4-6. Lens Delay Control Grind Mode- No delay adjustment 1 Mode (On/Off) Button � 2 Lens Delay Adjustment Buttons There is no lens delay adjustment in the Grind mode. Use the Lens Delay Fast and Slow buttons Lens Delay Adjustment Procedure to adjust the time for the lens to switch to the clear state after welding or cutting. -
Page 15: Sensitivity Control
4-7. Sensitivity Control � 1 Mode (On/Off) Button Adjust helmet sensitivity in lighting con- ditions helmet will be used in. 2 Sensitivity Adjustment Buttons � Press Mode (On/Off) button to turn hel- met On. Helmet display appears. Use Sensitivity control to make the lens more responsive to different light levels in various �... -
Page 16: Typical Lens Adjustment Procedure
4-8. Typical Lens Adjustment Procedure � Lens assembly displays prior settings when turned On. Retained set- tings are not shown in example. � In the Grind mode the lens is a fixed shade No. 3. No lens adjustments are possible. Adjusting Lens Assembly �... -
Page 17: Arc Time And Arc Count Buttons
4-9. Arc Time And Arc Count Buttons Press the Mode (On/Off) button to select ei- 2 Arc Count Button ther the Arc Time or Arc Count function. Press Arc Count button to record the num- 1 Arc Time Button ber of times the lens darkens (exposed to arc). -
Page 18: Section 5 - Adjusting Headgear
SECTION 5 – ADJUSTING HEADGEAR 5-1. Adjusting Headgear Seven slots on the right side of the head- � There are four headgear adjustments: band provide adjustment for the forward tilt headgear top, tightness, angle, and of the helmet. To adjust, lift and reposition distance. -
Page 19: Section 6 - Replacing Lens Covers
SECTION 6 – REPLACING LENS COVERS 6-1. Replacing The Lens Covers Remove the inside lens cover by pulling top Never use the auto-darkening lens center of lens cover from lens holding chan- without the inside and outside lens nels. Replace the lens cover by gently bow- covers properly installed. -
Page 20: Section 7 - Replacing The Battery
SECTION 7 – REPLACING THE BATTERY 7-1. Replacing The Battery To replace the battery, begin by removing Replace with CR2450 lithium battery (one the auto-darkening lens assembly (see Sec- required). tion 6-1). � Be sure Positive (+) side of the battery 1 Battery Tray faces up (toward inside of helmet). -
Page 21: Section 8 - Installing Optional Magnifying Lens And Sliding Side
SECTION 8 – INSTALLING OPTIONAL MAGNIFYING LENS AND SLIDING SIDE COVERS 8-1. Installing Optional Magnifying Lens And Sliding Side Covers 1 Optional Magnifying Lens Starting at the bottom, slide magnifying lens into the hel- met retaining brackets. Align the magnifying lens with auto-darkening lens assembly. -
Page 22: Section 9 - Maintenance And Storage
SECTION 9 – MAINTENANCE AND STORAGE � Do not use solvents or abrasive cleaning detergents to clean the helmet. Do not immerse the lens assembly in water. � Keep helmet dry; do not expose helmet to rain or snow. Keep helmet away from fire and oth- er sources of heat. -
Page 23: Section 10 - Troubleshooting
SECTION 10 – TROUBLESHOOTING 10-1. Troubleshooting Trouble Remedy Auto lens not On – au- Check battery and verify it is in good condition and installed to-lens does not darken properly. momentarily when the Check battery surfaces and contacts, and clean if necessary. Mode (On/Off) button is pressed. -
Page 24: Section 11 - Parts List
SECTION 11 – PARTS LIST Figure 11-1. Ultra HDV Auto-Darkening Helmet OM-288717 Page 22... - Page 25 Ultra HDV Auto-Darkening Welding Helmet Item Part No. Description Qty. 305002 Helmet, Shell Ultra HDV 216714 Label, Warning Helmet En/Sp/Fr 245819 Clip, Retaining Grinding Shield Left And Right 305007 Lens, Grinding Shield (Clear) 258853 Shield, Grinding Tear Away 216327 Lens Cover, Inside 4.1875 x 2.5 In 305005 Auto-Darkening Lens Assy.
-
Page 26: Section 12 - Limited Warranty
SECTION 12 – LIMITED WARRANTY LIMITED WARRANTY (AUSTRALIA) Welding Industries of Australia (WIA) warrants to the original retail purchaser that the Miller Au- to-Darkening welding helmet purchased (Product) will be free from defects in materials and workmanship for a period of 3 years from the date of purchase of the Product by the customer. - Page 27 LIMITED WARRANTY (NEW ZEALAND) Weldwell warrants to the original retail purchaser that the Miller Auto-Darkening welding helmet purchased (Product) will be free from defects in materials and workmanship for a period of 3 years from the date of purchase of the Product by the customer. If a defect in material or work- manship becomes evident during that period, Weldwell will, at its option, either: �...
- Page 28 For product information, Owner’s Manual translations, and more, visit www.MillerWelds.com Visit our Australian website at www.welding.com.au Phone 1300 300 884 Visit our New Zealand website www.weldwell.co.nz Phone 0800 9353 9355 ORIGINAL INSTRUCTIONS © Miller Electric Mfg. LLC 2023-02...
Need help?
Do you have a question about the Ultra HDV and is the answer not in the manual?
Questions and answers