Table of Contents
Advertisement
Advertisement
Table of Contents

Related Manuals for Miele W 1753


Summary of Contents for Miele W 1753
- Page 1 Operating instructions Washing machine W 1753 To avoid the risk of personal injury or damage to the appliance, it is en - CA essential that you read these operating instructions before installation and use. This maschine is not approved for use in the United States.
-
Page 2: Caring For The Environment
Caring for the environment Disposal of packing materials Disposing of your old appliance The packing materials protect the washer from damage during shipping. Old electric and electronic equipment They have been selected with an eye to often contains valuable materials. environmental compatibility and However, they may also contain harmful efficient disposal, and should be... -
Page 3: Table Of Contents
Contents Caring for the environment ......... . 2 Important safety instructions . - Page 4 Contents Detergent ............28 Selecting the right detergent .
- Page 5 The Miele water protection system ........
-
Page 6: Important Safety Instructions
Remember that high wash The W 1753 meets all CSA temperatures will make the porthole requirements. This machine is not glass hot. approved for use in the United Teach children not to touch the glass States. - Page 7 Miele will not be held liable for any damage or harm caused by a missing – the screw-out fuse in the house wiring system is unscrewed and or incomplete grounding system.
- Page 8 This special devices during spinning. product can be obtained from your Miele dealer or from Miele Customer Service. Closely follow the instructions on the product package.
- Page 9 Textiles that have been pre-treated with solvent-based cleaners must be Only use accessories that are rinsed thoroughly in water before you expressly authorized by Miele. wash them. If other parts are used, the appliance NEVER use solvent-based cleaners warranty and any associated (e.g., benzine) in the washing machine.
-
Page 10: Operating The Washing Machine
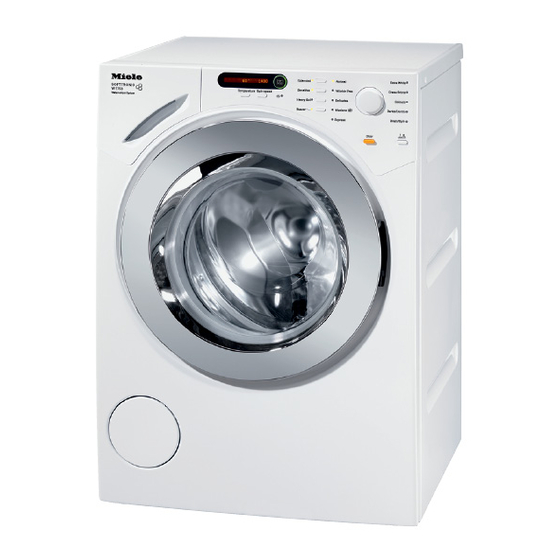
Operating the washing machine Control panel a Display e Start/Stop button See the following page for more Starts the selected wash program or information. stops a started program. b Temperature button f Extra option buttons For selecting a temperature. Various extras can be added to the wash programs. - Page 11 Operating the washing machine Program duration Once a program starts, the estimated program duration (in hours and minutes) is displayed. During the first 8 minutes of the program, the washer calculates the quantity and absorbency of the laundry. This can cause an increase or decrease in program times.
-
Page 12: Before Using For The First Time
Before using for the first time Setting the language Before the washer is used for the You will be prompted to select the first time, it needs to be properly desired display language. You can installed and connected. See change the language at any time "Installation and connection". -
Page 13: Environmentally Friendly Use
Environmentally friendly use Energy and water consumption Detergent consumption – To make the most out of each wash – Do not exceed the maximum load, load the maximum dry weight detergent dose listed on the for the program you have selected. package. -
Page 14: How To Wash Correctly
Miele laundry care guide. For a copy, contact Miele Do not wash items that are labelled Do directly, or visit the Miele Website. - Page 15 How to wash correctly B Switch the washer on D Select program C Load the washer ^ Press theDoor button to open the drum door. ^ Unfold the laundry and load it loosely into the drum. Mixing both large and small items in a load gives better wash results and helps distribute the load evenly during the spin cycle(s).
- Page 16 How to wash correctly F Select extra options Sensitive An additional final rinse washes away detergent residue and scents. An additional rinse takes place. Heavy Soil For heavily soiled laundry or stubborn dried on stains. A pre-wash takes place and the wash time for the main wash is extended.
- Page 17 How to wash correctly G Add detergent It is important to use the right amount, because ..too little detergent results in: – the laundry not getting clean, and turning grey and stiff over time –...
- Page 18 How to wash correctly H How to start a program Check that all items have been ^ Press the flashing Start/Stopbutton. removed from the drum. Items left The estimated program duration will behind could shrink or bleed colour appear in the display as soon as the during the next load.
-
Page 19: Spin Cycles
Spin cycles Final spin cycle speed De-select final spin (Rinse hold) ^ Use the Spin speed button to select Program feature. After the last rinse Normal 1500 cycle, the laundry remains in the Wrinkle Free 1200 water. This helps reduce creasing if Delicates the laundry cannot be immediately Woolens... -
Page 20: Program Overview
Program overview Normal 50°C to cold Fabric Items made fom cottons, linen or mixed fabrics Note: It is not possible to modify the spin speed. Wrinkle Free 60°C to 30°C Fabric Synthetic fabrics, mixed fibres and easy-care cottons Note: For fabrics that crease easily, reduce the final spin cycle speed. Delicates 60°C to cold Fabric... - Page 21 Program overview Extra White 90°C to 60°C Fabric For white items with special hygienic requests. Dress Shirts 60°C to cold Note: Pre-treat soiled cuffs and collars as needed. For silk shirts and blouses, use the Delicates program. Colours 40°C to cold Fabric Mixed loads of garments suitable for the Normal and Wrinkle Free programs.
-
Page 22: Extra Options
Extra options The following extras can be added to a program: Extended Sensitive Heavy Soil Buzzer Normal Wrinkle Free Delicates Woolens / Express Extra White Dress Shirts Colours Darks/Demin = Extended' is selected and cannot be deselected. -
Page 23: Garment Care Label Symbols
Garment care label symbols Washing Drying The number printed on the washtub The dots indicate the temperature symbol indicates the maximum wash Normal temperature temperature for the garment. Low temperature normal agitation Do not tumble dry normal agitation reduced agitation Ironing Hand wash The dots indicate the ironing... -
Page 24: Program Sequence
Program sequence Main wash Rinse Spin Water Wash Water Rinses Interim Final level rhythm level spin spin Normal Wrinkle Free Delicates – Woolens Express Extra White Dress Shirts – Colours Darks/Demin Drain/Spin – – – – – d = low water level a= Intensive rhythm ( = medium water level b= Normal rhythm... - Page 25 Program sequence The washer is equipped with fully Special features in the program electronic controls and load sequences: recognition. It automatically determines Anti-crease: how much water is needed, based on the size and absorbency of the load. To help prevent wrinkles, the washer This means that program sequences drum will continue to turn at intervals for and times can vary.
-
Page 26: Changing A Program Sequence
Changing a program sequence Canceling a program Changing a program You can cancel a program at any time Program after it has started. Once a program has started, a different ^ Press the Start/Stop button. program cannot be selected. Cancel program Temperature ^ Press the flashing Start/Stop button This setting can be changed within the... -
Page 27: Loading Or Removing Laundry
Changing a program sequence Loading or removing laundry Childproof lock ^ Press the Door button until the front The childproof lock prevents the front door opens. door from being opened and ^ Load or unload the laundry. programs from being interrupted. ^ Close the door. -
Page 28: Detergent
Detergent Selecting the right detergent You can use any detergent designed for automatic washing machines. Consult the package for dosages and instructions. Universal Colour Delicates Normal Wrinkle Free Delicates Woolens Liquid detergent especially for woollens Express Extra White Dress Shirts Colours Darks/Demin liquid detergent only... -
Page 29: Water Softener
If you are using several different dried-on soiling. products in the wash (e.g., special – The size of the load application detergents), Miele recommends loading the products in – The water hardness the following order into compartment If you do not know the water hardness level in your area, contact your local water utility. -
Page 30: Fabric Softener, Fabric Shaper, And Liquid Starch
Detergent Fabric softener, fabric shaper, If starch is used frequently, be sure and liquid starch to thoroughly clean the dispenser Starch compartment, especially the siphon. can be used to give body and crispness to laundered items. Dyes and dye removers Fabric shapers ^ Never use dye removers in this are synthetic starches and give an even... -
Page 31: Cleaning And Care
Cleaning and care Cleaning the drum Cleaning the dispenser drawer Washing at low temperatures and/or Regularly remove any detergent with liquid detergents can allow germs residue. and odours to form inside the appliance. At least once a month, to clean the drum and prevent the formation of odours, run a wash program at 60°C or above, using powdered detergent. - Page 32 Cleaning and care Cleaning the siphon and softener If liquid starch is used often, the channel siphon and fabric softener channel will need to be thoroughly cleaned. Liquid starch can cause a build-up and clogging. Cleaning the detergent drawer housing 1.
-
Page 33: Cleaning The Water Inlet Filters
Cleaning and care Cleaning the water inlet filters To clean the filter in the water inlet valve The water inlet valves are protected by ^ Use adjustable pliers to carefully two filter screens. They need to be checked approx. every 6 months. If loosen the ribbed plastic nut on the there are frequent interruptions to the inlet valve and unscrew. -
Page 34: Troubleshooting
Troubleshooting What to do if . . . Many of the faults you may encounter during everyday use can be easily rectified yourself. This helps save time and money, because you won't need to call Customer Service. The following troubleshooting guide can be used to help address minor problems without a service call. -
Page 35: Fault Messages In The Display
Troubleshooting Fault messages in the display Problem Possible cause RemedyA The display lights up – The water outlet is – Clean the drain filter and restricted or pump. blocked. Drain fault – The max. drain pump flashes. – The drain hose is height (delivery head) is sitting too high. -
Page 36: General Problems
Troubleshooting General problems Problem Possible cause Remedy The feet are not Even out the feet so the The washer shakes during spin cycles. leveled. washer is stable, and tighten the nuts. The washer didn't spin There was an It is best to include a mix of the laundry properly, and imbalance during the large and small items in the... -
Page 37: Unsatisfactory Wash Results
Troubleshooting Unsatisfactory wash results Problem Possible cause Remedy Liquid detergents usually – Use powdered detergent that You used liquid detergent and the do not contain bleaching contains bleach. laundry isn't clean. agents. They may fail to – Load the detergent into the compartment j. -
Page 38: The Loading Door Cannot Be Opened With The Door Button
Troubleshooting The loading door cannot be opened with the Door button Possible cause Remedy Insert the three-pin plug into the socket and/or The washer is not switch the washer on using the _ button. connected and/or switched The safety lock has been Switch off the childproofing as described in the activated. -
Page 39: Opening The Loading Door (Blocked Drain Outlet And/Or Power Outage)
Troubleshooting Opening the loading door Blocked drain outlet (blocked drain outlet and/or If the drain outlet is blocked, up to 25 l power outage) will be retained inside the washer. ^ Switch the washer off. Caution: If laundry has just been Behind the flap that covers the washed at a high temperature, water detergent compartment, there is lever... - Page 40 Troubleshooting Once the flow of water ceases: If the drain filter is not securely tightened, there is a risk of water leakage during operation. Opening the loading door NEVER reach into the drum until is has completely stopped moving. Reaching into a moving drum carries the risk of serious injury.
-
Page 41: Customer Service
Optional accessories for this washer serial number of your appliance. This are available from your Miele dealer or information can be found on the data from Miele Customer Service. plate, above the porthole glass when... -
Page 42: Installation And Connection
Installation and connection Front view a Inlet hose for hot water h Detergent dispenser drawer b Inlet hose for tap water (cold) i Control panel c Power cord j Loading door d - g Drain hose (with detachable k Access to drain filter, drain pump, swivel elbow) and emergency door release l Four height-adjustable feet... -
Page 43: Rear View
Installation and connection Rear view a Protruding lid to grip when moving e Drain hose the washer f Transport clip for inlet and drain b Power cord hoses g Safety cap for transit bars c Inlet hose for tap water (cold) h Transport clip for inlet and drain d Inlet hose for hot water hoses and for storing transit bars... -
Page 44: Installation Surface
(available from the 2. then use a screwdriver to release the Miele Spare Parts Dept). Otherwise catch at the top. there is the danger of the machine moving about and falling off the... - Page 45 Installation and connection ^ Using the spanner supplied, turn the ^ Turn the right-hand transit bar 90°, left-hand transit bar 90°, then then ^ withdraw the transit bar. ^ withdraw the transit bar.
-
Page 46: Re-Fitting The Transit Bars
Installation and connection To avoid the risk of injury the holes for the transit bars must be covered after the transit bars have been removed. ^ Secure the transit bars to the back of the washing machine. Make sure that the top catch is located above the holder. -
Page 47: Levelling The Machine
Installation and connection ^ Use a level to check that the washer Levelling the machine is standing square. To ensure safe and proper operation, the washer must stand perfectly level on all four feet. Improper footing may increase water and power consumption, and may cause the washer to wander across the floor. -
Page 48: Installing Under A Countertop
Installing under a countertop Washer-dryer stack The washer can be stacked with a The washer lid must NOT be Miele tumble dryer. A stacking kit will removed. "WTV 414", be required and can be obtained through your Miele dealer or Provided the workspace is high Miele Customer Service. -
Page 49: The Miele Water Protection System
If the hose ever needs to be replaced, suds container is pumped away. use only a genuine Miele hose - it is – Overflow protection tested to withstand pressure of at least 7000 kPa. -
Page 50: Tap Water Line (Cold Water)
If the washer is connected to this line poor wash result. only, the appliance will need to be re-programmed to cold water fill only. Please contact your Miele dealer or Miele Customer Service for reprogramming instructions. The second unused inlet hose, with the red tag, will be attached to the rear of the washer after re-programming. -
Page 51: Drainage System
Miele dealer or Miele Customer Service. For delivery heads over 1m (up to a max. of 1.8 m), contact your Miele Customer Service for a replacement pump and with a part # 1053992. Drain hose connection: 1. -
Page 52: Electrical Connection
Check with a qualified electrician or connection box can ONLY be used for service representative if you are in connecting the W 1753 Miele clothes doubt as to whether the appliance is washer and the T 7634 or T 7644 C properly grounded. -
Page 53: Technical Data
Technical data Height 850 mm Width 595 mm Depth 634 mm Depth with door open 1074 mm Height for building under 850 mm Width for building under 600 mm Weight 99 kg Voltage see data plate Connected load (watts) see data plate Fuse rating see data plate Consumption data... - Page 54 Programmable functions for changing default settings You can use the programmable functions to adjust the electronics to suit changing requirements. Programmable functions can be changed at any time.
-
Page 55: Programmable Functions
Programmable functions To access programmable functions To change a programmable function Turn the program selector to see the Use the Start/Stop button and the various options available for a program selector to access the programmable function. programmable functions. This second function for the button and The currently set option is marked with a check L. -
Page 56: Gentle Wash
Programmable functions Gentle wash Suds cooldown Activating the Gentle wash feature With this feature, additional water reduces the drum action. It is suitable flows into the washer at the end of for gently washing mildly soiled the main wash, to cool down the items. -
Page 57: Pin Code
Programmable functions Pin code You can use a pin code to lock the electronics. This feature protects your ^ Press the Start/Stopbutton. washer against unauthorized use. The following appears in the display for confirmation: Once the pin code is activated, you will need to enter it whenever you wish to Code activated operate the washer. -
Page 58: Temperature Unit
Programmable functions Temperature unit Keypad tone You can choose whether There will be a beep whenever a temperatures will be displayed in button is pressed. °C/Celsius or in The factory setting for the keypad tone °F/Fahrenheit. is Off. The factory setting is °C/Celsius. Brightness Buzzer There are 10 different settings for the... -
Page 59: Standby Display
Programmable functions Standby display Memory To save energy, the display goes out Whenever a program starts, the and the Start/Stop button will start washing machine stores the most flashing slowly. recently selected settings (program, temperature, spin speed/RPM and The display will always go out: any extra options). - Page 60 Alteration rights reserved / 2916 M.-Nr. 10 210 871 / 01 To obtain the most updated version of this guide, please visit the website of Miele.
Need help?
Do you have a question about the W 1753 and is the answer not in the manual?
Questions and answers
How can I unlock the door to Miele washer W 1753 after wash and spin cycles have finished?
how do I open the circular opening at the lower left on the front of my machine to clean it out.
there is a circular compartment at the bottom left on front of machine, how do you open it to clean inside