Table of Contents
Advertisement
Advertisement
Table of Contents

Related Manuals for Miele W 1753


Summary of Contents for Miele W 1753
- Page 1 Installation Instructions W 1753...
-
Page 2: Installation And Connection
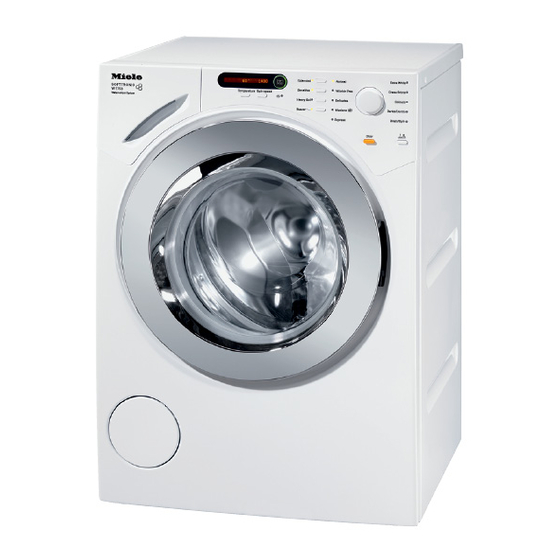
Installation and connection Front view a Inlet hose for hot water h Detergent dispenser drawer b Inlet hose for tap water (cold) i Control panel c Power cord j Loading door d - g Drain hose (with detachable k Access to drain filter, drain pump, swivel elbow) and emergency door release n Four height-adjustable feet... -
Page 3: Rear View
Installation and connection Rear view a Protruding lid to grip when moving e Drain hose the washer f Transport clip for inlet and drain b Power cord hoses g Safety cap for transit bars c Inlet hose for tap water (cold) h Transport clip for inlet and drain d Inlet hose for hot water hoses and for storing transit bars... -
Page 4: Installation Surface
(available from the 2. then use a screwdriver to release the Miele Spare Parts Dept). Otherwise catch at the top. there is the danger of the machine moving about and falling off the... - Page 5 Installation and connection ^ Using the spanner supplied, turn the ^ Turn the right-hand transit bar 90°, left-hand transit bar 90°, then then ^ withdraw the transit bar. ^ withdraw the transit bar.
-
Page 6: Re-Fitting The Transit Bars
Installation and connection To avoid the risk of injury the holes for the transit bars must be covered after the transit bars have been removed. ^ Secure the transit bars to the back of the washing machine. Make sure that the top catch is located above the holder. -
Page 7: Levelling The Machine
Installation and connection ^ Use a level to check that the washer Levelling the machine is standing square. To ensure safe and proper operation, the washer must stand perfectly level on all four feet. Improper footing may increase water and power consumption, and may cause the washer to wander across the floor. - Page 8 Installing under a countertop Washer-dryer stack The washer can be stacked with a The washer lid must NOT be Miele tumble dryer. A stacking kit will removed. "WTV 414", be required and can be obtained through your Miele dealer or Provided the workspace is high Miele Customer Service.
-
Page 9: The Miele Water Protection System
If the hose ever needs to be replaced, suds container is pumped away. use only a genuine Miele hose - it is – Overflow protection tested to withstand pressure of at least 7000 kPa. - Page 10 If the washer is connected to this line poor wash result. only, the appliance will need to be re-programmed to cold water fill only. Please contact your Miele dealer or Miele Customer Service for reprogramming instructions. The second unused inlet hose, with the red tag, will be attached to the rear of the washer after re-programming.
-
Page 11: Drainage System
Miele dealer or Miele Customer Service. For delivery heads over 1m (up to a max. of 1.8 m), contact your Miele Customer Service for a replacement pump and with a part # 1053992. Drain hose connection: 1. -
Page 12: Electrical Connection
Check with a qualified electrician or connection box can ONLY be used for service representative if you are in connecting the W 1753 Miele clothes doubt as to whether the appliance is washer and the T 7634 or T 7644 C properly grounded. -
Page 13: Technical Data
Technical data Height 850 mm Width 595 mm Depth 634 mm Depth with door open 1074 mm Height for building under 850 mm Width for building under 600 mm Weight 99 kg Voltage see data plate Connected load (watts) see data plate Fuse rating see data plate Consumption data... -
Page 14: Default Settings
Programmable functions for changing default settings You can use the programmable functions to adjust the electronics to suit changing requirements. Programmable functions can be changed at any time. -
Page 15: Programmable Functions
Programmable functions To access programmable functions To change a programmable function Turn the program selector to see the Use the Start/Stop button and the various options available for a program selector to access the programmable function. programmable functions. This second function for the button and The currently set option is marked with a check L. -
Page 16: Water Plus
Programmable functions Water plus Gentle wash Use the Water plus programmable Activating the Gentle wash feature function to set the options for the reduces the drum action. It is suitable Sensitive button. for gently washing mildly soiled items. You can choose one of three options: This option can be activated within the Water + programs for Normal and Wrinkle Free. -
Page 17: Pin Code
Programmable functions Pin code You can use a pin code to lock the electronics. This feature protects your ^ Press the Start/Stopbutton. washer against unauthorized use. The following appears in the display for confirmation: Once the pin code is activated, you will need to enter it whenever you wish to Code activated operate the washer. -
Page 18: Temperature Unit
Programmable functions Temperature unit Keypad tone You can choose whether There will be a beep whenever a temperatures will be displayed in button is pressed. °C/Celsius or in The factory setting for the keypad tone °F/Fahrenheit. is Off. The factory setting is °C/Celsius. Brightness Buzzer There are 10 different settings for the... -
Page 19: Standby Display
Programmable functions Standby display Memory To save energy, the display goes out Whenever a program starts, the and the Start/Stop button will start washing machine stores the most flashing slowly. recently selected settings (program, temperature, spin speed/RPM and The display will always go out: any extra options). - Page 20 Alteration rights reserved / 1016 M.-Nr. 10 210 870 / 02 To obtain the most updated version of this guide, please visit the website of Miele.
Need help?
Do you have a question about the W 1753 and is the answer not in the manual?
Questions and answers