Table of Contents
Advertisement
Quick Links
Wattstopper
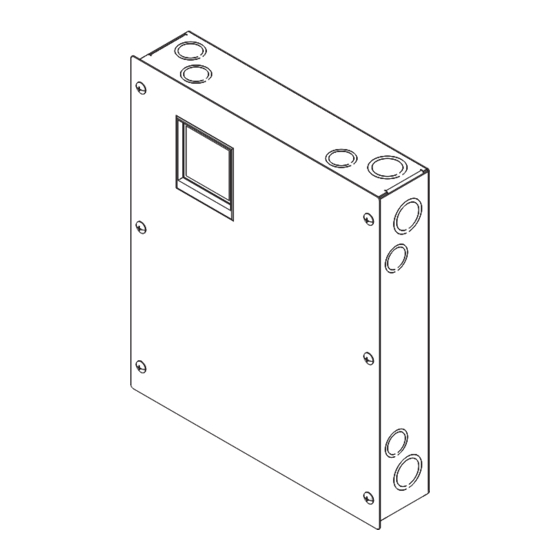
Lighting Control Panel
User Manual
No: 24270 – 05/23 rev. 2
Catalog Number: LC8-120/277
Country of Origin: Made in China
Power input ..........................................................120/277 VAC; 50/60 Hz
Accessory power ......................................................... 500 mA at 24 VDC
Switch inputs with screw terminals;
Used with 3-wire momentary, 2-wire momentary or maintained with pilot
light output
Relay grouping .........Configurable to switches through touchscreen user
interface
Panel weight ......................................................... 8.1 lbs. (without relays)
Relays .............................................Modular; dual 1-pole or single 2-pole
LCDP-1 relay ratings
Ballast/LED Driver ........................................................ 20 A @ 208V
Ballast/LED Driver .............................. 20 A @ 240V/480V (2 Phase)
Motor ..................................................................1 HP @ 208V/240V
Short Circuit Current Rating ........................... 14kA AIC @ 277 VAC
LCSP-2 relay ratings
Incandescent .......................................................20 A @ 120V/277V
Ballast/LED Driver ...............................................20 A @ 120V/277V
Motor ........................................................................ 1/2 HP @ 120V
Short Circuit Current Rating ........................... 14kA AIC @ 277 VAC
Relay weight ................................... LCDP-1: 0.49 lbs., LCSP-2: 0.37 lbs.
Operating conditions ....................................... For indoor installation only
............................... 32-122oF (0-50oC); 5-95% RH noncondensing
UL and CUL listed
®
SPECIFICATIONS
Advertisement
Table of Contents

Related Manuals for LEGRAND Wattstopper LC8-120/277


Summary of Contents for LEGRAND Wattstopper LC8-120/277
-
Page 1: Specifications
Wattstopper ® Lighting Control Panel User Manual No: 24270 – 05/23 rev. 2 Catalog Number: LC8-120/277 Country of Origin: Made in China SPECIFICATIONS Power input ............120/277 VAC; 50/60 Hz Accessory power ............500 mA at 24 VDC Switch inputs with screw terminals; Used with 3-wire momentary, 2-wire momentary or maintained with pilot light output Relay grouping ..Configurable to switches through touchscreen user... -
Page 2: Table Of Contents
CONTENTS Specifications ..................... 1 Description and Operation ................ 3 Quick Setup ....................3 Interior Lighting..................3 Exterior Lighting ................... 7 Installation and Setup ................12 Installing the Panel ................12 Wiring SPST Loads ................13 Wiring DPST Loads ................14 Connecting Low Voltage Switches to the LC8 ........ -
Page 3: Description And Operation
DESCRIPTION AND OPERATION The LC8 Lighting Control Panel is an easy to use lighting controller intended for applications where automated lighting control is required. Lighting control can be configured to respond to scheduling, photocell input, astronomic input, switch input and/or combinations of these. The LC8 is suitable for controlling interior or exterior lighting, and can be configured with either single pole single throw relays or double pole single throw relays for multi- pole circuits. - Page 4 Set time and date Touch Hour to highlight. Use up and down arrows to adjust time. Time: : 15 Repeat for setting minutes and date. Date: 02/07/11 Select Save Monday Step 2: Assign Relays to a Channel. Setup Home 02/07/11 Set Time And Date Daylight Saving Time 20 : 12 : 40...
- Page 5 Step 3: Set a Schedule. Setup Home Set Time And Date 02/07/11 Daylight Saving Time 20 : 12 : 40 Assign Relays/Input Assign Relays/Channel Sunrise 06:39 Assign Schedule/Channel Sunset 17:24 Select Setup from the Home menu. Select Next. Setup Schedules Schedules Setting [Sch01] [Sch02]...
- Page 6 Schedule Time - 1 Set Schedule 01 Schedule ON/OFF : 00 ON 00 : 00 OFF 00 : 00 ON 00 : 00 OFF 00 : 00 Off: 00 : 00 Blink Before Off Time Delay 000 Min Select Save to save settings. Touch hours (and minutes if desired) to highlight.Use up and down arrows to select times.
-
Page 7: Exterior Lighting
Local - Channel A Set [Sun] Sch01 [Mon] None [Tue] None [Wed] None [Thu] None [F r i ] None [Sat] None [Hol] None RESULT: Interior lighting will turn Enter Sch01 to each day of the week desired. ON at the scheduled ON time, and turn OFF at the scheduled OFF Select Save. - Page 8 Step 2: Enter Geographic Location. Setup Home 02/07/11 Set Time And Date Daylight Saving Time 20 : 12 : 40 Assign Relays/Input Assign Relays/Channel Sunrise 06:39 Assign Schedule/Channel Sunset 17:24 Select Setup from the Home menu. Select Next. Setup Setup Schedules Setting Schedules Setting Program Holiday...
- Page 9 Step 3: Assign Relays to a Channel. Setup Home Set Time And Date 02/07/11 Daylight Saving Time 20 : 12 : 40 Assign Relays/Input Assign Relays/Channel Sunrise 06:39 Assign Schedule/Channel Sunset 17:24 Select Setup from the Home menu. Setup menu displays. Setup Assign Relay 1 8 to Channel A H...
- Page 10 Setup Schedules Schedules Setting [Sch01] [Sch02] [Sch02] [Sch03] [Sch04] Program Holiday [Sch05] [Sch06] [Sch07] [Sch08] Select Location [Sch09] [Sch10] [Sch11] [Sch12] Sound Options [Sch13] [Sch14] [Sch15] [Sch16] Touch Schedules Setting to Select (Sch02). Touch again. display Schedule# setup screen. Schedule 02 Schedule 02 Astro &...
- Page 11 Setup Assign Schedule/Channel Set Time And Date Daylight Saving Time Assign Relays/Input Assign Relays/Channel Assign Schedule/Channel Select Assign Schedule/Channel. The Assign Schedule/Channel menu Touch again. displays. Select Channel B. Local - Channel B Set [Sun] Sch02 [Mon] None [Tue] None [Wed] None [Thu] None [F r i ] None...
-
Page 12: Installation And Setup
INSTALLATION AND SETUP LCDP 1 Line LED lit when relay is on. Load LCD with Double Pole Relay Module Touch Screen Line APPLIANCE CONTROL 88T9 Load Double Pole Pat. Pend. 800.879.8585 www.wattstopper.com 14000r1 Relay Module LCDP 1 LCDP 1 Line LED lit when relay is on. -
Page 13: Wiring Spst Loads
9. Connect the neutral feed wire to the “N” terminal block on the power supply module. 10. Connect the building source supply earth ground wire to earthing ground post. Use the other grounding post to bond power supply module to earth ground. CAUTION: This unit contains two earthing posts for grounding. -
Page 14: Wiring Dpst Loads
To Relay Module LCSP-2 Dual Single Pole Relay Module Input1 Line Use Copper Conductors Only LED lit when relay is on. Output1 Load 120/277V, 60Hz, 20A Tungsten, Ballast and LED Release 120V, 60Hz, 1/2 Hp 14kA AIC @ 277 VAC Button Energy Management Equipment Accessory 86WA... -
Page 15: Connecting Low Voltage Switches To The Lc8
Home Local - Relays 02/07/11 20 : 12 : 40 Sunrise 06:39 Sunset 17:24 8. Touch each relay to toggle the relay on and off. 9. Confirm that all of the relays switch and that the loads turn on and off. Connecting Low Voltage Switches to the LC8 The LC8 will operate with a variety of low voltage switch types including 2 wire momentary, 3 wire momentary, or maintained contact. -
Page 16: Connecting Occupancy Sensors And Photocells
Connecting Occupancy Sensors and Photocells Any WattStopper low voltage occupancy sensor that is intended to work with a power pack can be used as an input to the LC8 to control relays. Connect the occupancy sensor per the following diagram: - Pilot Blue - On... -
Page 17: Icon Definitions
Icon Definitions The following is a list of all icons and their functions. Icon Function Return to the Home screen with <Home> icon. Rotate through Input, Relay and Channel screens with <Rotate> icon. Enter the setup mode with <Setup> icon. Choose a panel with <Panel Select>... -
Page 18: Getting Started
Getting Started Upon initial startup, the Logo screen displays: Touch Screen to Start Touch the screen to display the Home menu: Home 02/07/11 20 : 12 : 40 Sunrise 06:39 Sunset 17:24 The Home screen always displays the current day of the week, date, Daylight Savings Time (DST) status and the time of day in 24 hour format. -
Page 19: Relays Override
Relays Override Home Local - Relays 02/07/11 20 : 12 : 40 Sunrise 06:39 Sunset 17:24 Touch Rotate to display the Touch a Relay to toggle the relay ON Local Relays screen. and OFF. Note that two pole relays will be controlled by the odd number, or first, relay position. -
Page 20: Setup Menus
Local - Channels Local - Input Touch Rotate to bring up the Touch the input number to toggle the Inputs screen. relay(s) programmed to the input Setup Menus There are three setup menus that you can cycle through: Setup Home 02/07/11 Set Time And Date Daylight Saving Time... - Page 21 Setting Time and Date Setup Home 02/07/11 Set Time And Date Daylight Saving Time 20 : 12 : 40 Assign Relays/Input Assign Relays/Channel Sunrise 06:39 Assign Schedule/Channel Sunset 17:24 Select Setup from the Home menu. Touch Set Time and Date. Set time and date Touch Hour to highlight.
- Page 22 Daylight Saving Time The LC8 can be set to follow or not follow DST. Setup Home Set Time And Date 02/07/11 Daylight Saving Time 20 : 12 : 40 Assign Relays/Input Assign Relays/Channel Sunrise 06:39 Assign Schedule/Channel Sunset 17:24 Select Setup from the Home menu. The Setup Menu Displays.
-
Page 23: Assigning Relays To An Input
Assigning Relays to an Input Setup Home Set Time And Date 02/07/11 Daylight Saving Time 20 : 12 : 40 Assign Relays/Input Assign Relays/Channel Sunrise 06:39 Assign Schedule/Channel Sunset 17:24 Select Setup from the Home menu. The Setup Menu Displays. Setup Assign Relays/Input Set Time And Date... -
Page 24: Assigning Relays To Channels
Assigning Relays to Channels Home Setup 02/07/11 Set Time And Date Daylight Saving Time 20 : 12 : 40 Assign Relays/Input Assign Relays/Channel Sunrise 06:39 Assign Schedule/Channel Sunset 17:24 Select Setup from the Home menu. The Setup Menu Displays. Setup Assign Relay 1 8 to Channel A H Set Time And Date... -
Page 25: Assigning Schedules To Channels
Assigning Schedules to Channels Home Setup 02/07/11 Set Time And Date Daylight Saving Time 20 : 12 : 40 Assign Relays/Input Assign Relays/Channel Sunrise 06:39 Assign Schedule/Channel Sunset 17:24 Select Setup from the Home menu. The Setup Menu Displays. Setup Assign Schedule/Channel Set Time And Date Daylight Saving Time... -
Page 26: Schedules
Schedules Schedule ON/OFF Home Setup 02/07/11 Set Time And Date Daylight Saving Time 20 : 12 : 40 Assign Relays/Input Assign Relays/Channel Sunrise 06:39 Assign Schedule/Channel Sunset 17:24 Select Setup from the Home menu. Select Next. Setup Schedules Schedules Setting [Sch01] [Sch02] [Sch03]... - Page 27 Schedule Time - 1 Set Schedule 01 Schedule ON/OFF : 00 ON 00 : 00 OFF 00 : 00 ON 00 : 00 OFF 00 : 00 Off: 00 : 00 Blink Before Off Time Delay 000 Min Use up and down arrows to select If the Blink Before Off feature is to be times.
- Page 28 Manual ON/Schedule OFF Time settings will turn the lighting OFF. Lighting will be turned ON manually. This setting works similar to Schedule ON/OFF, except that the ON time setting does not turn the lighting ON. It determines the time when the Time Delay feature is deactivated.
- Page 29 Schedule Time - 1 Set Schedule 01 Manual ON/Sched OFF : 00 ON 00 : 00 OFF 00 : 00 ON 00 : 00 OFF 00 : 00 Off: 00 : 00 Blink Before Off Time Delay 000 Min Use up and down arrows to select Touch the Blink Before Off display.
- Page 30 Astronomic & Schedule ON/OFF The astronomic feature and schedule work together by issuing commands for the lighting to turn ON and OFF. The astronomic command happens only at sunset and sunrise. The schedule command happens at the set ON and OFF times for the schedule.
- Page 31 Schedule 01 Time Offset Astro & Sched ON/OFF ON 00 : 00 OFF 00 : 00 ON 00 : 00 OFF 00 : 00 000 Min Blink Before Off Time Offset 000 Min Touch Time Offset. Touch again to set Use up and down arrows to set sunrise or sunset offset.
- Page 32 Setup Schedules Schedules Setting [Sch01] [Sch02] [Sch03] [Sch04] Program Holiday [Sch05] [Sch06] [Sch07] [Sch08] Select Location [Sch09] [Sch10] [Sch11] [Sch12] Sound Options [Sch13] [Sch14] [Sch15] [Sch16] Touch Schedules Setting to display Select (Sch01). Schedule # Setup menu. Touch again. Schedule 01 Schedule 01 Photo &...
- Page 33 Setup Schedules Schedules Setting [Sch01] [Sch02] [Sch03] [Sch04] Program Holiday [Sch05] [Sch06] [Sch07] [Sch08] Select Location [Sch09] [Sch10] [Sch11] [Sch12] Sound Options [Sch13] [Sch14] [Sch15] [Sch16] Touch Schedules Setting to display Select (Sch01). Schedule # Setup menu. Touch again. Schedule 01 Schedule 01 AS Auto ON/OFF AS Auto ON/OFF...
- Page 34 AS-100 Manual ON/Auto OFF This setting will use the Manual ON/Automatic OFF feature of the AS-100 Automatic Wall Switch (see the AS-100 installation instructions for more information). Follow the screens for AS-100 Auto ON/OFF, selecting AS Manual ON/Auto OFF when selecting schedule type. NOTE: The AS-100 switch must remain powered at all times in order to operate.
- Page 35 Setup Setup Schedules Setting Schedules Setting Program Holiday Program Holiday Select Location Select Location Sound Options Sound Options Schedules Setting displays. Touch Program Holiday. Touch again. Holiday set (page 1 ) Holiday Date Set Touch a **/**/** to display Holiday Use the up and down arrows to set Date Set.
- Page 36 Holiday Date Set Start: End: Use the up and down arrows to set Start amd End Dates. . Select Save Setting a Location for the Astronomic Feature Setup Home 02/07/11 Set Time And Date Daylight Saving Time 20 : 12 : 40 Assign Relays/Input Assign Relays/Channel Sunrise 06:39...
-
Page 37: Sound Options
Location set Location set Manual Entry Manual Entry Lat. State: Alabama Lon. City: Birmingham Sunrise 06:52 Sunset 16:50 Sunrise 06:52 Sunset 16:50 Scroll through entries to select state. If your location is not in city/state Scroll through entries to select city. lists, select Manual Entry. -
Page 38: Returning The Lc8 Panel To Factory Default Settings
Sound Options Touch the box to turn sound ON or OFF when screen is touched. Returning the LC8 Panel to Factory Default Settings To erase all programming and return the panel to factory default configuration: Setup Home Set Time And Date 02/07/11 Daylight Saving Time 20 : 12 : 40... -
Page 39: Troubleshooting
Restore Fact.Default You are about to clear all Memory to factory default. Touch the Yes key to clear all memory and return to main menu. [Yes] [No] Confirm the action by touching Yes. To cancel the action and return to the menu, touch No. TROUBLESHOOTING Problem What to Check... -
Page 40: Lighting Control Panel Circuit & Program Documentation Form
No. 24270– 05/23 rev. 2 800.879.8585 www.legrand.us/wattstopper © Copyright 2023 Legrand All Rights Reserved.
Need help?
Do you have a question about the Wattstopper LC8-120/277 and is the answer not in the manual?
Questions and answers