Table of Contents
Advertisement
Quick Links
Lighting Control Panel
LP8
SPECIFICATIONS
Supply Voltages. . . . . . . . . . . . . . . . . per selected power supply
P115/277 Power Supply . . . . . . . . . . . . . . . . . .115 or 277VAC
P240 Power Supply . . . . . . . . . . . . . . . . . . . . . . . . . . . .240VAC
P115/347 Power Supply . . . . . . . . . . . . . . . . . .115 or 347VAC
Load Ratings
@120VAC, 50/60Hz . . . . . . . . . . . . . 20A Tungsten or Ballast
@277/347VAC, 50/60Hz. . . . . . . . . . . . . . . . . . . . . 20A Ballast
@250VAC. . . . . . . . . . . . . . . . . . . . . . . . . . . . . . . . . . . . . . . .1HP
Accessory Power Ouput . . . . . . . . . . . 800mA @24VDC/VAC/ACR
Environmental
Maximum Ambient Temperature . . . . . . . . . . . . . . . . . . 60°C
Maximum Humidity . . . . . . 5% to 90% RH, non-condensing
UL & cUL Listed
LP Series
LP24
Advertisement
Table of Contents

Subscribe to Our Youtube Channel
Related Manuals for LEGRAND WattStopper LP Series


Summary of Contents for LEGRAND WattStopper LP Series
-
Page 1: Specifications
LP Series Lighting Control Panel LP24 SPECIFICATIONS Supply Voltages....per selected power supply P115/277 Power Supply ....115 or 277VAC P240 Power Supply . -
Page 2: Table Of Contents
Contents SPECIFICATIONS ..............1 INTRODUCTION . -
Page 3: Introduction
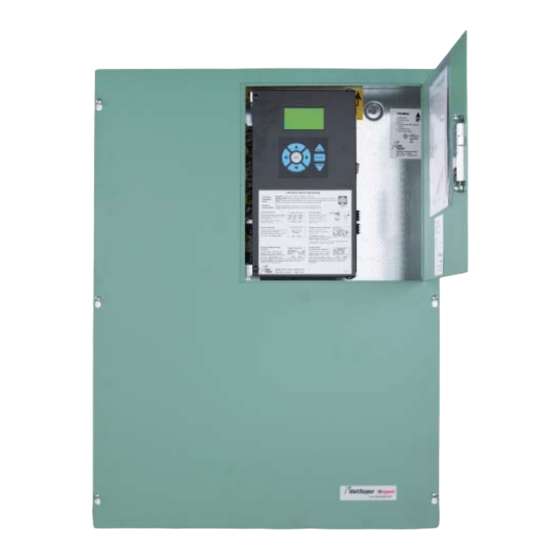
INTRODUCTION Welcome to the LP Series Lighting Control Panels The LP panels contain up to 8 relays controlling lighting through automatic scenarios, time schedules, photocells and occupant controlled switches. Scheduling capability is included through a built-in clock with a keypad and display window on the interior. The interior provides isolation between the line- and low-voltage sections of the panel, as well as the mounting frame for relays, the power supply and the circuit board assemblies. -
Page 4: System Wiring Overview
System Wiring Overview 277V 115V NEUT Page 4... -
Page 5: Installation
INSTALLATION Some of the procedures in this manual may have been previously completed using the “LP8 Quick Start Installation Guide.” The instructions that follow contain additional details about the installation that may be useful in particular applications. These instructions also provide information about installing optional equipment. -
Page 6: Install Interior
16.5" 6" (419.1 mm) (152.4 mm) Low Voltage Compartment (Class 2) Slotted 12.53" 15.08" Mounting (318.3 mm) (383.0 mm) Holes 14.5" (368.3 mm) Figure 2: LP8 Enclosure dimensions, mounting holes, location of line and low voltage wiring compartments 23.88" 8.13" (606.5 mm) (206.5 mm) Low Voltage Compartment... -
Page 7: Connect The Lp8 Power Supply
CONNECT THE LP8 POWER SUPPLY The LP8 has several power supply options that allow it to operate with 115VAC, 240VAC, 277VAC or 347VAC line voltage. These power supplies function with either 50 or 60 Hz. They have internal overcurrent protection. The transformer automatically turns off when overloaded and resets when the fault is removed. -
Page 8: Low Voltage Wiring
LOW VOLTAGE WIRING Open the interior door to access the connectors in the low voltage section. All input/output wiring in this section must be low voltage, Class 2 wiring. Do not use the low voltage wiring compartment as a raceway or junction box. -
Page 9: Install And Wire Exterior Photocell (Optional)
Mount Photocell on exterior or roof of building. Install and Wire Exterior Photocell (Optional) Sliding Window Light sensing window The LP8 has a specifi c terminal block for connection to a As it is moved up, Point toward North lights turn on Watt Stopper EM-24A2 exterior photocell. -
Page 10: Troubleshooting
TROUBLESHOOTING Problem Test Steps Next The LV switch Is it terminated correctly in the panel? No – Correct terminations does not control See pages 4 & 8. Yes – Go to next step the relay or group. Is the 12VDC indicating LED on the C8 No –... - Page 11 TROUBLESHOOTING (continued) Problem Test Steps Next The Astronomic Is the relay scheduled using the No – make the necessary changes and schedule is “Astronomic ON/OFF” or “Astronomic test again turning on the and Schedule ON/OFF” scenarios? Yes – Go to next step relay too early/ late.
-
Page 12: Ordering Information - Standard Configurations
WARRANTY INFORMATION Watt Stopper/Legrand warranties its products to be free of defects in materials and workmanship for a period of one (1) year. There are no obligations or liabilities on the part of Watt Stopper/Legrand for consequential damages arising out of, or in connection with, the use or performance of this product or other indirect damages with respect to loss of property, revenue or profi...
Need help?
Do you have a question about the WattStopper LP Series and is the answer not in the manual?
Questions and answers