
Related Manuals for Harvia HL60E


Summary of Contents for Harvia HL60E
- Page 1 HL60E, HL110E Instructions for Installation and Use of Electric Sauna Heater HL60E HL110E 06072021/Y05-0935...
-
Page 2: Table Of Contents
These instructions for installation and use are intended for the owner or the person in charge of the sauna, as well as for the electrician in charge of the electrical installation of the heater. After completing the installation, the person in charge of the installation should give these instructions to the owner of the sauna or to the person in charge of its operation. -
Page 3: Instructions For Use
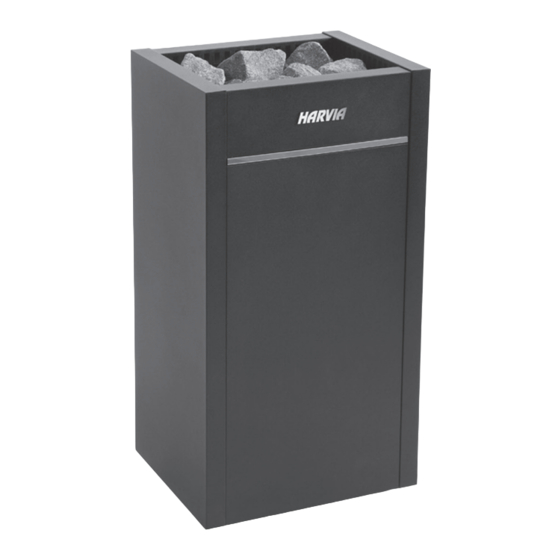
1. INSTRUCTIONS FOR USE 1.1. Piling of the Sauna Stones If the heater output is suitable for the sauna room, The piling of the sauna stones has a great effect on it will take about an hour for a properly insulated the functioning of the heater (figure 1). -
Page 4: Instructions For Bathing
Water properties Effect Recommendation Humus concentration Colour, taste, precipitates <12 mg/l Iron concentration Colour, odour, taste, precipitates <0,2 mg/l Manganese (Mn) concentration Colour, odour, taste, precipitates <0,10 mg/l Hardness: most important substances Precipitates Mg: <100 mg/l are magnesium (Mg) and lime, i.e. Ca: <100 mg/l calcium (Ca) Chloride-containing water... -
Page 5: Sauna Room
2. SAUNA ROOM Figure 2. 2.1. Sauna Room Structure NOTE! Check from the fire authorities which parts A. Insulation wool, thickness 50–100 mm. The of the firewall can be insulated. Flues which are in sauna room must be insulated carefully so that use must not be insulated. -
Page 6: Sauna Room Ventilation
min. 1000 mm 360° min. 500 mm 180° Figure 3. 2.2. Sauna Room Ventilation 2.3. Heater Output The air in the sauna room should change six times When the walls and ceiling are covered with panels per hour. Figure 3 illustrates different sauna room and insulation behind the panels is adequate, the ventilation options. -
Page 7: Instructions For Installation
Sauna room Width/Depth/Height Weight Cubic vol. Height 2.3.! max. kg min. m³ max. m³ min. mm HL60E 415/340/810 1900 HL110E 10,0 415/410/810 1900 Table 2. Installation details of the heater min. mm Figure 4. Minimum safety distances (all dimensions in millimeters) -
Page 8: Installation Of The Control Unit And Sensor
30-150 >150 30-150 Figure 6. Installing the sensor (all dimensions in millimeters) 3.4. Installation of the Control Unit and Sensor If the connecting and installation cables are • The control unit includes detailed instructions higher than 1000 mm from the floor in the sauna •... - Page 9 Figure 8. Replacing the Heating Elements Heater Output kW Fuses [A] 200 VAC 1-Phase 1-Phase 3-Phase (two circuits) HL60E 2x30 2x20 and 2x10 3x20 HL110E 10,0 2x40 and 2x20 3x30 Figure 9. Electrical connections...
-
Page 10: Spare Parts
4. SPARE PARTS HL60E Y10-0020 (2000W / 208V) x 3 HL110E Y10-0006 (3500W / 208V) x3 We recommend to use only the manufacturer’s spare parts. - Page 12 P.O.Box 12 Teollisuustie 1-7 40951 Muurame FINLAND +358 207 464 000 harvia@harvia.fi...
Need help?
Do you have a question about the HL60E and is the answer not in the manual?
Questions and answers