Advertisement
IMPORTANT SAFEGUARDS
When using electrical appliances, basic safety precautions should always be followed, including the following:
- Read all instructions before use.
- Do not touch hot surfaces. Use handles or knobs.
![shock hazard]() To protect against electric shock, do not immerse cord, plugs, or appliance inwater or other liquid.
To protect against electric shock, do not immerse cord, plugs, or appliance inwater or other liquid.- Close supervision is necessary when any appliance is used by or near children.
- Unplug from outlet when not in use and before cleaning. Allow to cool beforeputting on or taking off parts, and before cleaning the appliance.
- Do not operate the appliance with a damaged cord or plug or after the appliancemalfunctions, or has been damaged in any manner. Return the appliance to the nearest authorized service facility for examination, repair or adjustment.
- The use of accessory attachments not recommended by the appliance manufacturer may cause injuries.
- Do not use outdoors.
- Do not let cord hang over the edge of table or counter, or touch hot surfaces.
- Do not place on or near a hot gas or electric burner, or in a heated oven.
- Extreme caution must be used when moving an appliance containing hot oil orother hot liquids.
- Always attach plug to appliance first, then plug cord into the wall outlet. Todisconnect, turn any control to "off", then remove plug from wall outlet.
- Do not use appliance for other than intended use.
 To protect against electric shock, do not immerse cord, plugs, or appliance inwater or other liquid.
SAVE THESE INSTRUCTIONS
Safety instructions
- Before use, check that the electrical installation is compatible with the wattageand voltage stated on the bottom of the appliance.
- The temperature of accessible surfaces may be high when the appliance isoperating.
- The appliance is only to be operated in the closed position.
- Never leave the appliance unattended when in use.
- Do not immerse the appliance or power cord in water.
- To prevent the appliance from overheating, do not place it in a corner or against awall.
- Do not place the hot plates under water or on a fragile surface.
- This appliance is not intended to be operated by means of an external timer orseparate remote-control system.
- This appliance is intended to be used in household only.
It is not intended to be used in the following applications, and the warranty will not apply for:- staff kitchen areas in shops, offices and other working environments.
- farm houses.
- by clients in hotels, motels and other residential type environments.
- bed and breakfast type environments.
- If you have any problems, contact the authorized after-sales service center or theinternet address www.krups.com
Polarization instructions
![shock hazard]() If this appliance has a polarized plug (one blade is wider than the other), it is to reduce the risk of electric shock. This plug is intended to fit into a polarized outlet only one way. If the plug does not fit fully into the outlet, reverse the plug. If it still does not fit, contact a qualified electrician. Do not attempt to modify the plug in any way.
If this appliance has a polarized plug (one blade is wider than the other), it is to reduce the risk of electric shock. This plug is intended to fit into a polarized outlet only one way. If the plug does not fit fully into the outlet, reverse the plug. If it still does not fit, contact a qualified electrician. Do not attempt to modify the plug in any way.
Short Cord instructions
A short power-supply cord (or detachable power-supply cord) is to be provided to reduce the risk resulting from becoming entangled in or tripping over a longer cord. Longer detachable power-supply cords or extension cords are available and may be used if care is exercised in their use.
If a long detachable power-supply cord or extension cord is used:
- The marked electrical rating of the cord or extension cord should be at least asgreat as the electrical rating of the appliance;
- If the appliance is of the grounded type, the extension cord should be a grounding3-wire cord; and
- The longer cord should be arranged so that it does not drape over the countertopor table top where it can be pulled on by children or tripped over unintentionally.
THIS APPLIANCE IS INTENDED TO BE USED IN HOUSEHOLD ONLY.
Thank you for buying this appliance. Read the instructions in this leaflet carefully and keep them within reach. Any commercial use, inappropriate use or failure to comply with the instructions, the manufacturer accepts no responsibility and the warranty will not apply.
For your safety, this product conforms to all applicable standards and regulations (Electric Safety, Food Compliant Materials, and others).
Our company has an ongoing policy of research and development and may modify these products without prior notice.
- Do not consume food that comes into contact with the parts marked with
![]() .
. - Only use parts or accessories provided with the appliance or bought from anApproved-Service Center. Do not use them for other appliances or intention.
- To avoid damaging your appliance, do not use recipes that ask to use a flambemethod of cooking.
Prevention of accidents at home
- This appliance is not intended for use by persons (including children) with reducedphysical, sensory or mental capabilities, or lack of experience and knowledge, unless they have been given supervision or instruction concerning use of the appliance by an adult responsible for their safety. Children should be supervised to ensure that they do not play with the appliance.
- Accessible surface temperatures can be high when the appliance is operating. Nevertouch the hot surfaces of the appliance, always use a pot holder.
- If an accident occurs, rinse the burn immediately with cold water and call a doctor ifnecessary.
- Never leave the appliance plugged in when not in use.
- Cooking fumes may be dangerous for animals which have a particularly sensitive respiratory system, such as birds. We advise bird owners to keep them away from the cooking area.

Environment protection first!
 Your appliance contains valuable materials which can be recovered or recycled.
 Leave it at a local civic waste collection point.
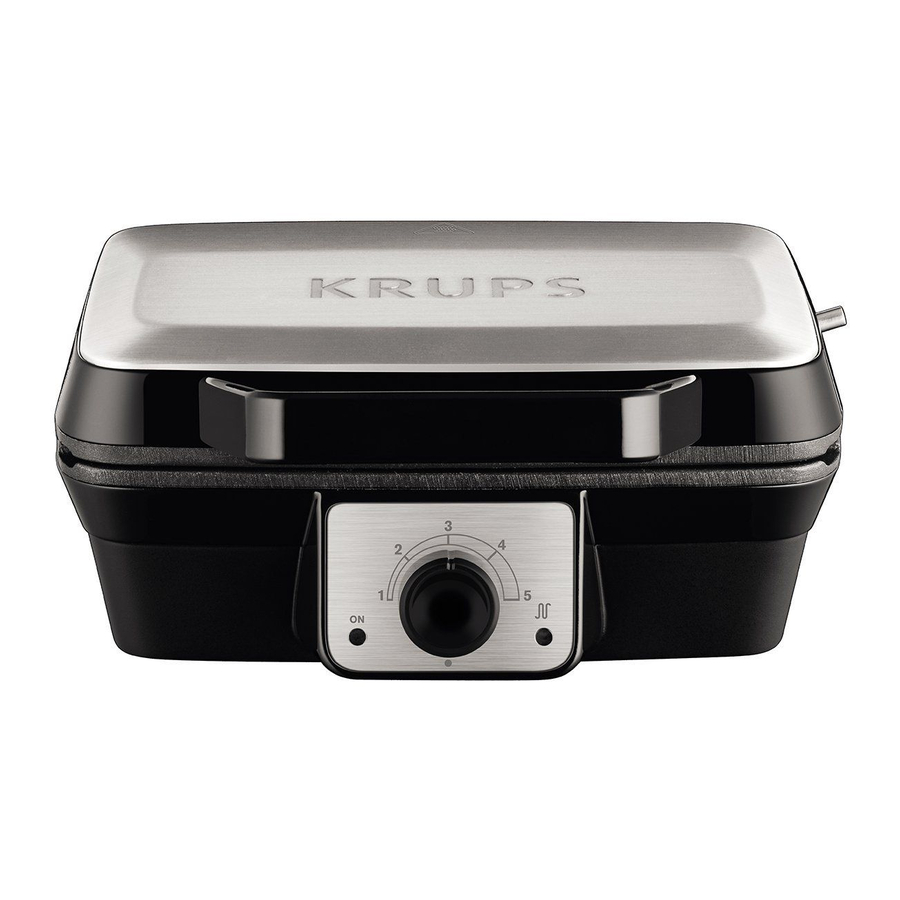
DESCRIPTION

- Magnetized batter collector tray
- Locking latch
- Handle
- Power indicator
- Browning selector
- Ready to use indicator
- Ladle
- Cord storage compartment
BEFORE USE
- Remove the ladle from the packaging (fig 1).
![]()
- Remove all packaging, self-adhesives and other accessories inside and outside the appliance.
- Unlock the appliance using the locking latch (b) on the side of the waffle maker (fig 2).
![]()
- When you first use the appliance, clean the plates using a soft cloth then pour a little oil on the plates and wipe them with the cloth.


USING YOUR APPLIANCE
- Unlock the appliance using the locking latch (b) on the side of the waffle maker (fig 2).
- Set up the magnetized batter collecting tray (fig 3).
![]()
- Check that the browning selector is in the zero position • (fig 4) then plug the cable into the wall (fig 5) : the indicator lights then switch on.
![]()
![]()
- Place the browning selector to the required baking position (fig 6). The green indicator light switch off as it preheats.
![]()
- Preheat the waffle maker for 8 to 10 minutes (fig 7).
![]()
- The green indicator light switches on when the waffle maker reaches the required cooking temperature (fig 8).
![]()
- Start baking.


The appliance might generate a slight odor or smoke the first time it is used; this is normal.
BAKING
- Pour the batter into each baking compartment using the ladle (g) (fig 9).
![]()
- The batter in the baking compartments should not exceed the height of the separator bar.(fig 10)
![]()
- Close the appliance using the handle (fig 11).
![]()
![warning]() Do not use the locking latch (b) while cooking (storage function only).
Do not use the locking latch (b) while cooking (storage function only).- Baking takes 3 to 5 minutes on average. Baking cycles may vary according to the type and quantity of batter used.
- Browning can be adjusted using the 5 browning positions. Try different thermostat positions to find the one that suits you best.
- The green light switches off and back on to indicate that the temperature is at the required level.Please note that this does not indicate that the waffle is ready.
- Remove the waffles using a non-metallic kitchen utensil so as not to damage the non-stick coating of the plates.
- Your waffle maker has a single container (a) at the back to catch the excess batter. It has a maximum level (MAX) indicator, be careful not to exceed this. Do not reuse the surplus batter.
- It is advisable to wait for the waffle maker to cool down before emptying the tray.
- Always make sure you use oven gloves to empty the tray if the appliance is still hot (fig 12).
![]()
- Make sure that the excess batter container is not obstructed to ensure that the batter collector tray works properly.


 Do not use the locking latch (b) while cooking (storage function only).
CLEANING
- Switch the browning selector to the zero position • (fig 4).
- Disconnect the power cord.
- Let the appliance cool down for 2 hours.
- The non-stick cooking plates in the appliance unit can be cleaned easily with a soft cloth.
- The ladle and the batter collector tray can be cleaned with a sponge, warm water and dish detergent.
- We do not recommend putting both accessories in the dishwasher.
- Do not use metal scouring pads, abrasive wire wool or harsh scouring powder as this may damage the non-stick coating.
STORAGE
- Close the appliance after cleaning and putting the batter collector tray back in its place.
- Use the locking latch to lock the appliance (fig 13).
![]()
- Wrap the cord under the appliance in the cord storage compartment (h) (fig 14).
![]()
- The appliance can be stored in a vertical position to save space.


RECIPE
Traditional waffles
This recipe is a must for thick, rich waffles.
Browning selector in position 4 or 5 (depending on cooking preferences). Cooking time: about 3 min to 4 min (according to browning required).
For approximately 12 waffles.
Ingredients:
- 2.5 cups of flour (plain),
- 2 tsp of baking powder
- 1 pinch of salt,
- 5 tbsp of sugar,
- 0.5 cup of melted butter,
- 2 eggs,
- 2 cups of milk.
- Mix the flour and baking powder in a large bowl.
- Make a hole in the middle and add salt, sugar, melted butter and eggs.
- Gradually mix in the milk a little at a time.
- Let the batter rest for 1 hour, then pour the batter in the waffle maker using the ladle (g): the batter in the baking compartments should not exceed the height of the the separator bar. (fig.10)
- Close the waffle maker and cook for the recommended amount of time.
- The waffles should be nicely browned, then put them on a dish and serve the waffles sprinkled with icing sugar.
- The waffles are delicious with melted chocolate, whipped cream, jam, ice cream, strawberries or any topping you prefer.
TROUBLESHOOTING
| Problems | Possible solutions |
No indicator light on | Check the connection to the wall socket. If the problem persists try connecting the unit to a different outlet. |
The green indicator light is off | The green indicator light switches on when the appliance reaches the selected temperature, this can take 8 to 10 minutes. Check that there are no obstructions when you close the unit. |
The waffles are not cooked properly | Ensure that the green indicator light is on when you add the batter. Once the batter is in the waffle maker, cook the waffles for 3 to 5 minutes, avoid opening the waffle maker too often because the heat escapes every time you open the appliance and this increases cooking time. Put the browning selector on the maximum position (position 5) if this is not already the case. |
The waffles are poorly shaped or do not rise | Check that you have added enough batter in the baking compartments (fig 11). Check that you did not close the locking latch before cooking. It could be a problem with your recipe. In this case, please use the recipe above. |
The batter overflows into the batter collector tray | Check that the tray is inserted properly (fig 3). When you bake several waffles, be careful not to exceed the MAX level on the dough collector tray. |
Does your appliance still not work? Please contact an authorized service center (see the list in the service booklet).

Documents / Resources
References
Download manual
Here you can download full pdf version of manual, it may contain additional safety instructions, warranty information, FCC rules, etc.
Advertisement


Need help?
Do you have a question about the WD6008 and is the answer not in the manual?
Questions and answers