
Subscribe to Our Youtube Channel
Related Manuals for Knauer K-7400S


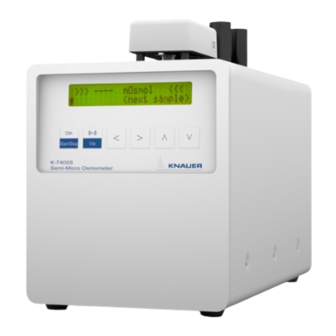
Summary of Contents for Knauer K-7400S
- Page 1 Semi-Micro Osmometer K-7400S Service instructions Document no. VSM-012 Document Number: V6700...
- Page 2 For latest version of the instructions, check our website: www.knauer.net/en/partner-area/Service-manuals. Legal information This document contains confidential information and may not be reproduced without written consent of KNAUER Wissenschaftliche Geräte GmbH. © KNAUER Wissenschaftliche Geräte GmbH 2022 All rights reserved.
-
Page 3: Table Of Contents
Spare Parts ............... . .23 Semi-Micro Osmometer K-7400S Service instructions , VSM-012... -
Page 4: Important Safety Notes
The warranty seal is a security label which indicates if any opening on instrument has occurred. Most KNAUER products are sold with the blue seal on the rear side to confirm that KNAUER was the last who took care of the instrument. An authorized service technician should order and use the warranty seal in orange color after opening the instrument (Order. -
Page 5: Definition Of Personal Or Material Dam Age
Devices which are shipped without the completed document “Service request form and decontamination report” will not be repaired. If you would like to return a device to KNAUER, make sure to enclose the com- pleted document: www.knauer.net/servicerequest Semi-Micro Osmometer K-7400S Service instructions , VSM-012... -
Page 6: Symbols And Signs
Most KNAUER products are sold with the blue seal on the rear side to confirm that KNAUER was the last who took care of the instrument. An authorized service techni- cian should order and use the warranty seal in orange color after opening the instrument (order no. -
Page 7: Overview
This phenomenon is called freezing point depression and is independent of the nature, size or shape of particles. The KNAUER freezing point osmometer is a simple, robust and easy to maintain instrument with following features: Automatic measurement process ƒ... -
Page 8: Replacement
To mount the housing, proceed in reverse order. Device defect The housing offers protection from electrical voltage which is build inside the device. Before putting the device into operation, install the housing completely. Semi-Micro Osmometer K-7400S Service instructions , VSM-012... -
Page 9: Cooling Block
To mount the cooling block, proceed in reverse order. Practical Tip The cooling block has to be adjusted/calibrated after the replacement. The adjustment procedure will be described later in adjustments sec- tion. Semi-Micro Osmometer K-7400S Service instructions , VSM-012... -
Page 10: Fan
The housing has been removed (see chap. 3.1). ƒ Tools Screwdriver ƒ Process Figure 1. Unplug the grey display cable from the main- board. 2. By unscrewing the screws holding the display (see next figure), remove it back wards. Semi-Micro Osmometer K-7400S Service instructions , VSM-012... - Page 11 Replacement Process Figure 3. Notice the installation order of screws and rings. Screw Metal disk Spacer sleeve Paper disk To mount the display, proceed in reverse order. Semi-Micro Osmometer K-7400S Service instructions , VSM-012...
-
Page 12: Power Supply
5. Unplug the ground cable the power input and the connector to the mainboard 6. Unscrew the four screws on power supply 7. Remove the power supply. To mount the power supply, proceed in reverse order. Semi-Micro Osmometer K-7400S Service instructions , VSM-012... -
Page 13: Mainboard
Make sure not to bend the clamp. 3. The battery will move for- ward out of the holder. 4. Remove the battery. To insert the battery of the main board, proceed in reverse order. Semi-Micro Osmometer K-7400S Service instructions , VSM-012... -
Page 14: Adjustments
1. The device has to be swit- ched on in service mode. 2. Switch the device on. 3. After the startup screen has appeared, press the up-down-up arrow keys quickly. 4. Device is in service mode. Semi-Micro Osmometer K-7400S Service instructions , VSM-012... - Page 15 If the adjustment process does not show the desired result, repeat steps 7-11. Deviations up to ± 0.2 °C are acceptable. After completing the adjustment process the water has to be removed and the cooling block cavity has to be dried. Semi-Micro Osmometer K-7400S Service instructions , VSM-012...
-
Page 16: Inserting The Adapter Into The Cooling Cavity
K7400 (A3709, A3709-1, A3709-2), a cooling cavity adapter is required. The adapter allows optimum heat transfer between measuring head and cooling block. Note: The adapter is pre installed on K-7400S. Required Tools Cooling cavity adapter (article no. G1770) ƒ Adapter tool (article no. W0225) ƒ... -
Page 17: Setting The Temperature Of The Cooling Cavity
Practical tip raised in comparison to the measuring head for glass vials. The feet of the measuring head do not need to rest on the device. This aspect does not affect the measurement results. Semi-Micro Osmometer K-7400S Service instructions , VSM-012... -
Page 18: Firmware Installation
ƒ RS-232 serial port ƒ The mentioned programs are required for upgrading the firmware and setting the key parameters after update, respectively. Contact KNAUER support team to receive the required programs : support@knauer.net. 5.1 Windows serial downloader program Process Figure 1. - Page 19 Firmware installation Process Figure 6. On configuration menu, Erase the code and data and download code only must be activated. 7. Click on OK to save the setting. Semi-Micro Osmometer K-7400S Service instructions , VSM-012...
- Page 20 12. Switch the device off. 13. Change the DIP switch mode to WORK and switch the device on again. 14. New firmware will be ap- peared on display on start up screen. Semi-Micro Osmometer K-7400S Service instructions , VSM-012...
-
Page 21: Hyper Terminal Program
Bits per second: 9600 ƒ Data bit: 8 ƒ Parity: None ƒ Stop bit: 1 ƒ Flow control: Hardware ƒ 6. Save the parameters by clicking first „Apply“ and than „OK“. Semi-Micro Osmometer K-7400S Service instructions , VSM-012... - Page 22 The com- mand is „Sernum:xxxxxx“ (serial no. of device). If the serial number was transmitted the command changes to „OKrnum:xxxxxx“ 13. Set the vibration time by giving Vtime:10 command. Semi-Micro Osmometer K-7400S Service instructions , VSM-012...
- Page 23 Firmware installation Process Figure 14. The set parameters could be checked by giving fol lowing commands: Sernum:? ƒ Vtime:? ƒ Semi-Micro Osmometer K-7400S Service instructions , VSM-012...
-
Page 24: Troubleshooting
Another sign for an empty battery is, losing time and date on DATE menu even after setting. For instructions how to replace the battery of the main board see chap. 3.7. Semi-Micro Osmometer K-7400S Service instructions , VSM-012... -
Page 25: Tips And Tricks
It is not possible to dilute the calibration standards since the activity ƒ coefficient of standards will be changed by dilution. Do not use the calibration standards from ampules which are left open ƒ for more than half an hour. Semi-Micro Osmometer K-7400S Service instructions , VSM-012... -
Page 26: Spare Parts
Plastic sample tubes, 500 pcs A0272 Power input G1591 400 mOsmol/kg calibration, solution A01241 (10 vials) 850 mOsmol/kg calibration, solution A01250 (12 vials) Plastic sample tubes, 1000 pcs A0720 Cooling cavity adapter G1770 Adapter tool W0225 Semi-Micro Osmometer K-7400S Service instructions , VSM-012... - Page 27 Latest KNAUER instructions online: www.knauer.net/service-instructions KNAUER Phone: +49 30 809727-0 Wissenschaftliche Geräte GmbH Fax: +49 30 8015010 Hegauer Weg 38 E-Mail: info@knauer.net 14163 Berlin Internet: www.knauer.net © KNAUER 2022...
Need help?
Do you have a question about the K-7400S and is the answer not in the manual?
Questions and answers