
Related Manuals for Hotpoint HXC6 8ATI Series


Summary of Contents for Hotpoint HXC6 8ATI Series
-
Page 1: Table Of Contents
HXC6.8ATI HXC9.8ATI English Operating Instructions COOKER HOOD Contents Operating Instructions,1 Warnings,8 Installation,10 CHIMNEY-LUCE controls,11 Maintenance and care,13 Troubleshooting,14 After Sales Service,15 Guarantee,16... - Page 2 Ø 8 x 40 Ø 5 x 45 Ø 3,5 x 9,5 ø 150-125mm ø 150mm...
- Page 3 Ø120mm Ø120mm Ø150mm Ø150mm Ø120 Ø120 Ø150 Ø150 Ø150mm...
- Page 4 Ø...
- Page 5 ø 120 ø 150...
- Page 6 ø 150 ø 3,5 x 9,5...
- Page 8 • Before cleaning or servicing the unit, disconnect it from the mains by pulling the power plug or disconnecting the Warnings main circuit breaker. ! Keep this manual for reference. If you • Always wear work gloves when installing sell, transfer or move the unit to another and servicing the unit.
- Page 9 • Strictly observe all local regulations in relation to the technical and safety measures to be employed in fumes extraction. • Clean the product frequently, inside and out (AT LEAST ONCE A MONTH, and in observance of the maintenance instruction given in this manual). •...
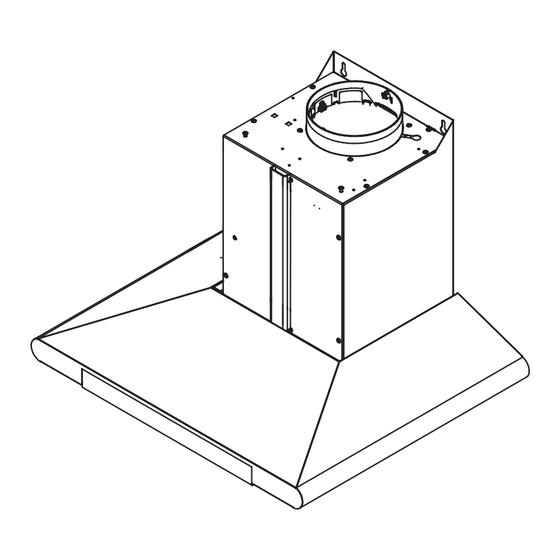
- Page 10 Installation Ducted version The installation procedure is illustrated in the fi rst pages The hood purifi es the air and expels it outdoors via an of this manual. exhaust duct (dia. 150mm) connected to its outlet fl ange. The installation must be done by a qualifi ed technician. The diameter of the exhaust tube must be equal to that of Electrical hook up the outlet fl...
-
Page 11: Chimney-Luce Controls,11
CHIMNEY-LUCE controls The hood can be turned off manually by pressing the T1 button (ON/OFF). If the timer is set, the hood turns off automatically when the set time runs out. Models with Touch control glass (basic) HXC6.8ATI- HXC9.8ATI T1 T2 T3 T4 T5 T6 T7 T8 T1 motor ON/OFF When the button is pressed with the hood off, the fi... -
Page 12: Maintenance And Care,13
Maintenance and care Caution! Before cleaning or servicing the unit, disconnect it from the mains by pulling the power plug or disconnecting the main circuit breaker. First cleaning • Remove the protective fi lm • Clean with a damp sponge and a little neutral soap •... - Page 13 PLEASE PHONE US TO REGISTER YOUR APPLIANCE AND ACTIVATE YOUR PARTS GUARANTEE ON 08448 24 24 24...
-
Page 14: Troubleshooting,14
Servicing the grease fi lter (A) The grease fi lter retains the Replacing the lights LED particles of grease produced The hood is fi tted with a lighting system based on LED during cooking; it must be technology. The LEDs ensure optimal lighting, longer life cleaned at least once a month and lower consumption compared with traditional lights. -
Page 15: After Sales Service,15
After Sales Service No one is better placed to care for your Hotpoint appliance during the course of its working life than us – the manufacturer. Essential Contact Information Hotpoint Service We are the largest service team in the country offering you access to 400 skilled telephone advisors and 1000 fully qualified engineers on call to ensure you receive fast, reliable, local service. -
Page 16: Guarantee,16
5 Year Parts Guarantee Hotpoint also offers you a free 5 year parts guarantee. This additional guarantee is conditional on you registering your appliance with us and the parts being fitted by one of our authorised engineers. There will be a charge for our engineer’s time.
Need help?
Do you have a question about the HXC6 8ATI Series and is the answer not in the manual?
Questions and answers