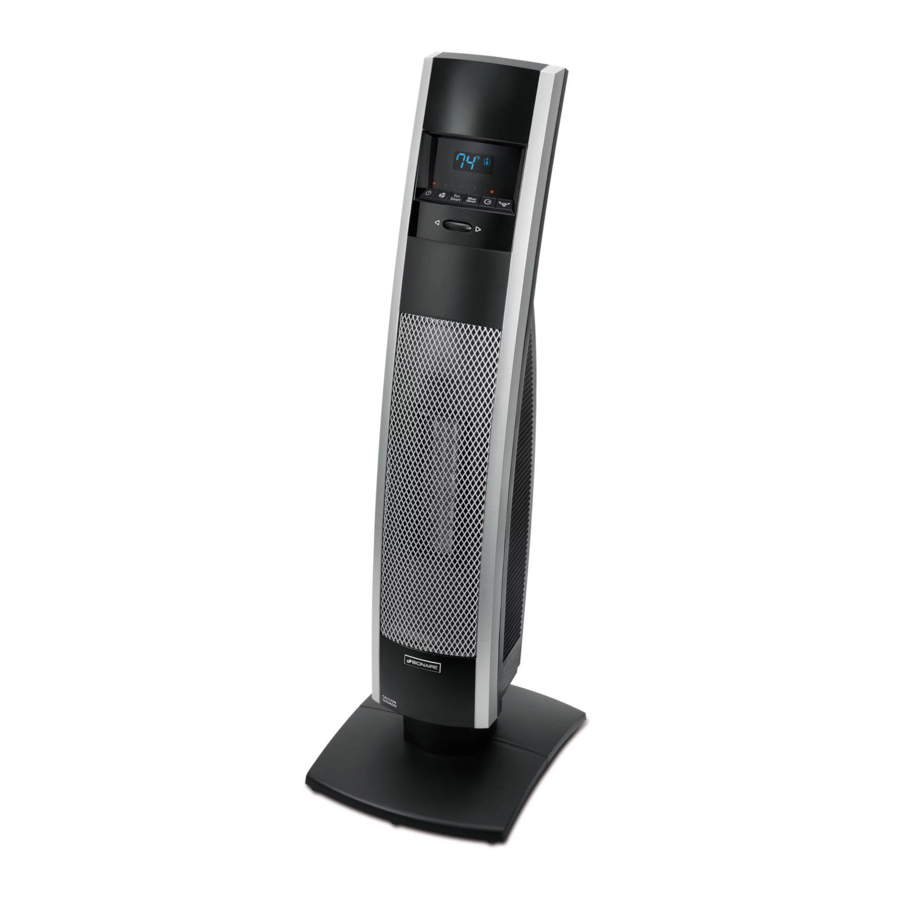
Bionaire BCH9221 - Tower Heater Manual
- Instruction manual (2 pages) ,
- Instruction manual (17 pages) ,
- Instruction manual (30 pages)
Advertisement
TECHNICAL SPECIFICATIONS
- Amps: 12.5
- Wattage: 1500W (+5% –10%)
- Working voltage: 120V AC/60Hz
ASSEMBLY INSTRUCTIONS
NOTE: A Phillips screwdriver is required for assembly.
Unpack your heater from the box, being careful to remove all parts from plastic bags and remaining packaging. Please save the carton for off-season storage.
Your heater is packed with separate base and pedestal in the box. Carefully remove all parts from plastic bags. To prevent scratches, place all parts onto a cloth before assembly. Follow the below instructions for Pedestal/Base assembly:
Pedestal Assembly
Step 1: Run the power cord through the center of the assembled pedestal. Snap pedestal into the bottom of the heater housing. Refer to Figure 1 & 2. Insert the alignment post from the heater housing into the hole on the pedestal for proper alignment.


Base Assembly
Step 1: The base is in two halves, snap them together by sliding slots of one base half into slots of second base half. Refer to Figure 3.

Step 2: Run the power cord through the center of the assembled base. To assemble the base to the unit, first make sure the side marked "Rear" is facing the back of the heater. Insert the alignment posts from the pedestal into the alignment holes on base for proper alignment. Line up holes of the base with holes on bottom of pedestal, and secure with 4 provided screws. Refer to Figure 4.

Step 3: Lace the power cord through the cord minders on the underside of the base. Refer to Figure 5.

Step 4: Turn the heater right side up on a flat level surface prior to beginning operation.
Remote Control
Your heater comes with a remote control, unpack the remote control from box. This includes one lithium battery, CR2025/3V. Please note this remote control will not work through walls. Remove battery before discarding the remote.
NOTE: REMOVE THE PROTECTIVE COVER FROM THE BATTERY PRIOR TO BEGINNING OPERATION.
Battery Replacement
- Locate the battery compartment on the back of the remote control handset. Insert a small object (such as a pin or paper clip) into the hole of the battery cover lock (see Figure 6) and slide out the battery cover.

- Remove old battery.
- Place new battery into battery compartment.
- Slide battery compartment into the remote control handset until the Battery Cover Lock is securely latched.
- For your convenience, a remote control holder is integrated into the back of the heater housing.

NOTES:
- Remove the battery from the equipment when it is not being used for an extended period of time.
- Remove the used battery promptly.
- Do not discard used batteries into household trash containers. Contact your local government for disposal or recycling practices in your area.
OPERATING INSTRUCTIONS

- Place heater on a firm, level surface.
- Plug heater into a standard outlet. Once plugged in, the Power Light will illuminate.
NOTE: Avoid overloading your circuit by not using other high wattage appliances in the same outlet. At 1500 watts, this unit draws 12.5 Amps. - Operate heater by pressing the Power Button (
![]() ) and selecting modes and settings according to preference.
) and selecting modes and settings according to preference.
NOTE: Remove the plastic film from the control panel before using (if included).
Power on/off
![]()
Press the Power On/Off Button to turn the heater on. Once on, the heater will run in the Max Heat mode and the Stay On icon will appear on the LCD Display. Press the Power On/Off button to manually turn off the heater at any setting.
NOTE: The Power Light will remain illuminated while unit is plugged in.
Mode selection
Select your desired heat settings by pressing the corresponding buttons as located on your heater or press the Mode button on remote control to cycle through the heat settings. An indicator light will illuminate next to each button to indicate that the selected setting/mode is activated.
Fan only setting
![]()
Press the Fan Only Button to run the heater without heat output. The Stay On icon will appear on the LCD Display.
HIGH heat setting
![]()
Press the Max Heat Button to run the heater continuously at 1500W. The Stay On icon will appear on the LCD Display.
LOW heat setting

Press the Low Heat Button to run the heater continuously at 750W. The Stay On icon will appear on the LCD Display.
Thermostat Control

Your heater is equipped with a digital thermostat that allows you to set your heater to a precise comfort level by turning the Dial Wheel on the control panel or pressing the arrow buttons on the remote control:
Turn the Dial Wheel to activate. The Thermostat icon (![]() ) will appear on the LCD Display.
) will appear on the LCD Display.
To preset a precise comfort level, turn the Dial Wheel to adjust the temperature from 85°F to 65°F (Default: "85"). The LCD Display will show the selected temperature reading. When the preset temperature is reached, the heater will shut off and cool down for 15 seconds. When the room temperature drops below the preset temperature, the heater will automatically turn on again to maintain the preset temperature level.
FrostProtect™ setting

Your heater is equipped with FrostProtect™ Setting. The heater will turn on automatically when the room temperature drops below 40°F. To activate FrostProtect™ Setting, turn the Dial Wheel to show "40" and the FrostProtect™ icon ( ) will appear on the LCD Display.
NOTE: It is normal for the heater to cycle on and off to maintain the preset temperature. Raise the thermostat setting or operate in Stay On mode to prevent the heater from cycling. When the preset temperature is reached or when the heater is shut off, the fan will run for 15 seconds without heat. This cool down process ensures an accurate and consistent temperature reading.
NOTE: To shut the heater off at any setting, press the Power Button (![]() ) until the LCD Display goes off. The heater will cool down for 15 seconds, and the Fan Only indicator light will blink in Amber until cool down is completed. The digital thermostat has memory; it will remember the last temperature setting before the heater is turned off. However, if the heater is unplugged, the digital thermostat will no longer remember the previous temperature setting. You will need to reset the digital thermostat if the heater is unplugged.
) until the LCD Display goes off. The heater will cool down for 15 seconds, and the Fan Only indicator light will blink in Amber until cool down is completed. The digital thermostat has memory; it will remember the last temperature setting before the heater is turned off. However, if the heater is unplugged, the digital thermostat will no longer remember the previous temperature setting. You will need to reset the digital thermostat if the heater is unplugged.
Oscillation

Press the Oscillation Button (![]() ) on control panel or remote control to activate or stop the oscillation feature.
) on control panel or remote control to activate or stop the oscillation feature.
NOTE: Please do not manually turn the heater on the base. It is designed to turn only by motorized oscillation.
Timer

Your heater is equipped with 24-Hour Auto Shut-off Timer feature. This allows you to program your heater to shut off automatically after running a defined time interval (from 0 to 24 hours).
- Press the Timer Button (
![]() ) once. The indicator light will begin to blink for 5 seconds. The LCD Display will show "0" and the "Hr" icon.
) once. The indicator light will begin to blink for 5 seconds. The LCD Display will show "0" and the "Hr" icon. - Turn the Dial Wheel on the control panel to adjust from 0 to 24 to select your desired time interval for the heater to shut-off automatically. The selected hour will appear on the LCD Display, and then the Timer indicator light will stop blinking in 3 seconds to indicate that the selected timer is activated. The LCD Display will return to show the preset temperature and mode setting.
- To cancel the Timer feature, press the Timer Button (
![]() ) twice within 5 seconds, the Timer indicator light will go off.
) twice within 5 seconds, the Timer indicator light will go off.
 ) once. The indicator light will begin to blink for 5 seconds. The LCD Display will show "0" and the "Hr" icon.
NOTE: The timer does not work with the FrostProtectTM Setting.
CLEANING/MAINTENANCE
Always unplug the heater before cleaning and allow the heater to cool down.
- Clean the unit with a soft cloth moistened with a mild soap and water solution.
- NEVER use abrasive or flammable solvents to clean the unit.
- After cleaning, be sure to completely dry the unit with a cloth or towel.
- Store heater in a cool, dry location.
- It is recommended that you store the unit in its original carton.
TIP: Over time, dust may accumulate on the front grills. This can be removed by wiping the unit with a damp cloth.
AUTO SAFETY SHUT-OFF
This heater is equipped with a technologically-advanced safety system that requires the user to reset the heater if there is a potential overheat situation. When a potential overheat temperature is reached, the system will automatically shut the heater off. It can only resume operation when the user resets the unit.
if the heater shuts down and the Power light is flashing:
- Stand the heater upright.
- Unplug the unit and wait 30 minutes.
- Plug in and operate normally.
- If the heater does not work normally, repeat steps 1, 2 and 3 again.
NOTE: If the heater is plugged in again and Power On/Off Button is pressed within the 30-minute cool down period, heater will run at Max Heat setting, but shut down in 2 seconds with the Power Light flashing. Please repeat the above 4 steps to reset the heater again and ensure to allow sufficient time for the thermostat to cool down.
TIP OVER PROTECTION
Tip over shut-off:
When the unit is accidentally knocked over, it will instantly shut off and the Power Light will flash. The unit may also shut off if it is moved or bumped. To reset, simply place the heater in an upright position, the Power Light will stop flashing and it will operate normally.
NOTE: If unit does not turn on when placed in the upright position, press Power On/Off Button once and heater will resume operation.
TROUBLE SHOOTING
General Information:
Environmental Factors - There are a number of factors that will affect your desired comfort level. These factors can include insulation, open or drafty doors and windows, and outside temperature. Please check and take action if any of these potential problems are affecting your heaters ability to adequately warm your room.
Supplemental Heat - Portable electric heaters are intended for supplemental heating of rooms to heat the room you are in and turn down the central heat thermostat. They are not intended to replace central heating systems.
Do NOT attempt to repair or adjust any electrical or mechanical functions on this heater. Doing so will void warranty. The inside of the heater contains no user serviceable parts. All servicing should be performed by qualified personnel only.
| Troubleshooting for your Heater | ||
| Trouble | Probable Cause | Solution |
|
| ✔ Press the Power Button to Turn on the Heater. ✔ Set heater upright on a level surface. ✔ Follow reset instructions listed in this manual. ✔ Ensure plug is properly inserted. Make sure electrical outlet and circuit breaker are working. ✔ Have outlet replaced by a licensed electrician. ✔ Turn the Dial Wheel right to the highest temperature setting. ✔ Unplug the heater and remove all obstructions. Position your heater 36 inches (91cm) away from all objects. ✔ Make sure no other high wattage appliances are operating on the same circuit and reset breaker if needed. |
|
| ✔ Follow Auto Safety Shut-off instructions to reset the heater and allow sufficient time for the heater to cool down before plugging in again. ✔ Set heater upright on a level surface. |
|
| ✔ Change setting to Max Heat. ✔ Turn the Dial Wheel right to the highest temperature setting. |
|
| ✔ To make this occur less frequently turn the Dial Wheel right to the highest setting. ✔ This is normal operation to ensure the heater is maintaining the room temp accurately. |
|
| ✔ Change battery (Disc type, 3 volt, CR2025). ✔ Remote works up to 20 feet (6m). ✔ Be sure to point remote at control panel on heater and there are no obstructions. ✔ Make sure display panel is clean. |
|
| ✔ Raise the temperature higher or change setting to Low or Max heat. ✔ Press the Max Heat or Low Heat Buttons. ✔ Press the Power Button to turn on the heater. |
|
| ✔ Run heater in Max Heat for maximum heat output. |
|
| ✔ If the noise persists, call Bionaire at 1-800-253-2764. |
|
| ✔ This is normal and is the result of dust or other debris accumulating on the heating element. Make sure the heater is in a well ventilated area and continue running until the odor or vapor goes away. |
If you have any questions regarding your product or would like to learn more about other Bionaire® products, please contact our Consumer Service Department at 1-800-253-2764 or visit our website at www.bionaire.com.
© 2012 Sunbeam Products, Inc. doing business as Jarden Consumer Solutions. All Rights Reserved.
Distributed by Sunbeam Products, Inc. doing business as Jarden Consumer Solutions, Boca Raton, Florida 33431.
Printed In China

Documents / ResourcesDownload manual
Here you can download full pdf version of manual, it may contain additional safety instructions, warranty information, FCC rules, etc.
Advertisement


Need help?
Do you have a question about the BCH9221 and is the answer not in the manual?
Questions and answers