Advertisement
Quick Links
Advertisement

Related Manuals for nVent Hoffman PROAIR CR29 Series


Summary of Contents for nVent Hoffman PROAIR CR29 Series
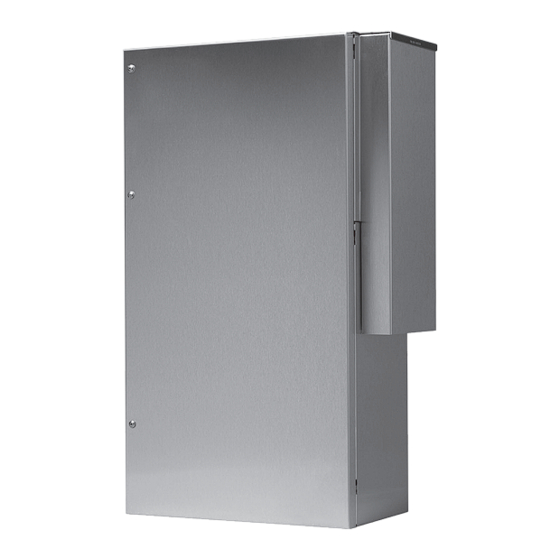
- Page 1 PROAIR Air Conditioner Cr29 Model INSTRUCTION MANUAL © 2018 nVent 89104461 Rev. I P/N 89104461...
- Page 2 TABLE OF CONTENTS Warranty and Return Policy ................................2 RECEIVING THE AIR CONDITIONER ...............................3 HANDLING AND TESTING THE AIR CONDITIONER ........................3 INSTALLATION INSTRUCTIONS ..............................4 SYSTEM CONTROLS ..................................4 Level I Temperature Controller ..................................4 Level II and III Temperature Controller ................................4 TECHNICAL INFORMATION ................................5 DESIGN DATA ........................................5 DIMENSION DRAWING ....................................5 CR29 Models 2700-4000 BTU/Hr.
- Page 3 RECEIVING THE AIR CONDITIONER Inspect the air conditioner. Check for concealed damage that may have occurred during shipment. Look for dents, scratches, loose assemblies, evidence of oil, etc. Damage evident upon receipt should be noted on the freight bill. Damage should be brought to the attention of the delivering carrier -- NOT to nVent Equipment Protection -- within 15 days of delivery.
- Page 4 INSTALLATION INSTRUCTIONS 1. Inspect air conditioner and verify functionality before mounting the air conditioner, see HANDLING AND TESTING THE AIR CONDITIONER on page 3. 2. Using the cutout dimensions shown in this manual, prepare the air “IN” and air “OUT” openings, and mounting bolt hole pattern for the enclosure.
- Page 5 TECHNICAL INFORMATION DESIGN DATA Shipping BTU/Hr @ Amps @ BTU/Hr @ Amps @ Model Voltage Phase Weight 131 F/131 F 131 F/131 F 95 F/95 F 95 F/95 F Temp lb./kg °F/°C CR290216GXXX 2600/3000 9.2/7.8 1900/2400 9.0/6.9 131/55 98/44 50/60 CR290226GXXX 2600/2700 3.7/3.6...
- Page 6 MOUNTING GASKET KIT MOUNTING CUTOUT DIMENSIONS DESIGN NOTES 1. Gasket kit included. Apply gasket to rear of air conditioner before mounting on enclosure. 2. Service cord terminated with appropriate plug cap. 3. Millimeter dimensions [ ] are for reference only; do not convert to inch dimensions.
- Page 7 COMPONENTS LIST 115 Volt 115 Volt 230 Volt 230 Volt Part Description 2700 4000 3000 4000 Blower, Condenser 29-4121-10 29-4121-10 29-4120-10 29-4120-10 Blower, Evaporator 29-4121-10 29-4121-10 29-4120-10 29-4120-10 Capacitor, Compressor, Start 89111993 89117017 89104095 Compressor 89108747 89100365 89108748 89104088 Thermal Overload, Compressor 89111994 89111997 89112198...
- Page 8 WIRE DIAGRAMS AND SCHEMATICS WIRE DIAGRAM, LEVEL 1, 2000 BTU 89111534 A SCHEMATIC, LEVEL 1, 2000 BTU © 2018 nVent 89104461 - 8 -...
- Page 9 WIRE DIAGRAM, 115V, LEVEL 1, 4000 BTU SCHEMATIC, 115V, LEVEL 1, 4000 BTU NOTE: For voltage, hertz, and options not shown in this manual, refer to the wiring diagram attached to the unit. © 2018 nVent 89104461 - 9 -...
- Page 10 WIRE DIAGRAM, 230V, LEVEL 1, 4000 BTU SCHEMATIC, 230V, LEVEL 1, 4000 BTU NOTE: For voltage, hertz, and options not shown in this manual, refer to the wiring diagram attached to the unit. © 2018 nVent 89104461 - 10 -...
- Page 11 WIRE DIAGRAM, LEVEL II AND III, 2000 BTU © 2018 nVent 89104461 - 11 -...
- Page 12 SCHEMATIC, LEVEL II AND III, 2000 BTU © 2018 nVent 89104461 - 12 -...
- Page 13 WIRE DIAGRAM, 115 VLEVEL II AND III, 4000 BTU SCHEMATIC, 115 V LEVEL II AND III, 4000 BTU NOTE: For voltage, hertz, and options not shown in this manual, refer to the wiring diagram attached to the unit. © 2018 nVent 89104461 - 13 -...
- Page 14 WIRE DIAGRAM, 230 V LEVEL II AND III, 4000 BTU SCHEMATIC, 230 V LEVEL II AND III, 4000 BTU NOTE: For voltage, hertz, and options not shown in this manual, refer to the wiring diagram attached to the unit. © 2018 nVent 89104461 - 14 -...
- Page 15 TEMPERATURE CONTROL The electromechanical thermostat is factory preset to 75 F/23 C. To change the temperature setting, refer to SYSTEM CONTROLS on page 4. PRINCIPLES OF OPERATION If electrical power to the air conditioner is interrupted and reapplied immediately (within 3 to 5 seconds), the compressor may not restart due to the high back pressure of the compressor.
- Page 16 HOW TO REMOVE, CLEAN OR INSTALL A NEW INLET AIR FILTER RP aluminum washable air filters are designed to provide excellent filtering efficiency with a high dust holding capacity and a minimum amount of resistance to air flow. Since they are constructed entirely of aluminum, they are lightweight and easy to service.
- Page 17 NOTES © 2018 nVent 89104461 - 17 -...
- Page 18 TROUBLE SHOOTING BASIC AIR CONDITIONING TROUBLE SHOOTING CHECK LIST 1. Check manufacturer’s nameplate located on the unit for correct power supply. 2. Turn on power to the unit. The evaporator (Enclosure or “COLD” air) blower should come on. Is there airflow? YES, proceed to step 3.
- Page 19 SYMPTOMS AND POSSIBLE CAUSES: SYMPTOM POSSIBLE CAUSE Blower not running Compressor not running Unit won’t cool Compressor runs, but has bad valves Loss of refrigerant Low line voltage at start. Should be +/-10% rated voltage. Compressor motor stuck Compressor tries to start but won’t run Bad relay Bad overload switch Bad run/start capacitor...
- Page 20 © 2018 nVent 89104461 Rev. I P/N 89104461...
Need help?
Do you have a question about the PROAIR CR29 Series and is the answer not in the manual?
Questions and answers