Table of Contents
Advertisement
Quick Links
Advertisement
Table of Contents

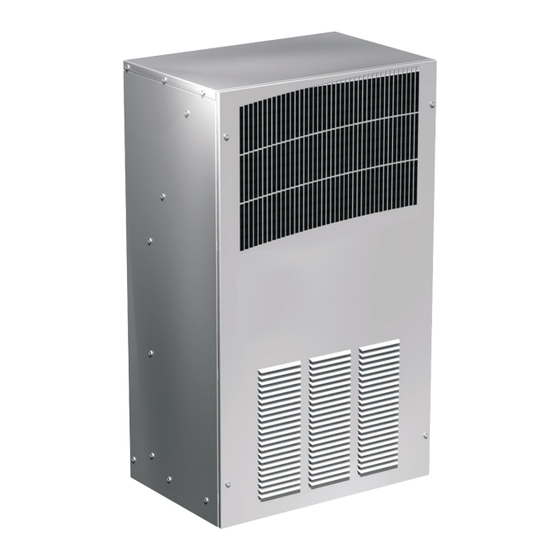
Summary of Contents for nVent Hoffman T Series
- Page 1 T29 Instruction Manual...
- Page 2 T-SERIES Air Conditioner t29 Model INSTRUCTION MANUAL Rev. K © 2019 nVent 89104464 P/N 89104464...
-
Page 3: Table Of Contents
TABLE OF CONTENTS Warranty and Return Policy ................................2 IMPORTANT NOTICE ..................................2 RECEIVING THE AIR CONDITIONER ............................... 3 HANDLING AND TESTING THE AIR CONDITIONER ........................3 INSTALLATION INSTRUCTIONS ..............................4 TECHNICAL INFORMATION ................................4 Design Data ........................................4 Dimensional Drawing ..................................... 5 Mounting Cutout Dimensions .................................. -
Page 4: Receiving The Air Conditioner
RECEIVING THE AIR CONDITIONER Inspect the air conditioner. Check for concealed damage that may have occurred during shipment. Look for dents, scratches, loose assemblies, evidence of oil, etc. Damage evident upon receipt should be noted on the freight bill. Damage should be brought to the attention of the delivering carrier -- NOT to NVent Equipment Protection -- within 15 days of delivery. -
Page 5: Installation Instructions
INSTALLATION INSTRUCTIONS 1. Inspect the air conditioner and verify correct functionality before mounting the air conditioner. See HANDLING AND TESTING THE AIR CONDITIONER on page 3. 2. Using the cutout dimensions shown in this manual, prepare the air “IN” and air “OUT” openings, and mounting bolt hole pattern for the enclosure. -
Page 6: Dimensional Drawing
DIMENSIONAL DRAWING C-NET INDUSTRIAL LTD. | +44(0)121 544 8608 | INFO@CNET-IS.CO.UK | WWW.CNET-IS.CO.UK 89104464 - 5 -... -
Page 7: Mounting Cutout Dimensions
MOUNTING CUTOUT DIMENSIONS C-NET INDUSTRIAL LTD. | +44(0)121 544 8608 | INFO@CNET-IS.CO.UK | WWW.CNET-IS.CO.UK 89104464 - 6 -... -
Page 8: Mounting Gasket Kit
MOUNTING GASKET KIT COMPONENTS LIST 115 Volt 230 Volt Part Description 4000 BTU 4000 BTU Blower, Condenser 28-1064-06M 28-1064-05M Blower, Evaporator 28-1064-06M 28-1064-05M Capacitor, Compressor, Start 89104096 Coil, Condenser 11-3001-03HE 11-3001-03HE Coil, Evaporator 28-1001-00 28-1001-00 Compressor , AE/AK 89100365 89104088 Filter, Air, Reusable 89057619 89057619... -
Page 9: Wire Diagrams And Schematics
WIRE DIAGRAMS AND SCHEMATICS WIRE DIAGRAM AND SCHEMATIC, 115 V, WITHOUT HEAT NOTE: The actual unit options may vary, see unit label. C-NET INDUSTRIAL LTD. | +44(0)121 544 8608 | INFO@CNET-IS.CO.UK | WWW.CNET-IS.CO.UK 89104464 - 8 -... -
Page 10: Wire Diagram And Schematic, 115 V, With Heat
WIRE DIAGRAM AND SCHEMATIC, 115 V, WITH HEAT 89101187 NOTE: The actual unit options may vary, see unit label. C-NET INDUSTRIAL LTD. | +44(0)121 544 8608 | INFO@CNET-IS.CO.UK | WWW.CNET-IS.CO.UK 89104464 - 9 -... -
Page 11: Wire Diagram And Schematic, 230 V, Without Heat
WIRE DIAGRAM AND SCHEMATIC, 230 V, WITHOUT HEAT NOTE: The actual unit options may vary, see unit label. C-NET INDUSTRIAL LTD. | +44(0)121 544 8608 | INFO@CNET-IS.CO.UK | WWW.CNET-IS.CO.UK 89104464 - 10 -... -
Page 12: Wire Diagram And Schematic, 230 V, With Heat
WIRE DIAGRAM AND SCHEMATIC, 230 V, WITH HEAT NOTE: The actual unit options may vary, see unit label. C-NET INDUSTRIAL LTD. | +44(0)121 544 8608 | INFO@CNET-IS.CO.UK | WWW.CNET-IS.CO.UK 89104464 - 11 -... -
Page 13: Temperature Control
TEMPERATURE CONTROL The electromechanical thermostat is factory preset to 75 F/23 C for cooling (Top thermostat) and 55 F/13 C for heating (Bottom thermostat). To change the temperature setting, remove the nylon plug from the back face of the unit. Use a standard screwdriver to adjust thermostat. For cooler temperatures turn clockwise, for warmer temperatures turn counterclockwise. -
Page 14: How To Remove, Clean Or Install A New Inlet Air Filter
HOW TO REMOVE, CLEAN OR INSTALL A NEW INLET AIR FILTER RP aluminum washable air filters are designed to provide excellent filtering efficiency with a high dust holding capacity and a minimum amount of resistance to air flow. Because they are constructed entirely of aluminum they are lightweight and easy to service. -
Page 15: Trouble Shooting
TROUBLE SHOOTING BASIC AIR CONDITIONING TROUBLE SHOOTING CHECK LIST 1. Check manufacturer’s nameplate located on the unit for correct power supply . 2. Turn the power to the unit on. The evaporator (Enclosure or “COLD” air) blower should come on. Is there airflow? YES, proceed to step 3. -
Page 16: Symptoms And Possible Causes
7. Make sure the coils are clean. Then check evaporator “air in” and “air out” temperatures. If the temperatures are the same: • Possible loss of refrigerant Repair or Replace • Possible bad valves in the defective part compressor 8. To check for a bad thermostat, turn power to the unit off. Remove the control box cover and place both thermostat wires onto one terminal (replace control box cover for safety). -
Page 17: F-Gas Information
F-GAS INFORMATION T290416GXXX T290426GXXX T290446GXXX Refrigerant Kühlmittel R134a Chłodziwo 1430 Factory Charge 354 Grams Füllmenge durch Hersteller 354 Gramm Opłata Fabryczna 354 Gramów Equivalent 0.51 Tons Equivalent 0,51 Tonnen Ekwilalent 0,51 Tony C-NET INDUSTRIAL LTD. | +44(0)121 544 8608 | INFO@CNET-IS.CO.UK | WWW.CNET-IS.CO.UK 89104464 - 16 -... - Page 18 NOTES C-NET INDUSTRIAL LTD. | +44(0)121 544 8608 | INFO@CNET-IS.CO.UK | WWW.CNET-IS.CO.UK 89104464 - 17 -...
- Page 19 NOTES C-NET INDUSTRIAL LTD. | +44(0)121 544 8608 | INFO@CNET-IS.CO.UK | WWW.CNET-IS.CO.UK 89104464 - 18 -...
- Page 20 NOTES C-NET INDUSTRIAL LTD. | +44(0)121 544 8608 | INFO@CNET-IS.CO.UK | WWW.CNET-IS.CO.UK 89104464 - 19 -...
- Page 21 nVent 2100 Hoffman Way Anoka, MN 55303 USA +1.763.422.2211 +1.763.576.3200 nVent.com C-NET INDUSTRIAL LTD. | +44(0)121 544 8608 | INFO@CNET-IS.CO.UK | WWW.CNET-IS.CO.UK Rev. K P/N 89104464 89104464...
- Page 22 +44 (0)121 544 6808 info@cnet-is.co.uk C-NET Industrial Solutions Limited Suite 12, Sandwell Business Centre Oldbury Road Smethwick B66 1NN United Kingdom...


Need help?
Do you have a question about the T Series and is the answer not in the manual?
Questions and answers